SlideShare une entreprise Scribd logo
1  sur  242
Télécharger pour lire hors ligne
Wolf SB 250 Ni
SERVICE MANUAL
20120309
FOREWORD
HOW TO USE THIS MANUAL
CONTENTS
MECHANISM ILLUSTRATION
Foreword
This service manual contains the technical data of each component inspection and
repair for the SANYANG PD25A series motorcycle. The manual is shown with
illustrations and focused on “Service Procedures”, “Operation Key Points”, and
“Inspection Adjustment” so that provides technician with service guidelines.
Copyright reserved.
If the style and construction of the motorcycle, PD25A series motorcycle, are
different from that of the photos, pictures shown in this manual, you should follow
the actual vehicle layout. Specifications may be changed without notice.
Service Department
SANYANG INDUSTRY CO., LTD.
Homepage Contents
How to use this manual
This service manual describes basic information of individual parts and system
inspection & service for SANYANG PD25A series motorcycle. In addition, please
refer to the manual contents for detailed information for the model year.
The first chapter covers general information and trouble diagnosis.
The second chapter covers service maintenance information and special tools
manual.
The third to the 9th chapters cover engine and driving systems.
The 10th chapter covers cooling systems.
The 11th to the 13th chapters contain the parts of vehicle frame.
The 14th chapter is electrical appliances.
The 15th chapter is emission control system.
The 16th chapter is electrical diagram.
Please see index of content for brief information and quick guide.
Content
Page Content Index
1-1 ~ 1-19 General Information 1
2-1 ~ 2-16 Maintenance Information 2
3-1 ~ 3-45 Injection System 3
4-1 ~ 4-14 Lubrication / Clutch / Transmission 4
5-1 ~ 5-8 AC Generator / Starting Clutch 5
6-1 ~ 6-8 Engine Removal 6
7-1 ~ 7-16 Cylinder Head / Valve 7
8-1 ~ 8-10 Cylinder / Piston 8
9-1 ~ 9-14 Crankshaft / Crankcase / Shifting Gear 9
10-1 ~ 10-14 Cooling System 10
11-1 ~ 11-10 Brake System 11
12-1 ~ 12-14 Steering / Front Wheel / Front Fork 12
13-1 ~ 13-12 Rear Wheel / Rear Cushion 13
14-1 ~ 14-26 Electrical System 14
15-1 ~ 15-10 Emission Control System 15
16-1 ~ 16-2 Wiring Diagram 16
Mechanism Illustration
Start /
Engine stop
switch
Main
Switch
RR brake
pedal
Starter relay
Air cleaner
Fuel tank cap
Winker relay
Battery
Headlight
dimmer /
Winker / Horn
switch
Ignition
il
ECU
Headlight
Fuse
Regulator/
Rectifier
Shifting
pedal
Meter
FR. Brake lever
Clutch lever Taillight
FR winker
RR. winker
Muffler
1. General Information
Symbols and Marks ·················· 1-1
General Safety··························· 1-2
Service Precautions·················· 1-3
Specifications -·························· 1-9
Torque Values(Engine) ············· 1-10
Torque Values(Frame) ·············· 1-11
Torque Values ··························· 1-11
Troubleshooting························ 1-12
Lubrication Points····················· 1-17
Symbols and Marks
Symbols and marks are used in this manual to indicate what and where the special service are
needed, in case supplemental information in procedures is needed for these symbols and marks,
explanations will be added to the text instead of using the symbols or marks.
Warning
Means that serious injury or even death may result if procedures are
not followed.
Caution
Means that equipment damages may result if procedures are not
followed.
Engine oil
Limits to use SAE 10W-30 API SG class oil. Warranty will not cover
the damage that caused by not apply with the limited engine oil.
(Recommended oil: Bramax G-3 oil)
Grease King Mate G-3 is recommended.
Gear oil
King Mate gear oil serials are recommended. (Bramax HYPOID GEAR
OIL # 140)
Locking
sealant
Apply sealant; medium strength sealant should be used unless
otherwise specified.
Oil seal Apply with lubricant.
Renew Replace with a new part before installation.
Brake fluid Use recommended brake fluid DOT3 or WELLRUN brake fluid.
Special tools Special tools
Correct Meaning correct installation.
Wrong Meaning wrong installation.
Indication Indication of components.
Directions Indicates position and operation directions
Components assembly directions each other.
Indicates where the bolt installation direction, --- means that bolt goes
through the component (invisibility).
1-1
1. General Information
General Safety
Carbon monoxide Battery
If you must run your engine, ensure the place is
well ventilated. Never run your engine in a closed
area. Run your engine in an open area, if you
have to run your engine in a closed area, be sure
to use a ventilator.
Caution
1-2
Caution
 Exhaust contains toxic gas, which may cause
one to lose consciousness and even result in
death.
Gasoline
Gasoline is a low ignition point and explosive
material. Work in a well-ventilated place, no flame
or spark allowed in the work place or where
gasoline is being stored.
Caution
 Gasoline is highly flammable, and may
explode under some conditions, keep it away
from children.
Used engine oil
Caution
Prolonged contact with used engine oil (or
transmission oil) may cause skin cancer although
it might not be verified.
 We recommend you to wash your hands with
soap and water right after contacting. Keep
the used oil beyond reach of children.
Hot components
Caution
 Components of the engine and exhaust
system can become extremely hot after
engine running. They remain very hot even
after the engine has been stopped for some
time. When performing service work on these
parts, wear insulated gloves and wait until the
vehicle is cooling down.
‧ Battery emits explosive gases; flame is strictly
prohibited. Keeps the place well ventilated
when charging the battery.
‧ Battery contains sulfuric acid (electrolyte),
which can cause serious burns, so be careful
not to get the sulfuric acid on your eyes or
skin. If you get battery acid on your skin, flush
it off immediately with water. If you get battery
acid in your eyes, flush it off immediately with
plenty of water and then go to hospital to
consult an ophthalmologist.
‧ If you swallow it by mistake, drink a lot of
water or milk, and take some laxative such as
vegetable oil and then go to see a doctor.
‧ Keep electrolyte beyond reach of children.
Brake shoe
Do not use compressed air or a dry brush to clean
components of the brake system; use a vacuum
cleaner or the equivalent to avoid dust flying.
Caution
 Inhaling brake shoe or pad ash may cause
disorders and cancer of the breathing system
Brake fluid
Caution
Spilling brake fluid on painted, plastic, or rubber
parts may cause damage to the parts. Place a
clean towel on the above-mentioned parts for
protection when servicing the brake system.
Keep the brake fluid beyond reach of children.
1. General Information
Service Precautions
 Always use with SANYANG genuine parts and
recommended oils. Using non-genuine parts for
SANYANG vehicle may damage it.
1-3
 Special tools are designed for removal and
installation of components without damaging the
part. Using wrong tools may result in damage.
 When servicing this bike, use only metric tools,
metric bolts, and nuts. Using wrong tools and
fasteners may damage this vehicle.
 Clean the outside of the parts or the cover
before removing it from the bike. Otherwise, dirt
and deposit accumulated on the part's surface
may fall into the engine, chassis, or brake
system, and cause damage.
 Wash and clean parts with high ignition point
solvent, and blow them dry with compressed air.
Pay special attention to O-rings or oil seals
because most cleaning agents have an adverse
effect on them.
 Never bend or twist a control cable to prevent
unsmooth control and premature worn out.
 Rubber parts may become deteriorated when
old and easy to be damaged by solvent and oil.
Check these parts before installation to make
sure that they are in good condition, replace if
necessary.
 When loosening a component, which has
different sized fasteners, operate with a
diagonal pattern and work from inside out.
Loosen the small fasteners first. If the bigger
ones are loosen first, small fasteners may
receive too much stress.
 Store complex components such as
transmission parts in the proper assemble order
and tie them together with a wire for ease of
installation later.
 Note the reassemble position of the important
components before disassembling them to
ensure they will be reassembled in correct
dimensions (depth, distance or position).
 Components not to be reused should be
replaced when disassembled including gaskets
metal seal rings, O-rings, oil seals, snap rings,
and split pins.
1. General Information
 The length of bolts and screws for assemblies,
cover plates or boxes is different from one
another; make sure they are correctly installed.
In case of confusion, Insert the bolt into the hole
to compare its length with other bolts, if its
length outside the hole is the same with other
bolts, it is a correct bolt. Bolts for the same
assembly should have the same length.
1-4
 Tighten assemblies with different dimension
fasteners as follows: Tighten all the fasteners
with fingers, then tighten the big ones with
special tool first diagonally from inside toward
outside, important components should be
tightened 2 to 3 times with appropriate
increments to avoid warp unless otherwise
indicated. Bolts and fasteners should be kept
clean and dry. Do not apply oil to the threads.
 When installing oil seal, fill the groove with
grease, install the oil seal with the name of the
manufacturer facing outside, and check the
shaft on which the oil seal is to be installed for
smoothness and for burrs that may damage the
oil seal.
 Remove residues of the old gasket or sealant
before reinstallation, grind with a grindstone if
the contact surface has any damage.
 The ends of rubber hoses (for fuel, vacuum, or
coolant) should be pushed as far as they can
go to their connections so that there is enough
room below the enlarged ends for tightening
the clamps.
Groove
Clamp
 Rubber and plastic boots should be properly
reinstalled to the original correct positions as
designed
Connector
Boots
 The tool should be pressed against two (inner
and outer) bearing races when removing a ball
bearing. Damage may result if the tool is
pressed against only one race (either inner race
or outer race). In this case, the bearing should
be replaced. To avoid damaging the bearing,
use equal force on both races.
Manufacturer's name
Both of these examples can result in bearing damage.
1. General Information
 Lubricate the rotation face with specified
lubricant on the lubrication points before
assembling.
1-5
● Check if positions and operation of installed
parts are correct and proper.
● Make sure service safety each other when
conducting by two persons.
● Note that do not let parts fall down.
 Before battery removal operation, you have to
remove the battery negative (-) cable first.
Avoid using tools like open-end wrench, which
may contact with body or create spark.
 After service completed, make sure all
connection points is secured.
Battery positive (+) cable should be connected
firstly.
And the two posts of battery have to be
greased after connected the cables.
● Make sure that the battery post caps are
located properly after the battery posts had
been serviced.
● If a fuse is burned, it has to find out the cause
and solved it. And then replace with specified
capacity fuse.
Capacity
verification
1. General Information
● When separating a connector, its locker has to
be unlocked first. Then, conduct the service
operation.
1-6
● Do not pull the wires as removing a connector
or wires. Hold the connector body.
● Make sure if the connector pins are bent,
extruded or loosened.
● Insert the connector completely.
● If there are two lockers on two connector sides,
make sure the lockers are locked in properly.
● Check if any wire loose.
● Check if the connector is covered by the twin
connector boot completely and secured
properly.
● Before connecting terminals, check if the boot
is cracked or the terminal is loose.
● Insert the terminal completely.
● Check if the boot covers the terminal.
● Do not let boot open facing up.
● Secure wires and wire harnesses to the frame
with respective wire bands at the designated
locations. Tighten the bands so that only the
insulated surfaces contact the wires or wire
harnesses
● Wire band and wire harness have to be
clamped secured properly.
● Do not squeeze wires against the weld or its
clamp.
1. General Information
● Do not let the wire harness contact with
rotating, moving or vibrating components
when routing the harness.
1-7
● Keep wire harnesses far away from the hot
parts.
● Avoid wire harnesses from sharp edges or
corners, and also avoid the jutted-out ends of
bolts and screws.
● Route harnesses so that they neither pull too
tight nor have excessive slack.
● Protect wires or wire harnesses with electrical
tape or tube if they contact a sharp edge or
corner. Thoroughly clean the surface where
tape is to be applied.
● Secure the rubber boot firmly as applying it on
wire harness.
Never Touch
● Never use wires or harnesses which insulation
has broken. Wrap electrical tape around the
damaged parts or replace them.
● Never clamp or squeeze the wire harness
when installing other components.
Never clamp or squeeze
the wire harness
Never too tight
1. General Information
● Do not let the wire harness be twisted when
installation.
1-8
● Wire harnesses routed along the handlebar
should not be pulled too tight or have
excessive slack, use rubber covering against
adjacent or surrounding parts in all steering
perimeters.
● Before operating a test instrument, the
operator should read the operation manual of
the instrument, and then conducts test in
accordance with the instruction.
● Use sand paper to clean connector
pins/terminals if rust is found. And then
continue the connection operation.
Do you know how to set the
instrument to its measurement
position and the insert locations
of its two probes?
Clean rust
1. General Information
1-9
Specifications
Maker SYM Model PD25A1
Overall Length 2005 mm Front TELESCOPIC FORK
Overall Width 790 mm
Suspension
System Rear UNIT SWING
Overall Height 1050 mm Front 110/70-17 54H
Dimension
Wheel Base 1320 mm
Tire
Specifications Rear 140/70-17 66H
Front 82 kg
Rear 91 kg
Front DISK (ø 288 mm)Curb
Weight
Total 173 kg
Brake System
Rear DISK (ø 222 mm)
Passengers/Weight Two / 150 kg Max. Speed > 140 km/hr
Front 112 kg
Performance
Climb Ability < 28°
Rear 211 kg Primary
Reduction
2.826 (65/23T)
Weight
Total
Weight
Total 323 kg Final
Reduction
2.69 (35/13T)
Type/ Cooling
System
Water-cooled
4-stroke
gasoline engine
Clutch Wet multi-plate
Installation and
arrangement
Vertical, below
center, incline
15°
Reduction
Transmission 6 speed, circulated
Fuel Used
Above 92
unleaded
Speedometer 0 ~ 199 km/hr
Fuel supply injection Horn 1
Bore Ø 71.0 mm Muffler
Expansion & Pulse
Type
Stroke 63.0 mm
Exhaust Pipe Position and
Direction
Right side and
Backward
C
yl
in
d
e
r
Number/Arrangem
ent
Single Cylinder Lubrication System Forced / Wet sump
Displacement 249.4 cc Solid Particulate -
Compression Ratio 10.5 : 1 CO < 3.0 %
Max. HP
25 ps / 7500
rpm
Exh
aust
Con
cent
rati
on
HC < 1600 PPM
Max. Torque
2.35 kg-m /
6000 rpm
E.E.C. √
Ignition
Full transistor
Ignition P.C.V. √
Engine
Starting System
Electrical
starter
Catalytic reaction control
system
√
1. General Information
1-10
Torque Values (Engine)
Item Q’t Thread Dia. (mm) Torque Value(kgf-m) Remarks
Cylinder stud bolt 4 10 1.0~1.4
Cylinder head nut 4 10 3.6~4.0
Cylinder head right bolt 2 6 1.0~1.4
Cylinder head side cover bolt 3 6 1.0~1.4
Cylinder head cover bolt 4 6 0.8~1.2
Cylinder head stud bolt (inlet
i )
2 6 1.0~1.4
Cylinder head stud bolt (EX.
i )
2 8 2.4~3.0
Air inject pipe bolt 4 6 1.0~1.4
Tappet adjustment screw nut 4 5 0.7~1.1 Lubricate with oil
Spark plug 1 10 1.0~1.2
Camshaft gear fix bolt 2 6 1.0~1.4
Camshaft setting plate bolt 1 6 0.8~1.2
Cam chain tensioning bolt 2 6 1.0~1.4
Throttle fix nut 2 6 0.8~1.2
Engine oil draining bolt 1 12 3.5~4.5
Engine oil strainer cap 1 30 1.3~1.7
Flywheel nut 1 14 8.5~10.5
R. crankcase cover bolt 12 6 0.8~1.2
L. crankcase cover bolt 11 6 0.8~1.2
L. crankcase rear cover bolt 2 6 0.8~1.2
Oil pump screw 2 6 0.7~1.1
Oil pump cover bolt 2 6 0.8~1.2
Water pump impeller 1 7 1.0~1.4
Water pump cover bolt 4 6 0.8~1.2
Crankcase bolt 11 6 0.8~1.2
Oil strainer cover bolt 2 6 0.8~1.2
Balancing shaft drive gear bolt 4 6 0.8~1.2
Primary drive gear nut 1 16 8.5~10.5
Balancing shaft fix nut 1 14 8.5~10.5
Clutch lifter plate bolt 6 6 1.0~1.4
Clutch fix nut 1 16 8.5~10.5
ACG fix bolt 3 6 0.8~1.4
Drive gear bolt 2 6 0.8~1.2
The torque values listed are important tightening torque values. Please see standard values for
those not listed in the table.
1. General Information
1-11
Torque Values (Frame)
Item
Q’t
y
Thread Dia.
(mm)
Torque Value
(Kg-m)
Remarks
Mounting bolt for steering handle post 4 8 1.0~1.4
Lock nut for steering stem 1 22 6.0~8.0
Steering top cone race 1 22 0.15~0.25
Front wheel axle nut 1 12 6.0~8.0
Rear wheel axle nut 1 14 10.0~12.0
Rear drive sprocket nut 4 8 2.7~3.0
Front cushion mounting bolt 4 8 3.0~3.5
Rear cushion upper connection bolt 1 10 3.5~4.5
Rear cushion lower connection bolt 1 10 3.5~4.5
Brake lever bolt 2 6 0.8~1.2
Brake hose bolt 4 10 3.0~4.0
Brake air-bleeding valve 2 6 0.8~1.0
Front brake disc mounting bolt 3 6 3.7~4.3
Rear brake disc mounting bolt 2 8 2.4~3.0
Gear change bolt 1 6 0.8~1.2
Brake clipper mounting bolt 2 6 1.5~2.0
Engine suspension nut 2 8 2.4~3.0 upper part of engine &
frame
Engine assembly nut 2 8 3.0~4.0 engine front part & engine
hanger
Engine assembly nut 1 10 4.5~5.5 engine rear part & frame
Special Bolt 8 8 1.5~2.5
Swing arm pivot nut 1 10 10.0~12.0
Muffler mounting nut 2 8 1.0~1.2
Muffler mounting bolt 2 8 3.2~3.8
The torque values listed in above table are for more important tightening torque values. Please refer to
standard values for those not listed in the table.
Torque Values
Type Tighten Torque Type Tighten Torque
5mm bolt, nut 0.45~0.60kgf-m 4mm screw 0.10~0.15kgf-m
6mm bolt, nut 0.80~1.20kgf-m 5mm screw 0.35~0.50kgf-m
8mm bolt, nut 1.80~2.50kgf-m 6mm screw, SH nut 0.70~1.10kgf-m
10mm bolt, nut 3.00~4.00kgf-m 6mm flange bolt, nut 1.00~1.40kgf-m
12mm bolt, nut 5.00~6.00kgf-m 8mm flange bolt, nut 2.40~3.00kgf-m
3mmscrew 0.05~0.08kgf-m 10mm flange bolt, nut 3.50~4.50kgf-m
1. General Information
Troubleshooting
A. Engine cannot be started or difficult to be started
Check and adjustment Fault condition Probable causes
1-12
Press the fuel injector feed
pipe and confirm whether
there is fuel in the feed pipe
The fuel supply to the fuel
injector is sufficient
The fuel injector is not
supplied with sufficient fuel
Check the spark plug ignition
condition
Perform cylinder compression
pressure test
Sparks
1. Check the fuel amount in the fuel tank
2. Check if the fuel pipe and the vacuum
tube are blocked or not
3. Malfunction of fuel pump relay or wiring
4. Evaporative Emission Control System
clogged
5. Malfunction of fuel pump
6. The fuel strainer is blocked or not
Week sparks or no spark
Normal cylinder
compression pressure
Low or no compression
pressure
1. Piston ring seized
2. Malfunction of cylinder valves
3. Worn cylinder and piston ring
4. Cylinder gasket leakage
5. Sand hole in the compression parts
1. Malfunction of spark plug
2. Spark plug contamination
3. Malfunction of ECU
4. Malfunction of the AC Generator
5. Ignition coil is in open or short circuit
6. Ignition coil shorted or open circuit
7. Malfunction of main switch
Restart the engine
No ignition With signs of ignition but
the engine cannot be
started
1. Malfunction of throttle valve operation
2. Air sucked into intake manifold
3. Incorrect ignition timing
Remove and check the spark
plug
Dry spark plug
1. Contaminated or clogged fuel injector
2. Malfunction of throttle valve operation
3. Malfunction of fuel pressure regulator
Wet spark plug
1. General Information
B. Engine runs sluggish (Speed does not go up, lack of power)
Check and adjustment Fault condition
Accelerate gradually and check
engine RPM
Engine RPM can be increased
Engine RPM cannot be increased
Check ignition timing
(Using ignition lamp)
Check cylinder compression
pressure (using pressure gauge)
Correct ignition timing Incorrect ignition timing
Normal compression pressure Abnormal compression pressure
Check if the fuel injector is
clogged or not
Not clogged
Clogged
Remove and check the spark
plug
Check if the engine is over
heated
No contamination or discoloration Contaminated or discolored
No knocking Knocking
1. Clogged air cleaner
2. Poor fuel supply
(Test on level road)
1. Replace the fuel injector
1. Remove the dirt
2. Incorrect spark plug heat range
3. Incorrect spark plug gap
1. Worn out piston or cylinder
2. Abnormal fuel injector
3. Poor fuel quality
4. Carbon deposit in the combustion chamber
5. Abnormal ignition timing
6. clutch slippage
1. Carbon deposit in the combustion chamber
2. Malfunction of fuel injector
3. Poor fuel quality
4. Abnormal ignition timing
Continually drive in acceleration
or high speed
Normal Engine overheated
1. Malfunction of ECU
2. Malfunction of AC Generator
1. Worn out cylinder or piston ring
2. Cylinder gasket leakage
3. and hole in compression parts
4. Valve deterioration
5. Jammed piston ring
3. Fuel tank emission control system clogged
4. Clogged exhaust pipe
5. Clogged fuel injector
Engine RPM cannot be
increased
3. clutch shoe damaged
1. clutch slippage
2. poor clutch contact surface
Probable causes
1-13
1. General Information
C. Engine runs sluggish (especially in low speed and idling)
Check and adjustment
Check ignition timing
(using ignition lamp)
Incorrect ignition timing (malfunction of
ECU or AC Generator)
1. Abnormal throttle body insulator gasket
Normal Abnormal
Check for any air sucked in
through the throttle body insulator
2. Abnormal throttle body installation
3. Abnormal inlet pipe gasket
4. Malfunction of ECU
No air sucked in Air sucked in
Probable causesFault condition
1. Contaminated spark plug
2. Malfunction of ECU
3. Malfunction of AC Generator
4. Malfunction of ignition coil
5. Open or short circuit in spark plug leads
6. Malfunction of main switch
Good spark Poor spark
Remove the spark plug and
check the spark condition
D. Engine runs sluggish (High speed)
Normal
Check the fuel pump supply
Check if fuel injector clogged
1. insufficient fuel
2. fuel hose clogged, pressed
3. EEC clogged
Good Poor
Check ignition timing
1. Malfunction of ECU
2. Malfunction of AC
Normal Abnormal
Clogged 1. Replace injector
Probable causesFault conditionCheck and adjustment
1-14
1. General Information
E. Starter Motor Malfunction
1. Starter Motor doesn’t rotate
Check the battery circuit by
activating turning signal
Push the staring button and check if
the starting relay is activated
Flashing normally Not flashing or dimmed
Starting relay activated Starting relay not activated
Connect the starting motor to
the battery
Starter Motor rotates Starter Motor doesn’t rotate
1. Bad contact in the starter switch
2. Abnormal Starter relay
3. Loose coupler or terminals
Insufficient Battery capacity
(60~120 flashes per minute)
1. Abnormal wire harness
1. Worn carbon brushes
2. Broken or shorted rotor windings
3. Broken Starter motor sub wire
4. Loose coupler
Braking light activated Braking light not activated
1. Burnt Fuse
2. Insufficient Battery Voltage
3. Abnormal braking switch
4. Abnormal main switch
Check and adjustment Fault condition Possible causes
Pull the brake handle or step
on the braking pedal
1-15
1. General Information
2. Starting Motor rotates slowly or spins without engagement with crankshaft
1-16
Check and adjustment Fault condition Possible causes
Flashing normally Not flashing or dimmed
Starting Motor Still rotating
slowly
Rotates Normally 1. Loose coupler or terminals
2. Starting Relay bad contact
1. Engine Seized
2. Starting Motor shorted or damaged
Connect the starting motor to
the battery
Insufficient Battery capacity
Check the battery circuit by
activating turning signal
3. Starter motor won’t stop rotating
Turn the main switch off
Motor keeps running Motor stops
1. Starting relay shorted
1. Starting switch shorted/ stuck
F. Abnormal Engine Noise
Fault condition Possible causes
1. Excessive valve clearance
2. Worn rocker arm
3. Worn camshaft
Rocker arm noise
Piston slapping 1. Worn piston and cylinder
2. Carbon deposit in the combustion chamber
3. Worn piston pin or connecting rod lower end
1. Worn camshaft bearings
2. Worn cam sprocket
3. Loose or worn cam chain
Cam chain noise
1. Worn or deteriorated rear wheel damping rubber
2. Gear surface worn
3. Worn transmission gear set
Transmission gear noise
Excessive clutch plate clearanceClutch knocking
1. General Information
Lubrication Points
1-17
Throttle cable / Front brake lever pivot / clutch lever
Steering stem
Side stand bracket
Front wheel bearing
Driven chain
Rear wheel bearing
1. General Information
1-18
NOTE:
2. Maintenance Information
Precautions in Operation ········· 2-1
Periodical Maintenance Schedule
···················································· 2-2
Lubrication System··················· 2-3
Cylinder Compression Test ····· 2-4
Fuel System······························· 2-5
Air Filter ····································· 2-5
Throttle Operation····················· 2-6
Spark Plug ································· 2-6
PCV System······························· 2-7
Valve Clearance Adjustment···· 2-7
Drive Chain Adjustment ··········· 2-8
Steering Mechanism ················· 2-8
Suspension System ·················· 2-9
Disk Brake System···················· 2-9
Tire·············································· 2-11
Battery········································ 2-12
Clutch Adjustment ···················· 2-12
Headlight Adjustment ··············· 2-13
Brake Switch······························ 2-13
Nuts, Bolts Tightness ··············· 2-13
Special Tools ····························· 2-14
2
Precautions in Operation
Specifications
Capacity 14000 c.c.Fuel tank
capacity Reserve 700 c.c.
Capacity 1700 c.c.
Engine Oil
Exchange 1500 c.c.
Throttle grip free play 2~6 mm
Spark plug NGK CR8E
Spark plug gap 0.7~0.8 mm
Ignition timing BTDC 13º / 1650 rpm
Idle speed 1650±100 rpm
Cylinder compression pressure 12±2 kgf/cm²
In 0.10±0.02 mmValve
clearance Ex 0.15±0.02 mm
Front 110/70-17 54H
Tire size
Rear 140/70-17 66H
Single ride Front:2.0 kg/cm² / Rear:2.0 kg/cm²
Tire Pressure
Tandem ride Front:2.0 kg/cm² / Rear:2.25 kg/cm²
Battery Type
GT12A-BS
(12V 10Ah)
2-1
2. Maintenance Information
2-2
Periodical Maintenance Schedule
NO Items
Initial
300KM
1 month /
every1000
KM
3 months /
every3000
KM
6 months /
every6000
KM
1year /
every12000K
M
1 ☆Air filter element I C C R
2 ☆Gasoline filter I I R
3 ☆Engine oil filter R R
4 ☆Engine oil strainer C C C
5 ☆Engine oil replacement R Change every 1000km
6 Tire pressure I I
7 Battery inspection I I
8 Brake lever free play check I I
9 Steering handle integrity check I I
10 Shock absorber performance check I I
11 Bolts tightening check I I
12 Check the engine for oil leakage I I
13 ☆Spark plug inspection or replacement I I R
14 ☆Change gear oil R Change every 5000km
15 Lubrication of the whole bike L
16 Exhaust pipe I I
17 ☆Ignition timing I I
18 ☆Idle emission check A I A
19 ☆Throttle operation I I
20 ☆Engine bolts torque I I
21 ☆Transmission / chain I I/L R
22 ☆Clutch free play inspection I I
23 Light/electrical system//instrument readings I I
24 Main stand/side stand spring I I
25 Fuel lines I I
26 Cam chain I I
27 ☆Valve clearance I A
28 ☆PCV I C
29 ☆Crankcase blow-by over-flow pipe I Drain every 2000km
30 ☆Evaporative control system I
31 ☆Throttle body A I A C
32 ECUimput voltage I
33 EFi sensor coupler I I
Note: I-Inspection A-Adjust R-Replace C-Clean L-Lubricate
Please have your periodical maintenance data recorded by your SYM Authorized Dealer to maintain the motorcycle in excellent
condition. The above maintenance schedule is established by taking the monthly 1,000 kilometers as a reference. Whichever
time or mileage comes first will be regarded as an index for maintenance.
Remark:These marks “☆” in the schedule are emission control items. According to EPA regulations, these item checks
must be performed periodically following the use r manual instructions. It’s prohibited to adjust or repair
these emission control items by unauthorized people. Otherwise, SYM is no responsible.
1. Clean or replace the air cleaner element more often when the motorcycle is operated on dusty roads or in the
heavily polluted environment.
2. Maintenance should be performed more often if the motorcycle is frequently operated in high speed and after the
motorcycle has accumulated a higher mileage.
3. Preventive maintenance
a. Ignition system-Perform maintenance or check when continuous abnormal ignition, misfire, after-burn, overheating occur.
b. Carbon deposit removal-Remove carbon deposits in cylinder head, piston heads, exhaust system when power is decreasing.
c. Replace worn out pistons, cylinder head.
2. Maintenance Information
Lubrication System
2-3
Engine Oil quantity
Caution
 Turn off the engine; park the motorcycle on
level surface with main stand.
 Run the engine for 3-5 minutes, check oil
capacity after engine off for3-5
Check oil quantity from inspection window, if oil
level is near lower limit, fill in the recommended oil
to upper limit.
Exchange engine oil
Remove the oil drain bolt under the crankcase to
drain the engine oil. After completely drain the
engine oil, clean the drain bolt and the washer. If
the washer is deformed or cracked, please change
a new one.
Engine oil drain bolt torque:3.5~4.5kgf-m
Caution
 Warm up the engine before draining oil; that
will make engine oil easily and thoroughly
drained.
Lower limit
Fill in the engine oil to the standard quantity.
Oil viscosity :SAE10W -30
Engine oil exchange volume
Full disassembly:1700 c.c.
Regular exchange:1500 c.c.
Run the engine for several minutes, check for oil
leakage.
Engine oil strainer cleaning
Drain engine oil completely,remove oil strainer
cap, spring, and strainer from left side of
crankcase.
Clean oil strainer with solvent or compressed air.
Check if O-ring is deformed or damaged, replace if
necessary.
Install strainer, spring, and oil strainer cap.
Torque value:1.3~1.7kgf-m
Oil strainer cap
Upper limit
Oil drain bolt
2. Maintenance Information
Replace oil filter
2-4
Remove bolts of oil filter chamber.
Remove the filter and replace it with a new one.
Caution
 Oil filter is paper type and cannot be cleaned
or reused.
Cylinder compression test
Warm up engine and turn it off.
Remove left cylinder head cover
Remove spark plug cap and spark plug.
Install compression gauge into the spark plug hole,
full open the throttle, and rotate the engine.
Caution
Rotate the engine until the reading in the gauge
gains no more.
 Usually, the highest-pressure reading will
appear in 4~7 seconds.
Compression pressure:12 ±2 Kgf/cm²
Check the following items if the pressure is too
low:
 Incorrect valve clearance.
 Valve leakage
 Cylinder head leakage. Piston, piston ring,
cylinder damaged.
Over-high pressure means combustion chamber
r piston top deposit carbon.o
boltx2
Oil filter
Spark plug
Pressure
gauge
2. Maintenance Information
Fuel System
2-5
Fuel lines
Check all fuel lines, and replace when they are
deteriorated, damaged or leaking.
Caution
 Gasoline is a highly flammable substance, so
any source of fire or spark is strictly
prohibited when operation.
Fuel filter
Warning
 Any source of fire or spark is strictly
prohibited when operation.
 Fuel filter is sealed type, replace it if it is
clogged.
Remove seat, fuel tank, and fuel pump.
Check if fuel filter is clogged or broken; replace it
with a new one when necessary.
Check the fuel line for leakage.
Air filter
Air filter element
Remove the seat.
Remove the air filter cover (4 Screws)
Remove the air filter element
Check if the filter element is dirty or damaged.
If the air cleaner filter element is too dirty or
damaged, please replace with new parts.
Caution
 The air filter element is paper type and
cannot be soaked or washed, or engine
performance will be affected.
 If the filter element is not installed correctly,
dust will be sucked into cylinder, which will
result in decreased power and shortened
engine life.
Fuel filter
Filter
Screw×4
Air filter element
2. Maintenance Information
2-6
Throttle operation
Operate the throttle grip to see if the throttle cable
is going smoothly.
If the throttle cable is deteriorated, twisted or
damaged, please exchange it.
If the cable does not go smoothly, lubricate the
cable.
Measure the free play of the throttle grip, through
the inner side flange of it.
Free play:2~6 mm
Adjustment can be done on both side of throttle
cable.
Conduct secondary adjustment on upper side.
Loose fix nut and rotate it to adjust free play.
Spark plug
Recommended spark plug:CR8E
Remove cylinder head left cover. (boltX3)
Remove spark plug cap.
Clean dirt around the spark-plug hole.
Remove spark plug.
Measure spark plug ignition gap.
Spark plug gap:0.7~0.8 mm
Carefully bend ground electrode of the plug to
adjust the gap if necessary.
Hold spark plug and install the spark plug by
screwing it with hand, after tightening the plug by
hands, use plug socket to tighten it to the standard
torque value.
Standard torque:1.0~1.2kgf-m
Install the spark plug cap.
2~6 mm
Adjusting nut
Lock nut
Spark plug cap
Ground electrode
Center electrode
0.7~0.8mm
2. Maintenance Information
PCV System
2-7
Unplug the drain tube, and leak the deposit off.
Drain the tube every 2,000 km.
Caution
 Under rainy or full- throttle situation, the
maintenance period should be shortened.
You can check the deposit amount through
the transparent tube.
Valve clearance Adjustment
Caution
 The valve clearance should be adjusted
when the engine is cold. (Under 35°C)
Remove fuel tank. Remove cylinder head.
Remove cylinder head side cover.
Remove the timing inspection cap and the AC.G
cap on the crankcase L cover.
Use a T socket wrench to rotate the crankshaft
counterclockwise. Align the “T” mark on the
AC.G flywheel with the crankcase sign, and
simultaneously, the cam- chain sprocket TDC
mark aligning with the cylinder head mark (That
means the piston is in the upper end of
compression stroke)
Valve clearance inspection & adjustment
Check the intake and exhaust valve clearance by
inserting the feeler gauge between the adjusting
screw and the lock nut.
Valve clearance: IN: 0.10±0.02 mm
EX: 0.15±0.02 mm
Adjust by loosening the lock nut first, and
turning the adjusting screw.
Caution
 When adjusting valve clearance, make sure
all clearance on standard volume; recheck
after tightening lock nuts.
Install cylinder head, cylinder head side cover,
timing inspection cap, and the AC.G cap
Caution
 Before installing cylinder head side cover,
timing inspection cap, and the AC.G cap,
check if the O-ring is damaged, and apply
some oil on it.
Drain tube
〝T〞mark
TDC mark
2. Maintenance Information
Drive chain adjustment
2-8
Drive chain inspection
Place the bike on its main-stand with its neutral
gear. Check the drive chain slack by moving the
chain up and down by fingers, and measure the
amount of chain slack.
Standard chain slack:10~20 mm
Caution
 Because the front and rear sprocket have
different wearing situations, so please rotate
the rear wheel to find the minimum chain
slack for the measurement.
Drive chain adjustment
If you need to adjust the chain slack, please
loosen the rear axle nut and sleeve nut first.
Turn the left and the right side adjusting nut evenly
to make the chain slack within the standard range.
Turn the nuts clockwise to tighten the chain, or
counterclockwise to loosen the chain.
Torque value:4.0~5.0kgf-m
After tightening the rear axle nut, please check the
sleeve nuts to prevent them from loosening.
Recheck the chain slack, and make sure the rear
wheel rotates smoothly.
If the chain is too dirty, use high-flash point
solvents to clean the chain. (Kerosene or Diesel.)
Caution
 Don’t use gasoline when cleaning the chain.
The gasoline will damage the O-ring in the
chain.
After cleaning, lubricate the chain with chain
lubricant.
Steering mechanism
Caution
 Check all wires and cables if they are
interfered with the rotation of steering handle
bar.
Lift the front wheel off the ground.
Turn handle from right to left and check if turning
is smoothly.
If handle is uneven or bending, or the handle can
be lifted through vertical direction, adjust the
handle top bearing.
Adjusting nutRear axle nut
Lock nut
2. Maintenance Information
Suspension system
2-9
Caution
 Do not ride the motorcycle with poor cushion.
 Loosened, worn or damaged cushion will
make poor stability and maneuverability.
Front cushion
Press down the front cushion several times to
check its integrity.
Check if any oil leakage or damage.
Replace relative parts if damaged.
Tighten all nuts and bolts.
Rear cushion
Press down the rear cushion several times to
check its integrity.
Check if any oil leakage or damage.
Replace relative parts if damaged.
Start the engine and gradually rise R.P.M. to
rotate the rear wheel; check if any looseness,
vibration; replace bushing if damaged.
Tighten all nuts and bolts.
Disk brake system
Brake System Hose
Check the brake hoses for corrosion or brake fluid
leaking.
Brake Fluid
Check brake fluid level in the brake fluid reservoir.
If the level is lower than the LOWER limit, add
brake fluid to UPPER limit. Also check brake
system for leaking if low brake fluid level found.
Caution
 To keep the reservoir in horizontal position,
do not take off the brake fluid cap before
keeping the steering handle steady.
 Do not operate the brake lever after the cap
removed. Otherwise, the brake fluid will be
sprayed out.
 Do not mix non-compatible brake fluid.
Lower limit
2. Maintenance Information
Air bleeding operation
2-10
Connect a transparent hose to air-bleeding valve.
Hold the brake lever and turn the air-bleeding
valve open. Perform this operation several times
until there is no air bubble inside the transparent
hose.
Caution
 Before closing the air bleed valve, do not
release the brake lever.
Add Brake Fluid
Add brake fluid to UPPER limit.
Recommended brake fluid: DOT3 or DOT4 WELL
RUN brake fluid.
Caution
 Never mix or use dirty brake fluid to prevent
braking system from deterioration or reducing
brake performance.
Brake Lining Wear
The indent mark on brake lining is the wear
limitation.
If the wear limit mark approximates the edge of
brake disc, replace the brake lining.
Caution
 It is not necessary to remove brake hose
when replacing the brake lining.
Master Cylinder Cap
Diaphragm
Upper limit
Brake fluid
Air-bleeding valveAir Bubble
Transparent tube
Brake
disc
Brake lining
wear limitation
2. Maintenance Information
2-11
Tire
Check the pressure of the tire to see if it is in the
specified pressure range.
Caution
 Tire pressure check should be done when the
tire is cold.
Specified tire pressure range
Tire pressure Front Rear
Single
riding
2.0 2.0Tire pressure
when cold
(Kg/cm²) Dual riding 2.0 2.25
Specified tire:
Front:110/70-17 54H
Rear:130/70-17 62H
Check if tire surface is stuck with nails, stones or
other objects.
Check if tire surface and wall are damaged or
worn, replace when necessary.
Check tire tread depth with eye or tire depth
gauge.
Replace the tire if it is uneven worn or insufficient
tread depth.
If the wearing of the tire thread reaches triangle
TWI mark index, the tire have to be replaced.
Measure tire thread depth from tire central surface,
replace the tire, if the depth is not enough.
Minimum tread depth:
Front wheel: 1.5 mm
Rear wheel: 2.0 mm
Caution
 The triangle TWI mark index is located along
the tire wall.
“△ ”TWI mark
2. Maintenance Information
Battery
2-12
Battery removal
Remove the seat
Remove the〝─〞negative pole first, then remove
the〝+〞positive pole.
Remove the battery holder and take out the
battery.
Caution
 If the rust on the posts is very serious, spray
some hot water on them. Then, you can
remove the rust by steel brush more easily.
 Apply some grease on the posts after
cleaning rust to prevent from happening
again.
If there is some rust on battery posts, clean it with
steel brush.
Install the battery in the reverse procedures of
removal.
Battery model : GT12A-BS
Clutch adjustment
Clutch lever free play inspection
Slightly pull the clutch lever to check the free play
before clutch disengagement.
Free play:10~20 mm
Clutch lever free play adjustment
Before adjusting the clutch lever free play, please
loosen the lock nut first. Then turn the adjusting
screw to achieve the recommended clutch free
play. If you want to decrease the free play of
clutch lever, turn it clockwise. If you want to
increase the free play, turn it counterclockwise.
After adjustment, tighten the adjusting nut with
lock nut.
Lubricate the clutch cable.
Positive poleNegative pole
10~20 mm
Adjusting nut Lock nut
2. Maintenance Information
2-13
Headlight adjustment
Turn on main switch. Loosen the headlight
adjustment screw to adjust headlight beam height.
Caution
 The factory setting of the beam height is
consistent with government orders.
 Improper headlight beam setting will make
driver in the opposite lane dazzled and cause
danger.
Brake switch
Inspection on the brake switch
When brake lever is pulled, brake switch will light
up the brake lamp.
Make sure that electrical starter can be activated
only under braking condition.
Adjustment of rear brake switch
Turn on the main switch.
When the brake pedal is stepped down for
20mm,the brake lamp should be activated.
If the brake lamp is not activated or activated too
early, please adjust through the rear-brake-switch
adjusting nut.
Turning clockwise will decrease the free play, and
counterclockwise will increase the free play.
Nuts, bolts tightness
Apply periodical maintenance in according with the
Periodical Maintenance Schedule.
Check if all the bolts and nuts on the frame are
tightened within standard torque.
Check all fixing pins, snap rings, hose (pipe)
lamps, and wire holders for security.c
Headlight adjusting screw
RR brake switch adjusting nut
Brake switch
2. Maintenance Information
Special tools
Name Rocker arm shaft disassemble tool Name Flywheel puller Name Valve remove and assemble tool
SY No. SYM-1445100 SY No. SYM-3110000-HMA SY No. SYM-1471110/20
Name Valve spring compressor Name Tappet adjusting wrench Name Tappet adjusting tool
SY No. SYM-1471100 SY No. SYM-9001200 SY No. SYM-9001210
(6203/6004UZ) (20*34*7)
Name Steering Nut Wrench Name 6203/6004UZ bearing Driver Name 20*32*6 oil seal driver
SY No. SYM-5320000 SY No. SYM-9620000 SY No. SYM-9120200
(6204) (6301)
Name 6204 Bearing Driver Name 6301 Bearing Driver Name Digital clamp meter
SY No. SYM-9110400 SY No. SYM-9610000 SY No. SYM-HE07007-05
2-14
2. Maintenance Information
Name Inner bearing puller set Name Outer bearing puller Name Bearing driver
SY No. SYM-6204020 SY No. SYM-6204001 SY No. SYM-6204024
Name Crankcase bush puller Name Cylinder pressure gauge Name Vacuum pressure gauge
SY No. SYM-1120310 SY No. SYM-HT07008 SY No. SYM-HT07011
Name EFi System Diagnostic tool Name Fuel pressure gauge Name Multi-meter
SY No. SY No. SYM-HT07010 SY No. SYM-HE07007-01
Name Vehicle circuit test tool kit Name Vehicle circuit test harness Name Fuel hose clamp
SY No. SYM-HE170008 SY No. SYM-HE170008-01 SY No. SYM-1950500
2-15
2. Maintenance Information
Name EFI fuel hose pliers Name EFI fuel hose removal pliers Name
Water pump mechanical
seal driver
SY No. SYM-1768100 SY No. SYM-1768110 SY No. SYM-1721700-H9A
Name Water pump bearing driver Name Water pump oil seal driver
SY No. SYM-9100100 SY No. SYM-9120500-H9A
2-16
3. Fuel Injection System
EFi System Diagram·································· 3-1
EFi System Operation ······························· 3-2
EFi System Introduction ··························· 3-3
Fuel System ··············································· 3-4
Ignition System·········································· 3-5
Sensors / Drives ········································ 3-6
Precautions in Operation·························· 3-12
EFi System Components Description ····· 3-13
EFi System Circuit····································· 3-29
ECU Pin Configuration······························ 3-30
Troubleshooting········································ 3-31
Intergrated Troubleshooting Procedure·· 3-35
Fuel Tank ····················································3-37
Fuel Pump···················································3-38
Fuel Unit······················································3-39
Air Cleaner··················································3-39
EFi System Diagnosis Methods················3-40
Check Light Fault Codes Differentiation··3-41
Fault Codes and Sensors Table················3-42
Fault Code and Check Light Flashing Light
Identification Table···································3-43
Troubleshooting Table ······························3-44
Comprehensive Maintenance List············3-45
EFi system diagram
ISC
(stepping motor)
ECT sensorMAP
sensor
Injector
TPS
TA sensor
Fuel pump
Rollover
sensor
Battery
ECU
Ignition coil
AISV
Diagnostic tool
EFi System
Check L
Relay
CPS
O2
Sensor
amp
3-1
3. Fuel Injection System
EFi system operation
3-2
ECU
Engine control
unit
CPS
Crankshaft
Position Sensor
MAP
TPS
Throttle Position
Sensor
Manifold Absolute
Pressure Sensor
K/S
LAMBDA
TA
TW
Engine Coolant
Temperature
Sensor
O2 sensor
Rollover
sensor
INJECTOR
IGN COIL
FUEL PUMP
CHECK LIGHT
Injector
Ignition Coil
Fuel pump
AISV AISV
Intake Air
Temperature Sensor
ISC Idle Speed Control
Valve
Tuning tools Diagnostic tool
VBATT (Stepping motor)Battery
voltage
3. Fuel Injection System
3-3
EFi system introduction
Based on 4-stroke SOHC engine, displacement 250 c.c. electronically controlled fuel injection.
Fuel vapor will be absorbed by carbon canister; blow-by gas from crankcase will be introduced to
combustion chamber. The O2 sensor enhances the efficiency of the catalytic converter by
dynamically controlling the air / fuel ratio.
Electrical fuel injection system
Electrical fuel injection system is constructed by fuel supply device: fuel tank, fuel pump, fuel filter,
pressure regulator, and fuel control device: injector, ECU.
The fuel is pumped by electrical fuel pump in the fuel tank to the injector on the intake manifold
(inlet pipemanifold). The fuel pressure regulator keeps the pressure around 294±6kpa. The
signals from ECU enable the injector to spray fuel into the combustion chamber once each two
crankshaft-revolutions. The excessive fuel flows back to the fuel tank through the fuel pressure
regulator. Fuel pump is placed inside the fuel tank to reduce the working noise and simplify the
fuel system. Electrically controlled ignition and injection system effectively reduce fuel
consumption rate and pollution.
In traditional gasoline engine, carburetor supplies the fuel. The engine vacuum generates negative
pressure in the carburetor; then fuel mixed with air and together the mixed gas sent into
combustion chamber. Under this condition, air-fuel ratio is determined by air and fuel sucked in.
Thus, the three major processes are done simultaneously in the carburetor: air quantity
measurement, the determination of fuel quantity, the mix of fuel and air.
Electrical fuel injection system checks intake air quantity and temperature; on this basis, the
programmed air-fuel ratio in the ECU determines the amount of fuel to be injected; then the
injector sprays the fuel. The difference between carburetor and electrical fuel injection is that the
three mechanisms are independent which will lead to more precise fuel control and supply.
EFi engine uses computer-programmed fuel injection, the main features are:
1﹒ The quantity of fuel injected is determined according to the condition of the engine. The engine
RPM and throttle position determines the fuel quantity and injection time-length.
2﹒ The quantity of fuel injection, and the determination of injection time length, are all controlled by
16-bit microcomputer.
3﹒ The fuel pressure regulator maintains a 294±6kpa pressure difference between inlet pipe and
fuel pipe, raising the accuracy of fuel injection.
4﹒ By measuring the air pressure of inlet pipe, this system gives the vehicle better accommodation
to the environment.
5﹒ Idle speed control system supplies by-pass air to stabilize the idle running and cold starting.
6﹒ O2 sensor feeds back the signal to minimize the exhaust pollution.
3. Fuel Injection System
Fuel system
Fuel pump
Injector
Fuel pump
relay
ECU
Power relay
Battery
System description
1. After Key-on, the sensors send signals to ECU. ECU controls the fuel pump relay to make the
fuel pump operate. If the engine is not started, the fuel pump will be shut down within 2 to 3
seconds in order to save electricity. Fuel pressure regulator maintains fuel pressure at 294 ±
6kPa (about 3 kg / cm ²). According to the operating conditions and environmental
compensation coefficient, appropriate fuel will be injected. After Key-off or engine stops
operating, the fuel pump stops running.
2. Fuel filter filtrates impurities in the fuel. Replace it periodically.
3. When the engine cannot be started, do not keep starting the motor, which may reduce battery
power (less than 10 V), and the fuel pump will not be able to operate. The correct way is to use
a new battery.
Injector
Ten-hole type injector provides fuel injection, enhances the effect of fuel atomization, and
reduces HC emission. Short-type injector cap can easily fix the injector, receive the fuel from the
fuel pump, and limit injector rotation sliding. The signals from ECU control the fuel pressure
regulator, using the diaphragm and spring to maintain the fuel pressure in 294 ± 6kPa (about 3 kg
/ cm ²), and determine the fuel injection quantity by adjusting injection time width under different
engine conditions.
Fuel pump
Electrical fuel pump is placed inside the fuel tank, powered by the battery and controlled by ECU.
Fuel pressure: 294 ± 6kPa (about 3 kg / cm ²)
3-4
3. Fuel Injection System
Ignition system
3-5
Principle
The computer programmed ignition system receives the signals from the crankshaft position
sensor, throttle position sensor, O2 Sensor, MAP sensor, intake air temperature sensor, engine
coolant temperature sensor. Calculating the engine RPM, the 16-bit microcomputer determines
the appropriate ignition timing, controls the ignition coil and triggers the spark plug This way can
not only make the engine achieve the maximum power output, but also help improve fuel
consumption rate.
Specification
1. Ignition timing: BTDC 10 ° / 1650RPM
2. Spark plug: NGK CR8E Clearance:0.7~0.8mm
3. ACG crankshaft position sensor coil resistance: 120Ω±20% (green/white-blue/yellow)
4. Ignition coil primary circuit resistance: 2.8 Ω ± 15% Secondary circuit:with cap9.0KΩ±20%
without cap14.0KΩ±20%
5. Battery Type / Capacity: GT12A-BS / 12V 10Ah
ACG/ Flywheel Gear
(23+1 Long teeth)
Crankshaft
position
sensor
Throttle position
Manifold absolute pressure
Engine coolant temperature
REG. REC
ECU
Oxygen content
Battery
Intake air temperature
Power
relay
Ignition coil
Sparkplug
.
3. Fuel Injection System
Sensors / drives
Crankshaft position sensor (CPS)
Function:
CPS identifies the teeth on the flywheel and sends voltage signal to ECU.
Crankshaft position
sensorLong
tooth
ECU
Flywheel
Description
Right after the engine is started; the crankshaft position sensor identifies the TDC position by
detecting the long tooth on the flywheel and ignites at the fixed angle. When the engine RPM
reaches the specified speed, the ignition timing will change to the software mode.
3-6
3. Fuel Injection System
Manifold absolute pressure (MAP) / Engine water temperature (TW) / Intake air
temperature (TA) sensor
TW Sensor
TA Sensor
ECU
Map sensor
Engine water temperature / Intake air temperature sensor: Use the variable resistor of
negative temperature coefficient (thermistor) to identify the outside temperature. The electrical
resistance value goes down when the temperature rises. On the contrary, the electrical resistance
value becomes higher when the temperature falls. Sensors provide the temperature of the engine
coolant and intake air to ECU to determine the injection and ignition timing.
3-7
Manifold absolute pressure sensor: uses the piezoresistive resistor composed of silicon
diaphragm, forming the Wheatstone bridge circuit to measure the atmospheric pressure and the
intake manifold pressure, which are both transmitted to ECU as reference of engine control.
Working voltage (5V)
Output voltage
Inletpressure
sensor
ECU
5V
Outputvoltage
Inlet pressure (kPa)
3. Fuel Injection System
O2 Sensor
ECU
Power relay
O2 Sensor
Battery O2 Sensor
3-8
Function
O2 Sensor measures the proportion of oxygen in the exhaust gas, sending signals to ECU which
adjusts the air-fuel ratio by changing the fuel injection time. If the proportion of oxygen is too low, it
means the air-fuel mixture is rich, the concentration of HC & CO in the exhaust gas will rise. If the
proportion of oxygen is too high, it means the air-fuel mixture is thin, thin air-fuel mixture will result
in higher combustion temperature and higher NOx concentration.
1. O2 Sensor outputs feedback signal to ECU which keeps the air-fuel mixture near the
stoichometric ratio approximately 14.6 and forms the closed loop control system.
2. When the air-fuel mixture is near the stoichometic ratio, CO / HC / NOx are converted
most efficiently.
3. O2 Sensor heater resistance: 6.7 ~ 10.5 Ω
4. O2 Sensor amendment in the voltage value: between 100 ~ 900 mV
Outputvoltage
1. Ceramics tube
2. Electrode
3. Emissions
4. Atmosphere
3
1 2
4
Rich ← 14.7 → Lean
3. Fuel Injection System
Throttle position sensor (TPS)
ECU
TPS
3-9
Battery
TPS
ECU
5V
6
VC
TPS output voltage
Basic Principle:
TPS is a rotary variable electric resistor. When it is rotated, both electric resistance and voltage
value will change, determining the throttle position.
Function:
TPS identifies the throttle valve position and sends signal to ECU as reference of engine control.
4
2
0
50
Voltage
E
VTA
100 150
Throttle valve opening angle
3. Fuel Injection System
Idle speed control valve (ISC stepping motor)
ISC
3-10
Function:
ECU controls ISC stepping motor to adjust the bypass intake air quantity and stabilize the idle
speed.
S
N
S
S
N
N
ECU
+Va
-Va
+Vb
-Vb
Step Va
Vb
Battery
3. Fuel Injection System
Air injection solenoid valve (AISV)
Function: AISV introduces appropriate air quantity to reduce pollutant emission.
Basic principle: When the engine RPM and throttle opening are higher than the default value,
ECU controls AISV opening or closure.
AISV
Reed valve
3-11
Fresh air
Power relay
Battery
ECU
Power relay
AISV
ECU
3. Fuel Injection System
Precautions in operation
General information
Warning
● Gasoline is a low fire point and explosive material. Always work in a well-ventilated place and
flame is strictly prohibited when working with gasoline.
● Before dismantling fuel system parts, leak fuel out first, or grip the fuel pipe by using pliers to
prevent fuel from splashing.
Caution
● Do not bend or twist the throttle cable. Damaged cable will lead to unstable driving.
● When disassembling fuel system parts, pay attention to O-ring position, replace with new one
as re-assembly.
Method of releasing fuel pressure in fuel system:
After removing fuel pump relay, turn on the main switch, press start switch to start the engine till it
stops to drain fuel in the fuel system.
Specification
Item Specifications
Idle RPM 1650±100 rpm
Throttle handle free play 2~6 mm
Fuel pressure 294±6kpa (3.0kg/cm²)
Torque value
Engine temperature sensor: 0.74~0.88kgf-m
O2 Sensor: 3.6~4.6kgf-m
Special Tools
Vacuum Gauge
Fuel Pressure Gauge
EFi System Diagnostic Scanner
Fuel Pipe Pliers
3-12
3. Fuel Injection System
EFi system components description
ECU(Electronic Control Unit)
Function Description:
● Powered by DC 8~16V, and has 36-pin socket on the unit.
● The hardware component consists of a 16-bit microcomputer that
is its control center. It contains the functional circuit interface of
engine condition sensing and the driving actuator for the fuel
injector, fuel pump, as well as ignition coil.
● Its major software is a monitor strategy operation program that
includes controlling strategy and self-diagnosis programs.
Testing Procedures:
1. Connect the diagnostic scanner to the diagnostic coupler on the
vehicle.
2. Key-on but do not start the engine, confirm the connection of ECU
and the diagnostic scanner.
3. Diagnostic scanner will automatically display Version
"certification" of the screen.
4. Confirm the application model, version is correct or not.
5. Check if the fault codes exist.
6. Remove the fault codes.
7. Start engine and check the parameters shown on the diagnostic
scanner.
Detection judge:
● Fault codes can be read and cleaned, and the fault codes will not
appear again after re-start.
Treatment of abnormal phenomena:
1. Can not connect→ First check whether the cartridge is correct
and ECU is normal or not. Replace with new parts and recheck.
2. Unable to start→ ECU or relevant parts abnormal. Replace with
new parts and recheck.
3. Fault codes appear→ ECU or relevant parts abnormal.
Troubleshoot and recheck.
3-13
3. Fuel Injection System
Throttle body
Function description:
● Throttle body is an inlet air flow regulating device (similar to the
carburetor).
● Throttle valve pivot drives the throttle position sensor
synchronously and makes ECU detect the throttle opening
immediately.
● Throttle valve positioning screw has been adjusted and marked
on the production line. Readjustment is not suggested.
● The ISC on throttle body functions to supply air making cold
starting easier; after engine warmed up, the air channel will be
reduced according to engine conditions.
Treatment of abnormal phenomena:
● If all fuel injection associated components identified no fault, and
other traditional engine components are also normal, the engine is
still not smooth, please confirm if too much carbon deposits in the
throttle body.
● If there is too much carbon deposit in the throttle body, please
clean throttle body, and then adjust the injection system.
Throttle
positioning
screw
3-14
3. Fuel Injection System
MAP sensor
Function description:
● Powered by 5V DC from ECU. It has 3-pin socket on the sensor. One
terminal is for power, and one terminal is for signal output. And, the
rest one is for grounding.
● The major component of the intake pressure sensor is a variable
transistor IC. Its reference voltage is DC 5V, and output voltage range
is DC 0~5V.
3-15
● It is a pressure-sensing sensor, and can measure the absolute pressure
in intake process. It also conducts fuel injection quantity correction
based on environmental position level.
Testing Procedures
Working voltage measurement
Output voltage measurement
1. Connect inlet pressure sensor properly (using the probe tool).
2. Key-on but do not start the engine.
3. Use "voltage meter" DC stalls (DCV) to check inlet pressure sensor
voltage.
4. Working voltage check:
● Voltage meter negative access to the inlet pressure sensor third pin
(Green/Pink)
● Voltage meter positive access to the inlet pressure sensor first pin
(Yellow / Black).
5. Confirm output voltage values:
● Voltage meter negative access to the inlet pressure sensor third pin
(Green/Pink)
● Voltage meter positive access to the inlet pressure sensor second pin
(Black/Red)
Caution
● The probe tool should contact the inner terminals to measure
the correct value.
Detection judge:
● Working voltage value: 5.0±0.1V
● Output voltage values:2.87±0.03V (Conditions: Measure on level ground
101.3 kPa)
Caution
● The higher the elevation, the lower voltage will be measured.
● Sea-level atmospheric pressure = 1Atm = 101.3kPa = 760mmHg =
1013mbar
Treatment of abnormal phenomena:
● MAP sensor damaged, or poor contact couplers.
● Check if the wire harness abnormal.
● If MAP sensor fails, replace with a new one and recheck output
voltage.
● If ECU fails, replace with a new one and recheck output voltage.
Pin Wire color Function
Left Y/B 5V voltage input
Center B/R Signal output
Right G/P Ground
Y/B B/R G/P
3. Fuel Injection System
TA sensor
Function Description
● Powered by 5V DC from ECU. It has 2-pin socket on the sensor.
One terminal is for voltage output, the other is for grounding.
● The major component of TA sensor is a variable resistor of
negative temperature coefficient
● Installed in the air filter, the resistor in TA sensor varies with
temperature variation and sends voltage signals for ECU to
calculate the intake air temperature; then, ECU adjusts injection
time and ignition angle.
Testing Procedures:
Resistance value measurement:
● Dismantled TA sensor connector.
● Use the "Ohmmeter" Ohm stalls to inspect sensor resistance.
Detection judge:
3-16
Temperature( )℃ Resistance value(KΩ)
-20 18.8 ± 2.4
40 1.136 ± 0.1
100 0.1553 ± 0.007
Treatment of abnormal phenomena:
● Damaged TA sensor or poor connector contact.
● Check if the wire harness abnormal.
● If TA sensor possibly failed, it is suggested to replace with a new
one.
Resistance value measurement
3. Fuel Injection System
TPS
Function description:
● Powered by 5V DC from ECU. It has 3-pin socket on the sensor.
One terminal is for power, and one terminal is for voltage output.
And, the rest one is for grounding.
● Its main component is a sophisticated variable resistor.
3-17
● Installed on the throttle body. While throttle is rotated, TPS senses
the throttle position (opening) and sends voltage signals for ECU
to judge the throttle position; then, ECU optimizes fuel injection
and ignition timing.
Working voltage measurement
Throttle output signal
measurement - close
Throttle output signal
measurement - full
Pin Wire color Function
Up White/Brown Signal output
Center Yellow/Black 5V voltage input
Low Green/Pink Ground
Y/B
W/BR
G/P
Testing Procedures:
1. Working voltage can be measured while sensor coupler is
connected (use probe tool) or removed (direct measurement).
2. Key-on but do not start the engine.
3. Use "voltage meter" DC stalls (DCV) to check voltage.
4. Working voltage check:
● Voltage meter negative access to TPS third pin.(green/pink)
● Voltage meter positive access to TPS second pin.(yellow/black)
5. Throttle output signal check: (using the probe tool)
● Voltage meter negative access to TPS third pin.(green/pink)
● Voltage meter positive access to TPS first pin.(white/brown)
● Measure the output voltages of both full-throttle and
close-throttle.
Caution
● The probe tool should contact the inner terminals to measure
the correct value.
Detection judge:
● Working voltage value:5.0±0.1V
● Close-throttle voltage value:0.6±0.02V
● Full-throttle voltage value:3.77±0.1V
3. Fuel Injection System
Diagnostic tool can be used to check throttle output signals.
1. Connect the Diagnostic tool, key-on but do not start the engine.
2. Switch screen to “data analysis.”
3. Rotate the throttle and check the voltage.
3-18
Throttle output signal
measurement -close
Treatment of abnormal phenomena:
● TPS damaged or coupler poor contact.
● Check if the wire harness abnormal.
● If TPS possibly failed, it is suggested to replace with a new one
and check again.
Warning
● It is prohibited to remove TPS from throttle body to conduct
any test.
Throttle output signal
measurement -full
3. Fuel Injection System
TW sensor:
Function Description:
● Powered by 5V DC from ECU. It has the two-pin socket on the
sensor. One terminal is for voltage output, and the other terminal
is for ground.
● The major component of TA sensor is a variable resistor of
negative temperature coefficient
3-19
● Installed on the cylinder head, the resistor in TW sensor varies
with temperature variation and sends voltage signals for ECU to
calculate the intake air temperature; then, ECU adjusts injection
time and ignition angle.
Testing Procedures:
Resistance value measurement:
● Remove the TW sensor from the vehicle.
● Use the "Ohmmeter" Ohm stalls to inspect sensor resistance.
Detection judge:
Resistance value measurement
Temperature ( )℃ Resistance value (KΩ)
-20 18.8 ± 2.4
40 1.136 ± 0.1
100 0.1553 ± 0.007
Treatment of abnormal phenomena:
● Damaged TW sensor or poor connector contact.
● Check if the wire harness abnormal.
● If TA sensor possibly failed, it is suggested to replace with a new
one.
3. Fuel Injection System
O2 Sensor
Function Description:
● Powered by 8-16V DC from ECU. It has the four-pin socket on the
sensor. One terminal is for heating power output, one for heating
control, one for signal grounding, and one for signal.
● O2 sensor sends signal to ECU, and ECU control air / fuel ratio
around 14.5 – 14.7 to form a close loop.
● When the air-fuel mixture is near the stoichometic ratio, CO / HC /
NOx are converted most efficiently.
Testing Procedures:
1. Working voltage check
● Remove O2 sensor coupler from the wire harness.
● Key-on but do not start the engine.
● Use "voltage meter" DC stalls (DCV) to check the power supply of
wire harness to the heating circuit of the O2 sensor.
● Working voltage check
Voltage meter negative access to the second pin of wire harness coupler.
(pink/white)
Voltage meter positive access to the first pin of wire harness. (red/yellow)
2. Resistance value check
● Remove O2 sensor coupler from the wire harness.
● Use the "Ohmmeter" Ohm stalls to inspect the heater sensor
resistance.
● Resistance value check
Ohmmeter negative access to the second pin of O2 sensor. (white)
Ohmmeter positive access to the first pin of O2 sensor. (white)
Working voltage check
3-20
G/P P/B
P/W R/Y
B GR
W W
Resistance value check
3. Fuel Injection System
3. Use of diagnosis tool to check O2 sensor work situations
● Connect the Diagnostic tool, key-on and start the engine.
● Completely warm up the engine. (idle running for more than "5
minutes")
voltage changing condition.
● Switch screen to "DATA STREAM 01/01", select "O2 Sensor"
project, turn the throttle to achieve 4500 rpm. Observe O2
Sensor acting.
● Observe O2 Sensor voltage changing condition.
Detection judge:
● Working voltage: above 10V
● Resistance value: 6.7~10.5Ω
● That Observe O2 Sensor voltage between 100 ~ 900 mV means
pollution close loop control system is normal. However, it is
abnormal, if the value is a fixed one.
Treatment of abnormal phenomena:
● Damaged O2 Sensor, damaged heater, or coupler poor contact.
● Check if the wire harness abnormal.
● If O2 Sensor possibly failed, it is suggested to replace with a new
one and check again.
3-21
3. Fuel Injection System
Rollover sensor
Function descriptionNormal
● Rollover sensor controls power of the power relay coil and has
three-pin socket.
● When the vehicle tilt angle is greater than 65 degrees, rollover
sensor will be the implementation of ECU system power-off. At
this time, to restart the engine, the main switch has to be turn on
again.
● It is a safety device, when the vehicle rolls over, it will cut off
power supply to ECU.
Rollover
Testing procedures:
● Rollover sensor is an electronic control mechanism. It is unable to
test while the sensor removed from the vehicle.
● In normal situation, key on, measure the voltage of white/brown
and green/pink (ground) wire of ECU, then the condition of the
rollover sensor can be judged.
Detection judge:
Voltage: Normal: 0.4~1.4V
Rollover: 3.7~4.4V
Treatment of abnormal phenomena:
Vehicle state vertical, no power supply to power relay or ECU.
● Rollover sensor internal short circuit or open circuit, or coupler
poor contact.
● Check if the wire harness abnormal.
● If Rollover Sensor possibly failed, it is suggested to replace with a
new one.
3-22
3. Fuel Injection System
ISC(stepping motor):
Function description:
3-23
● Powered by 8-16V DC from ECU. ISC has a four-pin socket.
● The 4-pin socket is composed of power supply and grounding
circuits of two motors, ECU controls the acting of stepping motor
by controlling the power supply and grounding circuit.
● Low-power-consuming DC motor drives the ISC. And the
movement of ISC controls the opening of idle speed air channel,
thus the idle speed of cold or warmed engine can be adjusted.
Testing Procedures
Resistance value check:
● Remove ISC coupler from throttle body. (It is okay to test while
ISC installed on throttle body.)
● Use the "Ohmmeter" Ohm stalls to inspect the resistance of the
two motor circuits.
A phase: ISCAP and ISCAN
B phase: ISCBP and ISCBN
ISCAP
ISCBP
ISC pins
Resistance value measurement of
A phase
Resistance value measurement of
B phase
Movement test (This test can only be conducted while ISC installed
on throttle body.)
● Key-off.
● Touch ISC with hand.
● Key-on.
ISCBN
ISCAN
● Feel if the ISC moves.
Caution
● The movement test can only be conducted while ISC installed
on throttle body.
Detection judge:
1. Resistance value:
A phase: 80 ± 10Ω (Environmental conditions: 15 ~ 25 )℃
B phase: 80 ± 10Ω (Environmental conditions: 15 ~ 25 ℃)
2. Movement test
Test in accordance with the test procedure illustrated above, ISC
will vibrate slightly or sounds continuous “da…da…”
Treatment of abnormal phenomena:
● Damaged ISC, or coupler poor contact.
● Check if the wire harness abnormal.
● If ISC is abnormal, it is suggested to replace with a new one and
recheck its movement.
3. Fuel Injection System
Fuel pump
Fuel pump working voltage
measurement
Fuel pump resistance
measurement
Function Description:
● Powered by 8-16V DC from ECU. Fuel pump has a four-pin
socket.
● The two pins are power supply and grounding. ECU controls the
movement of fuel pump by controlling the power.
● Low-power-consuming DC motor (12V) drives the vane pump to
keeps the pressure around 294±6kpa(3kg/cm2
)in the fuel supply
system.
● Fuel pump is placed inside the fuel tank. A fuel filter is installed
on the inlet front to prevent foreign material entering and
damaging the fuel pump and injector.
Testing Procedures 1
Fuel pump working voltage check:
● Connect fuel pump coupler (use probe tools), or remove it to
measure working voltage. (direct test)
● Key-on but do not start the engine.
● Use "voltage meter" DC stalls (DCV) to check fuel pump voltage.
● Working voltage check
Voltage meter negative access to the second pin of fuel pump. (green)
Voltage meter positive access to the first pin of fuel pump.
(black/orange)
Caution
● While measuring fuel pump working voltage, if the engine is
not started, ECU will cut off power supply to fuel pump within
3 seconds.
Detection judge 1
1. Working voltage: above 10V
2. Resistance:1.5±0.5Ω
3. Fuel pressure:294±6kPa (3kg/cm2
)
Testing Procedures 2
Fuel unit resistance check
● Remove fuel unit coupler.
● Use the "Ohmmeter" Ohm stalls to inspect the resistance of the
fuel unit. (yellow/white & green)
3-24
3. Fuel Injection System
Testing Procedures 3
Fuel pressure measurement
● Connect fuel gauge between fuel tank and injector.
Caution
● To measure fuel pressure, fuel hoses, injector side or fuel
pump side, will be removed. After the measurement, please
check if any fuel leaks.
Fuel system pressure
measurement
Detection judge 2
1. fuel pressure: 294±6kPa (3kg/cm2
)
Treatment of abnormal phenomena:
1. Fuel pump internal circuit damaged, or coupler poor contact.
2. Clogged filter.
Pressure
measurement-injector side
3. If fuel pump is abnormal, it is suggested to replace with a new
one.
4. If fuel gauge is abnormal, it is suggested to replace with a new
one.
Pressure measurement -fuel
pump side
3-25
3. Fuel Injection System
Fuel injector
Function Description:
● Powered by 8-16V DC from ECU. Fuel pump has a two-pin
socket.
● Its major component is a high resistance voltage driven solenoid
valve.
● The two pins are power supply and grounding. Fuel injector is
controlled by ECU to decide the injection timing, and the injector
pulse width.
Testing Procedures:
1. Resistance test
Use the "Ohmmeter" Ohm stalls to inspect the injector resistance.
2. Injector injection state check
Remove injector fix bolts, but do not disconnect the coupler.
Hold injector and injector cap with hand, no leak should happen.
Key-on and start the engine; inspect the injecting state.
Detection judge:Injector resistance
measurement 1. Resistance between the two pins: 10.5±0.53Ω
2. Injection state
● Good fuel atomizing, with a clear scattering angle → judged as
normal.
● Injection-state resembles water drop, no obvious scattering
angle → judged as abnormal.
Treatment of abnormal phenomena:
1. Resistance NG→ abnormal injector, it is recommended to replace
with a new one.
good injection
2. Abnormal injection state, reasons:
● Clogged injector→ abnormal injector, it is recommended to
replace with a new one.
● Insufficient fuel pressure→ check fuel pressure, it is
recommended to replace with a new one and recheck.
Warning
● Fuel is highly flammable and explosive. Work in a
well-ventilated place, no flame or spark allowed.
● Properly store the fuel injected by injector while conducting
test.
abnormal injection
3-26
3. Fuel Injection System
Transistor ignition coil
Function Description:
● Powered by 8-16V DC from ECU. Fuel pump has a two-pin socket.
● The two pins are power supply and grounding. Its major component is a
high conversion ratio transformer.
3-27
● The computer programmed ignition system receives the signals from
the Crankshaft position sensor, Throttle position sensor, O2 Sensor,
MAP sensor, Intake air temperature sensor, Engine coolant temperature
sensor. Calculating the engine RPM, the 16-bit microcomputer
determines the appropriate ignition timing, controls the ignition coil and
triggers the spark plug This way can not only make the engine achieve
the maximum power output, but also help improve fuel consumption
rate.
Testing Procedures
Resistance measurement:
● Remove primary circuit coupler from ignition coil.(red/yellow &
black/yellow)
● Use the "Ohmmeter" Ohm stalls to inspect the ignition coil resistance.
Primary circuit resistance
measurement
Detection judge:
● Ignition coil primary circuit: 2.8Ω±15%
● Ignition coil secondary circuit: without cap9.0KΩ±20% with cap14.0KΩ±
20%
Treatment of abnormal phenomena:
1. Ignition coil internal short circuit or open circuit, or coupler poor contact.
2. If ignition coil is abnormal or dose not ignite, it is recommended to
replace with a new one.
Crankshaft position / RPM sensor
Function Description
● It does not need power supply, and has a two-pin plug.
Resistance measurement
● Its major component is a reluctance induction coil.
Long tooth
● The spacing of flywheel and sensor should be 0.7 to 1.1 mm.
● Magnetic induction sensor is the use of flywheel on the Gear (23
+1 long tooth) rotary cutting induction coil changes in the
magnetic field sensor with the inductive voltage signal for ECU
judgment, calculated at the engine speed and crankshaft position,
and with a most appropriate time of fuel injection and ignition
control.
Testing Procedures
Resistance measurement:
● Remove CPS coupler. (blue/yellow & green/white)
● Use the "Ohmmeter" Ohm stalls to inspect the CPS resistance.
Detection judge
● Resistance: 120Ω±20%
Treatment of abnormal phenomena
1. CPS internal circuit damaged, or coupler poor contact.
2. Check if the wire harness abnormal.
3. If CPS is abnormal, it is suggested to replace with a new one.
3. Fuel Injection System
AISV
3-28
AISV working voltage
measurement
Resistance measurement
Function Description:
● AISV has two-pin socket, one is for power supply and the other is
for grounding.
● AISV acts while RPM under 3500.
● While idling, ECU controls AISV movements by controlling its
solenoid valve grounding circuit.
Testing Procedures
Resistance measurement:
● Use the "Ohmmeter" Ohm stalls to inspect the AISV resistance.
Detection judge
Resistance: 22 ± 2Ω (20~30℃)
Treatment of abnormal phenomena
● AISV internal short circuit or open circuit, or coupler poor contact.
● Check if the wire harness abnormal.
● If CPS is abnormal, it is suggested to replace with a new one.
3. Fuel Injection System
EFi system circuit
3-29
B
G
G
Test
switch
Engine-off
relay
GR
L/G
W/B
O/G
B
G/L
AISV
TW
sensor
MAP
sensorISC
IG.
coil
TA
sensorO2sensorTPS
Rollover
sensorCPSACG
Reg/Rec
Battery
Main
switch
R
B
G
EFi system
check lightY/G
Y
RY
P
Y
G/W
L/Y
W/G
Diagnostic
tool
coupler
R
B/Y
L/O Silicon
controlled
rectifierEngine-off
relay
Fan
Fuel
pumpInjector
Side stand indicator
Neutral gear indicator
Y/B
G/BR
B/R
R/Y
W/BR
G/P LG/R
Side stand
relay
L/O
Sidestand
switch
B/G
PU/R
G
G
R/GR
Silicon
controlled
rectifier
G/R
P/B
Clutch
switchW
W P/W
B/L
L/B
BR/B
Fan relay
PUG/B
B/O
O/L
Fuel pump
relay
B/Y
Water temp. injector
3. Fuel Injection System
ECU pin configuration
(on ECU)
ECU Pin Note
Pin
NO.
Wire
color
Pin
code
Note
Pin
NO.
Wire
color
Pin
code
Note
01 R/Y IGP Drive components Power + 19 R BAT ECU power +
02 B/W ROLL Rollover sensor signal input 20 P TEST Test switch signal (A/D)
03 L/Y CRK-P Crankshaft pos. Sensor+ 21 Y/G MIL Warning Lights O/P
04 LG/R NLSW Neutral gear switch signal 22 R/GR TW Eng. Water Temp. Sensor (A/D)
05 W/BR TH Throttle position [A/D] 23 - - No use
06 B/R PM Manifold Press. SNSR I/P [A/D] 24 G/P SG Sensor ground
07 P/B
HEGO
A/D
O2 Sensor [A/D] 25 G/BR TA
Intake air temperature sensor
(A/D)
08 G LG ECU ground 26 No use
09 G/W CRK-M Crankshaft pos. Sensor- 27 PU FANR Cooling fan drive
10 W/G K-LINE Sequence transmission signal output
/ input
28 G/L TWL Water temp. drive
11 O/G FLPR Fuel pump relay O/P 29 - - No use
12 O/L SOL AISV O/P 30 - - No use
13 Y/B VCC Sensor power + (DC 5V) 31 BR/B ISCAN Step motor A phase power -
14 G/B ISCBP Step motor A phase power + 32 B/W ISCBN Step motor B phase power -
15 L/B ISCAP Step motor B phase power + 33 No use
16 L/G INJ Fuel injector O/P 34 G/R CLSW Clutch switch signal
17 P/W
HEGO
HT
O2 Sensor heater ground 35 G PG1 Drive components ground
18 B/Y IG Ignition coil O/P 36 G PG Drive components ground
3-30
3. Fuel Injection System
Troubleshooting
EFi Circuit inspection Main switch on
3-31
NG
1. Bulbs blown?
2. Fuse blown?
3. Battery voltage too low?
4. ECU Power line bad contact?
5. Poor contact the main power
switch?
Warning lights extinguish after 2 seconds?
OK 6. ECU fault?
NG 1. Charging line anomaly?
Battery voltage above 12.5V? 2. Battery unable to store
electricity?
3. Short-circuit leakage?OK
Battery voltage & ECU voltage difference less
than 0.2 V?
1. Main switch OFF
2. Remove ECU coupler NG
3. Main switch ON 1. Lines anomaly?
4. Use voltage meter to measure the
power-pin voltage difference
OK5. Confirmed ECU and battery supply
voltage difference within 0.2 V
Battery voltage & actuator voltage difference
less than 0.2 V?
NG1. Main switch OFF
1. Lines anomaly?2. Remove injector, fuel pump, O2 sensor,
rollover sensor, ig. coil couplers
OK
OK
NG
3. Use voltage meter to measure the voltage
difference
4. Confirmed difference within 0.2 V
ECU 5V voltage - sensor voltage difference less than 0.1 V?
1. Main switch OFF
2. Use probe to insert TPS, engine temperature sensor,
MAP sensor couplers
3. Main switch ON
4. Use voltage meter to measure the sensor voltage
1. Lines anomaly?
2. ECU anomaly?
OK
5. Voltage standard value: 5.0±0.1V
Battery voltage - fuel pump voltage difference
less than 0.2 V?
1. Main switch OFF NG 1. Lines anomaly?
2. Removed fuel pump power coupler
3. Probe connects to two-pin connector of fuel
pump
2. Relay fault?
3. ECU anomaly?
4. Main switch ON
5. Record voltage values in three seconds
6. Confirm voltage difference within 0.2 V
End
3. Fuel Injection System
Difficult or unable to start engine
3-32
OK
NG
Difficult or unable to start engine
Warning lights extinguish
after 2 seconds?
Warning lights displays Fault
Code?
Fuel system anomaly?
Circuit anomaly?
Engine anomaly?
1. Inspection process in accordance with
circuit inspection
OK
NG
1. Use diagnostic tool to view EMS fault
content
2. Troubleshoot in accordance with
procedures on troubleshooting
NG
OK
1. Fuel tank inadequate?
2. Fuel injector pressure less than 294 ±
6kpr?
3. Fuel system leaks?
4. Pressure Regulator anomaly?
5. Fuel pump hose leakage?
6. Fuel pump anomaly?
7. Fuel injector anomaly?
1. Spark plug sparks?
2. Wet spark plug?
3. Spark plug cap loose?
4. Crankshaft position sensor Short
Circuit
5. The high-voltage power wire loose?
6. ECU anomaly?
7. O2 sensor connector corrosion, short
circuit?
1. Without valve clearance?
2. Incorrect valve timing?
3. Valve seized?
4. Cylinder and piston ring worn?
5. Improper adjustment of air adjusting
screw on throttle body?
END
NG
OK
NG
OK
3. Fuel Injection System
Idle flameout diagnosis
3-33
Idle Air Control Valve
Actuation whether or
failure?
If idle flameout cannot be
solved after checking the EFi
related mechanisms, it is
recommended to check
traditional engine
mechanisms.
Idle flameout Throttle line is jammed
and unable to revert to
full closure?
1. Link diagnostic tool to
view EFI fault content
2. Troubleshoot in
accordance with
Troubleshooting
procedures
Idle CO value beyond set
range (1.5% ~ 2.5%)?
Enough Gasoline?
Throttle body whether
coke seriously?Battery wires loose?
3. Fuel Injection System
CO value revised anomaly
In principle, system equipped with O2 Sensor, the CO value needs no adjustment. If CO value deviates from normal
range, please check if O2 Sensor or other mechanisms is abnormal.
3-34
Link diagnostic tool to
view if Idle CO value is
abnormal
Enough gasoline?
Battery wires loose?
Enough battery voltage?
Connect with the
diagnostic tool, enter
data steam screen.
If idle flameout cannot be
solved after checking the EFi
related mechanisms, it is
recommended to check
traditional engine
mechanisms.
Throttle line is jammed and
unable to revert to full
closure?
Idle flameout
Start engine and warm to 70
º C ~ 95 º C, check if engine
speed, idle control valve and
fuel injection timing, O2
sensor is abnormal?
Idle CO value beyond the
set range (1.5% ~ 2.5%)?
Idle running for 3 ~ 5
minutes, confirm the engine
is running normally then shut
off engine, eliminate fault
codes
3. Fuel Injection System
Intergrated troubleshooting procedure
3-35
Checking,
adjusting item
● Use meter to
measure battery
voltage
Fault reasonsFault status
determination
● Use diagnostic
tool to detect
battery voltage
Parts specifications
Battery
voltage
Detection items and
procedures
● Battery electricity
● Battery connector
loose
● Harness circuit
opening
● ECU coupler
disconnect
t d l
● Is battery
voltage above
10 V?
● Is diagnostic tool
showing voltage
above 10 V?
● Diagnostic tool
should show
voltage above
10 V.
NO
YES
● Is fault code
shown on
diagnostic tool?
● Fault Code is
show again after
fault code
elimination?
● TPS fault
● ETS fault
● CPS fault
● MAP fault
● O2 sensor fault
● ROS fault
● ECU fault
YES
● Use diagnostic
tool to detect
existing fault
code
● Eliminating fault
codes, and
restart engine
Fault code
inspection
with
diagnostic
tool
Please refer to
service manual for
detection method
and specification of
each sensor.
NO
● Does injector
inject?
● Is injecting angle
normal?
● Fuel pressure
enough?
● Removed injector
from intake
manifold, but do
not remove the
hose. (Injector and
injector cap tightly
by hands, fuel
spills should not
be the case)
● Start the engine
● Examine whether
injector injects
● Connect pressure
gauge between
the tank and
injector
Fuel
quantity and
fuel
pressure
● Insufficient fuel in
fuel tank
● Fuel pressure
specifications:
Key-on three
seconds but no
start engine
→more than
250 kPa
Idle speed→
294±6kPa
● Injector fault
● Fuel pump relay
fault
● Fuel pump fault
● p filter
clogged
● ECU fault
Fuel pum
● Injector
resistance:
11.7±0.6Ω
NO
● Check fuel
pressure
YES
● Remove the
spark plug from
the cylinder
head with
ignition coil
connected
● Start the engine
● Check spark
plug sparks
Ignition
situation
● Check if spark
plug ignites?
● Check if sparks
of spark plug
strength is
normal?
● Spark plug fault
● Rollover sensor fault
● ECU fault
● Ignition coil fault
● Crankshaft position
sensor fault
● Spark plug
specifications:
NGK-CR8ENO
next page
YES
3. Fuel Injection System
3-36
Continued from previous page
●Observe O2
sensor voltage
changes (Stand
motorcycle and
keep RPM abound
4500 to 5500
YES
● Whether O2
sensor voltage is
maintained
within a certain
range in a long
time
Close-loop
systems
mobility
● O2 sensor fault
● ECU fault
● O2 sensor
voltage
specifications:
100 ~ 900 mV
NO
● Use diagnostic
tool to detect the
manifold
pressure
Engine
vacuum
Is the value shown
on diagnostic tool
within set value?
● Valve clearance
abnormal
● Intake system leak
● Manifold
pressure
Specification:
32~38 kPa
NG
Normal starting
YES
YES
Can not starting or starting
difficulties
Finish In traditional engine overhaul
way to maintenance
3. Fuel Injection System
Fuel tank
3-37
Removal
Remove the rear seat.
Remove the front seat (bolt x2).
Release the fuel pipe band, fuel pump coupler, EEC
tube.
Bolt ×2
Caution
● Make sure the fuel is not too much in the fuel
tank. Pump out the fuel if necessary. Fuel
pipe
Fuel pump coupler
Remove the fuel tank rear bolt.
Bolt ×1
Remove the fuel tank.
Caution
● If the fuel tank is damaged or leaking, replace
with new one.
Installation
Install in the reverse order of removal.
3. Fuel Injection System
3-38
Fuel pump
Removal
Remove right and left turning signals and seat.
Drain fuel from fuel tank.
Remove EEC system and fuel hoses.
Remove power wire of fuel pump and fuel unit.
Remove fuel tank.
Remove fuel pump. (boltX8) 。
Fuel pump removal
Remove fuel pump power wire.
Loosen the clamp.
Remove fuel hose by using fuel hose removal pliers.
Tool number: SYM-1768110
bolt×8
Power
Clamp
Screw×
Remove the fuel pump.
Caution
● Check if the gasket worn or damaged.
Replace with new one if it is abnormal.
Check if the rubber hose fastened well.
Check if fuel filter contaminated or clogged. Replace
with new one if it is too dirty.
Fuel hose removal pliers
3. Fuel Injection System
Fuel unitFuel Unit
3-39
Remove fuel unit screw. (screw×4)
Remove fuel unit.
Installation
Install in the reverse order of removal.
Caution
● Do not bend the fuel unit float arm.
● Do not fill out too much fuel in the tank.
● Apply glue to the screw before
installation.
● Replace the washer with new one.
Air cleaner
Remove the rear and front seat.
Remove the air cleaner cover (bolt x4).
Remove the air cleaner element.
Caution
● The air cleaner is paper-base; please
blow it clean with compressed air. Don’t
use water or other solvent
● Replace it with new one if the dirt cannot
be removed.
Installation
Install in the reverse order of removal.
bolt×4
power wire
screw×4
Element
3. Fuel Injection System
EFi system diagnosis methods
When wrong signal occurs in motorcycle injection system, causing engine abnormal function or
unable starting, the check light at the meter will be lighting to inform drivers to carry out
maintenance.
While overhauling, diagnostic tool or meter flashing lighting identification can be applied to carry
out fault detection.
After troubleshooting maintenance, the check light will be off, but ECU will record the fault code.
Thus, fault code should be eliminated. There are two methods of fault elimination, one is using
diagnostic tool and the other is manual elimination.
Using diagnostic tool
Connect diagnostic tool and the test switch and check in accordance with diagnostic tool using
method. When EFi system or EFi parts malfunction is detected, replace or correct parts
according to information shown on the screen. After maintenance, fault code should be
eliminated, or the fault will exist in ECU.
Manual inspection
Use jumping wire (wire or paper clips, etc.) to ground test switch, check light on the meter will be
flashing, meaning that the injection system or parts is abnormal. When no diagnostic tool is
available, the long and short flashings can be used to tell the fault cause.
Test switch
coupler Diagnostic tool coupler
Diagnostic tool coupler and test switch coupler
3-40
3. Fuel Injection System
Check light fault codes differentiation
Check light flashing mode
When there is no diagnostic tool for fault detection, wire jump the test switch and identify the
ault by check light flashing and then correct the fault.f
3-41
Fault Code manual elimination procedure:
Fault code can be eliminated manually without using diagnostic tool, procedures as following:
1. Main switch OFF
2. Wire jump the test switch.
3. Full throttle and do not release.
4. Main switch ON
5. Continue step 3 and 4 for five seconds, five seconds later the check light will flash twice quickly. Then the fault
code will be eliminated.
6. Remove the jumping wire.
1 0.5 1 0.51 Unit: second
1 1 3 1 6
Fault code 22 Fault code 12 Continuous repeated
Nowire-jump
Testswitch
Wire-jump
No wire-jump
full
Throttle
closeclose
At least 5 seconds
ON
Main
switch
OFF OFF
Lighting
Lighting
Check light flashes twice
Notlit
Check
light
Notlit
3. Fuel Injection System
3-42
Fault codes and sensors table
No. Fault
d
Fault Description Parts Inspection
1 0120 Throttle position sensor fault TP Sensor and wire
2 0105 Manifold absolute pressure sensor fault MAP sensor and wire
3 0115 Engine temperature sensor fault (water) TW Sensor and wire
4 0110 Intake air temperature sensor fault TA Sensor and wire
5 1630 Roll over sensor fault Roll over sensor and wire
6 0130 O2 sensor fault O2 Sensor and wire
7 0201 INJ #1 fault Injector and wire
8 0351 IG #1 fault Ignition coil and wire
9 0230 Fuel pump fault Fuel pump and wire
10 0135 O2 sensor heater fault O2 Sensor and wire
11 1505 ISC Idle speed control motor fault ISC stepping motor and wire
12 1410 Exhaust 2nd
air control solenoid valve fault AISV and wire
13 0335 Crankshaft position sensor fault Crankshaft position sensor and
ire
14 1205 MAP wire fault MAP sensor and wire
15 0603 EEPROM fault EEPROM
16 0480 Fan relay fault Fan relay and wire
3. Fuel Injection System
3-43
Fault code and check light flashing lighting identification table
No.
Fault
codes
Fault Description
Check
light
Check light flashing
state
Parts Inspection
Throttle position sensor fault Lighting long 0,short 6 Throttle position sensor and wire
1 0120 Fault detection procedures Please refer to the "EFI System components description" throttle position sensor
(TPS) chapter
Manifold Absolute Pressure sensor fault lighting long 0,short 9 MAP sensor and wire
2 0105 Fault detection procedures Please refer to the "EFI System components description" manifold Absolute
Pressure sensor (MAP) chapter
Engine temperature sensor fault (water) lighting long 1,short 2 Engine temperature sensor and wire
3 0115 Fault detection procedures Please refer to the "EFI System components description" engine temperature
sensor (WPS) chapter.
Intake temperature sensor fault lighting long 1,short 3 Intake temperature sensor and wire
4 0110 Fault detection procedures Please refer to the "EFI System components description" intake temperature
sensor (TAS) chapter.
Roll over sensor fault lighting long 1,short 5 Roll over sensor and wire
5 1630
Fault detection procedures Please refer to the "EFI System components description" Roll over sensor chapter.
O2 sensor fault lighting long 1,short 7 O2 Sensor and wire
6 0130
Fault detection procedures Please refer to the "EFI System components description" O2 sensor chapter.
INJ #1 fault lighting long 3,short 3 Injector and wire
7 0201
Fault detection procedures Please refer to the "EFI System components description" fuel injector chapter.
IG #1 fault lighting long 3,short 7 Ignition coil and wire
8 0351
Fault detection procedures to adhere to the traditional way
Fuel pump fault lighting long 4,short 1 Fuel pump and wire
9 0230
Fault detection procedures Please refer to the "EFI System components description" fuel pump chapter.
O2 sensor heater fault lighting long 4,short 5 O2 Sensor and wire
10 0135
Fault detection procedures Please refer to the "EFI System components description" O2 Sensor chapter.
ISC motor fault lighting long 4,short 9 Step motor and wire
11 1505 Fault detection procedures Please refer to the "EFI System components description" idle speed control valve
(ISC) chapter.
Exhaust 2
nd
air solenoid valve fault lighting long 5,short 4 2
nd
air control valve and wire
12 1410 Fault detection procedures Please refer to the "EFI System components description" 2
nd
air solenoid valve
chapter.
Crankshaft position sensor fault lighting long 6,short 6 Crankshaft position sensor and wire
13 0335 Fault detection procedures Please refer to the "EFI System components description" Crankshaft position
sensor chapter.
MAP sensor wire fault lighting long 6,short 8 MAP sensor wire
14 1205
Fault detection procedures Please refer to the "EFI System components description" MAP sensor chapter.
EEPROM fault Not lit long –,short – EEPROM
15 0603
This fault Please direct replacement ECU
Cooling fan relay fault lighting long 4,short 3 Cooling fan relay and wire
16 0480
Fault detection procedures Please refer to the "EFI System components description" cooling fan relay chapter.
3. Fuel Injection System
3-44
Troubleshooting table
Comprehensive testing program PartsTest items
Abnormal
phenomena
Power
voltage
Fuel
press.
Ignition
state
Engine
vacuum
Injection
state
closed-
loop
control
system
Fault
Code
Detection
ECU
Throttle
position
sensor
Engine
temp.
sensor
Can’t start       
Start
state
Difficult to
start      
Without
idle      
Idle not
smooth     ˇ
RPM NG  
Idle
state
CO NG     
Not smooth        
Acceler-
ation
Inability
and slow        
Idle
flameout  
Flameo-
ut
Acceleratio
n flameout  
Related parts
Roll over
sensor
Fuel pump
Ignition
coil
Inlet pipe Injector O2 sensor
Power
relay
Fuel
pressure
adjustment
valve
Spark plug
Cylinder
head
Fuel pump
Secondary
air
injection
solenoid
valve
Main
switch
Fuel
pump
relay
MAP
sensor
Fuel
pressure
adjustment
valve
Battery
Fuel
filter
Note: 1. Integrated test motorcycle, according to the "Comprehensive Maintenance list" implementation.
2. Spare parts, according to the "EFI System components description" implementation.
Dafra next 250 manual de servico em ingles (sym wolf)

Contenu connexe

Tendances

manual de propietario de Ford Cargo
 manual de propietario de Ford Cargo manual de propietario de Ford Cargo
manual de propietario de Ford CargoJorge Antonio Guillen
 
Manual dafra next 250 estrangeiro (sym wolf)
Manual dafra next 250 estrangeiro (sym wolf)Manual dafra next 250 estrangeiro (sym wolf)
Manual dafra next 250 estrangeiro (sym wolf)Nome Sobrenome
 
Keeway superlight 125 service manual
Keeway superlight 125 service manualKeeway superlight 125 service manual
Keeway superlight 125 service manualDaniel Rosario
 
094 Airbag de cabeza.pdf
094 Airbag de cabeza.pdf094 Airbag de cabeza.pdf
094 Airbag de cabeza.pdfjcarrey
 
Manual serviço biz125 ks es 00 x6b-kss-001 bateria
Manual serviço biz125 ks es   00 x6b-kss-001 bateriaManual serviço biz125 ks es   00 x6b-kss-001 bateria
Manual serviço biz125 ks es 00 x6b-kss-001 bateriaThiago Huari
 
Manual transmission final
Manual transmission finalManual transmission final
Manual transmission finalSagar Ahire
 
Manual de serviã§os super 100 80507-d03 a-001
Manual de serviã§os super 100   80507-d03 a-001Manual de serviã§os super 100   80507-d03 a-001
Manual de serviã§os super 100 80507-d03 a-001nielson araujo
 
Manual de serviço cbr600 f(1) (~1997) diagrama
Manual de serviço cbr600 f(1) (~1997) diagramaManual de serviço cbr600 f(1) (~1997) diagrama
Manual de serviço cbr600 f(1) (~1997) diagramaThiago Huari
 
1994 kawasaki klf220 a7 bayou service repair manual
1994 kawasaki klf220 a7 bayou service repair manual1994 kawasaki klf220 a7 bayou service repair manual
1994 kawasaki klf220 a7 bayou service repair manualjknhdjskm
 
2009 Polaris Outlaw 90 Service Repair Manual
2009 Polaris Outlaw 90 Service Repair Manual2009 Polaris Outlaw 90 Service Repair Manual
2009 Polaris Outlaw 90 Service Repair Manualjdnnnd efjmdd
 
Manual do propietário cg150 titan ks es esd cg150 sport cg150 job d2203-man...
Manual do propietário cg150 titan ks es esd cg150 sport cg150 job   d2203-man...Manual do propietário cg150 titan ks es esd cg150 sport cg150 job   d2203-man...
Manual do propietário cg150 titan ks es esd cg150 sport cg150 job d2203-man...Thiago Huari
 

Tendances (20)

Bf4 l2011 manual de mantenimiento
Bf4 l2011 manual de mantenimientoBf4 l2011 manual de mantenimiento
Bf4 l2011 manual de mantenimiento
 
8 exhaust brake
8 exhaust brake8 exhaust brake
8 exhaust brake
 
manual de propietario de Ford Cargo
 manual de propietario de Ford Cargo manual de propietario de Ford Cargo
manual de propietario de Ford Cargo
 
partes de moto.pptx
partes de moto.pptxpartes de moto.pptx
partes de moto.pptx
 
Volvo manual
Volvo manualVolvo manual
Volvo manual
 
Manual dafra next 250 estrangeiro (sym wolf)
Manual dafra next 250 estrangeiro (sym wolf)Manual dafra next 250 estrangeiro (sym wolf)
Manual dafra next 250 estrangeiro (sym wolf)
 
SRS systems
SRS systemsSRS systems
SRS systems
 
Keeway superlight 125 service manual
Keeway superlight 125 service manualKeeway superlight 125 service manual
Keeway superlight 125 service manual
 
094 Airbag de cabeza.pdf
094 Airbag de cabeza.pdf094 Airbag de cabeza.pdf
094 Airbag de cabeza.pdf
 
4 sensores
4 sensores4 sensores
4 sensores
 
Iveco workshop manual
Iveco workshop manualIveco workshop manual
Iveco workshop manual
 
Manual serviço biz125 ks es 00 x6b-kss-001 bateria
Manual serviço biz125 ks es   00 x6b-kss-001 bateriaManual serviço biz125 ks es   00 x6b-kss-001 bateria
Manual serviço biz125 ks es 00 x6b-kss-001 bateria
 
Manual transmission final
Manual transmission finalManual transmission final
Manual transmission final
 
Manual de serviã§os super 100 80507-d03 a-001
Manual de serviã§os super 100   80507-d03 a-001Manual de serviã§os super 100   80507-d03 a-001
Manual de serviã§os super 100 80507-d03 a-001
 
Manual de serviço cbr600 f(1) (~1997) diagrama
Manual de serviço cbr600 f(1) (~1997) diagramaManual de serviço cbr600 f(1) (~1997) diagrama
Manual de serviço cbr600 f(1) (~1997) diagrama
 
1994 kawasaki klf220 a7 bayou service repair manual
1994 kawasaki klf220 a7 bayou service repair manual1994 kawasaki klf220 a7 bayou service repair manual
1994 kawasaki klf220 a7 bayou service repair manual
 
Cg 150 titan 2013-FLEX
Cg 150 titan 2013-FLEXCg 150 titan 2013-FLEX
Cg 150 titan 2013-FLEX
 
2009 Polaris Outlaw 90 Service Repair Manual
2009 Polaris Outlaw 90 Service Repair Manual2009 Polaris Outlaw 90 Service Repair Manual
2009 Polaris Outlaw 90 Service Repair Manual
 
MANUAL SAIL 2010.pdf
MANUAL SAIL 2010.pdfMANUAL SAIL 2010.pdf
MANUAL SAIL 2010.pdf
 
Manual do propietário cg150 titan ks es esd cg150 sport cg150 job d2203-man...
Manual do propietário cg150 titan ks es esd cg150 sport cg150 job   d2203-man...Manual do propietário cg150 titan ks es esd cg150 sport cg150 job   d2203-man...
Manual do propietário cg150 titan ks es esd cg150 sport cg150 job d2203-man...
 

Similaire à Dafra next 250 manual de servico em ingles (sym wolf)

Case cx330 crawler excavator service repair manual
Case cx330 crawler excavator service repair manualCase cx330 crawler excavator service repair manual
Case cx330 crawler excavator service repair manualfujjsekfkksekm
 
Case cx330 crawler excavator service repair manual
Case cx330 crawler excavator service repair manualCase cx330 crawler excavator service repair manual
Case cx330 crawler excavator service repair manualfujsjefkskemm
 
Case cx330 crawler excavator service repair manual
Case cx330 crawler excavator service repair manualCase cx330 crawler excavator service repair manual
Case cx330 crawler excavator service repair manualfjskekxswesemm
 
2002 Honda TRX400EX Fourtrax Service Repair Manual
2002 Honda TRX400EX Fourtrax Service Repair Manual2002 Honda TRX400EX Fourtrax Service Repair Manual
2002 Honda TRX400EX Fourtrax Service Repair Manualfusjejjkekmdmn
 
Case cx470 c tier 4 crawler excavator service repair manual
Case cx470 c tier 4 crawler excavator service repair manualCase cx470 c tier 4 crawler excavator service repair manual
Case cx470 c tier 4 crawler excavator service repair manualfjjskekfsem
 
Case cx350 c tier 4 crawler excavator service repair manual
Case cx350 c tier 4 crawler excavator service repair manualCase cx350 c tier 4 crawler excavator service repair manual
Case cx350 c tier 4 crawler excavator service repair manualfjjskekfsem
 
2010 YAMAHA F300CA 4-STROKE OUTBOARD Service Repair Manual SN:1000001 and up
2010 YAMAHA F300CA 4-STROKE OUTBOARD Service Repair Manual SN:1000001 and up2010 YAMAHA F300CA 4-STROKE OUTBOARD Service Repair Manual SN:1000001 and up
2010 YAMAHA F300CA 4-STROKE OUTBOARD Service Repair Manual SN:1000001 and upufjjdkkkesmdmm
 
Case cx160 c tier 4 crawler excavator service repair manual
Case cx160 c tier 4 crawler excavator service repair manualCase cx160 c tier 4 crawler excavator service repair manual
Case cx160 c tier 4 crawler excavator service repair manualfjjskekksemmm
 
Case cx160 c tier 4 crawler excavator service repair manual
Case cx160 c tier 4 crawler excavator service repair manualCase cx160 c tier 4 crawler excavator service repair manual
Case cx160 c tier 4 crawler excavator service repair manualufjsekksmemm
 
HITACHI 4HK1 ENGINE Service Repair Manual
HITACHI 4HK1 ENGINE Service Repair ManualHITACHI 4HK1 ENGINE Service Repair Manual
HITACHI 4HK1 ENGINE Service Repair Manualjnfmmsd ejdkmsm
 
Hitachi 6 hk1 engine service repair manual
Hitachi 6 hk1 engine service repair manualHitachi 6 hk1 engine service repair manual
Hitachi 6 hk1 engine service repair manualjmdms eekduui
 
Hitachi 6 hk1 engine service repair manual
Hitachi 6 hk1 engine service repair manualHitachi 6 hk1 engine service repair manual
Hitachi 6 hk1 engine service repair manualfjjsjekksemm
 
Hitachi 6 hk1 engine service repair manual
Hitachi 6 hk1 engine service repair manualHitachi 6 hk1 engine service repair manual
Hitachi 6 hk1 engine service repair manualfjjskekdmme
 

Similaire à Dafra next 250 manual de servico em ingles (sym wolf) (16)

Dafra - Citycom 300i - Manual de Serviço PTBR
Dafra - Citycom 300i - Manual de Serviço PTBRDafra - Citycom 300i - Manual de Serviço PTBR
Dafra - Citycom 300i - Manual de Serviço PTBR
 
Case cx330 crawler excavator service repair manual
Case cx330 crawler excavator service repair manualCase cx330 crawler excavator service repair manual
Case cx330 crawler excavator service repair manual
 
Case cx330 crawler excavator service repair manual
Case cx330 crawler excavator service repair manualCase cx330 crawler excavator service repair manual
Case cx330 crawler excavator service repair manual
 
Case cx330 crawler excavator service repair manual
Case cx330 crawler excavator service repair manualCase cx330 crawler excavator service repair manual
Case cx330 crawler excavator service repair manual
 
2002 Honda TRX400EX Fourtrax Service Repair Manual
2002 Honda TRX400EX Fourtrax Service Repair Manual2002 Honda TRX400EX Fourtrax Service Repair Manual
2002 Honda TRX400EX Fourtrax Service Repair Manual
 
[Tm] suzuki manual_de_taller_suzuki_gn_gn_125_2014_
[Tm] suzuki manual_de_taller_suzuki_gn_gn_125_2014_[Tm] suzuki manual_de_taller_suzuki_gn_gn_125_2014_
[Tm] suzuki manual_de_taller_suzuki_gn_gn_125_2014_
 
Case cx470 c tier 4 crawler excavator service repair manual
Case cx470 c tier 4 crawler excavator service repair manualCase cx470 c tier 4 crawler excavator service repair manual
Case cx470 c tier 4 crawler excavator service repair manual
 
Case cx350 c tier 4 crawler excavator service repair manual
Case cx350 c tier 4 crawler excavator service repair manualCase cx350 c tier 4 crawler excavator service repair manual
Case cx350 c tier 4 crawler excavator service repair manual
 
2010 YAMAHA F300CA 4-STROKE OUTBOARD Service Repair Manual SN:1000001 and up
2010 YAMAHA F300CA 4-STROKE OUTBOARD Service Repair Manual SN:1000001 and up2010 YAMAHA F300CA 4-STROKE OUTBOARD Service Repair Manual SN:1000001 and up
2010 YAMAHA F300CA 4-STROKE OUTBOARD Service Repair Manual SN:1000001 and up
 
Workshop manual volvo_md6a_md7a
Workshop manual volvo_md6a_md7aWorkshop manual volvo_md6a_md7a
Workshop manual volvo_md6a_md7a
 
Case cx160 c tier 4 crawler excavator service repair manual
Case cx160 c tier 4 crawler excavator service repair manualCase cx160 c tier 4 crawler excavator service repair manual
Case cx160 c tier 4 crawler excavator service repair manual
 
Case cx160 c tier 4 crawler excavator service repair manual
Case cx160 c tier 4 crawler excavator service repair manualCase cx160 c tier 4 crawler excavator service repair manual
Case cx160 c tier 4 crawler excavator service repair manual
 
HITACHI 4HK1 ENGINE Service Repair Manual
HITACHI 4HK1 ENGINE Service Repair ManualHITACHI 4HK1 ENGINE Service Repair Manual
HITACHI 4HK1 ENGINE Service Repair Manual
 
Hitachi 6 hk1 engine service repair manual
Hitachi 6 hk1 engine service repair manualHitachi 6 hk1 engine service repair manual
Hitachi 6 hk1 engine service repair manual
 
Hitachi 6 hk1 engine service repair manual
Hitachi 6 hk1 engine service repair manualHitachi 6 hk1 engine service repair manual
Hitachi 6 hk1 engine service repair manual
 
Hitachi 6 hk1 engine service repair manual
Hitachi 6 hk1 engine service repair manualHitachi 6 hk1 engine service repair manual
Hitachi 6 hk1 engine service repair manual
 

Plus de Nome Sobrenome

Manual Karcher K3390 K 3390 - lista de peças de reposição part number
Manual Karcher K3390 K 3390 - lista de peças de reposição part numberManual Karcher K3390 K 3390 - lista de peças de reposição part number
Manual Karcher K3390 K 3390 - lista de peças de reposição part numberNome Sobrenome
 
Quansheng TG UV2 TGUV2 - complete user manual
Quansheng TG UV2 TGUV2 - complete user manualQuansheng TG UV2 TGUV2 - complete user manual
Quansheng TG UV2 TGUV2 - complete user manualNome Sobrenome
 
Termo De Uso do CEMIG atende (atualizado em 2023)
Termo De Uso do CEMIG atende (atualizado em 2023)Termo De Uso do CEMIG atende (atualizado em 2023)
Termo De Uso do CEMIG atende (atualizado em 2023)Nome Sobrenome
 
Manual Lavadora Karcher K 3390 K3390 K 3.390 BR
Manual Lavadora Karcher K 3390 K3390 K 3.390 BRManual Lavadora Karcher K 3390 K3390 K 3.390 BR
Manual Lavadora Karcher K 3390 K3390 K 3.390 BRNome Sobrenome
 
Manual do Motor Portão Eletronico Rossi DZ
Manual do Motor Portão Eletronico Rossi DZManual do Motor Portão Eletronico Rossi DZ
Manual do Motor Portão Eletronico Rossi DZNome Sobrenome
 
Manual Motor ROSSI - catalogo da linha DZ
Manual Motor ROSSI - catalogo da linha DZManual Motor ROSSI - catalogo da linha DZ
Manual Motor ROSSI - catalogo da linha DZNome Sobrenome
 
Manual Motor Portão Eletronico ROSSI DZ - manual de instalação
Manual Motor Portão Eletronico ROSSI DZ - manual de instalaçãoManual Motor Portão Eletronico ROSSI DZ - manual de instalação
Manual Motor Portão Eletronico ROSSI DZ - manual de instalaçãoNome Sobrenome
 
Manual super mix fun kitchen funkitchen manual
Manual super mix fun kitchen funkitchen manualManual super mix fun kitchen funkitchen manual
Manual super mix fun kitchen funkitchen manualNome Sobrenome
 
Manual da pipoqueira britania pop time elétrica
Manual da pipoqueira britania pop time elétricaManual da pipoqueira britania pop time elétrica
Manual da pipoqueira britania pop time elétricaNome Sobrenome
 
Manual da panela de pressão Nigro Eterna
Manual da panela de pressão Nigro EternaManual da panela de pressão Nigro Eterna
Manual da panela de pressão Nigro EternaNome Sobrenome
 
Manual da Repouseira Cadeirinha Descanso Care Star Baby
Manual da Repouseira Cadeirinha Descanso Care Star BabyManual da Repouseira Cadeirinha Descanso Care Star Baby
Manual da Repouseira Cadeirinha Descanso Care Star BabyNome Sobrenome
 
Medical Infrared Thermometer - K1176079898
Medical Infrared Thermometer - K1176079898Medical Infrared Thermometer - K1176079898
Medical Infrared Thermometer - K1176079898Nome Sobrenome
 
Manual dvr intelbras serie 3000 3104 3108 3116
Manual dvr intelbras serie 3000 3104 3108 3116Manual dvr intelbras serie 3000 3104 3108 3116
Manual dvr intelbras serie 3000 3104 3108 3116Nome Sobrenome
 
Hikvision rtsp url streaming tutorial manual
Hikvision rtsp url streaming tutorial manualHikvision rtsp url streaming tutorial manual
Hikvision rtsp url streaming tutorial manualNome Sobrenome
 
Manual PPA - P16261 - automatizadores deslizantes CE
Manual PPA - P16261 - automatizadores deslizantes CEManual PPA - P16261 - automatizadores deslizantes CE
Manual PPA - P16261 - automatizadores deslizantes CENome Sobrenome
 
PPA - Gabarito base de furacao - DZ PREDIAL
PPA - Gabarito base de furacao - DZ PREDIALPPA - Gabarito base de furacao - DZ PREDIAL
PPA - Gabarito base de furacao - DZ PREDIALNome Sobrenome
 
PPA - MANUAL TRIFLEX CONNECT P04722 rev2
PPA - MANUAL TRIFLEX CONNECT P04722 rev2PPA - MANUAL TRIFLEX CONNECT P04722 rev2
PPA - MANUAL TRIFLEX CONNECT P04722 rev2Nome Sobrenome
 
Manual do Modulo Relé para Sinaleira PPA
Manual do Modulo Relé para Sinaleira PPAManual do Modulo Relé para Sinaleira PPA
Manual do Modulo Relé para Sinaleira PPANome Sobrenome
 
Manual da Lavadora Brastemp - BWJ09AB - Guia Rápido
Manual da Lavadora Brastemp - BWJ09AB - Guia RápidoManual da Lavadora Brastemp - BWJ09AB - Guia Rápido
Manual da Lavadora Brastemp - BWJ09AB - Guia RápidoNome Sobrenome
 
Manual da Lavadora Brastemp - BWJ09AB - instruções
Manual da Lavadora Brastemp - BWJ09AB - instruçõesManual da Lavadora Brastemp - BWJ09AB - instruções
Manual da Lavadora Brastemp - BWJ09AB - instruçõesNome Sobrenome
 

Plus de Nome Sobrenome (20)

Manual Karcher K3390 K 3390 - lista de peças de reposição part number
Manual Karcher K3390 K 3390 - lista de peças de reposição part numberManual Karcher K3390 K 3390 - lista de peças de reposição part number
Manual Karcher K3390 K 3390 - lista de peças de reposição part number
 
Quansheng TG UV2 TGUV2 - complete user manual
Quansheng TG UV2 TGUV2 - complete user manualQuansheng TG UV2 TGUV2 - complete user manual
Quansheng TG UV2 TGUV2 - complete user manual
 
Termo De Uso do CEMIG atende (atualizado em 2023)
Termo De Uso do CEMIG atende (atualizado em 2023)Termo De Uso do CEMIG atende (atualizado em 2023)
Termo De Uso do CEMIG atende (atualizado em 2023)
 
Manual Lavadora Karcher K 3390 K3390 K 3.390 BR
Manual Lavadora Karcher K 3390 K3390 K 3.390 BRManual Lavadora Karcher K 3390 K3390 K 3.390 BR
Manual Lavadora Karcher K 3390 K3390 K 3.390 BR
 
Manual do Motor Portão Eletronico Rossi DZ
Manual do Motor Portão Eletronico Rossi DZManual do Motor Portão Eletronico Rossi DZ
Manual do Motor Portão Eletronico Rossi DZ
 
Manual Motor ROSSI - catalogo da linha DZ
Manual Motor ROSSI - catalogo da linha DZManual Motor ROSSI - catalogo da linha DZ
Manual Motor ROSSI - catalogo da linha DZ
 
Manual Motor Portão Eletronico ROSSI DZ - manual de instalação
Manual Motor Portão Eletronico ROSSI DZ - manual de instalaçãoManual Motor Portão Eletronico ROSSI DZ - manual de instalação
Manual Motor Portão Eletronico ROSSI DZ - manual de instalação
 
Manual super mix fun kitchen funkitchen manual
Manual super mix fun kitchen funkitchen manualManual super mix fun kitchen funkitchen manual
Manual super mix fun kitchen funkitchen manual
 
Manual da pipoqueira britania pop time elétrica
Manual da pipoqueira britania pop time elétricaManual da pipoqueira britania pop time elétrica
Manual da pipoqueira britania pop time elétrica
 
Manual da panela de pressão Nigro Eterna
Manual da panela de pressão Nigro EternaManual da panela de pressão Nigro Eterna
Manual da panela de pressão Nigro Eterna
 
Manual da Repouseira Cadeirinha Descanso Care Star Baby
Manual da Repouseira Cadeirinha Descanso Care Star BabyManual da Repouseira Cadeirinha Descanso Care Star Baby
Manual da Repouseira Cadeirinha Descanso Care Star Baby
 
Medical Infrared Thermometer - K1176079898
Medical Infrared Thermometer - K1176079898Medical Infrared Thermometer - K1176079898
Medical Infrared Thermometer - K1176079898
 
Manual dvr intelbras serie 3000 3104 3108 3116
Manual dvr intelbras serie 3000 3104 3108 3116Manual dvr intelbras serie 3000 3104 3108 3116
Manual dvr intelbras serie 3000 3104 3108 3116
 
Hikvision rtsp url streaming tutorial manual
Hikvision rtsp url streaming tutorial manualHikvision rtsp url streaming tutorial manual
Hikvision rtsp url streaming tutorial manual
 
Manual PPA - P16261 - automatizadores deslizantes CE
Manual PPA - P16261 - automatizadores deslizantes CEManual PPA - P16261 - automatizadores deslizantes CE
Manual PPA - P16261 - automatizadores deslizantes CE
 
PPA - Gabarito base de furacao - DZ PREDIAL
PPA - Gabarito base de furacao - DZ PREDIALPPA - Gabarito base de furacao - DZ PREDIAL
PPA - Gabarito base de furacao - DZ PREDIAL
 
PPA - MANUAL TRIFLEX CONNECT P04722 rev2
PPA - MANUAL TRIFLEX CONNECT P04722 rev2PPA - MANUAL TRIFLEX CONNECT P04722 rev2
PPA - MANUAL TRIFLEX CONNECT P04722 rev2
 
Manual do Modulo Relé para Sinaleira PPA
Manual do Modulo Relé para Sinaleira PPAManual do Modulo Relé para Sinaleira PPA
Manual do Modulo Relé para Sinaleira PPA
 
Manual da Lavadora Brastemp - BWJ09AB - Guia Rápido
Manual da Lavadora Brastemp - BWJ09AB - Guia RápidoManual da Lavadora Brastemp - BWJ09AB - Guia Rápido
Manual da Lavadora Brastemp - BWJ09AB - Guia Rápido
 
Manual da Lavadora Brastemp - BWJ09AB - instruções
Manual da Lavadora Brastemp - BWJ09AB - instruçõesManual da Lavadora Brastemp - BWJ09AB - instruções
Manual da Lavadora Brastemp - BWJ09AB - instruções
 

Dernier

The 10th anniversary, Hyundai World Rally Team's amazing journey
The 10th anniversary, Hyundai World Rally Team's amazing journeyThe 10th anniversary, Hyundai World Rally Team's amazing journey
The 10th anniversary, Hyundai World Rally Team's amazing journeyHyundai Motor Group
 
Innovating Manufacturing with CNC Technology
Innovating Manufacturing with CNC TechnologyInnovating Manufacturing with CNC Technology
Innovating Manufacturing with CNC Technologyquickpartslimitlessm
 
Call Girls in Malviya Nagar Delhi 💯 Call Us 🔝9205541914 🔝( Delhi) Escorts Ser...
Call Girls in Malviya Nagar Delhi 💯 Call Us 🔝9205541914 🔝( Delhi) Escorts Ser...Call Girls in Malviya Nagar Delhi 💯 Call Us 🔝9205541914 🔝( Delhi) Escorts Ser...
Call Girls in Malviya Nagar Delhi 💯 Call Us 🔝9205541914 🔝( Delhi) Escorts Ser...Delhi Call girls
 
What Causes BMW Chassis Stabilization Malfunction Warning To Appear
What Causes BMW Chassis Stabilization Malfunction Warning To AppearWhat Causes BMW Chassis Stabilization Malfunction Warning To Appear
What Causes BMW Chassis Stabilization Malfunction Warning To AppearJCL Automotive
 
Vip Hot Call Girls 🫤 Mahipalpur ➡️ 9711199171 ➡️ Delhi 🫦 Whatsapp Number
Vip Hot Call Girls 🫤 Mahipalpur ➡️ 9711199171 ➡️ Delhi 🫦 Whatsapp NumberVip Hot Call Girls 🫤 Mahipalpur ➡️ 9711199171 ➡️ Delhi 🫦 Whatsapp Number
Vip Hot Call Girls 🫤 Mahipalpur ➡️ 9711199171 ➡️ Delhi 🫦 Whatsapp Numberkumarajju5765
 
Vip Hot🥵 Call Girls Delhi Delhi {9711199012} Avni Thakur 🧡😘 High Profile Girls
Vip Hot🥵 Call Girls Delhi Delhi {9711199012} Avni Thakur 🧡😘 High Profile GirlsVip Hot🥵 Call Girls Delhi Delhi {9711199012} Avni Thakur 🧡😘 High Profile Girls
Vip Hot🥵 Call Girls Delhi Delhi {9711199012} Avni Thakur 🧡😘 High Profile Girlsshivangimorya083
 
Introduction of Basic of Paint Technology
Introduction of Basic of Paint TechnologyIntroduction of Basic of Paint Technology
Introduction of Basic of Paint TechnologyRaghavendraMishra19
 
How To Fix Mercedes Benz Anti-Theft Protection Activation Issue
How To Fix Mercedes Benz Anti-Theft Protection Activation IssueHow To Fix Mercedes Benz Anti-Theft Protection Activation Issue
How To Fix Mercedes Benz Anti-Theft Protection Activation IssueTerry Sayther Automotive
 
83778-77756 ( HER.SELF ) Brings Call Girls In Laxmi Nagar
83778-77756 ( HER.SELF ) Brings Call Girls In Laxmi Nagar83778-77756 ( HER.SELF ) Brings Call Girls In Laxmi Nagar
83778-77756 ( HER.SELF ) Brings Call Girls In Laxmi Nagardollysharma2066
 
Delhi Call Girls Saket 9711199171 ☎✔👌✔ Whatsapp Hard And Sexy Vip Call
Delhi Call Girls Saket 9711199171 ☎✔👌✔ Whatsapp Hard And Sexy Vip CallDelhi Call Girls Saket 9711199171 ☎✔👌✔ Whatsapp Hard And Sexy Vip Call
Delhi Call Girls Saket 9711199171 ☎✔👌✔ Whatsapp Hard And Sexy Vip Callshivangimorya083
 
Electronic Vehicle (EV) Industry Challenges
Electronic Vehicle (EV) Industry ChallengesElectronic Vehicle (EV) Industry Challenges
Electronic Vehicle (EV) Industry Challengesmarketingmangosemi
 
Dubai Call Girls Size E6 (O525547819) Call Girls In Dubai
Dubai Call Girls  Size E6 (O525547819) Call Girls In DubaiDubai Call Girls  Size E6 (O525547819) Call Girls In Dubai
Dubai Call Girls Size E6 (O525547819) Call Girls In Dubaikojalkojal131
 
Delhi Call Girls Mayur Vihar 9711199171 ☎✔👌✔ Whatsapp Hard And Sexy Vip Call
Delhi Call Girls Mayur Vihar 9711199171 ☎✔👌✔ Whatsapp Hard And Sexy Vip CallDelhi Call Girls Mayur Vihar 9711199171 ☎✔👌✔ Whatsapp Hard And Sexy Vip Call
Delhi Call Girls Mayur Vihar 9711199171 ☎✔👌✔ Whatsapp Hard And Sexy Vip Callshivangimorya083
 
新南威尔士大学毕业证(UNSW毕业证)成绩单原版一比一
新南威尔士大学毕业证(UNSW毕业证)成绩单原版一比一新南威尔士大学毕业证(UNSW毕业证)成绩单原版一比一
新南威尔士大学毕业证(UNSW毕业证)成绩单原版一比一nsrmw5ykn
 
Delhi Call Girls Saket 9711199171 ☎✔👌✔ Full night Service for more than 1 person
Delhi Call Girls Saket 9711199171 ☎✔👌✔ Full night Service for more than 1 personDelhi Call Girls Saket 9711199171 ☎✔👌✔ Full night Service for more than 1 person
Delhi Call Girls Saket 9711199171 ☎✔👌✔ Full night Service for more than 1 personshivangimorya083
 
꧁ ୨⎯Call Girls In Ashok Vihar, New Delhi **✿❀7042364481❀✿**Escorts ServiCes C...
꧁ ୨⎯Call Girls In Ashok Vihar, New Delhi **✿❀7042364481❀✿**Escorts ServiCes C...꧁ ୨⎯Call Girls In Ashok Vihar, New Delhi **✿❀7042364481❀✿**Escorts ServiCes C...
꧁ ୨⎯Call Girls In Ashok Vihar, New Delhi **✿❀7042364481❀✿**Escorts ServiCes C...Hot Call Girls In Sector 58 (Noida)
 
BLUE VEHICLES the kids picture show 2024
BLUE VEHICLES the kids picture show 2024BLUE VEHICLES the kids picture show 2024
BLUE VEHICLES the kids picture show 2024AHOhOops1
 
Russian Call Girls Delhi Indirapuram {9711199171} Aarvi Gupta ✌️Independent ...
Russian  Call Girls Delhi Indirapuram {9711199171} Aarvi Gupta ✌️Independent ...Russian  Call Girls Delhi Indirapuram {9711199171} Aarvi Gupta ✌️Independent ...
Russian Call Girls Delhi Indirapuram {9711199171} Aarvi Gupta ✌️Independent ...shivangimorya083
 
꧁ ୨ Call Girls In Radisson Blu Plaza Delhi Airport, New Delhi ❀7042364481❀ Es...
꧁ ୨ Call Girls In Radisson Blu Plaza Delhi Airport, New Delhi ❀7042364481❀ Es...꧁ ୨ Call Girls In Radisson Blu Plaza Delhi Airport, New Delhi ❀7042364481❀ Es...
꧁ ୨ Call Girls In Radisson Blu Plaza Delhi Airport, New Delhi ❀7042364481❀ Es...Hot Call Girls In Sector 58 (Noida)
 

Dernier (20)

The 10th anniversary, Hyundai World Rally Team's amazing journey
The 10th anniversary, Hyundai World Rally Team's amazing journeyThe 10th anniversary, Hyundai World Rally Team's amazing journey
The 10th anniversary, Hyundai World Rally Team's amazing journey
 
Hotel Escorts Sushant Golf City - 9548273370 Call Girls Service in Lucknow, c...
Hotel Escorts Sushant Golf City - 9548273370 Call Girls Service in Lucknow, c...Hotel Escorts Sushant Golf City - 9548273370 Call Girls Service in Lucknow, c...
Hotel Escorts Sushant Golf City - 9548273370 Call Girls Service in Lucknow, c...
 
Innovating Manufacturing with CNC Technology
Innovating Manufacturing with CNC TechnologyInnovating Manufacturing with CNC Technology
Innovating Manufacturing with CNC Technology
 
Call Girls in Malviya Nagar Delhi 💯 Call Us 🔝9205541914 🔝( Delhi) Escorts Ser...
Call Girls in Malviya Nagar Delhi 💯 Call Us 🔝9205541914 🔝( Delhi) Escorts Ser...Call Girls in Malviya Nagar Delhi 💯 Call Us 🔝9205541914 🔝( Delhi) Escorts Ser...
Call Girls in Malviya Nagar Delhi 💯 Call Us 🔝9205541914 🔝( Delhi) Escorts Ser...
 
What Causes BMW Chassis Stabilization Malfunction Warning To Appear
What Causes BMW Chassis Stabilization Malfunction Warning To AppearWhat Causes BMW Chassis Stabilization Malfunction Warning To Appear
What Causes BMW Chassis Stabilization Malfunction Warning To Appear
 
Vip Hot Call Girls 🫤 Mahipalpur ➡️ 9711199171 ➡️ Delhi 🫦 Whatsapp Number
Vip Hot Call Girls 🫤 Mahipalpur ➡️ 9711199171 ➡️ Delhi 🫦 Whatsapp NumberVip Hot Call Girls 🫤 Mahipalpur ➡️ 9711199171 ➡️ Delhi 🫦 Whatsapp Number
Vip Hot Call Girls 🫤 Mahipalpur ➡️ 9711199171 ➡️ Delhi 🫦 Whatsapp Number
 
Vip Hot🥵 Call Girls Delhi Delhi {9711199012} Avni Thakur 🧡😘 High Profile Girls
Vip Hot🥵 Call Girls Delhi Delhi {9711199012} Avni Thakur 🧡😘 High Profile GirlsVip Hot🥵 Call Girls Delhi Delhi {9711199012} Avni Thakur 🧡😘 High Profile Girls
Vip Hot🥵 Call Girls Delhi Delhi {9711199012} Avni Thakur 🧡😘 High Profile Girls
 
Introduction of Basic of Paint Technology
Introduction of Basic of Paint TechnologyIntroduction of Basic of Paint Technology
Introduction of Basic of Paint Technology
 
How To Fix Mercedes Benz Anti-Theft Protection Activation Issue
How To Fix Mercedes Benz Anti-Theft Protection Activation IssueHow To Fix Mercedes Benz Anti-Theft Protection Activation Issue
How To Fix Mercedes Benz Anti-Theft Protection Activation Issue
 
83778-77756 ( HER.SELF ) Brings Call Girls In Laxmi Nagar
83778-77756 ( HER.SELF ) Brings Call Girls In Laxmi Nagar83778-77756 ( HER.SELF ) Brings Call Girls In Laxmi Nagar
83778-77756 ( HER.SELF ) Brings Call Girls In Laxmi Nagar
 
Delhi Call Girls Saket 9711199171 ☎✔👌✔ Whatsapp Hard And Sexy Vip Call
Delhi Call Girls Saket 9711199171 ☎✔👌✔ Whatsapp Hard And Sexy Vip CallDelhi Call Girls Saket 9711199171 ☎✔👌✔ Whatsapp Hard And Sexy Vip Call
Delhi Call Girls Saket 9711199171 ☎✔👌✔ Whatsapp Hard And Sexy Vip Call
 
Electronic Vehicle (EV) Industry Challenges
Electronic Vehicle (EV) Industry ChallengesElectronic Vehicle (EV) Industry Challenges
Electronic Vehicle (EV) Industry Challenges
 
Dubai Call Girls Size E6 (O525547819) Call Girls In Dubai
Dubai Call Girls  Size E6 (O525547819) Call Girls In DubaiDubai Call Girls  Size E6 (O525547819) Call Girls In Dubai
Dubai Call Girls Size E6 (O525547819) Call Girls In Dubai
 
Delhi Call Girls Mayur Vihar 9711199171 ☎✔👌✔ Whatsapp Hard And Sexy Vip Call
Delhi Call Girls Mayur Vihar 9711199171 ☎✔👌✔ Whatsapp Hard And Sexy Vip CallDelhi Call Girls Mayur Vihar 9711199171 ☎✔👌✔ Whatsapp Hard And Sexy Vip Call
Delhi Call Girls Mayur Vihar 9711199171 ☎✔👌✔ Whatsapp Hard And Sexy Vip Call
 
新南威尔士大学毕业证(UNSW毕业证)成绩单原版一比一
新南威尔士大学毕业证(UNSW毕业证)成绩单原版一比一新南威尔士大学毕业证(UNSW毕业证)成绩单原版一比一
新南威尔士大学毕业证(UNSW毕业证)成绩单原版一比一
 
Delhi Call Girls Saket 9711199171 ☎✔👌✔ Full night Service for more than 1 person
Delhi Call Girls Saket 9711199171 ☎✔👌✔ Full night Service for more than 1 personDelhi Call Girls Saket 9711199171 ☎✔👌✔ Full night Service for more than 1 person
Delhi Call Girls Saket 9711199171 ☎✔👌✔ Full night Service for more than 1 person
 
꧁ ୨⎯Call Girls In Ashok Vihar, New Delhi **✿❀7042364481❀✿**Escorts ServiCes C...
꧁ ୨⎯Call Girls In Ashok Vihar, New Delhi **✿❀7042364481❀✿**Escorts ServiCes C...꧁ ୨⎯Call Girls In Ashok Vihar, New Delhi **✿❀7042364481❀✿**Escorts ServiCes C...
꧁ ୨⎯Call Girls In Ashok Vihar, New Delhi **✿❀7042364481❀✿**Escorts ServiCes C...
 
BLUE VEHICLES the kids picture show 2024
BLUE VEHICLES the kids picture show 2024BLUE VEHICLES the kids picture show 2024
BLUE VEHICLES the kids picture show 2024
 
Russian Call Girls Delhi Indirapuram {9711199171} Aarvi Gupta ✌️Independent ...
Russian  Call Girls Delhi Indirapuram {9711199171} Aarvi Gupta ✌️Independent ...Russian  Call Girls Delhi Indirapuram {9711199171} Aarvi Gupta ✌️Independent ...
Russian Call Girls Delhi Indirapuram {9711199171} Aarvi Gupta ✌️Independent ...
 
꧁ ୨ Call Girls In Radisson Blu Plaza Delhi Airport, New Delhi ❀7042364481❀ Es...
꧁ ୨ Call Girls In Radisson Blu Plaza Delhi Airport, New Delhi ❀7042364481❀ Es...꧁ ୨ Call Girls In Radisson Blu Plaza Delhi Airport, New Delhi ❀7042364481❀ Es...
꧁ ୨ Call Girls In Radisson Blu Plaza Delhi Airport, New Delhi ❀7042364481❀ Es...
 

Dafra next 250 manual de servico em ingles (sym wolf)

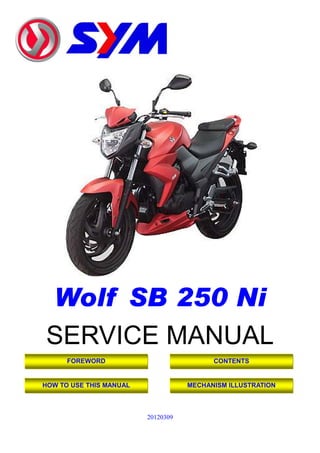
  • 1. Wolf SB 250 Ni SERVICE MANUAL 20120309 FOREWORD HOW TO USE THIS MANUAL CONTENTS MECHANISM ILLUSTRATION
  • 2. Foreword This service manual contains the technical data of each component inspection and repair for the SANYANG PD25A series motorcycle. The manual is shown with illustrations and focused on “Service Procedures”, “Operation Key Points”, and “Inspection Adjustment” so that provides technician with service guidelines. Copyright reserved. If the style and construction of the motorcycle, PD25A series motorcycle, are different from that of the photos, pictures shown in this manual, you should follow the actual vehicle layout. Specifications may be changed without notice. Service Department SANYANG INDUSTRY CO., LTD. Homepage Contents
  • 3. How to use this manual This service manual describes basic information of individual parts and system inspection & service for SANYANG PD25A series motorcycle. In addition, please refer to the manual contents for detailed information for the model year. The first chapter covers general information and trouble diagnosis. The second chapter covers service maintenance information and special tools manual. The third to the 9th chapters cover engine and driving systems. The 10th chapter covers cooling systems. The 11th to the 13th chapters contain the parts of vehicle frame. The 14th chapter is electrical appliances. The 15th chapter is emission control system. The 16th chapter is electrical diagram. Please see index of content for brief information and quick guide.
  • 4. Content Page Content Index 1-1 ~ 1-19 General Information 1 2-1 ~ 2-16 Maintenance Information 2 3-1 ~ 3-45 Injection System 3 4-1 ~ 4-14 Lubrication / Clutch / Transmission 4 5-1 ~ 5-8 AC Generator / Starting Clutch 5 6-1 ~ 6-8 Engine Removal 6 7-1 ~ 7-16 Cylinder Head / Valve 7 8-1 ~ 8-10 Cylinder / Piston 8 9-1 ~ 9-14 Crankshaft / Crankcase / Shifting Gear 9 10-1 ~ 10-14 Cooling System 10 11-1 ~ 11-10 Brake System 11 12-1 ~ 12-14 Steering / Front Wheel / Front Fork 12 13-1 ~ 13-12 Rear Wheel / Rear Cushion 13 14-1 ~ 14-26 Electrical System 14 15-1 ~ 15-10 Emission Control System 15 16-1 ~ 16-2 Wiring Diagram 16
  • 5. Mechanism Illustration Start / Engine stop switch Main Switch RR brake pedal Starter relay Air cleaner Fuel tank cap Winker relay Battery Headlight dimmer / Winker / Horn switch Ignition il ECU Headlight Fuse Regulator/ Rectifier Shifting pedal Meter FR. Brake lever Clutch lever Taillight FR winker RR. winker Muffler
  • 6. 1. General Information Symbols and Marks ·················· 1-1 General Safety··························· 1-2 Service Precautions·················· 1-3 Specifications -·························· 1-9 Torque Values(Engine) ············· 1-10 Torque Values(Frame) ·············· 1-11 Torque Values ··························· 1-11 Troubleshooting························ 1-12 Lubrication Points····················· 1-17 Symbols and Marks Symbols and marks are used in this manual to indicate what and where the special service are needed, in case supplemental information in procedures is needed for these symbols and marks, explanations will be added to the text instead of using the symbols or marks. Warning Means that serious injury or even death may result if procedures are not followed. Caution Means that equipment damages may result if procedures are not followed. Engine oil Limits to use SAE 10W-30 API SG class oil. Warranty will not cover the damage that caused by not apply with the limited engine oil. (Recommended oil: Bramax G-3 oil) Grease King Mate G-3 is recommended. Gear oil King Mate gear oil serials are recommended. (Bramax HYPOID GEAR OIL # 140) Locking sealant Apply sealant; medium strength sealant should be used unless otherwise specified. Oil seal Apply with lubricant. Renew Replace with a new part before installation. Brake fluid Use recommended brake fluid DOT3 or WELLRUN brake fluid. Special tools Special tools Correct Meaning correct installation. Wrong Meaning wrong installation. Indication Indication of components. Directions Indicates position and operation directions Components assembly directions each other. Indicates where the bolt installation direction, --- means that bolt goes through the component (invisibility). 1-1
  • 7. 1. General Information General Safety Carbon monoxide Battery If you must run your engine, ensure the place is well ventilated. Never run your engine in a closed area. Run your engine in an open area, if you have to run your engine in a closed area, be sure to use a ventilator. Caution 1-2 Caution  Exhaust contains toxic gas, which may cause one to lose consciousness and even result in death. Gasoline Gasoline is a low ignition point and explosive material. Work in a well-ventilated place, no flame or spark allowed in the work place or where gasoline is being stored. Caution  Gasoline is highly flammable, and may explode under some conditions, keep it away from children. Used engine oil Caution Prolonged contact with used engine oil (or transmission oil) may cause skin cancer although it might not be verified.  We recommend you to wash your hands with soap and water right after contacting. Keep the used oil beyond reach of children. Hot components Caution  Components of the engine and exhaust system can become extremely hot after engine running. They remain very hot even after the engine has been stopped for some time. When performing service work on these parts, wear insulated gloves and wait until the vehicle is cooling down. ‧ Battery emits explosive gases; flame is strictly prohibited. Keeps the place well ventilated when charging the battery. ‧ Battery contains sulfuric acid (electrolyte), which can cause serious burns, so be careful not to get the sulfuric acid on your eyes or skin. If you get battery acid on your skin, flush it off immediately with water. If you get battery acid in your eyes, flush it off immediately with plenty of water and then go to hospital to consult an ophthalmologist. ‧ If you swallow it by mistake, drink a lot of water or milk, and take some laxative such as vegetable oil and then go to see a doctor. ‧ Keep electrolyte beyond reach of children. Brake shoe Do not use compressed air or a dry brush to clean components of the brake system; use a vacuum cleaner or the equivalent to avoid dust flying. Caution  Inhaling brake shoe or pad ash may cause disorders and cancer of the breathing system Brake fluid Caution Spilling brake fluid on painted, plastic, or rubber parts may cause damage to the parts. Place a clean towel on the above-mentioned parts for protection when servicing the brake system. Keep the brake fluid beyond reach of children.
  • 8. 1. General Information Service Precautions  Always use with SANYANG genuine parts and recommended oils. Using non-genuine parts for SANYANG vehicle may damage it. 1-3  Special tools are designed for removal and installation of components without damaging the part. Using wrong tools may result in damage.  When servicing this bike, use only metric tools, metric bolts, and nuts. Using wrong tools and fasteners may damage this vehicle.  Clean the outside of the parts or the cover before removing it from the bike. Otherwise, dirt and deposit accumulated on the part's surface may fall into the engine, chassis, or brake system, and cause damage.  Wash and clean parts with high ignition point solvent, and blow them dry with compressed air. Pay special attention to O-rings or oil seals because most cleaning agents have an adverse effect on them.  Never bend or twist a control cable to prevent unsmooth control and premature worn out.  Rubber parts may become deteriorated when old and easy to be damaged by solvent and oil. Check these parts before installation to make sure that they are in good condition, replace if necessary.  When loosening a component, which has different sized fasteners, operate with a diagonal pattern and work from inside out. Loosen the small fasteners first. If the bigger ones are loosen first, small fasteners may receive too much stress.  Store complex components such as transmission parts in the proper assemble order and tie them together with a wire for ease of installation later.  Note the reassemble position of the important components before disassembling them to ensure they will be reassembled in correct dimensions (depth, distance or position).  Components not to be reused should be replaced when disassembled including gaskets metal seal rings, O-rings, oil seals, snap rings, and split pins.
  • 9. 1. General Information  The length of bolts and screws for assemblies, cover plates or boxes is different from one another; make sure they are correctly installed. In case of confusion, Insert the bolt into the hole to compare its length with other bolts, if its length outside the hole is the same with other bolts, it is a correct bolt. Bolts for the same assembly should have the same length. 1-4  Tighten assemblies with different dimension fasteners as follows: Tighten all the fasteners with fingers, then tighten the big ones with special tool first diagonally from inside toward outside, important components should be tightened 2 to 3 times with appropriate increments to avoid warp unless otherwise indicated. Bolts and fasteners should be kept clean and dry. Do not apply oil to the threads.  When installing oil seal, fill the groove with grease, install the oil seal with the name of the manufacturer facing outside, and check the shaft on which the oil seal is to be installed for smoothness and for burrs that may damage the oil seal.  Remove residues of the old gasket or sealant before reinstallation, grind with a grindstone if the contact surface has any damage.  The ends of rubber hoses (for fuel, vacuum, or coolant) should be pushed as far as they can go to their connections so that there is enough room below the enlarged ends for tightening the clamps. Groove Clamp  Rubber and plastic boots should be properly reinstalled to the original correct positions as designed Connector Boots  The tool should be pressed against two (inner and outer) bearing races when removing a ball bearing. Damage may result if the tool is pressed against only one race (either inner race or outer race). In this case, the bearing should be replaced. To avoid damaging the bearing, use equal force on both races. Manufacturer's name Both of these examples can result in bearing damage.
  • 10. 1. General Information  Lubricate the rotation face with specified lubricant on the lubrication points before assembling. 1-5 ● Check if positions and operation of installed parts are correct and proper. ● Make sure service safety each other when conducting by two persons. ● Note that do not let parts fall down.  Before battery removal operation, you have to remove the battery negative (-) cable first. Avoid using tools like open-end wrench, which may contact with body or create spark.  After service completed, make sure all connection points is secured. Battery positive (+) cable should be connected firstly. And the two posts of battery have to be greased after connected the cables. ● Make sure that the battery post caps are located properly after the battery posts had been serviced. ● If a fuse is burned, it has to find out the cause and solved it. And then replace with specified capacity fuse. Capacity verification
  • 11. 1. General Information ● When separating a connector, its locker has to be unlocked first. Then, conduct the service operation. 1-6 ● Do not pull the wires as removing a connector or wires. Hold the connector body. ● Make sure if the connector pins are bent, extruded or loosened. ● Insert the connector completely. ● If there are two lockers on two connector sides, make sure the lockers are locked in properly. ● Check if any wire loose. ● Check if the connector is covered by the twin connector boot completely and secured properly. ● Before connecting terminals, check if the boot is cracked or the terminal is loose. ● Insert the terminal completely. ● Check if the boot covers the terminal. ● Do not let boot open facing up. ● Secure wires and wire harnesses to the frame with respective wire bands at the designated locations. Tighten the bands so that only the insulated surfaces contact the wires or wire harnesses ● Wire band and wire harness have to be clamped secured properly. ● Do not squeeze wires against the weld or its clamp.
  • 12. 1. General Information ● Do not let the wire harness contact with rotating, moving or vibrating components when routing the harness. 1-7 ● Keep wire harnesses far away from the hot parts. ● Avoid wire harnesses from sharp edges or corners, and also avoid the jutted-out ends of bolts and screws. ● Route harnesses so that they neither pull too tight nor have excessive slack. ● Protect wires or wire harnesses with electrical tape or tube if they contact a sharp edge or corner. Thoroughly clean the surface where tape is to be applied. ● Secure the rubber boot firmly as applying it on wire harness. Never Touch ● Never use wires or harnesses which insulation has broken. Wrap electrical tape around the damaged parts or replace them. ● Never clamp or squeeze the wire harness when installing other components. Never clamp or squeeze the wire harness Never too tight
  • 13. 1. General Information ● Do not let the wire harness be twisted when installation. 1-8 ● Wire harnesses routed along the handlebar should not be pulled too tight or have excessive slack, use rubber covering against adjacent or surrounding parts in all steering perimeters. ● Before operating a test instrument, the operator should read the operation manual of the instrument, and then conducts test in accordance with the instruction. ● Use sand paper to clean connector pins/terminals if rust is found. And then continue the connection operation. Do you know how to set the instrument to its measurement position and the insert locations of its two probes? Clean rust
  • 14. 1. General Information 1-9 Specifications Maker SYM Model PD25A1 Overall Length 2005 mm Front TELESCOPIC FORK Overall Width 790 mm Suspension System Rear UNIT SWING Overall Height 1050 mm Front 110/70-17 54H Dimension Wheel Base 1320 mm Tire Specifications Rear 140/70-17 66H Front 82 kg Rear 91 kg Front DISK (ø 288 mm)Curb Weight Total 173 kg Brake System Rear DISK (ø 222 mm) Passengers/Weight Two / 150 kg Max. Speed > 140 km/hr Front 112 kg Performance Climb Ability < 28° Rear 211 kg Primary Reduction 2.826 (65/23T) Weight Total Weight Total 323 kg Final Reduction 2.69 (35/13T) Type/ Cooling System Water-cooled 4-stroke gasoline engine Clutch Wet multi-plate Installation and arrangement Vertical, below center, incline 15° Reduction Transmission 6 speed, circulated Fuel Used Above 92 unleaded Speedometer 0 ~ 199 km/hr Fuel supply injection Horn 1 Bore Ø 71.0 mm Muffler Expansion & Pulse Type Stroke 63.0 mm Exhaust Pipe Position and Direction Right side and Backward C yl in d e r Number/Arrangem ent Single Cylinder Lubrication System Forced / Wet sump Displacement 249.4 cc Solid Particulate - Compression Ratio 10.5 : 1 CO < 3.0 % Max. HP 25 ps / 7500 rpm Exh aust Con cent rati on HC < 1600 PPM Max. Torque 2.35 kg-m / 6000 rpm E.E.C. √ Ignition Full transistor Ignition P.C.V. √ Engine Starting System Electrical starter Catalytic reaction control system √
  • 15. 1. General Information 1-10 Torque Values (Engine) Item Q’t Thread Dia. (mm) Torque Value(kgf-m) Remarks Cylinder stud bolt 4 10 1.0~1.4 Cylinder head nut 4 10 3.6~4.0 Cylinder head right bolt 2 6 1.0~1.4 Cylinder head side cover bolt 3 6 1.0~1.4 Cylinder head cover bolt 4 6 0.8~1.2 Cylinder head stud bolt (inlet i ) 2 6 1.0~1.4 Cylinder head stud bolt (EX. i ) 2 8 2.4~3.0 Air inject pipe bolt 4 6 1.0~1.4 Tappet adjustment screw nut 4 5 0.7~1.1 Lubricate with oil Spark plug 1 10 1.0~1.2 Camshaft gear fix bolt 2 6 1.0~1.4 Camshaft setting plate bolt 1 6 0.8~1.2 Cam chain tensioning bolt 2 6 1.0~1.4 Throttle fix nut 2 6 0.8~1.2 Engine oil draining bolt 1 12 3.5~4.5 Engine oil strainer cap 1 30 1.3~1.7 Flywheel nut 1 14 8.5~10.5 R. crankcase cover bolt 12 6 0.8~1.2 L. crankcase cover bolt 11 6 0.8~1.2 L. crankcase rear cover bolt 2 6 0.8~1.2 Oil pump screw 2 6 0.7~1.1 Oil pump cover bolt 2 6 0.8~1.2 Water pump impeller 1 7 1.0~1.4 Water pump cover bolt 4 6 0.8~1.2 Crankcase bolt 11 6 0.8~1.2 Oil strainer cover bolt 2 6 0.8~1.2 Balancing shaft drive gear bolt 4 6 0.8~1.2 Primary drive gear nut 1 16 8.5~10.5 Balancing shaft fix nut 1 14 8.5~10.5 Clutch lifter plate bolt 6 6 1.0~1.4 Clutch fix nut 1 16 8.5~10.5 ACG fix bolt 3 6 0.8~1.4 Drive gear bolt 2 6 0.8~1.2 The torque values listed are important tightening torque values. Please see standard values for those not listed in the table.
  • 16. 1. General Information 1-11 Torque Values (Frame) Item Q’t y Thread Dia. (mm) Torque Value (Kg-m) Remarks Mounting bolt for steering handle post 4 8 1.0~1.4 Lock nut for steering stem 1 22 6.0~8.0 Steering top cone race 1 22 0.15~0.25 Front wheel axle nut 1 12 6.0~8.0 Rear wheel axle nut 1 14 10.0~12.0 Rear drive sprocket nut 4 8 2.7~3.0 Front cushion mounting bolt 4 8 3.0~3.5 Rear cushion upper connection bolt 1 10 3.5~4.5 Rear cushion lower connection bolt 1 10 3.5~4.5 Brake lever bolt 2 6 0.8~1.2 Brake hose bolt 4 10 3.0~4.0 Brake air-bleeding valve 2 6 0.8~1.0 Front brake disc mounting bolt 3 6 3.7~4.3 Rear brake disc mounting bolt 2 8 2.4~3.0 Gear change bolt 1 6 0.8~1.2 Brake clipper mounting bolt 2 6 1.5~2.0 Engine suspension nut 2 8 2.4~3.0 upper part of engine & frame Engine assembly nut 2 8 3.0~4.0 engine front part & engine hanger Engine assembly nut 1 10 4.5~5.5 engine rear part & frame Special Bolt 8 8 1.5~2.5 Swing arm pivot nut 1 10 10.0~12.0 Muffler mounting nut 2 8 1.0~1.2 Muffler mounting bolt 2 8 3.2~3.8 The torque values listed in above table are for more important tightening torque values. Please refer to standard values for those not listed in the table. Torque Values Type Tighten Torque Type Tighten Torque 5mm bolt, nut 0.45~0.60kgf-m 4mm screw 0.10~0.15kgf-m 6mm bolt, nut 0.80~1.20kgf-m 5mm screw 0.35~0.50kgf-m 8mm bolt, nut 1.80~2.50kgf-m 6mm screw, SH nut 0.70~1.10kgf-m 10mm bolt, nut 3.00~4.00kgf-m 6mm flange bolt, nut 1.00~1.40kgf-m 12mm bolt, nut 5.00~6.00kgf-m 8mm flange bolt, nut 2.40~3.00kgf-m 3mmscrew 0.05~0.08kgf-m 10mm flange bolt, nut 3.50~4.50kgf-m
  • 17. 1. General Information Troubleshooting A. Engine cannot be started or difficult to be started Check and adjustment Fault condition Probable causes 1-12 Press the fuel injector feed pipe and confirm whether there is fuel in the feed pipe The fuel supply to the fuel injector is sufficient The fuel injector is not supplied with sufficient fuel Check the spark plug ignition condition Perform cylinder compression pressure test Sparks 1. Check the fuel amount in the fuel tank 2. Check if the fuel pipe and the vacuum tube are blocked or not 3. Malfunction of fuel pump relay or wiring 4. Evaporative Emission Control System clogged 5. Malfunction of fuel pump 6. The fuel strainer is blocked or not Week sparks or no spark Normal cylinder compression pressure Low or no compression pressure 1. Piston ring seized 2. Malfunction of cylinder valves 3. Worn cylinder and piston ring 4. Cylinder gasket leakage 5. Sand hole in the compression parts 1. Malfunction of spark plug 2. Spark plug contamination 3. Malfunction of ECU 4. Malfunction of the AC Generator 5. Ignition coil is in open or short circuit 6. Ignition coil shorted or open circuit 7. Malfunction of main switch Restart the engine No ignition With signs of ignition but the engine cannot be started 1. Malfunction of throttle valve operation 2. Air sucked into intake manifold 3. Incorrect ignition timing Remove and check the spark plug Dry spark plug 1. Contaminated or clogged fuel injector 2. Malfunction of throttle valve operation 3. Malfunction of fuel pressure regulator Wet spark plug
  • 18. 1. General Information B. Engine runs sluggish (Speed does not go up, lack of power) Check and adjustment Fault condition Accelerate gradually and check engine RPM Engine RPM can be increased Engine RPM cannot be increased Check ignition timing (Using ignition lamp) Check cylinder compression pressure (using pressure gauge) Correct ignition timing Incorrect ignition timing Normal compression pressure Abnormal compression pressure Check if the fuel injector is clogged or not Not clogged Clogged Remove and check the spark plug Check if the engine is over heated No contamination or discoloration Contaminated or discolored No knocking Knocking 1. Clogged air cleaner 2. Poor fuel supply (Test on level road) 1. Replace the fuel injector 1. Remove the dirt 2. Incorrect spark plug heat range 3. Incorrect spark plug gap 1. Worn out piston or cylinder 2. Abnormal fuel injector 3. Poor fuel quality 4. Carbon deposit in the combustion chamber 5. Abnormal ignition timing 6. clutch slippage 1. Carbon deposit in the combustion chamber 2. Malfunction of fuel injector 3. Poor fuel quality 4. Abnormal ignition timing Continually drive in acceleration or high speed Normal Engine overheated 1. Malfunction of ECU 2. Malfunction of AC Generator 1. Worn out cylinder or piston ring 2. Cylinder gasket leakage 3. and hole in compression parts 4. Valve deterioration 5. Jammed piston ring 3. Fuel tank emission control system clogged 4. Clogged exhaust pipe 5. Clogged fuel injector Engine RPM cannot be increased 3. clutch shoe damaged 1. clutch slippage 2. poor clutch contact surface Probable causes 1-13
  • 19. 1. General Information C. Engine runs sluggish (especially in low speed and idling) Check and adjustment Check ignition timing (using ignition lamp) Incorrect ignition timing (malfunction of ECU or AC Generator) 1. Abnormal throttle body insulator gasket Normal Abnormal Check for any air sucked in through the throttle body insulator 2. Abnormal throttle body installation 3. Abnormal inlet pipe gasket 4. Malfunction of ECU No air sucked in Air sucked in Probable causesFault condition 1. Contaminated spark plug 2. Malfunction of ECU 3. Malfunction of AC Generator 4. Malfunction of ignition coil 5. Open or short circuit in spark plug leads 6. Malfunction of main switch Good spark Poor spark Remove the spark plug and check the spark condition D. Engine runs sluggish (High speed) Normal Check the fuel pump supply Check if fuel injector clogged 1. insufficient fuel 2. fuel hose clogged, pressed 3. EEC clogged Good Poor Check ignition timing 1. Malfunction of ECU 2. Malfunction of AC Normal Abnormal Clogged 1. Replace injector Probable causesFault conditionCheck and adjustment 1-14
  • 20. 1. General Information E. Starter Motor Malfunction 1. Starter Motor doesn’t rotate Check the battery circuit by activating turning signal Push the staring button and check if the starting relay is activated Flashing normally Not flashing or dimmed Starting relay activated Starting relay not activated Connect the starting motor to the battery Starter Motor rotates Starter Motor doesn’t rotate 1. Bad contact in the starter switch 2. Abnormal Starter relay 3. Loose coupler or terminals Insufficient Battery capacity (60~120 flashes per minute) 1. Abnormal wire harness 1. Worn carbon brushes 2. Broken or shorted rotor windings 3. Broken Starter motor sub wire 4. Loose coupler Braking light activated Braking light not activated 1. Burnt Fuse 2. Insufficient Battery Voltage 3. Abnormal braking switch 4. Abnormal main switch Check and adjustment Fault condition Possible causes Pull the brake handle or step on the braking pedal 1-15
  • 21. 1. General Information 2. Starting Motor rotates slowly or spins without engagement with crankshaft 1-16 Check and adjustment Fault condition Possible causes Flashing normally Not flashing or dimmed Starting Motor Still rotating slowly Rotates Normally 1. Loose coupler or terminals 2. Starting Relay bad contact 1. Engine Seized 2. Starting Motor shorted or damaged Connect the starting motor to the battery Insufficient Battery capacity Check the battery circuit by activating turning signal 3. Starter motor won’t stop rotating Turn the main switch off Motor keeps running Motor stops 1. Starting relay shorted 1. Starting switch shorted/ stuck F. Abnormal Engine Noise Fault condition Possible causes 1. Excessive valve clearance 2. Worn rocker arm 3. Worn camshaft Rocker arm noise Piston slapping 1. Worn piston and cylinder 2. Carbon deposit in the combustion chamber 3. Worn piston pin or connecting rod lower end 1. Worn camshaft bearings 2. Worn cam sprocket 3. Loose or worn cam chain Cam chain noise 1. Worn or deteriorated rear wheel damping rubber 2. Gear surface worn 3. Worn transmission gear set Transmission gear noise Excessive clutch plate clearanceClutch knocking
  • 22. 1. General Information Lubrication Points 1-17 Throttle cable / Front brake lever pivot / clutch lever Steering stem Side stand bracket Front wheel bearing Driven chain Rear wheel bearing
  • 24. 2. Maintenance Information Precautions in Operation ········· 2-1 Periodical Maintenance Schedule ···················································· 2-2 Lubrication System··················· 2-3 Cylinder Compression Test ····· 2-4 Fuel System······························· 2-5 Air Filter ····································· 2-5 Throttle Operation····················· 2-6 Spark Plug ································· 2-6 PCV System······························· 2-7 Valve Clearance Adjustment···· 2-7 Drive Chain Adjustment ··········· 2-8 Steering Mechanism ················· 2-8 Suspension System ·················· 2-9 Disk Brake System···················· 2-9 Tire·············································· 2-11 Battery········································ 2-12 Clutch Adjustment ···················· 2-12 Headlight Adjustment ··············· 2-13 Brake Switch······························ 2-13 Nuts, Bolts Tightness ··············· 2-13 Special Tools ····························· 2-14 2 Precautions in Operation Specifications Capacity 14000 c.c.Fuel tank capacity Reserve 700 c.c. Capacity 1700 c.c. Engine Oil Exchange 1500 c.c. Throttle grip free play 2~6 mm Spark plug NGK CR8E Spark plug gap 0.7~0.8 mm Ignition timing BTDC 13º / 1650 rpm Idle speed 1650±100 rpm Cylinder compression pressure 12±2 kgf/cm² In 0.10±0.02 mmValve clearance Ex 0.15±0.02 mm Front 110/70-17 54H Tire size Rear 140/70-17 66H Single ride Front:2.0 kg/cm² / Rear:2.0 kg/cm² Tire Pressure Tandem ride Front:2.0 kg/cm² / Rear:2.25 kg/cm² Battery Type GT12A-BS (12V 10Ah) 2-1
  • 25. 2. Maintenance Information 2-2 Periodical Maintenance Schedule NO Items Initial 300KM 1 month / every1000 KM 3 months / every3000 KM 6 months / every6000 KM 1year / every12000K M 1 ☆Air filter element I C C R 2 ☆Gasoline filter I I R 3 ☆Engine oil filter R R 4 ☆Engine oil strainer C C C 5 ☆Engine oil replacement R Change every 1000km 6 Tire pressure I I 7 Battery inspection I I 8 Brake lever free play check I I 9 Steering handle integrity check I I 10 Shock absorber performance check I I 11 Bolts tightening check I I 12 Check the engine for oil leakage I I 13 ☆Spark plug inspection or replacement I I R 14 ☆Change gear oil R Change every 5000km 15 Lubrication of the whole bike L 16 Exhaust pipe I I 17 ☆Ignition timing I I 18 ☆Idle emission check A I A 19 ☆Throttle operation I I 20 ☆Engine bolts torque I I 21 ☆Transmission / chain I I/L R 22 ☆Clutch free play inspection I I 23 Light/electrical system//instrument readings I I 24 Main stand/side stand spring I I 25 Fuel lines I I 26 Cam chain I I 27 ☆Valve clearance I A 28 ☆PCV I C 29 ☆Crankcase blow-by over-flow pipe I Drain every 2000km 30 ☆Evaporative control system I 31 ☆Throttle body A I A C 32 ECUimput voltage I 33 EFi sensor coupler I I Note: I-Inspection A-Adjust R-Replace C-Clean L-Lubricate Please have your periodical maintenance data recorded by your SYM Authorized Dealer to maintain the motorcycle in excellent condition. The above maintenance schedule is established by taking the monthly 1,000 kilometers as a reference. Whichever time or mileage comes first will be regarded as an index for maintenance. Remark:These marks “☆” in the schedule are emission control items. According to EPA regulations, these item checks must be performed periodically following the use r manual instructions. It’s prohibited to adjust or repair these emission control items by unauthorized people. Otherwise, SYM is no responsible. 1. Clean or replace the air cleaner element more often when the motorcycle is operated on dusty roads or in the heavily polluted environment. 2. Maintenance should be performed more often if the motorcycle is frequently operated in high speed and after the motorcycle has accumulated a higher mileage. 3. Preventive maintenance a. Ignition system-Perform maintenance or check when continuous abnormal ignition, misfire, after-burn, overheating occur. b. Carbon deposit removal-Remove carbon deposits in cylinder head, piston heads, exhaust system when power is decreasing. c. Replace worn out pistons, cylinder head.
  • 26. 2. Maintenance Information Lubrication System 2-3 Engine Oil quantity Caution  Turn off the engine; park the motorcycle on level surface with main stand.  Run the engine for 3-5 minutes, check oil capacity after engine off for3-5 Check oil quantity from inspection window, if oil level is near lower limit, fill in the recommended oil to upper limit. Exchange engine oil Remove the oil drain bolt under the crankcase to drain the engine oil. After completely drain the engine oil, clean the drain bolt and the washer. If the washer is deformed or cracked, please change a new one. Engine oil drain bolt torque:3.5~4.5kgf-m Caution  Warm up the engine before draining oil; that will make engine oil easily and thoroughly drained. Lower limit Fill in the engine oil to the standard quantity. Oil viscosity :SAE10W -30 Engine oil exchange volume Full disassembly:1700 c.c. Regular exchange:1500 c.c. Run the engine for several minutes, check for oil leakage. Engine oil strainer cleaning Drain engine oil completely,remove oil strainer cap, spring, and strainer from left side of crankcase. Clean oil strainer with solvent or compressed air. Check if O-ring is deformed or damaged, replace if necessary. Install strainer, spring, and oil strainer cap. Torque value:1.3~1.7kgf-m Oil strainer cap Upper limit Oil drain bolt
  • 27. 2. Maintenance Information Replace oil filter 2-4 Remove bolts of oil filter chamber. Remove the filter and replace it with a new one. Caution  Oil filter is paper type and cannot be cleaned or reused. Cylinder compression test Warm up engine and turn it off. Remove left cylinder head cover Remove spark plug cap and spark plug. Install compression gauge into the spark plug hole, full open the throttle, and rotate the engine. Caution Rotate the engine until the reading in the gauge gains no more.  Usually, the highest-pressure reading will appear in 4~7 seconds. Compression pressure:12 ±2 Kgf/cm² Check the following items if the pressure is too low:  Incorrect valve clearance.  Valve leakage  Cylinder head leakage. Piston, piston ring, cylinder damaged. Over-high pressure means combustion chamber r piston top deposit carbon.o boltx2 Oil filter Spark plug Pressure gauge
  • 28. 2. Maintenance Information Fuel System 2-5 Fuel lines Check all fuel lines, and replace when they are deteriorated, damaged or leaking. Caution  Gasoline is a highly flammable substance, so any source of fire or spark is strictly prohibited when operation. Fuel filter Warning  Any source of fire or spark is strictly prohibited when operation.  Fuel filter is sealed type, replace it if it is clogged. Remove seat, fuel tank, and fuel pump. Check if fuel filter is clogged or broken; replace it with a new one when necessary. Check the fuel line for leakage. Air filter Air filter element Remove the seat. Remove the air filter cover (4 Screws) Remove the air filter element Check if the filter element is dirty or damaged. If the air cleaner filter element is too dirty or damaged, please replace with new parts. Caution  The air filter element is paper type and cannot be soaked or washed, or engine performance will be affected.  If the filter element is not installed correctly, dust will be sucked into cylinder, which will result in decreased power and shortened engine life. Fuel filter Filter Screw×4 Air filter element
  • 29. 2. Maintenance Information 2-6 Throttle operation Operate the throttle grip to see if the throttle cable is going smoothly. If the throttle cable is deteriorated, twisted or damaged, please exchange it. If the cable does not go smoothly, lubricate the cable. Measure the free play of the throttle grip, through the inner side flange of it. Free play:2~6 mm Adjustment can be done on both side of throttle cable. Conduct secondary adjustment on upper side. Loose fix nut and rotate it to adjust free play. Spark plug Recommended spark plug:CR8E Remove cylinder head left cover. (boltX3) Remove spark plug cap. Clean dirt around the spark-plug hole. Remove spark plug. Measure spark plug ignition gap. Spark plug gap:0.7~0.8 mm Carefully bend ground electrode of the plug to adjust the gap if necessary. Hold spark plug and install the spark plug by screwing it with hand, after tightening the plug by hands, use plug socket to tighten it to the standard torque value. Standard torque:1.0~1.2kgf-m Install the spark plug cap. 2~6 mm Adjusting nut Lock nut Spark plug cap Ground electrode Center electrode 0.7~0.8mm
  • 30. 2. Maintenance Information PCV System 2-7 Unplug the drain tube, and leak the deposit off. Drain the tube every 2,000 km. Caution  Under rainy or full- throttle situation, the maintenance period should be shortened. You can check the deposit amount through the transparent tube. Valve clearance Adjustment Caution  The valve clearance should be adjusted when the engine is cold. (Under 35°C) Remove fuel tank. Remove cylinder head. Remove cylinder head side cover. Remove the timing inspection cap and the AC.G cap on the crankcase L cover. Use a T socket wrench to rotate the crankshaft counterclockwise. Align the “T” mark on the AC.G flywheel with the crankcase sign, and simultaneously, the cam- chain sprocket TDC mark aligning with the cylinder head mark (That means the piston is in the upper end of compression stroke) Valve clearance inspection & adjustment Check the intake and exhaust valve clearance by inserting the feeler gauge between the adjusting screw and the lock nut. Valve clearance: IN: 0.10±0.02 mm EX: 0.15±0.02 mm Adjust by loosening the lock nut first, and turning the adjusting screw. Caution  When adjusting valve clearance, make sure all clearance on standard volume; recheck after tightening lock nuts. Install cylinder head, cylinder head side cover, timing inspection cap, and the AC.G cap Caution  Before installing cylinder head side cover, timing inspection cap, and the AC.G cap, check if the O-ring is damaged, and apply some oil on it. Drain tube 〝T〞mark TDC mark
  • 31. 2. Maintenance Information Drive chain adjustment 2-8 Drive chain inspection Place the bike on its main-stand with its neutral gear. Check the drive chain slack by moving the chain up and down by fingers, and measure the amount of chain slack. Standard chain slack:10~20 mm Caution  Because the front and rear sprocket have different wearing situations, so please rotate the rear wheel to find the minimum chain slack for the measurement. Drive chain adjustment If you need to adjust the chain slack, please loosen the rear axle nut and sleeve nut first. Turn the left and the right side adjusting nut evenly to make the chain slack within the standard range. Turn the nuts clockwise to tighten the chain, or counterclockwise to loosen the chain. Torque value:4.0~5.0kgf-m After tightening the rear axle nut, please check the sleeve nuts to prevent them from loosening. Recheck the chain slack, and make sure the rear wheel rotates smoothly. If the chain is too dirty, use high-flash point solvents to clean the chain. (Kerosene or Diesel.) Caution  Don’t use gasoline when cleaning the chain. The gasoline will damage the O-ring in the chain. After cleaning, lubricate the chain with chain lubricant. Steering mechanism Caution  Check all wires and cables if they are interfered with the rotation of steering handle bar. Lift the front wheel off the ground. Turn handle from right to left and check if turning is smoothly. If handle is uneven or bending, or the handle can be lifted through vertical direction, adjust the handle top bearing. Adjusting nutRear axle nut Lock nut
  • 32. 2. Maintenance Information Suspension system 2-9 Caution  Do not ride the motorcycle with poor cushion.  Loosened, worn or damaged cushion will make poor stability and maneuverability. Front cushion Press down the front cushion several times to check its integrity. Check if any oil leakage or damage. Replace relative parts if damaged. Tighten all nuts and bolts. Rear cushion Press down the rear cushion several times to check its integrity. Check if any oil leakage or damage. Replace relative parts if damaged. Start the engine and gradually rise R.P.M. to rotate the rear wheel; check if any looseness, vibration; replace bushing if damaged. Tighten all nuts and bolts. Disk brake system Brake System Hose Check the brake hoses for corrosion or brake fluid leaking. Brake Fluid Check brake fluid level in the brake fluid reservoir. If the level is lower than the LOWER limit, add brake fluid to UPPER limit. Also check brake system for leaking if low brake fluid level found. Caution  To keep the reservoir in horizontal position, do not take off the brake fluid cap before keeping the steering handle steady.  Do not operate the brake lever after the cap removed. Otherwise, the brake fluid will be sprayed out.  Do not mix non-compatible brake fluid. Lower limit
  • 33. 2. Maintenance Information Air bleeding operation 2-10 Connect a transparent hose to air-bleeding valve. Hold the brake lever and turn the air-bleeding valve open. Perform this operation several times until there is no air bubble inside the transparent hose. Caution  Before closing the air bleed valve, do not release the brake lever. Add Brake Fluid Add brake fluid to UPPER limit. Recommended brake fluid: DOT3 or DOT4 WELL RUN brake fluid. Caution  Never mix or use dirty brake fluid to prevent braking system from deterioration or reducing brake performance. Brake Lining Wear The indent mark on brake lining is the wear limitation. If the wear limit mark approximates the edge of brake disc, replace the brake lining. Caution  It is not necessary to remove brake hose when replacing the brake lining. Master Cylinder Cap Diaphragm Upper limit Brake fluid Air-bleeding valveAir Bubble Transparent tube Brake disc Brake lining wear limitation
  • 34. 2. Maintenance Information 2-11 Tire Check the pressure of the tire to see if it is in the specified pressure range. Caution  Tire pressure check should be done when the tire is cold. Specified tire pressure range Tire pressure Front Rear Single riding 2.0 2.0Tire pressure when cold (Kg/cm²) Dual riding 2.0 2.25 Specified tire: Front:110/70-17 54H Rear:130/70-17 62H Check if tire surface is stuck with nails, stones or other objects. Check if tire surface and wall are damaged or worn, replace when necessary. Check tire tread depth with eye or tire depth gauge. Replace the tire if it is uneven worn or insufficient tread depth. If the wearing of the tire thread reaches triangle TWI mark index, the tire have to be replaced. Measure tire thread depth from tire central surface, replace the tire, if the depth is not enough. Minimum tread depth: Front wheel: 1.5 mm Rear wheel: 2.0 mm Caution  The triangle TWI mark index is located along the tire wall. “△ ”TWI mark
  • 35. 2. Maintenance Information Battery 2-12 Battery removal Remove the seat Remove the〝─〞negative pole first, then remove the〝+〞positive pole. Remove the battery holder and take out the battery. Caution  If the rust on the posts is very serious, spray some hot water on them. Then, you can remove the rust by steel brush more easily.  Apply some grease on the posts after cleaning rust to prevent from happening again. If there is some rust on battery posts, clean it with steel brush. Install the battery in the reverse procedures of removal. Battery model : GT12A-BS Clutch adjustment Clutch lever free play inspection Slightly pull the clutch lever to check the free play before clutch disengagement. Free play:10~20 mm Clutch lever free play adjustment Before adjusting the clutch lever free play, please loosen the lock nut first. Then turn the adjusting screw to achieve the recommended clutch free play. If you want to decrease the free play of clutch lever, turn it clockwise. If you want to increase the free play, turn it counterclockwise. After adjustment, tighten the adjusting nut with lock nut. Lubricate the clutch cable. Positive poleNegative pole 10~20 mm Adjusting nut Lock nut
  • 36. 2. Maintenance Information 2-13 Headlight adjustment Turn on main switch. Loosen the headlight adjustment screw to adjust headlight beam height. Caution  The factory setting of the beam height is consistent with government orders.  Improper headlight beam setting will make driver in the opposite lane dazzled and cause danger. Brake switch Inspection on the brake switch When brake lever is pulled, brake switch will light up the brake lamp. Make sure that electrical starter can be activated only under braking condition. Adjustment of rear brake switch Turn on the main switch. When the brake pedal is stepped down for 20mm,the brake lamp should be activated. If the brake lamp is not activated or activated too early, please adjust through the rear-brake-switch adjusting nut. Turning clockwise will decrease the free play, and counterclockwise will increase the free play. Nuts, bolts tightness Apply periodical maintenance in according with the Periodical Maintenance Schedule. Check if all the bolts and nuts on the frame are tightened within standard torque. Check all fixing pins, snap rings, hose (pipe) lamps, and wire holders for security.c Headlight adjusting screw RR brake switch adjusting nut Brake switch
  • 37. 2. Maintenance Information Special tools Name Rocker arm shaft disassemble tool Name Flywheel puller Name Valve remove and assemble tool SY No. SYM-1445100 SY No. SYM-3110000-HMA SY No. SYM-1471110/20 Name Valve spring compressor Name Tappet adjusting wrench Name Tappet adjusting tool SY No. SYM-1471100 SY No. SYM-9001200 SY No. SYM-9001210 (6203/6004UZ) (20*34*7) Name Steering Nut Wrench Name 6203/6004UZ bearing Driver Name 20*32*6 oil seal driver SY No. SYM-5320000 SY No. SYM-9620000 SY No. SYM-9120200 (6204) (6301) Name 6204 Bearing Driver Name 6301 Bearing Driver Name Digital clamp meter SY No. SYM-9110400 SY No. SYM-9610000 SY No. SYM-HE07007-05 2-14
  • 38. 2. Maintenance Information Name Inner bearing puller set Name Outer bearing puller Name Bearing driver SY No. SYM-6204020 SY No. SYM-6204001 SY No. SYM-6204024 Name Crankcase bush puller Name Cylinder pressure gauge Name Vacuum pressure gauge SY No. SYM-1120310 SY No. SYM-HT07008 SY No. SYM-HT07011 Name EFi System Diagnostic tool Name Fuel pressure gauge Name Multi-meter SY No. SY No. SYM-HT07010 SY No. SYM-HE07007-01 Name Vehicle circuit test tool kit Name Vehicle circuit test harness Name Fuel hose clamp SY No. SYM-HE170008 SY No. SYM-HE170008-01 SY No. SYM-1950500 2-15
  • 39. 2. Maintenance Information Name EFI fuel hose pliers Name EFI fuel hose removal pliers Name Water pump mechanical seal driver SY No. SYM-1768100 SY No. SYM-1768110 SY No. SYM-1721700-H9A Name Water pump bearing driver Name Water pump oil seal driver SY No. SYM-9100100 SY No. SYM-9120500-H9A 2-16
  • 40. 3. Fuel Injection System EFi System Diagram·································· 3-1 EFi System Operation ······························· 3-2 EFi System Introduction ··························· 3-3 Fuel System ··············································· 3-4 Ignition System·········································· 3-5 Sensors / Drives ········································ 3-6 Precautions in Operation·························· 3-12 EFi System Components Description ····· 3-13 EFi System Circuit····································· 3-29 ECU Pin Configuration······························ 3-30 Troubleshooting········································ 3-31 Intergrated Troubleshooting Procedure·· 3-35 Fuel Tank ····················································3-37 Fuel Pump···················································3-38 Fuel Unit······················································3-39 Air Cleaner··················································3-39 EFi System Diagnosis Methods················3-40 Check Light Fault Codes Differentiation··3-41 Fault Codes and Sensors Table················3-42 Fault Code and Check Light Flashing Light Identification Table···································3-43 Troubleshooting Table ······························3-44 Comprehensive Maintenance List············3-45 EFi system diagram ISC (stepping motor) ECT sensorMAP sensor Injector TPS TA sensor Fuel pump Rollover sensor Battery ECU Ignition coil AISV Diagnostic tool EFi System Check L Relay CPS O2 Sensor amp 3-1
  • 41. 3. Fuel Injection System EFi system operation 3-2 ECU Engine control unit CPS Crankshaft Position Sensor MAP TPS Throttle Position Sensor Manifold Absolute Pressure Sensor K/S LAMBDA TA TW Engine Coolant Temperature Sensor O2 sensor Rollover sensor INJECTOR IGN COIL FUEL PUMP CHECK LIGHT Injector Ignition Coil Fuel pump AISV AISV Intake Air Temperature Sensor ISC Idle Speed Control Valve Tuning tools Diagnostic tool VBATT (Stepping motor)Battery voltage
  • 42. 3. Fuel Injection System 3-3 EFi system introduction Based on 4-stroke SOHC engine, displacement 250 c.c. electronically controlled fuel injection. Fuel vapor will be absorbed by carbon canister; blow-by gas from crankcase will be introduced to combustion chamber. The O2 sensor enhances the efficiency of the catalytic converter by dynamically controlling the air / fuel ratio. Electrical fuel injection system Electrical fuel injection system is constructed by fuel supply device: fuel tank, fuel pump, fuel filter, pressure regulator, and fuel control device: injector, ECU. The fuel is pumped by electrical fuel pump in the fuel tank to the injector on the intake manifold (inlet pipemanifold). The fuel pressure regulator keeps the pressure around 294±6kpa. The signals from ECU enable the injector to spray fuel into the combustion chamber once each two crankshaft-revolutions. The excessive fuel flows back to the fuel tank through the fuel pressure regulator. Fuel pump is placed inside the fuel tank to reduce the working noise and simplify the fuel system. Electrically controlled ignition and injection system effectively reduce fuel consumption rate and pollution. In traditional gasoline engine, carburetor supplies the fuel. The engine vacuum generates negative pressure in the carburetor; then fuel mixed with air and together the mixed gas sent into combustion chamber. Under this condition, air-fuel ratio is determined by air and fuel sucked in. Thus, the three major processes are done simultaneously in the carburetor: air quantity measurement, the determination of fuel quantity, the mix of fuel and air. Electrical fuel injection system checks intake air quantity and temperature; on this basis, the programmed air-fuel ratio in the ECU determines the amount of fuel to be injected; then the injector sprays the fuel. The difference between carburetor and electrical fuel injection is that the three mechanisms are independent which will lead to more precise fuel control and supply. EFi engine uses computer-programmed fuel injection, the main features are: 1﹒ The quantity of fuel injected is determined according to the condition of the engine. The engine RPM and throttle position determines the fuel quantity and injection time-length. 2﹒ The quantity of fuel injection, and the determination of injection time length, are all controlled by 16-bit microcomputer. 3﹒ The fuel pressure regulator maintains a 294±6kpa pressure difference between inlet pipe and fuel pipe, raising the accuracy of fuel injection. 4﹒ By measuring the air pressure of inlet pipe, this system gives the vehicle better accommodation to the environment. 5﹒ Idle speed control system supplies by-pass air to stabilize the idle running and cold starting. 6﹒ O2 sensor feeds back the signal to minimize the exhaust pollution.
  • 43. 3. Fuel Injection System Fuel system Fuel pump Injector Fuel pump relay ECU Power relay Battery System description 1. After Key-on, the sensors send signals to ECU. ECU controls the fuel pump relay to make the fuel pump operate. If the engine is not started, the fuel pump will be shut down within 2 to 3 seconds in order to save electricity. Fuel pressure regulator maintains fuel pressure at 294 ± 6kPa (about 3 kg / cm ²). According to the operating conditions and environmental compensation coefficient, appropriate fuel will be injected. After Key-off or engine stops operating, the fuel pump stops running. 2. Fuel filter filtrates impurities in the fuel. Replace it periodically. 3. When the engine cannot be started, do not keep starting the motor, which may reduce battery power (less than 10 V), and the fuel pump will not be able to operate. The correct way is to use a new battery. Injector Ten-hole type injector provides fuel injection, enhances the effect of fuel atomization, and reduces HC emission. Short-type injector cap can easily fix the injector, receive the fuel from the fuel pump, and limit injector rotation sliding. The signals from ECU control the fuel pressure regulator, using the diaphragm and spring to maintain the fuel pressure in 294 ± 6kPa (about 3 kg / cm ²), and determine the fuel injection quantity by adjusting injection time width under different engine conditions. Fuel pump Electrical fuel pump is placed inside the fuel tank, powered by the battery and controlled by ECU. Fuel pressure: 294 ± 6kPa (about 3 kg / cm ²) 3-4
  • 44. 3. Fuel Injection System Ignition system 3-5 Principle The computer programmed ignition system receives the signals from the crankshaft position sensor, throttle position sensor, O2 Sensor, MAP sensor, intake air temperature sensor, engine coolant temperature sensor. Calculating the engine RPM, the 16-bit microcomputer determines the appropriate ignition timing, controls the ignition coil and triggers the spark plug This way can not only make the engine achieve the maximum power output, but also help improve fuel consumption rate. Specification 1. Ignition timing: BTDC 10 ° / 1650RPM 2. Spark plug: NGK CR8E Clearance:0.7~0.8mm 3. ACG crankshaft position sensor coil resistance: 120Ω±20% (green/white-blue/yellow) 4. Ignition coil primary circuit resistance: 2.8 Ω ± 15% Secondary circuit:with cap9.0KΩ±20% without cap14.0KΩ±20% 5. Battery Type / Capacity: GT12A-BS / 12V 10Ah ACG/ Flywheel Gear (23+1 Long teeth) Crankshaft position sensor Throttle position Manifold absolute pressure Engine coolant temperature REG. REC ECU Oxygen content Battery Intake air temperature Power relay Ignition coil Sparkplug .
  • 45. 3. Fuel Injection System Sensors / drives Crankshaft position sensor (CPS) Function: CPS identifies the teeth on the flywheel and sends voltage signal to ECU. Crankshaft position sensorLong tooth ECU Flywheel Description Right after the engine is started; the crankshaft position sensor identifies the TDC position by detecting the long tooth on the flywheel and ignites at the fixed angle. When the engine RPM reaches the specified speed, the ignition timing will change to the software mode. 3-6
  • 46. 3. Fuel Injection System Manifold absolute pressure (MAP) / Engine water temperature (TW) / Intake air temperature (TA) sensor TW Sensor TA Sensor ECU Map sensor Engine water temperature / Intake air temperature sensor: Use the variable resistor of negative temperature coefficient (thermistor) to identify the outside temperature. The electrical resistance value goes down when the temperature rises. On the contrary, the electrical resistance value becomes higher when the temperature falls. Sensors provide the temperature of the engine coolant and intake air to ECU to determine the injection and ignition timing. 3-7 Manifold absolute pressure sensor: uses the piezoresistive resistor composed of silicon diaphragm, forming the Wheatstone bridge circuit to measure the atmospheric pressure and the intake manifold pressure, which are both transmitted to ECU as reference of engine control. Working voltage (5V) Output voltage Inletpressure sensor ECU 5V Outputvoltage Inlet pressure (kPa)
  • 47. 3. Fuel Injection System O2 Sensor ECU Power relay O2 Sensor Battery O2 Sensor 3-8 Function O2 Sensor measures the proportion of oxygen in the exhaust gas, sending signals to ECU which adjusts the air-fuel ratio by changing the fuel injection time. If the proportion of oxygen is too low, it means the air-fuel mixture is rich, the concentration of HC & CO in the exhaust gas will rise. If the proportion of oxygen is too high, it means the air-fuel mixture is thin, thin air-fuel mixture will result in higher combustion temperature and higher NOx concentration. 1. O2 Sensor outputs feedback signal to ECU which keeps the air-fuel mixture near the stoichometric ratio approximately 14.6 and forms the closed loop control system. 2. When the air-fuel mixture is near the stoichometic ratio, CO / HC / NOx are converted most efficiently. 3. O2 Sensor heater resistance: 6.7 ~ 10.5 Ω 4. O2 Sensor amendment in the voltage value: between 100 ~ 900 mV Outputvoltage 1. Ceramics tube 2. Electrode 3. Emissions 4. Atmosphere 3 1 2 4 Rich ← 14.7 → Lean
  • 48. 3. Fuel Injection System Throttle position sensor (TPS) ECU TPS 3-9 Battery TPS ECU 5V 6 VC TPS output voltage Basic Principle: TPS is a rotary variable electric resistor. When it is rotated, both electric resistance and voltage value will change, determining the throttle position. Function: TPS identifies the throttle valve position and sends signal to ECU as reference of engine control. 4 2 0 50 Voltage E VTA 100 150 Throttle valve opening angle
  • 49. 3. Fuel Injection System Idle speed control valve (ISC stepping motor) ISC 3-10 Function: ECU controls ISC stepping motor to adjust the bypass intake air quantity and stabilize the idle speed. S N S S N N ECU +Va -Va +Vb -Vb Step Va Vb Battery
  • 50. 3. Fuel Injection System Air injection solenoid valve (AISV) Function: AISV introduces appropriate air quantity to reduce pollutant emission. Basic principle: When the engine RPM and throttle opening are higher than the default value, ECU controls AISV opening or closure. AISV Reed valve 3-11 Fresh air Power relay Battery ECU Power relay AISV ECU
  • 51. 3. Fuel Injection System Precautions in operation General information Warning ● Gasoline is a low fire point and explosive material. Always work in a well-ventilated place and flame is strictly prohibited when working with gasoline. ● Before dismantling fuel system parts, leak fuel out first, or grip the fuel pipe by using pliers to prevent fuel from splashing. Caution ● Do not bend or twist the throttle cable. Damaged cable will lead to unstable driving. ● When disassembling fuel system parts, pay attention to O-ring position, replace with new one as re-assembly. Method of releasing fuel pressure in fuel system: After removing fuel pump relay, turn on the main switch, press start switch to start the engine till it stops to drain fuel in the fuel system. Specification Item Specifications Idle RPM 1650±100 rpm Throttle handle free play 2~6 mm Fuel pressure 294±6kpa (3.0kg/cm²) Torque value Engine temperature sensor: 0.74~0.88kgf-m O2 Sensor: 3.6~4.6kgf-m Special Tools Vacuum Gauge Fuel Pressure Gauge EFi System Diagnostic Scanner Fuel Pipe Pliers 3-12
  • 52. 3. Fuel Injection System EFi system components description ECU(Electronic Control Unit) Function Description: ● Powered by DC 8~16V, and has 36-pin socket on the unit. ● The hardware component consists of a 16-bit microcomputer that is its control center. It contains the functional circuit interface of engine condition sensing and the driving actuator for the fuel injector, fuel pump, as well as ignition coil. ● Its major software is a monitor strategy operation program that includes controlling strategy and self-diagnosis programs. Testing Procedures: 1. Connect the diagnostic scanner to the diagnostic coupler on the vehicle. 2. Key-on but do not start the engine, confirm the connection of ECU and the diagnostic scanner. 3. Diagnostic scanner will automatically display Version "certification" of the screen. 4. Confirm the application model, version is correct or not. 5. Check if the fault codes exist. 6. Remove the fault codes. 7. Start engine and check the parameters shown on the diagnostic scanner. Detection judge: ● Fault codes can be read and cleaned, and the fault codes will not appear again after re-start. Treatment of abnormal phenomena: 1. Can not connect→ First check whether the cartridge is correct and ECU is normal or not. Replace with new parts and recheck. 2. Unable to start→ ECU or relevant parts abnormal. Replace with new parts and recheck. 3. Fault codes appear→ ECU or relevant parts abnormal. Troubleshoot and recheck. 3-13
  • 53. 3. Fuel Injection System Throttle body Function description: ● Throttle body is an inlet air flow regulating device (similar to the carburetor). ● Throttle valve pivot drives the throttle position sensor synchronously and makes ECU detect the throttle opening immediately. ● Throttle valve positioning screw has been adjusted and marked on the production line. Readjustment is not suggested. ● The ISC on throttle body functions to supply air making cold starting easier; after engine warmed up, the air channel will be reduced according to engine conditions. Treatment of abnormal phenomena: ● If all fuel injection associated components identified no fault, and other traditional engine components are also normal, the engine is still not smooth, please confirm if too much carbon deposits in the throttle body. ● If there is too much carbon deposit in the throttle body, please clean throttle body, and then adjust the injection system. Throttle positioning screw 3-14
  • 54. 3. Fuel Injection System MAP sensor Function description: ● Powered by 5V DC from ECU. It has 3-pin socket on the sensor. One terminal is for power, and one terminal is for signal output. And, the rest one is for grounding. ● The major component of the intake pressure sensor is a variable transistor IC. Its reference voltage is DC 5V, and output voltage range is DC 0~5V. 3-15 ● It is a pressure-sensing sensor, and can measure the absolute pressure in intake process. It also conducts fuel injection quantity correction based on environmental position level. Testing Procedures Working voltage measurement Output voltage measurement 1. Connect inlet pressure sensor properly (using the probe tool). 2. Key-on but do not start the engine. 3. Use "voltage meter" DC stalls (DCV) to check inlet pressure sensor voltage. 4. Working voltage check: ● Voltage meter negative access to the inlet pressure sensor third pin (Green/Pink) ● Voltage meter positive access to the inlet pressure sensor first pin (Yellow / Black). 5. Confirm output voltage values: ● Voltage meter negative access to the inlet pressure sensor third pin (Green/Pink) ● Voltage meter positive access to the inlet pressure sensor second pin (Black/Red) Caution ● The probe tool should contact the inner terminals to measure the correct value. Detection judge: ● Working voltage value: 5.0±0.1V ● Output voltage values:2.87±0.03V (Conditions: Measure on level ground 101.3 kPa) Caution ● The higher the elevation, the lower voltage will be measured. ● Sea-level atmospheric pressure = 1Atm = 101.3kPa = 760mmHg = 1013mbar Treatment of abnormal phenomena: ● MAP sensor damaged, or poor contact couplers. ● Check if the wire harness abnormal. ● If MAP sensor fails, replace with a new one and recheck output voltage. ● If ECU fails, replace with a new one and recheck output voltage. Pin Wire color Function Left Y/B 5V voltage input Center B/R Signal output Right G/P Ground Y/B B/R G/P
  • 55. 3. Fuel Injection System TA sensor Function Description ● Powered by 5V DC from ECU. It has 2-pin socket on the sensor. One terminal is for voltage output, the other is for grounding. ● The major component of TA sensor is a variable resistor of negative temperature coefficient ● Installed in the air filter, the resistor in TA sensor varies with temperature variation and sends voltage signals for ECU to calculate the intake air temperature; then, ECU adjusts injection time and ignition angle. Testing Procedures: Resistance value measurement: ● Dismantled TA sensor connector. ● Use the "Ohmmeter" Ohm stalls to inspect sensor resistance. Detection judge: 3-16 Temperature( )℃ Resistance value(KΩ) -20 18.8 ± 2.4 40 1.136 ± 0.1 100 0.1553 ± 0.007 Treatment of abnormal phenomena: ● Damaged TA sensor or poor connector contact. ● Check if the wire harness abnormal. ● If TA sensor possibly failed, it is suggested to replace with a new one. Resistance value measurement
  • 56. 3. Fuel Injection System TPS Function description: ● Powered by 5V DC from ECU. It has 3-pin socket on the sensor. One terminal is for power, and one terminal is for voltage output. And, the rest one is for grounding. ● Its main component is a sophisticated variable resistor. 3-17 ● Installed on the throttle body. While throttle is rotated, TPS senses the throttle position (opening) and sends voltage signals for ECU to judge the throttle position; then, ECU optimizes fuel injection and ignition timing. Working voltage measurement Throttle output signal measurement - close Throttle output signal measurement - full Pin Wire color Function Up White/Brown Signal output Center Yellow/Black 5V voltage input Low Green/Pink Ground Y/B W/BR G/P Testing Procedures: 1. Working voltage can be measured while sensor coupler is connected (use probe tool) or removed (direct measurement). 2. Key-on but do not start the engine. 3. Use "voltage meter" DC stalls (DCV) to check voltage. 4. Working voltage check: ● Voltage meter negative access to TPS third pin.(green/pink) ● Voltage meter positive access to TPS second pin.(yellow/black) 5. Throttle output signal check: (using the probe tool) ● Voltage meter negative access to TPS third pin.(green/pink) ● Voltage meter positive access to TPS first pin.(white/brown) ● Measure the output voltages of both full-throttle and close-throttle. Caution ● The probe tool should contact the inner terminals to measure the correct value. Detection judge: ● Working voltage value:5.0±0.1V ● Close-throttle voltage value:0.6±0.02V ● Full-throttle voltage value:3.77±0.1V
  • 57. 3. Fuel Injection System Diagnostic tool can be used to check throttle output signals. 1. Connect the Diagnostic tool, key-on but do not start the engine. 2. Switch screen to “data analysis.” 3. Rotate the throttle and check the voltage. 3-18 Throttle output signal measurement -close Treatment of abnormal phenomena: ● TPS damaged or coupler poor contact. ● Check if the wire harness abnormal. ● If TPS possibly failed, it is suggested to replace with a new one and check again. Warning ● It is prohibited to remove TPS from throttle body to conduct any test. Throttle output signal measurement -full
  • 58. 3. Fuel Injection System TW sensor: Function Description: ● Powered by 5V DC from ECU. It has the two-pin socket on the sensor. One terminal is for voltage output, and the other terminal is for ground. ● The major component of TA sensor is a variable resistor of negative temperature coefficient 3-19 ● Installed on the cylinder head, the resistor in TW sensor varies with temperature variation and sends voltage signals for ECU to calculate the intake air temperature; then, ECU adjusts injection time and ignition angle. Testing Procedures: Resistance value measurement: ● Remove the TW sensor from the vehicle. ● Use the "Ohmmeter" Ohm stalls to inspect sensor resistance. Detection judge: Resistance value measurement Temperature ( )℃ Resistance value (KΩ) -20 18.8 ± 2.4 40 1.136 ± 0.1 100 0.1553 ± 0.007 Treatment of abnormal phenomena: ● Damaged TW sensor or poor connector contact. ● Check if the wire harness abnormal. ● If TA sensor possibly failed, it is suggested to replace with a new one.
  • 59. 3. Fuel Injection System O2 Sensor Function Description: ● Powered by 8-16V DC from ECU. It has the four-pin socket on the sensor. One terminal is for heating power output, one for heating control, one for signal grounding, and one for signal. ● O2 sensor sends signal to ECU, and ECU control air / fuel ratio around 14.5 – 14.7 to form a close loop. ● When the air-fuel mixture is near the stoichometic ratio, CO / HC / NOx are converted most efficiently. Testing Procedures: 1. Working voltage check ● Remove O2 sensor coupler from the wire harness. ● Key-on but do not start the engine. ● Use "voltage meter" DC stalls (DCV) to check the power supply of wire harness to the heating circuit of the O2 sensor. ● Working voltage check Voltage meter negative access to the second pin of wire harness coupler. (pink/white) Voltage meter positive access to the first pin of wire harness. (red/yellow) 2. Resistance value check ● Remove O2 sensor coupler from the wire harness. ● Use the "Ohmmeter" Ohm stalls to inspect the heater sensor resistance. ● Resistance value check Ohmmeter negative access to the second pin of O2 sensor. (white) Ohmmeter positive access to the first pin of O2 sensor. (white) Working voltage check 3-20 G/P P/B P/W R/Y B GR W W Resistance value check
  • 60. 3. Fuel Injection System 3. Use of diagnosis tool to check O2 sensor work situations ● Connect the Diagnostic tool, key-on and start the engine. ● Completely warm up the engine. (idle running for more than "5 minutes") voltage changing condition. ● Switch screen to "DATA STREAM 01/01", select "O2 Sensor" project, turn the throttle to achieve 4500 rpm. Observe O2 Sensor acting. ● Observe O2 Sensor voltage changing condition. Detection judge: ● Working voltage: above 10V ● Resistance value: 6.7~10.5Ω ● That Observe O2 Sensor voltage between 100 ~ 900 mV means pollution close loop control system is normal. However, it is abnormal, if the value is a fixed one. Treatment of abnormal phenomena: ● Damaged O2 Sensor, damaged heater, or coupler poor contact. ● Check if the wire harness abnormal. ● If O2 Sensor possibly failed, it is suggested to replace with a new one and check again. 3-21
  • 61. 3. Fuel Injection System Rollover sensor Function descriptionNormal ● Rollover sensor controls power of the power relay coil and has three-pin socket. ● When the vehicle tilt angle is greater than 65 degrees, rollover sensor will be the implementation of ECU system power-off. At this time, to restart the engine, the main switch has to be turn on again. ● It is a safety device, when the vehicle rolls over, it will cut off power supply to ECU. Rollover Testing procedures: ● Rollover sensor is an electronic control mechanism. It is unable to test while the sensor removed from the vehicle. ● In normal situation, key on, measure the voltage of white/brown and green/pink (ground) wire of ECU, then the condition of the rollover sensor can be judged. Detection judge: Voltage: Normal: 0.4~1.4V Rollover: 3.7~4.4V Treatment of abnormal phenomena: Vehicle state vertical, no power supply to power relay or ECU. ● Rollover sensor internal short circuit or open circuit, or coupler poor contact. ● Check if the wire harness abnormal. ● If Rollover Sensor possibly failed, it is suggested to replace with a new one. 3-22
  • 62. 3. Fuel Injection System ISC(stepping motor): Function description: 3-23 ● Powered by 8-16V DC from ECU. ISC has a four-pin socket. ● The 4-pin socket is composed of power supply and grounding circuits of two motors, ECU controls the acting of stepping motor by controlling the power supply and grounding circuit. ● Low-power-consuming DC motor drives the ISC. And the movement of ISC controls the opening of idle speed air channel, thus the idle speed of cold or warmed engine can be adjusted. Testing Procedures Resistance value check: ● Remove ISC coupler from throttle body. (It is okay to test while ISC installed on throttle body.) ● Use the "Ohmmeter" Ohm stalls to inspect the resistance of the two motor circuits. A phase: ISCAP and ISCAN B phase: ISCBP and ISCBN ISCAP ISCBP ISC pins Resistance value measurement of A phase Resistance value measurement of B phase Movement test (This test can only be conducted while ISC installed on throttle body.) ● Key-off. ● Touch ISC with hand. ● Key-on. ISCBN ISCAN ● Feel if the ISC moves. Caution ● The movement test can only be conducted while ISC installed on throttle body. Detection judge: 1. Resistance value: A phase: 80 ± 10Ω (Environmental conditions: 15 ~ 25 )℃ B phase: 80 ± 10Ω (Environmental conditions: 15 ~ 25 ℃) 2. Movement test Test in accordance with the test procedure illustrated above, ISC will vibrate slightly or sounds continuous “da…da…” Treatment of abnormal phenomena: ● Damaged ISC, or coupler poor contact. ● Check if the wire harness abnormal. ● If ISC is abnormal, it is suggested to replace with a new one and recheck its movement.
  • 63. 3. Fuel Injection System Fuel pump Fuel pump working voltage measurement Fuel pump resistance measurement Function Description: ● Powered by 8-16V DC from ECU. Fuel pump has a four-pin socket. ● The two pins are power supply and grounding. ECU controls the movement of fuel pump by controlling the power. ● Low-power-consuming DC motor (12V) drives the vane pump to keeps the pressure around 294±6kpa(3kg/cm2 )in the fuel supply system. ● Fuel pump is placed inside the fuel tank. A fuel filter is installed on the inlet front to prevent foreign material entering and damaging the fuel pump and injector. Testing Procedures 1 Fuel pump working voltage check: ● Connect fuel pump coupler (use probe tools), or remove it to measure working voltage. (direct test) ● Key-on but do not start the engine. ● Use "voltage meter" DC stalls (DCV) to check fuel pump voltage. ● Working voltage check Voltage meter negative access to the second pin of fuel pump. (green) Voltage meter positive access to the first pin of fuel pump. (black/orange) Caution ● While measuring fuel pump working voltage, if the engine is not started, ECU will cut off power supply to fuel pump within 3 seconds. Detection judge 1 1. Working voltage: above 10V 2. Resistance:1.5±0.5Ω 3. Fuel pressure:294±6kPa (3kg/cm2 ) Testing Procedures 2 Fuel unit resistance check ● Remove fuel unit coupler. ● Use the "Ohmmeter" Ohm stalls to inspect the resistance of the fuel unit. (yellow/white & green) 3-24
  • 64. 3. Fuel Injection System Testing Procedures 3 Fuel pressure measurement ● Connect fuel gauge between fuel tank and injector. Caution ● To measure fuel pressure, fuel hoses, injector side or fuel pump side, will be removed. After the measurement, please check if any fuel leaks. Fuel system pressure measurement Detection judge 2 1. fuel pressure: 294±6kPa (3kg/cm2 ) Treatment of abnormal phenomena: 1. Fuel pump internal circuit damaged, or coupler poor contact. 2. Clogged filter. Pressure measurement-injector side 3. If fuel pump is abnormal, it is suggested to replace with a new one. 4. If fuel gauge is abnormal, it is suggested to replace with a new one. Pressure measurement -fuel pump side 3-25
  • 65. 3. Fuel Injection System Fuel injector Function Description: ● Powered by 8-16V DC from ECU. Fuel pump has a two-pin socket. ● Its major component is a high resistance voltage driven solenoid valve. ● The two pins are power supply and grounding. Fuel injector is controlled by ECU to decide the injection timing, and the injector pulse width. Testing Procedures: 1. Resistance test Use the "Ohmmeter" Ohm stalls to inspect the injector resistance. 2. Injector injection state check Remove injector fix bolts, but do not disconnect the coupler. Hold injector and injector cap with hand, no leak should happen. Key-on and start the engine; inspect the injecting state. Detection judge:Injector resistance measurement 1. Resistance between the two pins: 10.5±0.53Ω 2. Injection state ● Good fuel atomizing, with a clear scattering angle → judged as normal. ● Injection-state resembles water drop, no obvious scattering angle → judged as abnormal. Treatment of abnormal phenomena: 1. Resistance NG→ abnormal injector, it is recommended to replace with a new one. good injection 2. Abnormal injection state, reasons: ● Clogged injector→ abnormal injector, it is recommended to replace with a new one. ● Insufficient fuel pressure→ check fuel pressure, it is recommended to replace with a new one and recheck. Warning ● Fuel is highly flammable and explosive. Work in a well-ventilated place, no flame or spark allowed. ● Properly store the fuel injected by injector while conducting test. abnormal injection 3-26
  • 66. 3. Fuel Injection System Transistor ignition coil Function Description: ● Powered by 8-16V DC from ECU. Fuel pump has a two-pin socket. ● The two pins are power supply and grounding. Its major component is a high conversion ratio transformer. 3-27 ● The computer programmed ignition system receives the signals from the Crankshaft position sensor, Throttle position sensor, O2 Sensor, MAP sensor, Intake air temperature sensor, Engine coolant temperature sensor. Calculating the engine RPM, the 16-bit microcomputer determines the appropriate ignition timing, controls the ignition coil and triggers the spark plug This way can not only make the engine achieve the maximum power output, but also help improve fuel consumption rate. Testing Procedures Resistance measurement: ● Remove primary circuit coupler from ignition coil.(red/yellow & black/yellow) ● Use the "Ohmmeter" Ohm stalls to inspect the ignition coil resistance. Primary circuit resistance measurement Detection judge: ● Ignition coil primary circuit: 2.8Ω±15% ● Ignition coil secondary circuit: without cap9.0KΩ±20% with cap14.0KΩ± 20% Treatment of abnormal phenomena: 1. Ignition coil internal short circuit or open circuit, or coupler poor contact. 2. If ignition coil is abnormal or dose not ignite, it is recommended to replace with a new one. Crankshaft position / RPM sensor Function Description ● It does not need power supply, and has a two-pin plug. Resistance measurement ● Its major component is a reluctance induction coil. Long tooth ● The spacing of flywheel and sensor should be 0.7 to 1.1 mm. ● Magnetic induction sensor is the use of flywheel on the Gear (23 +1 long tooth) rotary cutting induction coil changes in the magnetic field sensor with the inductive voltage signal for ECU judgment, calculated at the engine speed and crankshaft position, and with a most appropriate time of fuel injection and ignition control. Testing Procedures Resistance measurement: ● Remove CPS coupler. (blue/yellow & green/white) ● Use the "Ohmmeter" Ohm stalls to inspect the CPS resistance. Detection judge ● Resistance: 120Ω±20% Treatment of abnormal phenomena 1. CPS internal circuit damaged, or coupler poor contact. 2. Check if the wire harness abnormal. 3. If CPS is abnormal, it is suggested to replace with a new one.
  • 67. 3. Fuel Injection System AISV 3-28 AISV working voltage measurement Resistance measurement Function Description: ● AISV has two-pin socket, one is for power supply and the other is for grounding. ● AISV acts while RPM under 3500. ● While idling, ECU controls AISV movements by controlling its solenoid valve grounding circuit. Testing Procedures Resistance measurement: ● Use the "Ohmmeter" Ohm stalls to inspect the AISV resistance. Detection judge Resistance: 22 ± 2Ω (20~30℃) Treatment of abnormal phenomena ● AISV internal short circuit or open circuit, or coupler poor contact. ● Check if the wire harness abnormal. ● If CPS is abnormal, it is suggested to replace with a new one.
  • 68. 3. Fuel Injection System EFi system circuit 3-29 B G G Test switch Engine-off relay GR L/G W/B O/G B G/L AISV TW sensor MAP sensorISC IG. coil TA sensorO2sensorTPS Rollover sensorCPSACG Reg/Rec Battery Main switch R B G EFi system check lightY/G Y RY P Y G/W L/Y W/G Diagnostic tool coupler R B/Y L/O Silicon controlled rectifierEngine-off relay Fan Fuel pumpInjector Side stand indicator Neutral gear indicator Y/B G/BR B/R R/Y W/BR G/P LG/R Side stand relay L/O Sidestand switch B/G PU/R G G R/GR Silicon controlled rectifier G/R P/B Clutch switchW W P/W B/L L/B BR/B Fan relay PUG/B B/O O/L Fuel pump relay B/Y Water temp. injector
  • 69. 3. Fuel Injection System ECU pin configuration (on ECU) ECU Pin Note Pin NO. Wire color Pin code Note Pin NO. Wire color Pin code Note 01 R/Y IGP Drive components Power + 19 R BAT ECU power + 02 B/W ROLL Rollover sensor signal input 20 P TEST Test switch signal (A/D) 03 L/Y CRK-P Crankshaft pos. Sensor+ 21 Y/G MIL Warning Lights O/P 04 LG/R NLSW Neutral gear switch signal 22 R/GR TW Eng. Water Temp. Sensor (A/D) 05 W/BR TH Throttle position [A/D] 23 - - No use 06 B/R PM Manifold Press. SNSR I/P [A/D] 24 G/P SG Sensor ground 07 P/B HEGO A/D O2 Sensor [A/D] 25 G/BR TA Intake air temperature sensor (A/D) 08 G LG ECU ground 26 No use 09 G/W CRK-M Crankshaft pos. Sensor- 27 PU FANR Cooling fan drive 10 W/G K-LINE Sequence transmission signal output / input 28 G/L TWL Water temp. drive 11 O/G FLPR Fuel pump relay O/P 29 - - No use 12 O/L SOL AISV O/P 30 - - No use 13 Y/B VCC Sensor power + (DC 5V) 31 BR/B ISCAN Step motor A phase power - 14 G/B ISCBP Step motor A phase power + 32 B/W ISCBN Step motor B phase power - 15 L/B ISCAP Step motor B phase power + 33 No use 16 L/G INJ Fuel injector O/P 34 G/R CLSW Clutch switch signal 17 P/W HEGO HT O2 Sensor heater ground 35 G PG1 Drive components ground 18 B/Y IG Ignition coil O/P 36 G PG Drive components ground 3-30
  • 70. 3. Fuel Injection System Troubleshooting EFi Circuit inspection Main switch on 3-31 NG 1. Bulbs blown? 2. Fuse blown? 3. Battery voltage too low? 4. ECU Power line bad contact? 5. Poor contact the main power switch? Warning lights extinguish after 2 seconds? OK 6. ECU fault? NG 1. Charging line anomaly? Battery voltage above 12.5V? 2. Battery unable to store electricity? 3. Short-circuit leakage?OK Battery voltage & ECU voltage difference less than 0.2 V? 1. Main switch OFF 2. Remove ECU coupler NG 3. Main switch ON 1. Lines anomaly? 4. Use voltage meter to measure the power-pin voltage difference OK5. Confirmed ECU and battery supply voltage difference within 0.2 V Battery voltage & actuator voltage difference less than 0.2 V? NG1. Main switch OFF 1. Lines anomaly?2. Remove injector, fuel pump, O2 sensor, rollover sensor, ig. coil couplers OK OK NG 3. Use voltage meter to measure the voltage difference 4. Confirmed difference within 0.2 V ECU 5V voltage - sensor voltage difference less than 0.1 V? 1. Main switch OFF 2. Use probe to insert TPS, engine temperature sensor, MAP sensor couplers 3. Main switch ON 4. Use voltage meter to measure the sensor voltage 1. Lines anomaly? 2. ECU anomaly? OK 5. Voltage standard value: 5.0±0.1V Battery voltage - fuel pump voltage difference less than 0.2 V? 1. Main switch OFF NG 1. Lines anomaly? 2. Removed fuel pump power coupler 3. Probe connects to two-pin connector of fuel pump 2. Relay fault? 3. ECU anomaly? 4. Main switch ON 5. Record voltage values in three seconds 6. Confirm voltage difference within 0.2 V End
  • 71. 3. Fuel Injection System Difficult or unable to start engine 3-32 OK NG Difficult or unable to start engine Warning lights extinguish after 2 seconds? Warning lights displays Fault Code? Fuel system anomaly? Circuit anomaly? Engine anomaly? 1. Inspection process in accordance with circuit inspection OK NG 1. Use diagnostic tool to view EMS fault content 2. Troubleshoot in accordance with procedures on troubleshooting NG OK 1. Fuel tank inadequate? 2. Fuel injector pressure less than 294 ± 6kpr? 3. Fuel system leaks? 4. Pressure Regulator anomaly? 5. Fuel pump hose leakage? 6. Fuel pump anomaly? 7. Fuel injector anomaly? 1. Spark plug sparks? 2. Wet spark plug? 3. Spark plug cap loose? 4. Crankshaft position sensor Short Circuit 5. The high-voltage power wire loose? 6. ECU anomaly? 7. O2 sensor connector corrosion, short circuit? 1. Without valve clearance? 2. Incorrect valve timing? 3. Valve seized? 4. Cylinder and piston ring worn? 5. Improper adjustment of air adjusting screw on throttle body? END NG OK NG OK
  • 72. 3. Fuel Injection System Idle flameout diagnosis 3-33 Idle Air Control Valve Actuation whether or failure? If idle flameout cannot be solved after checking the EFi related mechanisms, it is recommended to check traditional engine mechanisms. Idle flameout Throttle line is jammed and unable to revert to full closure? 1. Link diagnostic tool to view EFI fault content 2. Troubleshoot in accordance with Troubleshooting procedures Idle CO value beyond set range (1.5% ~ 2.5%)? Enough Gasoline? Throttle body whether coke seriously?Battery wires loose?
  • 73. 3. Fuel Injection System CO value revised anomaly In principle, system equipped with O2 Sensor, the CO value needs no adjustment. If CO value deviates from normal range, please check if O2 Sensor or other mechanisms is abnormal. 3-34 Link diagnostic tool to view if Idle CO value is abnormal Enough gasoline? Battery wires loose? Enough battery voltage? Connect with the diagnostic tool, enter data steam screen. If idle flameout cannot be solved after checking the EFi related mechanisms, it is recommended to check traditional engine mechanisms. Throttle line is jammed and unable to revert to full closure? Idle flameout Start engine and warm to 70 º C ~ 95 º C, check if engine speed, idle control valve and fuel injection timing, O2 sensor is abnormal? Idle CO value beyond the set range (1.5% ~ 2.5%)? Idle running for 3 ~ 5 minutes, confirm the engine is running normally then shut off engine, eliminate fault codes
  • 74. 3. Fuel Injection System Intergrated troubleshooting procedure 3-35 Checking, adjusting item ● Use meter to measure battery voltage Fault reasonsFault status determination ● Use diagnostic tool to detect battery voltage Parts specifications Battery voltage Detection items and procedures ● Battery electricity ● Battery connector loose ● Harness circuit opening ● ECU coupler disconnect t d l ● Is battery voltage above 10 V? ● Is diagnostic tool showing voltage above 10 V? ● Diagnostic tool should show voltage above 10 V. NO YES ● Is fault code shown on diagnostic tool? ● Fault Code is show again after fault code elimination? ● TPS fault ● ETS fault ● CPS fault ● MAP fault ● O2 sensor fault ● ROS fault ● ECU fault YES ● Use diagnostic tool to detect existing fault code ● Eliminating fault codes, and restart engine Fault code inspection with diagnostic tool Please refer to service manual for detection method and specification of each sensor. NO ● Does injector inject? ● Is injecting angle normal? ● Fuel pressure enough? ● Removed injector from intake manifold, but do not remove the hose. (Injector and injector cap tightly by hands, fuel spills should not be the case) ● Start the engine ● Examine whether injector injects ● Connect pressure gauge between the tank and injector Fuel quantity and fuel pressure ● Insufficient fuel in fuel tank ● Fuel pressure specifications: Key-on three seconds but no start engine →more than 250 kPa Idle speed→ 294±6kPa ● Injector fault ● Fuel pump relay fault ● Fuel pump fault ● p filter clogged ● ECU fault Fuel pum ● Injector resistance: 11.7±0.6Ω NO ● Check fuel pressure YES ● Remove the spark plug from the cylinder head with ignition coil connected ● Start the engine ● Check spark plug sparks Ignition situation ● Check if spark plug ignites? ● Check if sparks of spark plug strength is normal? ● Spark plug fault ● Rollover sensor fault ● ECU fault ● Ignition coil fault ● Crankshaft position sensor fault ● Spark plug specifications: NGK-CR8ENO next page YES
  • 75. 3. Fuel Injection System 3-36 Continued from previous page ●Observe O2 sensor voltage changes (Stand motorcycle and keep RPM abound 4500 to 5500 YES ● Whether O2 sensor voltage is maintained within a certain range in a long time Close-loop systems mobility ● O2 sensor fault ● ECU fault ● O2 sensor voltage specifications: 100 ~ 900 mV NO ● Use diagnostic tool to detect the manifold pressure Engine vacuum Is the value shown on diagnostic tool within set value? ● Valve clearance abnormal ● Intake system leak ● Manifold pressure Specification: 32~38 kPa NG Normal starting YES YES Can not starting or starting difficulties Finish In traditional engine overhaul way to maintenance
  • 76. 3. Fuel Injection System Fuel tank 3-37 Removal Remove the rear seat. Remove the front seat (bolt x2). Release the fuel pipe band, fuel pump coupler, EEC tube. Bolt ×2 Caution ● Make sure the fuel is not too much in the fuel tank. Pump out the fuel if necessary. Fuel pipe Fuel pump coupler Remove the fuel tank rear bolt. Bolt ×1 Remove the fuel tank. Caution ● If the fuel tank is damaged or leaking, replace with new one. Installation Install in the reverse order of removal.
  • 77. 3. Fuel Injection System 3-38 Fuel pump Removal Remove right and left turning signals and seat. Drain fuel from fuel tank. Remove EEC system and fuel hoses. Remove power wire of fuel pump and fuel unit. Remove fuel tank. Remove fuel pump. (boltX8) 。 Fuel pump removal Remove fuel pump power wire. Loosen the clamp. Remove fuel hose by using fuel hose removal pliers. Tool number: SYM-1768110 bolt×8 Power Clamp Screw× Remove the fuel pump. Caution ● Check if the gasket worn or damaged. Replace with new one if it is abnormal. Check if the rubber hose fastened well. Check if fuel filter contaminated or clogged. Replace with new one if it is too dirty. Fuel hose removal pliers
  • 78. 3. Fuel Injection System Fuel unitFuel Unit 3-39 Remove fuel unit screw. (screw×4) Remove fuel unit. Installation Install in the reverse order of removal. Caution ● Do not bend the fuel unit float arm. ● Do not fill out too much fuel in the tank. ● Apply glue to the screw before installation. ● Replace the washer with new one. Air cleaner Remove the rear and front seat. Remove the air cleaner cover (bolt x4). Remove the air cleaner element. Caution ● The air cleaner is paper-base; please blow it clean with compressed air. Don’t use water or other solvent ● Replace it with new one if the dirt cannot be removed. Installation Install in the reverse order of removal. bolt×4 power wire screw×4 Element
  • 79. 3. Fuel Injection System EFi system diagnosis methods When wrong signal occurs in motorcycle injection system, causing engine abnormal function or unable starting, the check light at the meter will be lighting to inform drivers to carry out maintenance. While overhauling, diagnostic tool or meter flashing lighting identification can be applied to carry out fault detection. After troubleshooting maintenance, the check light will be off, but ECU will record the fault code. Thus, fault code should be eliminated. There are two methods of fault elimination, one is using diagnostic tool and the other is manual elimination. Using diagnostic tool Connect diagnostic tool and the test switch and check in accordance with diagnostic tool using method. When EFi system or EFi parts malfunction is detected, replace or correct parts according to information shown on the screen. After maintenance, fault code should be eliminated, or the fault will exist in ECU. Manual inspection Use jumping wire (wire or paper clips, etc.) to ground test switch, check light on the meter will be flashing, meaning that the injection system or parts is abnormal. When no diagnostic tool is available, the long and short flashings can be used to tell the fault cause. Test switch coupler Diagnostic tool coupler Diagnostic tool coupler and test switch coupler 3-40
  • 80. 3. Fuel Injection System Check light fault codes differentiation Check light flashing mode When there is no diagnostic tool for fault detection, wire jump the test switch and identify the ault by check light flashing and then correct the fault.f 3-41 Fault Code manual elimination procedure: Fault code can be eliminated manually without using diagnostic tool, procedures as following: 1. Main switch OFF 2. Wire jump the test switch. 3. Full throttle and do not release. 4. Main switch ON 5. Continue step 3 and 4 for five seconds, five seconds later the check light will flash twice quickly. Then the fault code will be eliminated. 6. Remove the jumping wire. 1 0.5 1 0.51 Unit: second 1 1 3 1 6 Fault code 22 Fault code 12 Continuous repeated Nowire-jump Testswitch Wire-jump No wire-jump full Throttle closeclose At least 5 seconds ON Main switch OFF OFF Lighting Lighting Check light flashes twice Notlit Check light Notlit
  • 81. 3. Fuel Injection System 3-42 Fault codes and sensors table No. Fault d Fault Description Parts Inspection 1 0120 Throttle position sensor fault TP Sensor and wire 2 0105 Manifold absolute pressure sensor fault MAP sensor and wire 3 0115 Engine temperature sensor fault (water) TW Sensor and wire 4 0110 Intake air temperature sensor fault TA Sensor and wire 5 1630 Roll over sensor fault Roll over sensor and wire 6 0130 O2 sensor fault O2 Sensor and wire 7 0201 INJ #1 fault Injector and wire 8 0351 IG #1 fault Ignition coil and wire 9 0230 Fuel pump fault Fuel pump and wire 10 0135 O2 sensor heater fault O2 Sensor and wire 11 1505 ISC Idle speed control motor fault ISC stepping motor and wire 12 1410 Exhaust 2nd air control solenoid valve fault AISV and wire 13 0335 Crankshaft position sensor fault Crankshaft position sensor and ire 14 1205 MAP wire fault MAP sensor and wire 15 0603 EEPROM fault EEPROM 16 0480 Fan relay fault Fan relay and wire
  • 82. 3. Fuel Injection System 3-43 Fault code and check light flashing lighting identification table No. Fault codes Fault Description Check light Check light flashing state Parts Inspection Throttle position sensor fault Lighting long 0,short 6 Throttle position sensor and wire 1 0120 Fault detection procedures Please refer to the "EFI System components description" throttle position sensor (TPS) chapter Manifold Absolute Pressure sensor fault lighting long 0,short 9 MAP sensor and wire 2 0105 Fault detection procedures Please refer to the "EFI System components description" manifold Absolute Pressure sensor (MAP) chapter Engine temperature sensor fault (water) lighting long 1,short 2 Engine temperature sensor and wire 3 0115 Fault detection procedures Please refer to the "EFI System components description" engine temperature sensor (WPS) chapter. Intake temperature sensor fault lighting long 1,short 3 Intake temperature sensor and wire 4 0110 Fault detection procedures Please refer to the "EFI System components description" intake temperature sensor (TAS) chapter. Roll over sensor fault lighting long 1,short 5 Roll over sensor and wire 5 1630 Fault detection procedures Please refer to the "EFI System components description" Roll over sensor chapter. O2 sensor fault lighting long 1,short 7 O2 Sensor and wire 6 0130 Fault detection procedures Please refer to the "EFI System components description" O2 sensor chapter. INJ #1 fault lighting long 3,short 3 Injector and wire 7 0201 Fault detection procedures Please refer to the "EFI System components description" fuel injector chapter. IG #1 fault lighting long 3,short 7 Ignition coil and wire 8 0351 Fault detection procedures to adhere to the traditional way Fuel pump fault lighting long 4,short 1 Fuel pump and wire 9 0230 Fault detection procedures Please refer to the "EFI System components description" fuel pump chapter. O2 sensor heater fault lighting long 4,short 5 O2 Sensor and wire 10 0135 Fault detection procedures Please refer to the "EFI System components description" O2 Sensor chapter. ISC motor fault lighting long 4,short 9 Step motor and wire 11 1505 Fault detection procedures Please refer to the "EFI System components description" idle speed control valve (ISC) chapter. Exhaust 2 nd air solenoid valve fault lighting long 5,short 4 2 nd air control valve and wire 12 1410 Fault detection procedures Please refer to the "EFI System components description" 2 nd air solenoid valve chapter. Crankshaft position sensor fault lighting long 6,short 6 Crankshaft position sensor and wire 13 0335 Fault detection procedures Please refer to the "EFI System components description" Crankshaft position sensor chapter. MAP sensor wire fault lighting long 6,short 8 MAP sensor wire 14 1205 Fault detection procedures Please refer to the "EFI System components description" MAP sensor chapter. EEPROM fault Not lit long –,short – EEPROM 15 0603 This fault Please direct replacement ECU Cooling fan relay fault lighting long 4,short 3 Cooling fan relay and wire 16 0480 Fault detection procedures Please refer to the "EFI System components description" cooling fan relay chapter.
  • 83. 3. Fuel Injection System 3-44 Troubleshooting table Comprehensive testing program PartsTest items Abnormal phenomena Power voltage Fuel press. Ignition state Engine vacuum Injection state closed- loop control system Fault Code Detection ECU Throttle position sensor Engine temp. sensor Can’t start        Start state Difficult to start       Without idle       Idle not smooth     ˇ RPM NG   Idle state CO NG      Not smooth         Acceler- ation Inability and slow         Idle flameout   Flameo- ut Acceleratio n flameout   Related parts Roll over sensor Fuel pump Ignition coil Inlet pipe Injector O2 sensor Power relay Fuel pressure adjustment valve Spark plug Cylinder head Fuel pump Secondary air injection solenoid valve Main switch Fuel pump relay MAP sensor Fuel pressure adjustment valve Battery Fuel filter Note: 1. Integrated test motorcycle, according to the "Comprehensive Maintenance list" implementation. 2. Spare parts, according to the "EFI System components description" implementation.