SlideShare une entreprise Scribd logo
1  sur  51
Télécharger pour lire hors ligne
Instruction Manual for Attendance Management System


                                Table of Contents
Chapter One Function Characteristics of system ……………………… …………………… ………3

Chapter Two Installation Requirem ents of System ……………………………………………………4

Chapter Three Software Installation and Database Connection…………………………………………5

   3.1      Single        Installation………………………………………………………5

   3.2      Network        Installation………………………………………………………8

   3.3      Database        Connection……………………………………………………16

Chapter Four Specific Operation Instructions of Software………………………………………………18

    4 .1 Pr oc e du re Di ag r a m fo r I ni ti al Use …… … …… … …… … …… … … …… …… 1 8

    4 . 2    L o g i n    O n … … … … … … … … … … … … … … … … … … … … … … … … 1 8

    4.4     Personnel Information…………………………………………………………20

    4.4.1【Company               Information】…………………………………………………20

    4.4.2【Department              Information】…………………………………………………21

    4.4.3【Staff            Information】…………………………………………………22

    4.4.4【Register             Sta ff   Demission】……………………………………………27

    4 . 4 . 5 【 St a ff   Demission          Inquiry】……………………………………………28

    4.5 Attendance M anagement …………………………………………………………29

       4.5.1【Attendance                 Rules】…………………………………………………30

       4.5.2【Attendance                 Rules】…………………………………………………31

       4.5.3【Shift            Definition】…………………………………………………33

         4 .5. 4【 Sh i ft       Patt er n】 …… … …… …… …… … …… ……… … …… … 3 6

         4.5.5【Shift           Allotment】…………………………………………………37

         4.5.6【Shift           Allotment】…………………………………………………38

         4.5.8【Holiday          Registration】…………………………………………………39

         4.5.9【Leave          Registration】…………………………………………………40

         4.5. 10【Overwork R egist rat ion】………………………………………………41

         4 . 5 . 11 【 C o mp u t a t i o n   Rule】………………………………………………43

  4 . 6 Te r m i n a l    Management…………………………………………………………44

    4.7      Statistic        Repo rt … ……… …… ……… …… ……… … ……… ……… 53

    4.8     System        Maintenance…………………………………………………………54


                                        Page 1 Total 51 Pages
Instruction Manual for Attendance Management System


Chapter One Function Characteristics of System
     The Attendance Management System is user-oriented. It is a
universal attendance management system developed for factories
and companies for their computer management of attendance. The
system interface is clear and friendly; it is reliable and easy to operate,
and provides help for machine connection. You can conduct quick and
easy inquiry, sum-up and computation on the system. The supervisor
can set the jurisdiction for the operators, and the operators can set
their own password, in doing so, it will effectively prevent from illegal
use or exceeding authority to use the system. The system has strict
fault-tolerant system, which will avoid false operation and illegal input
of data. The backup function of the system ensures that the data will
not lose and it will restore running quickly in case the system appears
breakdown.
     The Attendance Management System has five functional
modules,       including         “Personnel    Information”,   “Attendance
Management”,        “Statistic    Report”,    “System   Maintenance”   and
“Attendance Device”.


                             Page 2 Total 51 Pages
Instruction Manual for Attendance Management System


  Chapter Two Installation Requirements of the

                                   System
1. Requirements for Hardware:
    1)    CPU: above 1GMHz
    2)    Memory: Above 128MB
    3)    Hard Disk: Above 2GB hard disk space
    4)    Communication Port (COM Port):1
      (An extension wire is needed to connect with USB and COM
port, if it is USB interface)
2. Running Environment
         Database: ACCESS
         Operating System: WIN98/2000/ME/XP/NT/2003


  Chapter Three Installation and Uninstall of the

                                  Software
3.1 Install the Management Software
  1. Double click the installation program in the installation disk to
install the system, as shown in the following figure:


                            Page 3 Total 51 Pages
Instruction Manual for Attendance Management System


  2. Click “Next” to install the program, or click “Cancel” to end the
installation.


                             Page 4 Total 51 Pages
Instruction Manual for Attendance Management System


  3. Select the address where the program is to be installed. The
software is to be installed in F:/Program Files/Stand-alone Fingerprint
Attendance System in default. You can change the installation route
by clicking “Next”. Click “Next”.


                           Page 5 Total 51 Pages
Instruction Manual for Attendance Management System


   4. Choose or manually input the icon folder of the fingerprint
attendance system. The default is: “Attendance Management System”.
You may directly modify it, and click “Next” to start to install the
software when you have confirmed it. The system will automatically
install the software under the route you have set, and establish a
shortcut icon both in Start Menu and Desktop.

   Chapter Four Introduction to the Operation

Procedure of the Software
     If the machine is a fingerprint attendance machine, you can firstly
register the fingerprint of the staff and record the “Fingerprint No” of
each staff, and then start to operate the software.
     If the machine bought by the user is sensor card attendance
machine, you can input the card number held by the staff in the Staff
Information of the software (or read in the card number with the “Card


                             Page 6 Total 51 Pages
Instruction Manual for Attendance Management System

Read-in” function), then transfer the information to the attendance
machine.

4.1 Functional Modules
    This software includes altogether five functional modules:
【Personnel Information】,【Attendance Management】,【Statistic
Report】【System Maintenance】 and
       ,                       【Communication Programme】
    1.In【Personnel Information】, you can input and edit company
information, department information and staff information, deal with
the resignation of staff, and edit the staff information such as work
type, degree, nationality and birthplace, etc.
    2. 【Attendance Management】includes the setting of attendance
rules, shift, shift status review, as well as record of holidays, leaves
and overtime.
    3. 【Statistic Report】includes the review, export and print of
original record sheet, attendance record, daily report and monthly
report.
    4.You can add, modify and delete the administrator in【System
Maintenance】, and set, modify the jurisdiction of administration and
remove the outdated data.
       【Communication Programme】 can set the parameters for
    5.In                        you
the attendance machine, register the staff information (upload the
registration information to the attendance machine), download the
staff information (download the registration information from the
attendance machine to the software), review and set the parameters
of the attendance machine, as well as collect the attendance data.


                          Page 7 Total 51 Pages
Instruction Manual for Attendance Management System


      4.2 Operating Procedures of the Software
 Login System                    Change Password               Personnel Info Setting                       Device Setting


 Register Staff                  Shift Definition               Set Shift Pattern                 Start Shift Allotment


Review General shift                 Collect Attendance Data               Review Original Data                      Data Analysis

  Allotment Table


          Review Original Data


      4.3 Operating Procedures for the Initial Use of the
      Software
                  If the machine is a fingerprint attendance machine, you can firstly
      register the fingerprint of the staff and record the “Fingerprint No” of
      each staff, and then start to operate the software.
      1.Set Administrator
                  The user is recommended to modify the password when they log
      on the software for the first time (the user name for the first log-on is
      the administrator account: admin; password: blank). If several
      operators are to use the system, you should establish account for
      each operator, and allot appropriate jurisdiction for each operator
      based on their work.
      2.Establish Personnel Archive
                  A. Set company information: Note that Company Name is the
      general department of the whole system;
                  B. Department Information: Department is the classification of
      staff. You are recommended to set subsidiary departments based on
      the different work within the same department.
                  C. Staff Information: Generally the attendance system is used to
      manage the attendance of the staff. Therefore, the staff information is
                                                     Page 8 Total 51 Pages
Instruction Manual for Attendance Management System

the basis of the attendance system. In the above sections, “Staff No”,
“Name”,     “Registration    No(Fingerprint     No)”,    “Join    Date”    and
“Department” are required to be filled.
     ※Note:
     The【Registration No】 【Staff Information】
                         in                  should be consistent
with the number of the staff registered at the fingerprint attendance
machine;
     【Join Date】:The attendance system will only sum up the date
after the join date of the staff.
3. Acquire the fingerprint information and register the name to
the Attendance Machine
     For the Fingerprint Attendance Machine, the user must record the
fingerprint information of all staff on the fingerprint machine (one
“Registration No for each staff”);
     The fingerprint information is stored in the Attendance Machine.
By using this software, you can acquire the registration information
and store it in the software system. For one thing, it will avoid the loss
of fingerprint information due to abnormal circumstances of the
attendance machine which results in repeated input of information; on
the other hand, if the customer uses several attendance machines,
they can “write” (register) the fingerprint information to the other
attendance machines through this software.
     To connect the attendance machine with 【 Communication
Programme】:
     A.You can check the information on the attendance machine
through the software, e.g. the number of staff registered, the
fingerprint recorded and quantity of attendance records, etc. You can
also set certain parameters of the attendance machine.
     B. To take the fingerprint information registered at the attendance
machine to the software;
     C . To upload the name information (firstly you must have

                            Page 9 Total 51 Pages
Instruction Manual for Attendance Management System

established the staff information and have take the information to the
software ) to the attendance machine.
       ※Note:
       Part of attendance machines use standard communication wire
(RS232) to connect with the computer. You need to set the Baud rate
of the computer port to make it consistent with the BAUD rate of the
attendance machine. The default Baud rate of common is: 38400BPS.
4.【Shift Setting】
        “Shift” refers to the in and out times and it s schedule
within a day which includes the setting of in and out time, late
arrival, early out rules, absence rules and overtime rules, etc.
       You can sort out all working circumstances of all staff in the
company, and set different ways of in and out within a day as one shift
(e.g. day shift, night shift, long day shift, etc.).
5.【Shift Allotment】
   “Shift Allotment” is to designate the daily shift of each staff;
generally speaking, it refers to the specific shift of each staff in certain
day.
    【Shift Allotment】is the basis for a attendance management
software to analyze data and acquire statistic report. This is
because the system has to know how the work of certain staff is
managed in certain day, and whether this staff is late or early out,
or keep regular attendance. Therefore, “Shift Set ting” and “Shift
Allotment” are the core of attendance management system.
  A.【Shift Pattern】
       If the staff attends his work on a periodic basis, you can preset
one or several “Shift Patterns” in “Shift Pattern”. As shown in the
following figure, the staff of certain company attend their work from
Monday to Friday, and rest at weekends. Therefore, we can set a
periodic Shift Pattern for this company.


                             Page 10 Total 51 Pages
Instruction Manual for Attendance Management System


  B.【Start Shift Allotment】:
    You can manage the shift for the staff with the “Shift Allotment
Module” set in Shift Pattern (to assign the “shift” for certain staff for
that day).
  C.【General Shift Allotment Table】
    After you have assigned the shift, you can review the Shift
Allotment of each staff in the “General Shift Allotment Table” of the
“Attendance Management” module. Firstly you can check whether the
shift allotment is successful and the result of the shift allotment, and
secondly you can make adjustment to the shift allotment, see the
following figure:


6.Backup Data
    After you have set the staff information, attendance rules, shift
setting and shift allotment, we recommend you to back up the data

                          Page 11 Total 51 Pages
Instruction Manual for Attendance Management System

with meaningful names, so that you can restore the data when the
system is not available due to computer problems, so as to reduce the
work to input the information.
7.Collect Data
      After you have inputted the fingerprint information to the software
and registered the names at the attendance machine, your staff then
can use the machine to record their attendance. The administrator
needs to collect the data to the software after a period of time
(generally at the end of the month), and acquire the statistic report
through the analysis of the software.
      Use 【Attendance Data Download】 from the 【Communication
Programme】 and select “download new record” to acquire the
records after the previous data collection.
       With “download new record” function, you can only collect the
data after the previous data collection, which saves your time and
avoid repeated collection.


8. Analyze Data
      The principle of the attendance system is to sum up the
attendance records of staff based on the work registration of the staff
in accordance with the attendance rules preset by the computer (shift
allotment, asking for leave and out of office, etc.).
      The following is the procedure of working principle of the
attendance system

                                    Staff Information


            Original Record
                                                    Shift Definition and Allotment
(Acquired from the Attendance Machine)
                                                    Asking for leave, out of office and Holidays


                                 Page 12 Total 51 Pages
Instruction Manual for Attendance Management System


                             Data Analysis


                             Report Sum-up

                     (Daily Report , Monthly Report)


9. Review Report
    After the data is analyzed, you can review the attendance report.


    Chapter Five Specific Introduction to Each

                               Module
1.Personnel Information
1.1 Set【Company Information】
    Click 【Company Information】module, you will enter the setting
window for company information, as shown in the following figure:


    Click 【Modify】 and then sequentially input company name


                         Page 13 Total 51 Pages
Instruction Manual for Attendance Management System

(compulsory, it can be abbreviated), address, telephone, and then
click store.
1.2 Set 【Department Information】
     Click 【Department Information】 module to enter the setting
window for department information.


     The Company is the general department of the whole department
structure. All the departments can be set subsidiary departments.
Theoretically, the level of subsidiary departments of one department is
not limited. But, for the purpose of management, it’s better to set no
more than 4 levels of subsidiary departments.


【Application Steps】:
    1.Add【Department】
     Click “Add” and then input “Department No”, “Department Name”,
“Administrative Department”, “Responsible Person of the Department”,
and then click “Store”.
     Note: The administrative department must be filled. Except for the
top department (company), each department has an administrative
department. Theoretically the levels of the department is not limited.
    2.Modify 【Department】
     By clicking “Modify”, you can modify the department information
already added.


                             Page 14 Total 51 Pages
Instruction Manual for Attendance Management System

    3.Delete【Department】
    By clicking “Delete”, you can delete the department information
already added. But if the department has added with the staff
information, it can not be deleted.
    4.Print
    Select “Print” to print the department list.
    5.Exit
    Select “Exit” to exit the department setting module.
1.3 Set 【Staff Information】
  Click 【Staff Information】 module to enter the setting window for
staff information and add staff information.


    【 Staff Information Setting 】 module is used to establish
personnel information archive; it is the basis of the whole attendance
management software system. You should fill it carefully.
    1. Add Staff Information
    Click “Add” in the management window of 【Staff Information】,
the following window will pop up.


                          Page 15 Total 51 Pages
Instruction Manual for Attendance Management System


     Fill the archive information of the staff in 【Staff Information】
window. Staff No, Name, Card No (Registration No) and Department
are compulsory items to be completed. Other items are optional.
     After all the items are competed, click “Store” to store the
personnel information of the staff.
     【Staff No】: it is the “Work No” of the staff in the company.
Generally it is a serials of numbers, it may also include letters.
     Note: The Staff No is the most important basis of the attendance
system for the staff, therefore, don't change the Staff No during the
using process.
     【Card No (Registration No)】: it is the number that the staff
registered at the attendance machine. This number should be
consistent with the registration number that the staff has registered at
the attendance machine; otherwise the data treatment will not be
available.
     【Card Free 】: if you select this item, it means that the staff you
selected doesn’t need to register his attendance. The system will not
deal with the attendance data of this staff.
     【Join Date】: The attendance system will only deal with the

                             Page 16 Total 51 Pages
Instruction Manual for Attendance Management System

attendance data after the join date. Therefore, when you fill in the join
date, you can optionally fill a prior date.
      2. Add Staff Information
      In the 【Staff Information】 window, select the staff whose archive
information needs to be modified, and then select “Add”, it will pop up
the following windows:


Department Tree        Select indication arrow            Inquiry Toolbar


      You can use “Inquiry Toolbar” to find out the staff whose archive
information needs to be modified according to the conditions, you may
also use the “Department Tree” on the left side to find the staff.
      Click “Modify” to enter the dialog box for staff information setting.
The procedure is the same with the steps to 【add staff information】.
      3. Delete Staff Information
      In the 【Staff Information】 window, select the staff whose archive
information needs to be deleted; click “Add”, it will pop up the
following window: (you can use “Inquiry Toolbar” to find out the staff
whose archive information needs to be deleted according to the
conditions, you may also use the “Department Tree” on the left side to
find the staff)


      If you delete this staff, all the attendance data of this staff will be
deleted.

                              Page 17 Total 51 Pages
Instruction Manual for Attendance Management System

     4. Print
     In the 【Staff Information】 window, select the staff whose archive
information needs to be printed; click “Print”, the “Individual Staff
Information ” will pop up.

     Click the icon “         ” on the top right corner, you can print the
staff information.
     5. Import
     This attendance system supports EXCEL format import function.
It can import the staff information in certain format into the staff
information archive.
     In the 【Staff Information】 window, select “Import”, you will enter
the data import module, as shown in the figure below:


     Click “Browse File” to select the EXCEL file which has stored the
personnel information, and fill in the name of the personnel
information sheet, click “Next Step”.


                             Page 18 Total 51 Pages
Instruction Manual for Attendance Management System


    Set field corresponding relationship, and then click “Next Step”;
    Note: Only the department name in 【Subordinate Department】
has already existed in 【Department Information】can the personnel
information be correctly imported.


    If the staff information fails to be correctly imported, you can

                         Page 19 Total 51 Pages
Instruction Manual for Attendance Management System

select “View Log” to check the reason for the failure. If you succeed in
the import, click “Operation Complete”.
     6. Export
    The 【Export】 function is able to export the staff information to
  EXCEL file.

1.4 Demission and Restoration Management
     Select “Personnel Information”—> “Register Staff Demission” to
  handle the Demission procedure for the staff:
1.4.1 Demission
     Click “Add” in the window of “Register Staff Demission”, and then
click “Select Staff” to select the staff to be left, and fill in “Handler” and
“Demission Reason”, click “Store” to complete the registration for the
staff demission.


1.4.2 Demission
     Select the staff from the staff information sheet who is to restore,
and click “Restoration”, the window below will pop up:


                             Page 20 Total 51 Pages
Instruction Manual for Attendance Management System

    Select “Yes” to complete the restoration.

1.5 Set 【Personnel Parameter】
    Set the property information of the staff such as “Work Type”,
“Education Information” and “Nationality Information”.
    Click “Personnel Parameter” module to enter the setting window
for personnel parameters, add property information of the staff such
as “Work Type”, “Education Information” and “Nationality Information”.


【Application Steps】:
    1. Add
    Select the property information of the staff to be set, for example:
select “Work Type” to view the set work type. If you want to set new
“Work Type”, click “Add”; fill in the new work type in the name of the
work type, click “Store” to complete the setting.
    2. Modify
    Select the property information of the staff to be set, choose the
information item to be modified, and click “Modify”; fill in the new work
type in the name of the work type, click “Store” to complete the setting.
    3. Delete
    Select the property information of the staff to be set, choose the
information item to be deleted, and click “Delete” to complete the

                          Page 21 Total 51 Pages
Instruction Manual for Attendance Management System

deletion.

2. Attendance Management
2.1 Set 【Shift Definition】
     Select 【Attendance Management】 【Shift Definition】 or directly
                                                     ,
click the 【Shift Definition】icon in the directory to enter the setting
module of shift definition.


     “Shift” refers to the time and schedule to attend and leave
work within a day.It includes the setting for attending and leaving
work, rules for late arrival and early out, absence rules and
overtime rules, etc.
     You can set different ways of attending and leaving work as
one shift (for example: day shift, night shift, long day shift, etc.)
based on the work circumstances of all staff in the company.


     1. Noun Explanation
     【Shift Section】:
     “Shift Section” refers to the time section included in the “Shift”. It
is constituted by a starting point (the time to attend work) and a ending

                             Page 22 Total 51 Pages
Instruction Manual for Attendance Management System

point (the time to leave work).
     The common shift may be one section and may also include
several sections. This software only supports one shift including three
sections at most.
     As shown in the figure above, the “long day shift” includes three
“shift sections”:
          First Section: 08:00-12:00
          Second Section: 14:00-18:00
          Third Section: 20:00-28:00 (04:00 at the second day)
     【Not Sign In】 【Not Sign Out】:
     “Sign In”: Whether it is mandatory to sign card to attend work
(press fingerprint ) in this shift
     “Sign Out”: It is mandatory to sign card (press fingerprint ) to
leave work in this shift
     1) If “Not Sign In” or “Not Sign Out” is checked, the staff will be
deemed absence if the staff hasn’t signed card within this period of
time.
     2) If “Sign In” or “Sign Out” is not selected, the staff can either
choose to sign card or not to sign card. The report will not compute
the absence, late arrival, early out and missed signatures, etc.
     【Shift Section Treatment Category】
     Define the property of 【Shift Section】: For the purpose to
calculate the wage rate after the reports are treated (the legal
overtime wage is N times than normal attendance. The specific times
will be defined based on the overtime property ).
     Including: 【Normal Attendance】,【Overtime at Normal Time】,
【Overtime at Weekend】and 【Overtime on Holiday】
     【Previous Valid】
     “Previous Valid” refers to a period of time where the attendance
data signed before the attending time is valid.

                            Page 23 Total 51 Pages
Instruction Manual for Attendance Management System

     For example: shift section 【Attend Work Card】is :08:00, set
【Previous Valid】 60 minutes, then all the attendance data between
                as
07:00-08:00 is deemed normal attendance. The attendance data
before 07:00 is valid attendance.
     【After Valid】
     “After Valid” refers to a period of time where the attendance data
signed after the leaving time is valid.
     For example: shift section 【Attend Work Card】is :08:00, set
【After Valid】as 30 minutes, then all the attendance data between
08:00-08:30 is deemed normal attendance (if the staff exceed the
overdue time, it will be deducted work hour and deemed late for
work).The attendance data after 08:30 is valid attendance.
     【Late Arrival】:
     “Late Arrival” refers to what can be set as late within the scope of
“After Valid” of shift section 【Attend Work Card】
     For example: Shift section 【Attend Work Card】is 08:00; set
【Late Arrival】 0 minute and 【After Valid】 30 minutes; if the staff
              as                         as
signs at 08:01, this staff is deemed to be late for 1 minute.
     【Early Out】
     “Early Out” refers to what can be set as leaving earlier within the
scope of “Previous Valid” of shift section 【Leave Work Card】
     For example: Shift section 【Attend Work Card】is 12:00; set
【Early Out】as 0 minute and 【Previous Valid】 30 minutes; if the
                                           as
staff signs at 11:59 this staff is deemed to leave earlier for 1 minute.


     【Application Steps】:
    1) Add “Shift”
     In the 【Shift Setting】window, click “Add”, and sequentially input
the shift number, name and subordinate department.(The default
subordinate department is the whole company)

                             Page 24 Total 51 Pages
Instruction Manual for Attendance Management System

     Set the parameter of 【Shift Section】.
     After the setting is completed, confirm it and click “Store” to
  complete the adding of shift.
     2) Modify “Shift”
     In the 【Shift Setting】window, select the shift from the shift list
whose parameters needs to be modified, click “Modify” to modify the
shift.
     3. Delete “Shift”
     In the 【Shift Setting】window, select the shift from the shift list
whose parameters needs to be modified, click “delete” to delete the
shift.

2.2 Set 【Shift Pattern】
     Shift Pattern: it refers to the rules to attend work on a
periodic basis.
     If the staff attend work on a periodic circulation, you can firstly set
one or several “Shift Allotment Templates” in “Shift Pattern” module. If
you arrange the shift according to the module, you will save much
time.
     Click “Attendance Management” —> “Shift Pattern” or directly
click the “Shift Pattern” icon in the directory to enter the setting module
of “Shift Pattern”.


                           Page 25 Total 51 Pages
Instruction Manual for Attendance Management System

     As shown in the figure above, it has set an “Shift Pattern” on
a weekly basis: rest on Saturday and Sunday, “Normal work”
from Monday to Friday.
【Application Steps】:
  1) Add “Shift Pattern”
     In the “Shift Pattern” window, click “Add”, manually input “Shift
Pattern Name”, “Periodic Unit” and “Period”, then the “Shift Allotment”
will display the Shift Pattern, click the pull-down menu, and select the
shift allotment for the current day, click “Store”. “Shift Pattern” is
successfully added.
  2) Modify “Shift Pattern”
   In the “Shift Pattern” window, select the “Shift Pattern” from the
“Shift Pattern List” which needs to be modified, and then click “Modify”.
You can select the shift which needs to be modified from the “Shift
Allotment” section, click “Store” to complete the modification to the
“Shift Pattern”.
3) Delete “Shift Pattern”
     In the “Shift Pattern” window, select the “Shift Pattern” from the
“Shift Pattern List” which needs to be deleted, and then click “Delete”.
Click “Store” to complete the deletion of the “Shift Pattern”.

2.3 【Staff Shift Allotment】
     【Shift Allotment】is the basis for a attendance management
software to analyze data and acquire statistic report. This is
because the system has to know how the work of certain staff is
managed in certain day, and whether this staff is late or early out,
or keep regular attendance. Therefore, “Shift Setting” and “Shift
Allotment” are the core of attendance management system.
     Click “Start Shift Allotment” module, the system will pop up the
dialog box “Shift Allotment”. The user can allot the shift according to
the schedule template set in the Shift Pattern.

                             Page 26 Total 51 Pages
Instruction Manual for Attendance Management System


【Application Steps】:
    1) Add Shift Allotment
    In the “Shift Allotment” window, click “Add”
    A、 Select staff
    Click “Select Staff”, the dialog box “Staff Option” will pop up, as
    shown in the figure below:


    In the “Staff Option” window, select the subordinate department of
the staff whose shift needs to be allotted, then all the staff in the
selected department will appear in the section “Staff to be Selected”.
Click “Single Option” or choose multiply staff and put them on the


                         Page 27 Total 51 Pages
Instruction Manual for Attendance Management System

“Selected Staff” section on the right, click “Ok” to complete the
selection.
     B、 Select the start date and end date of the shift allotment


     C、 Select “Shift Pattern”


     D、 Click “Store” to complete the shift allotment made for a
          period of time based on certain shift pattern.
     2) Delete Shift Allotment
     in the “Shift Allotment” window, drag the mouse to select the shift
allotment which needs to be deleted, and then click “Delete” to
complete the deletion of the shift allotment.
     3) Review Shift Allotment
     in the “Shift Allotment” window, check           “Display the Inquiry
Toolbar”, the system will automatically display the inquiry of shift
allotment.


     Select "Input Search Condition", you can review the specific shift
allotment.

2.4 Set 【General Shift Allotment Table】
     The “General Shift Allotment Table” can reflect and adjust the
shift allotment of the staff. When the “Shift Allotment” is finished, you
can check the result of the shift allotment; you can also adjust the
result.
     Click “Attendance Management”—> “General Shift Allotment
Table”, enter the setting module of “General Shift Allotment Table”


                             Page 28 Total 51 Pages
Instruction Manual for Attendance Management System


Department
List


  Staff List


          【Application Steps】:
               1) Review
               Firstly select the month for which the “shift allotment” is to be
          reviewed, and then select the “Department List” in the left to review or
          modify the department where the staff to be modified is located.
          Display the staff in the current department in the staff list, and then
          select the staff from the staff list. Display the shift allotment of this staff
          in the current month in the “Shift Allotment Table”.
               2) Modify Shift Allotment Table
               When the shift allotment of the staff for the current month is
          displayed in the “Shift Allotment ” table, you can select certain day,
          and then click the pull-down menu, choose the shift which needs to be
          changed in the shift list, and then click “Store” to finish the
          modification to the shift of that day.
               3) Delete Shift Allotment Table
               Firstly select the month, and then choose the staff from the staff
          list whose shift allotment is to be deleted ; click “Delete” to complete
          the deletion.

                                      Page 29 Total 51 Pages
Instruction Manual for Attendance Management System


2.5 Holiday Registration
     Holiday Setting: set the fixed holidays and festivals of the
company. Holidays and festivals refer to the non-work time.
     Click “Attendance Management”—> “Holiday Registration”, enter
the setting module of “Holiday Registration”


【Application Steps】:
     1) Add Holiday
     In the “Holiday Setting” window, click “Add”, and then manually
input the holiday name; select the start time and end time of the
holiday, and then click “Store” to complete the adding of holiday.
     2) Modify Holiday
     In the “Holiday Setting” window select the holiday to be modified
from the list; click “Modify”, and then modify the holiday content;
click “Store” to complete the modification of the holiday
     3) Delete Holiday
     In the “Holiday Setting” window select the holiday to be deleted
from the list; click “Delete”, and then delete the holiday; click “Store” to
complete the deletion of the holiday.

2.6 Leave or Sign-out Registration
     Click    “Attendance      Management”—>          “Leave   or   Sign-out
Registration”, enter the setting module of “Leave or Sign-out
Registration”


                             Page 30 Total 51 Pages
Instruction Manual for Attendance Management System


【Application Steps】:
    1) 2.6 Add Leave or Sign-out Registration
    In the “Leave or Sign-out Registration” window, click “Add”, and
then click “Select Staff” to select the staff who wants to ask for leave;
input the start date, end date, leave type and wages; input the leave
reason, and then click “Store” to complete the leave registration.
    2) Modify Leave or Sign-out Record
    In the “Leave or Sign-out Registration” window, select the leave
or sign-out record to be modified; click “Modify” to modify the leave
record or sign-out record; click “Store” to complete the modification.
    3) Delete Leave or Sign-out Record
    In the “Leave or Sign-out Registration” window, select the leave
or sign-out record to be deleted; click “Delete” to delete the leave
record or sign-out record; click “Store” to complete the deletion.

2.7 Manual Adjustment

【Manual Adjustment】: It refers to the manual operation of adding
  attendance record in the attendance management software. It is
  mainly applied to one or more than one certain circumstances
  where the staff fails in signing in due to accidents.
    Click “Attendance Management”—> “Manual Adjustment”, enter
the setting module of “Manual Adjustment”


                          Page 31 Total 51 Pages
Instruction Manual for Attendance Management System


【Application Steps】:
     1) Add Manual Adjustment registration
         a. Click “Add” in the setting window of “Manual Adjustment”;
         b. Click “Select Staff” to select the staff who needs manual
              adjustment;
         c.    Select the start date, end date and time;
         d. Input the reason for manual adjustment;
         e. Click “Store” to complete the adding of manual adjustment
              record.
     2) Modify manual adjustment registration
     In the setting window of “Manual Adjustment”, select the manual
adjustment record which needs to be modified; click “Modify”, and
then modify the manual adjustment record; click “Store” to complete
the modification to the manual adjustment record.
     3) Delete manual make-up registration
     In the setting window of “Manual Adjustment”, select the manual
adjustment record which needs to be deleted; click “Delete”, and then
delete the manual adjustment record; click “Store” to complete the
deletion of the manual adjustment record.

2.8 Set 【Computation Rule】
     Computation Rule: it refers to the setting of Computation Rule for
the overtime statistic report.
     Click “Attendance Management”—> “Computation Rule”, enter
the setting module of “Computation Rule”

                             Page 32 Total 51 Pages
Instruction Manual for Attendance Management System


    Initial Value: it means the minimal time value from which the
    computation starts to count.
    Integer Value: it refers to the value which we can set to filter the
    trivial time.
    For example: if the initial value is set as 30 minutes in “Weekend
OT”, the computation of overtime work will be started from 30th minute.
Take the integer value as 20 minutes. If one staff have worked
overtime for 65 minutes, because the overwork exceeding the initial
value 30 minutes will be deemed overwork, while 65=20*3+5, 5
minutes is the residue less than 20 minutes, so it can be filtered.
Therefore, the overwork displayed in the statistic report will be 60
minutes.
【Application Steps】:
1) Add “Computation Rule”
    a.     Click “Add” in the setting window of “Computation Rule”;
    b.     Select the category of “Computation Rule”;
    c.     Manually set the “Initial Value” and “Integer Value”;
    d.     Set "OT Rates"
    e.     Click “Store” to complete the adding of computation rule.
2) Modify “Computation Rule”
    In the setting window of “Computation Rule”, select the category


                            Page 33 Total 51 Pages
Instruction Manual for Attendance Management System

of the “Computation Rule” to be modified; click “Modify” and then click
“Store” to complete the modification.
3) Add “Computation Rule”
     In the setting window of “Computation Rule”, select the category
of the “Computation Rule” to be deleted; click “Delete” and then click
“Store” to complete the Deletion.

3. Terminal Management
     “Terminal Management” is a management module for attendance
device, including four modules namely “Data Collection”, “Staff
Registration and Acquisition of Registration Information”, “Attendance
Machine Setting” and “Ringing Setting”.
     Select the “Device Management” icon in the directory, and then
you can enter the Terminal Management module.


      If you are to manage the attendance machine, you need firstly
“connect the attendance machine”
3.1 Add Attendance Machine
     1) Open the Main Interface


                             Page 34 Total 51 Pages
Instruction Manual for Attendance Management System


A. Click “Add”, the following interface will appear; select the
    specific device model, and then click “Confirm”


                    Page 35 Total 51 Pages
Instruction Manual for Attendance Management System

     B. Select the connection method


     C. The machine number of the attendance machine should be
           consistent with the that of the attendance machine to be
           connected;
     D. Set the communication password and make it the same with
           the communication password of the attendance machine;
           generally the default value of fingerprint attendance machine
           is 0.
     E.    Confirm whether the above settings are correct (generally to
           keep the default value). Click “Store” and “Connect”, then
           you can successfully connect it with the attendance
           machine.


3.2 Staff Information and Fingerprint Management
     The 【Staff Information and Fingerprint Management】 module
includes the following content:
    A. 【 Download Staff Information 】 : to take the registration
          information from the attendance to the software. If it is a
          fingerprint attendance machine, it can take the fingerprint
          registration information from the attendance machine to the
          software;

                             Page 36 Total 51 Pages
Instruction Manual for Attendance Management System

   B. 【 Upload Staff Information 】 : to upload the registration
       information stored in the software to the attendance machine;
       if it is a fingerprint attendance machine, this operation must be
       carried out after 【Acquire Registration Information】(that is:
       only when the software has stored the fingerprint registration
       information can it be uploaded to the attendance machine).
   C. 【Modify User’s Jurisdiction】: With this function, you can
       modify the jurisdiction of certain staff to operate the
       attendance machine, and you can change the “Administrator”
       to “Common Staff”; or modify the “Common Staff” to
       “Administrator”.
   D. 【Delete Registration Information】: You can remove the
       information of certain staff in the attendance machine.
    1. Download Staff Information
    Click “Download Staff Information” in the 【 Staff Information
Management】module. The registration information list will appear
when the download is completed, as shown in the picture below:


    You can acquire the fingerprint information registered at the

                          Page 37 Total 51 Pages
Instruction Manual for Attendance Management System

attendance machine and input it in the software. And you can match
the fingerprint registration number with the staff information.
     If the fingerprint attendance machine occurs catastrophic failure,
you can upload the fingerprint information (and the name information)
stored in the software to the attendance machine.
     2. Upload Staff Information
     Click “Upload Staff Information” in the 【Staff Information and
Fingerprint Management】module, and the registered staff information
window will appear:


     Select the staff whose registration information is to be uploaded,
and then click “Ok” to upload the registration stored in the software to
the attendance machine.
     If it is a fingerprint attendance machine, because the user has
already registered the fingerprint information at the fingerprint
attendance machine, the user can select “Only Register Name” to
upload the staff name to the fingerprint attendance machine.

     3. 【Modify User’s Jurisdiction】


                             Page 38 Total 51 Pages
Instruction Manual for Attendance Management System

    Select the staff whose jurisdiction needs to be modified from the
user registration information list in the 【 Staff Information and
Fingerprint Management 】module, and then click “Modify User’s
Jurisdiction” to complete the modification;


    4. 【Delete Registration Information】
    Select the staff whose jurisdiction needs to be deleted from the
user registration information list in the 【 Staff Information and
Fingerprint Management】module, and then click “Delete Staff” to
complete the deletion;


                         Page 39 Total 51 Pages
Instruction Manual for Attendance Management System


3.3. Attendance Machine Management
    The 【Attendance Machine Management】module is mainly used
  to review and modify the parameters of the attendance machine.


     【Initialize Attendance Machine】 it will remove all the information
                                    :
(registration information, attendance information) in the attendance
machine, and restore it to the factory default status;
     【Synchronize Sign-in Time】: it will synchronize the time of the
attendance machine with the computer.


3.5 Download Attendance Data
     The 【 Download Attendance Data 】 function is to collect the
attendance record of the attendance machine to the software.
     If you select “Collect New Data”, it will collect all the new data in
the attendance machine and drop the attendance records which have
once been collected, which saves time.
     If you select “Collect All Data”, it will collect all the attendance


                             Page 40 Total 51 Pages
Instruction Manual for Attendance Management System

records stored in the attendance machine, and will not clarify the
collected records with that having not been collected.


    “Clear All Attendance Record”: it will remove all the attendance
record stored in the attendance machine. It cannot be restored after it
is removed. Be Cautious!


4. Statistic Report
      【
    The Statistic Report】       【
                         includes Attendance Information Analysis】,
【Daily Attendance Report】 Monthly Attendance Report】 Original
                         【
                         ,                          【
                                                    ,
Data Report】and【Detailed Attendance Record】.
   1) 【Attendance Information Analysis】: it will analyze and deal
       with the collected attendance records and acquire the
       Attendance Statistic Report (Daily Report and Monthly Report,
       etc.)
    Except that the “Original Record Sheet” is formed during the
downloading of attendance data, all the other reports can not be
reviewed prior to the 【Attendance Information Analysis】.
   2) 【Original Data Report】: it refers to the original attendance
       record collected from the attendance machine to the software;
   3) 【Detailed Attendance Record】: it refers to each record
       signed in by the staff in each time.
   4) 【Daily Attendance Report】: it refers to the daily attendance
       of the staff. One record for each staff in one day (it only counts


                         Page 41 Total 51 Pages
Instruction Manual for Attendance Management System

           those that meets the attendance rules and the statistic
           conditions set in shift setting);
        5) 【Monthly Attendance Report】:It refers to the attendance
           record of the staff within a month; one record for each staff for
           every one month;

5. Database Management
        On the top left corner of the software there is a pull-down menu of
the “System”, which includes four modules namely 【 Backup
        【Restore Database】
Database】,               【Compress Database】 【Upgrade
                          ,                 and
Data Analysis】.


        【Backup Database】: it will back up the database to a backup
file.
        【Restore Database】:it will restore the information stored in the
database to the software.
        【Compress Database】:The database will become large when
the software has been used for a period of time, which slows down the

                              Page 42 Total 51 Pages
Instruction Manual for Attendance Management System

running speed of the software.
     1. Backup Database
    Backup Database: it will back up all the data in the attendance
software to a file, and store it at the designated location. When the
system appears catastrophic failure, it can restore the backup file. To
ensure that all the data will not get lost.
    Select “Backup Database” module in the pull-down menu of the
“System”, it will pop up a “Save As” window; select the backup path for
the backup database, and then click “Save” to complete the backup.


     2. Restore Database
    Select “Restore Database” module in the pull-down menu of the
“System”, it will pop up a “Authentication” dialog box:


                           Page 43 Total 51 Pages
Instruction Manual for Attendance Management System


     Input the current “Users Name” and “Password”, and click
“Confirm” to enter the “Restore Database” window; open the backup
path of the database, and then select the database to be restored;
click “Open” to restore the database. As shown in the following
picture:


    3. Compress Database
     Select “Compress Database” module in the pull-down menu of


                             Page 44 Total 51 Pages
Instruction Manual for Attendance Management System

the “System”, it will compress the database.

6. System Maintenance
    The “System Maintenance” window includes "User Management"
and “Remove Data”.
    【User Management】: You can add, delete the administrator or
modify the jurisdiction of the administrator;
    【Remove Data】: You can remove the expired attendance data
6.1 User Management
   Click “User Management” module to enter the setting window of
user management


【Application Steps】:
     A. 【Add】
    In the “User Management” window, click “Add” to enter the “User
Property Page”; input the “Login ID” and “Login Password”; select the
operation jurisdiction for this administrator, and click “Save” to add an
administrator.


                          Page 45 Total 51 Pages
Instruction Manual for Attendance Management System


     B. 【Modify】
     Choose the administrator to be modified in the window of “User
Management”


     Click “Modify” to enter the “User Property Page” window; modify
the “Login ID”, “Login Password” and the “operation Jurisdiction”, click
“Save” to finish the modification to the administrator.
     C. 【Modify】
     Select the administrator to be deleted in the "User Management"
window, and then click “Delete” to delete the administrator.

                             Page 46 Total 51 Pages
Instruction Manual for Attendance Management System

2. Remove Data
    Click “Remove Data” module, the “Authentication” window will
pop up


    Input the active “User Name” and “Password”, and then click
“Confirm” to enter “Remove the expired data in the database” window:


    Select the months with the expired data, and then click “Confirm”
to remove the attendance data from the selected months.
2. Access Control
    a. The Access Device management is the same with the
attendance device. Please refer to “Device Management”


                        Page 47 Total 51 Pages
Instruction Manual for Attendance Management System


     b. Time Slot Setting
Step 1: Choose the machine


Step 2: Read, modify and download time slot


c. Lock Setting
Step: Select machine, and then set Lock Mixture; lastly download


                             Page 48 Total 51 Pages
Instruction Manual for Attendance Management System


d. Authorized Download


Step 1: Choose the machine


                         Page 49 Total 51 Pages
Instruction Manual for Attendance Management System


Step 2: select the tree-type department in the right side.


Step 3: select time slot and division


Step 4: select staff


Step 5: click “Download”


                             Page 50 Total 51 Pages
Instruction Manual for Attendance Management System


The End!


           Page 51 Total 51 Pages

Contenu connexe

En vedette

15.project attendence managemnt system
15.project attendence managemnt system15.project attendence managemnt system
15.project attendence managemnt systemHaseeb Nasir
 
Secubio Ac201 data sheet
Secubio Ac201 data sheetSecubio Ac201 data sheet
Secubio Ac201 data sheetsecubio Secubio
 
Secubio Black and white/Blue LCD Fingerprint Machine hardware Manual
Secubio Black and white/Blue LCD Fingerprint Machine hardware ManualSecubio Black and white/Blue LCD Fingerprint Machine hardware Manual
Secubio Black and white/Blue LCD Fingerprint Machine hardware Manualsecubio Secubio
 
Bpr Project - Attendance Management System
Bpr Project - Attendance Management SystemBpr Project - Attendance Management System
Bpr Project - Attendance Management SystemGihan Timantha
 
Srand002 attendance management system
Srand002   attendance management systemSrand002   attendance management system
Srand002 attendance management systemAndroidproject
 
Leave Management System: Software Requirements Specification Document(SRS)
Leave Management System: Software Requirements Specification Document(SRS) Leave Management System: Software Requirements Specification Document(SRS)
Leave Management System: Software Requirements Specification Document(SRS) Abhilasha Lahigude
 
School attendance management system (sams)
School attendance management system (sams)School attendance management system (sams)
School attendance management system (sams)gajananp2008
 
Student Management System Project Abstract
Student Management System Project AbstractStudent Management System Project Abstract
Student Management System Project AbstractUdhayyagethan Mano
 
Smart Attendance Management System Using Android WIFI Technology
Smart Attendance Management System Using Android WIFI TechnologySmart Attendance Management System Using Android WIFI Technology
Smart Attendance Management System Using Android WIFI TechnologySukanta Biswas
 

En vedette (13)

15.project attendence managemnt system
15.project attendence managemnt system15.project attendence managemnt system
15.project attendence managemnt system
 
Attendance Management System
Attendance Management SystemAttendance Management System
Attendance Management System
 
Student Attendance System
Student Attendance SystemStudent Attendance System
Student Attendance System
 
Attendance monitoring system
Attendance monitoring systemAttendance monitoring system
Attendance monitoring system
 
Secubio Ac201 data sheet
Secubio Ac201 data sheetSecubio Ac201 data sheet
Secubio Ac201 data sheet
 
Secubio Black and white/Blue LCD Fingerprint Machine hardware Manual
Secubio Black and white/Blue LCD Fingerprint Machine hardware ManualSecubio Black and white/Blue LCD Fingerprint Machine hardware Manual
Secubio Black and white/Blue LCD Fingerprint Machine hardware Manual
 
Bpr Project - Attendance Management System
Bpr Project - Attendance Management SystemBpr Project - Attendance Management System
Bpr Project - Attendance Management System
 
Attendance management system
Attendance management systemAttendance management system
Attendance management system
 
Srand002 attendance management system
Srand002   attendance management systemSrand002   attendance management system
Srand002 attendance management system
 
Leave Management System: Software Requirements Specification Document(SRS)
Leave Management System: Software Requirements Specification Document(SRS) Leave Management System: Software Requirements Specification Document(SRS)
Leave Management System: Software Requirements Specification Document(SRS)
 
School attendance management system (sams)
School attendance management system (sams)School attendance management system (sams)
School attendance management system (sams)
 
Student Management System Project Abstract
Student Management System Project AbstractStudent Management System Project Abstract
Student Management System Project Abstract
 
Smart Attendance Management System Using Android WIFI Technology
Smart Attendance Management System Using Android WIFI TechnologySmart Attendance Management System Using Android WIFI Technology
Smart Attendance Management System Using Android WIFI Technology
 

Similaire à Secubio New Time and Attendance software manual

access-control-time-attendance-management-system-user-manual-rev-e103.pptx
access-control-time-attendance-management-system-user-manual-rev-e103.pptxaccess-control-time-attendance-management-system-user-manual-rev-e103.pptx
access-control-time-attendance-management-system-user-manual-rev-e103.pptxJosue138778
 
Monitoring of computers
Monitoring of computers Monitoring of computers
Monitoring of computers carlosrudy_45
 
SysInfoTools OpenOffice Impress Repair
 SysInfoTools OpenOffice Impress Repair SysInfoTools OpenOffice Impress Repair
SysInfoTools OpenOffice Impress RepairSysInfoTools Software
 
Preventive Maintenance System (Plant Maintaintenance)
Preventive Maintenance System (Plant Maintaintenance)Preventive Maintenance System (Plant Maintaintenance)
Preventive Maintenance System (Plant Maintaintenance)nfra erp
 
Payroll Management System SRS
Payroll Management System SRSPayroll Management System SRS
Payroll Management System SRSShubham Modi
 
Employee Management
Employee ManagementEmployee Management
Employee ManagementMaharohit
 
SAP ADMINISTRATION
SAP ADMINISTRATIONSAP ADMINISTRATION
SAP ADMINISTRATIONAly Adel
 
System analysis and_design
System analysis and_designSystem analysis and_design
System analysis and_designTushar Rajput
 
Cicero Discovery White Paper
Cicero Discovery White PaperCicero Discovery White Paper
Cicero Discovery White PaperCicero, Inc.
 
Patch Management Software - Administrator Guide
Patch Management Software - Administrator Guide Patch Management Software - Administrator Guide
Patch Management Software - Administrator Guide websecurity
 
ESR Professional Development Training : OpenESR user guide
ESR Professional  Development Training : OpenESR  user guideESR Professional  Development Training : OpenESR  user guide
ESR Professional Development Training : OpenESR user guideTidiani Togola
 
Development of Intelligence Process Tracking System for Job Seekers
Development of Intelligence Process Tracking System for Job SeekersDevelopment of Intelligence Process Tracking System for Job Seekers
Development of Intelligence Process Tracking System for Job SeekersIJMIT JOURNAL
 
IRJET- Android Application for Employee Monitoring and Tracking System.
IRJET- Android Application for Employee Monitoring and Tracking System.IRJET- Android Application for Employee Monitoring and Tracking System.
IRJET- Android Application for Employee Monitoring and Tracking System.IRJET Journal
 
Android Application For Employee Monitoring And Tracking System
Android Application For Employee Monitoring And Tracking SystemAndroid Application For Employee Monitoring And Tracking System
Android Application For Employee Monitoring And Tracking SystemSheila Sinclair
 
Getting Started Guide
Getting Started GuideGetting Started Guide
Getting Started GuideEMAINT
 
E-Commerce Mobile Sale System
E-Commerce Mobile Sale SystemE-Commerce Mobile Sale System
E-Commerce Mobile Sale SystemAbhishek Kumar
 

Similaire à Secubio New Time and Attendance software manual (20)

access-control-time-attendance-management-system-user-manual-rev-e103.pptx
access-control-time-attendance-management-system-user-manual-rev-e103.pptxaccess-control-time-attendance-management-system-user-manual-rev-e103.pptx
access-control-time-attendance-management-system-user-manual-rev-e103.pptx
 
Monitoring of computers
Monitoring of computers Monitoring of computers
Monitoring of computers
 
SysInfoTools OpenOffice Impress Repair
 SysInfoTools OpenOffice Impress Repair SysInfoTools OpenOffice Impress Repair
SysInfoTools OpenOffice Impress Repair
 
Preventive Maintenance System (Plant Maintaintenance)
Preventive Maintenance System (Plant Maintaintenance)Preventive Maintenance System (Plant Maintaintenance)
Preventive Maintenance System (Plant Maintaintenance)
 
Payroll Management System SRS
Payroll Management System SRSPayroll Management System SRS
Payroll Management System SRS
 
eresource pms generic
eresource pms generic eresource pms generic
eresource pms generic
 
SysInfoTools OpenOffice Base Repair
SysInfoTools OpenOffice Base RepairSysInfoTools OpenOffice Base Repair
SysInfoTools OpenOffice Base Repair
 
Employee Management
Employee ManagementEmployee Management
Employee Management
 
Software Details
Software DetailsSoftware Details
Software Details
 
SAP ADMINISTRATION
SAP ADMINISTRATIONSAP ADMINISTRATION
SAP ADMINISTRATION
 
System analysis and_design
System analysis and_designSystem analysis and_design
System analysis and_design
 
Cicero Discovery White Paper
Cicero Discovery White PaperCicero Discovery White Paper
Cicero Discovery White Paper
 
Patch Management Software - Administrator Guide
Patch Management Software - Administrator Guide Patch Management Software - Administrator Guide
Patch Management Software - Administrator Guide
 
ESR Professional Development Training : OpenESR user guide
ESR Professional  Development Training : OpenESR  user guideESR Professional  Development Training : OpenESR  user guide
ESR Professional Development Training : OpenESR user guide
 
Development of Intelligence Process Tracking System for Job Seekers
Development of Intelligence Process Tracking System for Job SeekersDevelopment of Intelligence Process Tracking System for Job Seekers
Development of Intelligence Process Tracking System for Job Seekers
 
IRJET- Android Application for Employee Monitoring and Tracking System.
IRJET- Android Application for Employee Monitoring and Tracking System.IRJET- Android Application for Employee Monitoring and Tracking System.
IRJET- Android Application for Employee Monitoring and Tracking System.
 
Android Application For Employee Monitoring And Tracking System
Android Application For Employee Monitoring And Tracking SystemAndroid Application For Employee Monitoring And Tracking System
Android Application For Employee Monitoring And Tracking System
 
Getting Started Guide
Getting Started GuideGetting Started Guide
Getting Started Guide
 
E-Commerce Mobile Sale System
E-Commerce Mobile Sale SystemE-Commerce Mobile Sale System
E-Commerce Mobile Sale System
 
SysInfoTools MS Word DOTM Recovery
SysInfoTools MS Word DOTM RecoverySysInfoTools MS Word DOTM Recovery
SysInfoTools MS Word DOTM Recovery
 

Dernier

High Class Call Girls Nagpur Grishma Call 7001035870 Meet With Nagpur Escorts
High Class Call Girls Nagpur Grishma Call 7001035870 Meet With Nagpur EscortsHigh Class Call Girls Nagpur Grishma Call 7001035870 Meet With Nagpur Escorts
High Class Call Girls Nagpur Grishma Call 7001035870 Meet With Nagpur Escortsranjana rawat
 
How Automation is Driving Efficiency Through the Last Mile of Reporting
How Automation is Driving Efficiency Through the Last Mile of ReportingHow Automation is Driving Efficiency Through the Last Mile of Reporting
How Automation is Driving Efficiency Through the Last Mile of ReportingAggregage
 
The Economic History of the U.S. Lecture 17.pdf
The Economic History of the U.S. Lecture 17.pdfThe Economic History of the U.S. Lecture 17.pdf
The Economic History of the U.S. Lecture 17.pdfGale Pooley
 
VIP Kolkata Call Girl Serampore 👉 8250192130 Available With Room
VIP Kolkata Call Girl Serampore 👉 8250192130  Available With RoomVIP Kolkata Call Girl Serampore 👉 8250192130  Available With Room
VIP Kolkata Call Girl Serampore 👉 8250192130 Available With Roomdivyansh0kumar0
 
The Economic History of the U.S. Lecture 18.pdf
The Economic History of the U.S. Lecture 18.pdfThe Economic History of the U.S. Lecture 18.pdf
The Economic History of the U.S. Lecture 18.pdfGale Pooley
 
Quarter 4- Module 3 Principles of Marketing
Quarter 4- Module 3 Principles of MarketingQuarter 4- Module 3 Principles of Marketing
Quarter 4- Module 3 Principles of MarketingMaristelaRamos12
 
Russian Call Girls In Gtb Nagar (Delhi) 9711199012 💋✔💕😘 Naughty Call Girls Se...
Russian Call Girls In Gtb Nagar (Delhi) 9711199012 💋✔💕😘 Naughty Call Girls Se...Russian Call Girls In Gtb Nagar (Delhi) 9711199012 💋✔💕😘 Naughty Call Girls Se...
Russian Call Girls In Gtb Nagar (Delhi) 9711199012 💋✔💕😘 Naughty Call Girls Se...shivangimorya083
 
Dividend Policy and Dividend Decision Theories.pptx
Dividend Policy and Dividend Decision Theories.pptxDividend Policy and Dividend Decision Theories.pptx
Dividend Policy and Dividend Decision Theories.pptxanshikagoel52
 
20240417-Calibre-April-2024-Investor-Presentation.pdf
20240417-Calibre-April-2024-Investor-Presentation.pdf20240417-Calibre-April-2024-Investor-Presentation.pdf
20240417-Calibre-April-2024-Investor-Presentation.pdfAdnet Communications
 
Instant Issue Debit Cards - High School Spirit
Instant Issue Debit Cards - High School SpiritInstant Issue Debit Cards - High School Spirit
Instant Issue Debit Cards - High School Spiritegoetzinger
 
OAT_RI_Ep19 WeighingTheRisks_Apr24_TheYellowMetal.pptx
OAT_RI_Ep19 WeighingTheRisks_Apr24_TheYellowMetal.pptxOAT_RI_Ep19 WeighingTheRisks_Apr24_TheYellowMetal.pptx
OAT_RI_Ep19 WeighingTheRisks_Apr24_TheYellowMetal.pptxhiddenlevers
 
06_Joeri Van Speybroek_Dell_MeetupDora&Cybersecurity.pdf
06_Joeri Van Speybroek_Dell_MeetupDora&Cybersecurity.pdf06_Joeri Van Speybroek_Dell_MeetupDora&Cybersecurity.pdf
06_Joeri Van Speybroek_Dell_MeetupDora&Cybersecurity.pdfFinTech Belgium
 
Log your LOA pain with Pension Lab's brilliant campaign
Log your LOA pain with Pension Lab's brilliant campaignLog your LOA pain with Pension Lab's brilliant campaign
Log your LOA pain with Pension Lab's brilliant campaignHenry Tapper
 
The Economic History of the U.S. Lecture 19.pdf
The Economic History of the U.S. Lecture 19.pdfThe Economic History of the U.S. Lecture 19.pdf
The Economic History of the U.S. Lecture 19.pdfGale Pooley
 
Dharavi Russian callg Girls, { 09892124323 } || Call Girl In Mumbai ...
Dharavi Russian callg Girls, { 09892124323 } || Call Girl In Mumbai ...Dharavi Russian callg Girls, { 09892124323 } || Call Girl In Mumbai ...
Dharavi Russian callg Girls, { 09892124323 } || Call Girl In Mumbai ...Pooja Nehwal
 
The Economic History of the U.S. Lecture 22.pdf
The Economic History of the U.S. Lecture 22.pdfThe Economic History of the U.S. Lecture 22.pdf
The Economic History of the U.S. Lecture 22.pdfGale Pooley
 
Call Girls Service Nagpur Maya Call 7001035870 Meet With Nagpur Escorts
Call Girls Service Nagpur Maya Call 7001035870 Meet With Nagpur EscortsCall Girls Service Nagpur Maya Call 7001035870 Meet With Nagpur Escorts
Call Girls Service Nagpur Maya Call 7001035870 Meet With Nagpur Escortsranjana rawat
 
Q3 2024 Earnings Conference Call and Webcast Slides
Q3 2024 Earnings Conference Call and Webcast SlidesQ3 2024 Earnings Conference Call and Webcast Slides
Q3 2024 Earnings Conference Call and Webcast SlidesMarketing847413
 
Malad Call Girl in Services 9892124323 | ₹,4500 With Room Free Delivery
Malad Call Girl in Services  9892124323 | ₹,4500 With Room Free DeliveryMalad Call Girl in Services  9892124323 | ₹,4500 With Room Free Delivery
Malad Call Girl in Services 9892124323 | ₹,4500 With Room Free DeliveryPooja Nehwal
 

Dernier (20)

High Class Call Girls Nagpur Grishma Call 7001035870 Meet With Nagpur Escorts
High Class Call Girls Nagpur Grishma Call 7001035870 Meet With Nagpur EscortsHigh Class Call Girls Nagpur Grishma Call 7001035870 Meet With Nagpur Escorts
High Class Call Girls Nagpur Grishma Call 7001035870 Meet With Nagpur Escorts
 
How Automation is Driving Efficiency Through the Last Mile of Reporting
How Automation is Driving Efficiency Through the Last Mile of ReportingHow Automation is Driving Efficiency Through the Last Mile of Reporting
How Automation is Driving Efficiency Through the Last Mile of Reporting
 
The Economic History of the U.S. Lecture 17.pdf
The Economic History of the U.S. Lecture 17.pdfThe Economic History of the U.S. Lecture 17.pdf
The Economic History of the U.S. Lecture 17.pdf
 
VIP Kolkata Call Girl Serampore 👉 8250192130 Available With Room
VIP Kolkata Call Girl Serampore 👉 8250192130  Available With RoomVIP Kolkata Call Girl Serampore 👉 8250192130  Available With Room
VIP Kolkata Call Girl Serampore 👉 8250192130 Available With Room
 
Commercial Bank Economic Capsule - April 2024
Commercial Bank Economic Capsule - April 2024Commercial Bank Economic Capsule - April 2024
Commercial Bank Economic Capsule - April 2024
 
The Economic History of the U.S. Lecture 18.pdf
The Economic History of the U.S. Lecture 18.pdfThe Economic History of the U.S. Lecture 18.pdf
The Economic History of the U.S. Lecture 18.pdf
 
Quarter 4- Module 3 Principles of Marketing
Quarter 4- Module 3 Principles of MarketingQuarter 4- Module 3 Principles of Marketing
Quarter 4- Module 3 Principles of Marketing
 
Russian Call Girls In Gtb Nagar (Delhi) 9711199012 💋✔💕😘 Naughty Call Girls Se...
Russian Call Girls In Gtb Nagar (Delhi) 9711199012 💋✔💕😘 Naughty Call Girls Se...Russian Call Girls In Gtb Nagar (Delhi) 9711199012 💋✔💕😘 Naughty Call Girls Se...
Russian Call Girls In Gtb Nagar (Delhi) 9711199012 💋✔💕😘 Naughty Call Girls Se...
 
Dividend Policy and Dividend Decision Theories.pptx
Dividend Policy and Dividend Decision Theories.pptxDividend Policy and Dividend Decision Theories.pptx
Dividend Policy and Dividend Decision Theories.pptx
 
20240417-Calibre-April-2024-Investor-Presentation.pdf
20240417-Calibre-April-2024-Investor-Presentation.pdf20240417-Calibre-April-2024-Investor-Presentation.pdf
20240417-Calibre-April-2024-Investor-Presentation.pdf
 
Instant Issue Debit Cards - High School Spirit
Instant Issue Debit Cards - High School SpiritInstant Issue Debit Cards - High School Spirit
Instant Issue Debit Cards - High School Spirit
 
OAT_RI_Ep19 WeighingTheRisks_Apr24_TheYellowMetal.pptx
OAT_RI_Ep19 WeighingTheRisks_Apr24_TheYellowMetal.pptxOAT_RI_Ep19 WeighingTheRisks_Apr24_TheYellowMetal.pptx
OAT_RI_Ep19 WeighingTheRisks_Apr24_TheYellowMetal.pptx
 
06_Joeri Van Speybroek_Dell_MeetupDora&Cybersecurity.pdf
06_Joeri Van Speybroek_Dell_MeetupDora&Cybersecurity.pdf06_Joeri Van Speybroek_Dell_MeetupDora&Cybersecurity.pdf
06_Joeri Van Speybroek_Dell_MeetupDora&Cybersecurity.pdf
 
Log your LOA pain with Pension Lab's brilliant campaign
Log your LOA pain with Pension Lab's brilliant campaignLog your LOA pain with Pension Lab's brilliant campaign
Log your LOA pain with Pension Lab's brilliant campaign
 
The Economic History of the U.S. Lecture 19.pdf
The Economic History of the U.S. Lecture 19.pdfThe Economic History of the U.S. Lecture 19.pdf
The Economic History of the U.S. Lecture 19.pdf
 
Dharavi Russian callg Girls, { 09892124323 } || Call Girl In Mumbai ...
Dharavi Russian callg Girls, { 09892124323 } || Call Girl In Mumbai ...Dharavi Russian callg Girls, { 09892124323 } || Call Girl In Mumbai ...
Dharavi Russian callg Girls, { 09892124323 } || Call Girl In Mumbai ...
 
The Economic History of the U.S. Lecture 22.pdf
The Economic History of the U.S. Lecture 22.pdfThe Economic History of the U.S. Lecture 22.pdf
The Economic History of the U.S. Lecture 22.pdf
 
Call Girls Service Nagpur Maya Call 7001035870 Meet With Nagpur Escorts
Call Girls Service Nagpur Maya Call 7001035870 Meet With Nagpur EscortsCall Girls Service Nagpur Maya Call 7001035870 Meet With Nagpur Escorts
Call Girls Service Nagpur Maya Call 7001035870 Meet With Nagpur Escorts
 
Q3 2024 Earnings Conference Call and Webcast Slides
Q3 2024 Earnings Conference Call and Webcast SlidesQ3 2024 Earnings Conference Call and Webcast Slides
Q3 2024 Earnings Conference Call and Webcast Slides
 
Malad Call Girl in Services 9892124323 | ₹,4500 With Room Free Delivery
Malad Call Girl in Services  9892124323 | ₹,4500 With Room Free DeliveryMalad Call Girl in Services  9892124323 | ₹,4500 With Room Free Delivery
Malad Call Girl in Services 9892124323 | ₹,4500 With Room Free Delivery
 

Secubio New Time and Attendance software manual

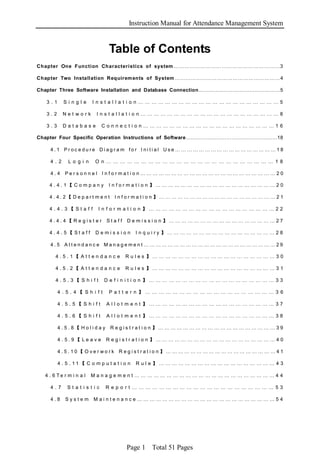
  • 1. Instruction Manual for Attendance Management System Table of Contents Chapter One Function Characteristics of system ……………………… …………………… ………3 Chapter Two Installation Requirem ents of System ……………………………………………………4 Chapter Three Software Installation and Database Connection…………………………………………5 3.1 Single Installation………………………………………………………5 3.2 Network Installation………………………………………………………8 3.3 Database Connection……………………………………………………16 Chapter Four Specific Operation Instructions of Software………………………………………………18 4 .1 Pr oc e du re Di ag r a m fo r I ni ti al Use …… … …… … …… … …… … … …… …… 1 8 4 . 2 L o g i n O n … … … … … … … … … … … … … … … … … … … … … … … … 1 8 4.4 Personnel Information…………………………………………………………20 4.4.1【Company Information】…………………………………………………20 4.4.2【Department Information】…………………………………………………21 4.4.3【Staff Information】…………………………………………………22 4.4.4【Register Sta ff Demission】……………………………………………27 4 . 4 . 5 【 St a ff Demission Inquiry】……………………………………………28 4.5 Attendance M anagement …………………………………………………………29 4.5.1【Attendance Rules】…………………………………………………30 4.5.2【Attendance Rules】…………………………………………………31 4.5.3【Shift Definition】…………………………………………………33 4 .5. 4【 Sh i ft Patt er n】 …… … …… …… …… … …… ……… … …… … 3 6 4.5.5【Shift Allotment】…………………………………………………37 4.5.6【Shift Allotment】…………………………………………………38 4.5.8【Holiday Registration】…………………………………………………39 4.5.9【Leave Registration】…………………………………………………40 4.5. 10【Overwork R egist rat ion】………………………………………………41 4 . 5 . 11 【 C o mp u t a t i o n Rule】………………………………………………43 4 . 6 Te r m i n a l Management…………………………………………………………44 4.7 Statistic Repo rt … ……… …… ……… …… ……… … ……… ……… 53 4.8 System Maintenance…………………………………………………………54 Page 1 Total 51 Pages
  • 2. Instruction Manual for Attendance Management System Chapter One Function Characteristics of System The Attendance Management System is user-oriented. It is a universal attendance management system developed for factories and companies for their computer management of attendance. The system interface is clear and friendly; it is reliable and easy to operate, and provides help for machine connection. You can conduct quick and easy inquiry, sum-up and computation on the system. The supervisor can set the jurisdiction for the operators, and the operators can set their own password, in doing so, it will effectively prevent from illegal use or exceeding authority to use the system. The system has strict fault-tolerant system, which will avoid false operation and illegal input of data. The backup function of the system ensures that the data will not lose and it will restore running quickly in case the system appears breakdown. The Attendance Management System has five functional modules, including “Personnel Information”, “Attendance Management”, “Statistic Report”, “System Maintenance” and “Attendance Device”. Page 2 Total 51 Pages
  • 3. Instruction Manual for Attendance Management System Chapter Two Installation Requirements of the System 1. Requirements for Hardware: 1) CPU: above 1GMHz 2) Memory: Above 128MB 3) Hard Disk: Above 2GB hard disk space 4) Communication Port (COM Port):1 (An extension wire is needed to connect with USB and COM port, if it is USB interface) 2. Running Environment Database: ACCESS Operating System: WIN98/2000/ME/XP/NT/2003 Chapter Three Installation and Uninstall of the Software 3.1 Install the Management Software 1. Double click the installation program in the installation disk to install the system, as shown in the following figure: Page 3 Total 51 Pages
  • 4. Instruction Manual for Attendance Management System 2. Click “Next” to install the program, or click “Cancel” to end the installation. Page 4 Total 51 Pages
  • 5. Instruction Manual for Attendance Management System 3. Select the address where the program is to be installed. The software is to be installed in F:/Program Files/Stand-alone Fingerprint Attendance System in default. You can change the installation route by clicking “Next”. Click “Next”. Page 5 Total 51 Pages
  • 6. Instruction Manual for Attendance Management System 4. Choose or manually input the icon folder of the fingerprint attendance system. The default is: “Attendance Management System”. You may directly modify it, and click “Next” to start to install the software when you have confirmed it. The system will automatically install the software under the route you have set, and establish a shortcut icon both in Start Menu and Desktop. Chapter Four Introduction to the Operation Procedure of the Software If the machine is a fingerprint attendance machine, you can firstly register the fingerprint of the staff and record the “Fingerprint No” of each staff, and then start to operate the software. If the machine bought by the user is sensor card attendance machine, you can input the card number held by the staff in the Staff Information of the software (or read in the card number with the “Card Page 6 Total 51 Pages
  • 7. Instruction Manual for Attendance Management System Read-in” function), then transfer the information to the attendance machine. 4.1 Functional Modules This software includes altogether five functional modules: 【Personnel Information】,【Attendance Management】,【Statistic Report】【System Maintenance】 and , 【Communication Programme】 1.In【Personnel Information】, you can input and edit company information, department information and staff information, deal with the resignation of staff, and edit the staff information such as work type, degree, nationality and birthplace, etc. 2. 【Attendance Management】includes the setting of attendance rules, shift, shift status review, as well as record of holidays, leaves and overtime. 3. 【Statistic Report】includes the review, export and print of original record sheet, attendance record, daily report and monthly report. 4.You can add, modify and delete the administrator in【System Maintenance】, and set, modify the jurisdiction of administration and remove the outdated data. 【Communication Programme】 can set the parameters for 5.In you the attendance machine, register the staff information (upload the registration information to the attendance machine), download the staff information (download the registration information from the attendance machine to the software), review and set the parameters of the attendance machine, as well as collect the attendance data. Page 7 Total 51 Pages
  • 8. Instruction Manual for Attendance Management System 4.2 Operating Procedures of the Software Login System Change Password Personnel Info Setting Device Setting Register Staff Shift Definition Set Shift Pattern Start Shift Allotment Review General shift Collect Attendance Data Review Original Data Data Analysis Allotment Table Review Original Data 4.3 Operating Procedures for the Initial Use of the Software If the machine is a fingerprint attendance machine, you can firstly register the fingerprint of the staff and record the “Fingerprint No” of each staff, and then start to operate the software. 1.Set Administrator The user is recommended to modify the password when they log on the software for the first time (the user name for the first log-on is the administrator account: admin; password: blank). If several operators are to use the system, you should establish account for each operator, and allot appropriate jurisdiction for each operator based on their work. 2.Establish Personnel Archive A. Set company information: Note that Company Name is the general department of the whole system; B. Department Information: Department is the classification of staff. You are recommended to set subsidiary departments based on the different work within the same department. C. Staff Information: Generally the attendance system is used to manage the attendance of the staff. Therefore, the staff information is Page 8 Total 51 Pages
  • 9. Instruction Manual for Attendance Management System the basis of the attendance system. In the above sections, “Staff No”, “Name”, “Registration No(Fingerprint No)”, “Join Date” and “Department” are required to be filled. ※Note: The【Registration No】 【Staff Information】 in should be consistent with the number of the staff registered at the fingerprint attendance machine; 【Join Date】:The attendance system will only sum up the date after the join date of the staff. 3. Acquire the fingerprint information and register the name to the Attendance Machine For the Fingerprint Attendance Machine, the user must record the fingerprint information of all staff on the fingerprint machine (one “Registration No for each staff”); The fingerprint information is stored in the Attendance Machine. By using this software, you can acquire the registration information and store it in the software system. For one thing, it will avoid the loss of fingerprint information due to abnormal circumstances of the attendance machine which results in repeated input of information; on the other hand, if the customer uses several attendance machines, they can “write” (register) the fingerprint information to the other attendance machines through this software. To connect the attendance machine with 【 Communication Programme】: A.You can check the information on the attendance machine through the software, e.g. the number of staff registered, the fingerprint recorded and quantity of attendance records, etc. You can also set certain parameters of the attendance machine. B. To take the fingerprint information registered at the attendance machine to the software; C . To upload the name information (firstly you must have Page 9 Total 51 Pages
  • 10. Instruction Manual for Attendance Management System established the staff information and have take the information to the software ) to the attendance machine. ※Note: Part of attendance machines use standard communication wire (RS232) to connect with the computer. You need to set the Baud rate of the computer port to make it consistent with the BAUD rate of the attendance machine. The default Baud rate of common is: 38400BPS. 4.【Shift Setting】 “Shift” refers to the in and out times and it s schedule within a day which includes the setting of in and out time, late arrival, early out rules, absence rules and overtime rules, etc. You can sort out all working circumstances of all staff in the company, and set different ways of in and out within a day as one shift (e.g. day shift, night shift, long day shift, etc.). 5.【Shift Allotment】 “Shift Allotment” is to designate the daily shift of each staff; generally speaking, it refers to the specific shift of each staff in certain day. 【Shift Allotment】is the basis for a attendance management software to analyze data and acquire statistic report. This is because the system has to know how the work of certain staff is managed in certain day, and whether this staff is late or early out, or keep regular attendance. Therefore, “Shift Set ting” and “Shift Allotment” are the core of attendance management system. A.【Shift Pattern】 If the staff attends his work on a periodic basis, you can preset one or several “Shift Patterns” in “Shift Pattern”. As shown in the following figure, the staff of certain company attend their work from Monday to Friday, and rest at weekends. Therefore, we can set a periodic Shift Pattern for this company. Page 10 Total 51 Pages
  • 11. Instruction Manual for Attendance Management System B.【Start Shift Allotment】: You can manage the shift for the staff with the “Shift Allotment Module” set in Shift Pattern (to assign the “shift” for certain staff for that day). C.【General Shift Allotment Table】 After you have assigned the shift, you can review the Shift Allotment of each staff in the “General Shift Allotment Table” of the “Attendance Management” module. Firstly you can check whether the shift allotment is successful and the result of the shift allotment, and secondly you can make adjustment to the shift allotment, see the following figure: 6.Backup Data After you have set the staff information, attendance rules, shift setting and shift allotment, we recommend you to back up the data Page 11 Total 51 Pages
  • 12. Instruction Manual for Attendance Management System with meaningful names, so that you can restore the data when the system is not available due to computer problems, so as to reduce the work to input the information. 7.Collect Data After you have inputted the fingerprint information to the software and registered the names at the attendance machine, your staff then can use the machine to record their attendance. The administrator needs to collect the data to the software after a period of time (generally at the end of the month), and acquire the statistic report through the analysis of the software. Use 【Attendance Data Download】 from the 【Communication Programme】 and select “download new record” to acquire the records after the previous data collection. With “download new record” function, you can only collect the data after the previous data collection, which saves your time and avoid repeated collection. 8. Analyze Data The principle of the attendance system is to sum up the attendance records of staff based on the work registration of the staff in accordance with the attendance rules preset by the computer (shift allotment, asking for leave and out of office, etc.). The following is the procedure of working principle of the attendance system Staff Information Original Record Shift Definition and Allotment (Acquired from the Attendance Machine) Asking for leave, out of office and Holidays Page 12 Total 51 Pages
  • 13. Instruction Manual for Attendance Management System Data Analysis Report Sum-up (Daily Report , Monthly Report) 9. Review Report After the data is analyzed, you can review the attendance report. Chapter Five Specific Introduction to Each Module 1.Personnel Information 1.1 Set【Company Information】 Click 【Company Information】module, you will enter the setting window for company information, as shown in the following figure: Click 【Modify】 and then sequentially input company name Page 13 Total 51 Pages
  • 14. Instruction Manual for Attendance Management System (compulsory, it can be abbreviated), address, telephone, and then click store. 1.2 Set 【Department Information】 Click 【Department Information】 module to enter the setting window for department information. The Company is the general department of the whole department structure. All the departments can be set subsidiary departments. Theoretically, the level of subsidiary departments of one department is not limited. But, for the purpose of management, it’s better to set no more than 4 levels of subsidiary departments. 【Application Steps】: 1.Add【Department】 Click “Add” and then input “Department No”, “Department Name”, “Administrative Department”, “Responsible Person of the Department”, and then click “Store”. Note: The administrative department must be filled. Except for the top department (company), each department has an administrative department. Theoretically the levels of the department is not limited. 2.Modify 【Department】 By clicking “Modify”, you can modify the department information already added. Page 14 Total 51 Pages
  • 15. Instruction Manual for Attendance Management System 3.Delete【Department】 By clicking “Delete”, you can delete the department information already added. But if the department has added with the staff information, it can not be deleted. 4.Print Select “Print” to print the department list. 5.Exit Select “Exit” to exit the department setting module. 1.3 Set 【Staff Information】 Click 【Staff Information】 module to enter the setting window for staff information and add staff information. 【 Staff Information Setting 】 module is used to establish personnel information archive; it is the basis of the whole attendance management software system. You should fill it carefully. 1. Add Staff Information Click “Add” in the management window of 【Staff Information】, the following window will pop up. Page 15 Total 51 Pages
  • 16. Instruction Manual for Attendance Management System Fill the archive information of the staff in 【Staff Information】 window. Staff No, Name, Card No (Registration No) and Department are compulsory items to be completed. Other items are optional. After all the items are competed, click “Store” to store the personnel information of the staff. 【Staff No】: it is the “Work No” of the staff in the company. Generally it is a serials of numbers, it may also include letters. Note: The Staff No is the most important basis of the attendance system for the staff, therefore, don't change the Staff No during the using process. 【Card No (Registration No)】: it is the number that the staff registered at the attendance machine. This number should be consistent with the registration number that the staff has registered at the attendance machine; otherwise the data treatment will not be available. 【Card Free 】: if you select this item, it means that the staff you selected doesn’t need to register his attendance. The system will not deal with the attendance data of this staff. 【Join Date】: The attendance system will only deal with the Page 16 Total 51 Pages
  • 17. Instruction Manual for Attendance Management System attendance data after the join date. Therefore, when you fill in the join date, you can optionally fill a prior date. 2. Add Staff Information In the 【Staff Information】 window, select the staff whose archive information needs to be modified, and then select “Add”, it will pop up the following windows: Department Tree Select indication arrow Inquiry Toolbar You can use “Inquiry Toolbar” to find out the staff whose archive information needs to be modified according to the conditions, you may also use the “Department Tree” on the left side to find the staff. Click “Modify” to enter the dialog box for staff information setting. The procedure is the same with the steps to 【add staff information】. 3. Delete Staff Information In the 【Staff Information】 window, select the staff whose archive information needs to be deleted; click “Add”, it will pop up the following window: (you can use “Inquiry Toolbar” to find out the staff whose archive information needs to be deleted according to the conditions, you may also use the “Department Tree” on the left side to find the staff) If you delete this staff, all the attendance data of this staff will be deleted. Page 17 Total 51 Pages
  • 18. Instruction Manual for Attendance Management System 4. Print In the 【Staff Information】 window, select the staff whose archive information needs to be printed; click “Print”, the “Individual Staff Information ” will pop up. Click the icon “ ” on the top right corner, you can print the staff information. 5. Import This attendance system supports EXCEL format import function. It can import the staff information in certain format into the staff information archive. In the 【Staff Information】 window, select “Import”, you will enter the data import module, as shown in the figure below: Click “Browse File” to select the EXCEL file which has stored the personnel information, and fill in the name of the personnel information sheet, click “Next Step”. Page 18 Total 51 Pages
  • 19. Instruction Manual for Attendance Management System Set field corresponding relationship, and then click “Next Step”; Note: Only the department name in 【Subordinate Department】 has already existed in 【Department Information】can the personnel information be correctly imported. If the staff information fails to be correctly imported, you can Page 19 Total 51 Pages
  • 20. Instruction Manual for Attendance Management System select “View Log” to check the reason for the failure. If you succeed in the import, click “Operation Complete”. 6. Export The 【Export】 function is able to export the staff information to EXCEL file. 1.4 Demission and Restoration Management Select “Personnel Information”—> “Register Staff Demission” to handle the Demission procedure for the staff: 1.4.1 Demission Click “Add” in the window of “Register Staff Demission”, and then click “Select Staff” to select the staff to be left, and fill in “Handler” and “Demission Reason”, click “Store” to complete the registration for the staff demission. 1.4.2 Demission Select the staff from the staff information sheet who is to restore, and click “Restoration”, the window below will pop up: Page 20 Total 51 Pages
  • 21. Instruction Manual for Attendance Management System Select “Yes” to complete the restoration. 1.5 Set 【Personnel Parameter】 Set the property information of the staff such as “Work Type”, “Education Information” and “Nationality Information”. Click “Personnel Parameter” module to enter the setting window for personnel parameters, add property information of the staff such as “Work Type”, “Education Information” and “Nationality Information”. 【Application Steps】: 1. Add Select the property information of the staff to be set, for example: select “Work Type” to view the set work type. If you want to set new “Work Type”, click “Add”; fill in the new work type in the name of the work type, click “Store” to complete the setting. 2. Modify Select the property information of the staff to be set, choose the information item to be modified, and click “Modify”; fill in the new work type in the name of the work type, click “Store” to complete the setting. 3. Delete Select the property information of the staff to be set, choose the information item to be deleted, and click “Delete” to complete the Page 21 Total 51 Pages
  • 22. Instruction Manual for Attendance Management System deletion. 2. Attendance Management 2.1 Set 【Shift Definition】 Select 【Attendance Management】 【Shift Definition】 or directly  , click the 【Shift Definition】icon in the directory to enter the setting module of shift definition. “Shift” refers to the time and schedule to attend and leave work within a day.It includes the setting for attending and leaving work, rules for late arrival and early out, absence rules and overtime rules, etc. You can set different ways of attending and leaving work as one shift (for example: day shift, night shift, long day shift, etc.) based on the work circumstances of all staff in the company. 1. Noun Explanation 【Shift Section】: “Shift Section” refers to the time section included in the “Shift”. It is constituted by a starting point (the time to attend work) and a ending Page 22 Total 51 Pages
  • 23. Instruction Manual for Attendance Management System point (the time to leave work). The common shift may be one section and may also include several sections. This software only supports one shift including three sections at most. As shown in the figure above, the “long day shift” includes three “shift sections”: First Section: 08:00-12:00 Second Section: 14:00-18:00 Third Section: 20:00-28:00 (04:00 at the second day) 【Not Sign In】 【Not Sign Out】: “Sign In”: Whether it is mandatory to sign card to attend work (press fingerprint ) in this shift “Sign Out”: It is mandatory to sign card (press fingerprint ) to leave work in this shift 1) If “Not Sign In” or “Not Sign Out” is checked, the staff will be deemed absence if the staff hasn’t signed card within this period of time. 2) If “Sign In” or “Sign Out” is not selected, the staff can either choose to sign card or not to sign card. The report will not compute the absence, late arrival, early out and missed signatures, etc. 【Shift Section Treatment Category】 Define the property of 【Shift Section】: For the purpose to calculate the wage rate after the reports are treated (the legal overtime wage is N times than normal attendance. The specific times will be defined based on the overtime property ). Including: 【Normal Attendance】,【Overtime at Normal Time】, 【Overtime at Weekend】and 【Overtime on Holiday】 【Previous Valid】 “Previous Valid” refers to a period of time where the attendance data signed before the attending time is valid. Page 23 Total 51 Pages
  • 24. Instruction Manual for Attendance Management System For example: shift section 【Attend Work Card】is :08:00, set 【Previous Valid】 60 minutes, then all the attendance data between as 07:00-08:00 is deemed normal attendance. The attendance data before 07:00 is valid attendance. 【After Valid】 “After Valid” refers to a period of time where the attendance data signed after the leaving time is valid. For example: shift section 【Attend Work Card】is :08:00, set 【After Valid】as 30 minutes, then all the attendance data between 08:00-08:30 is deemed normal attendance (if the staff exceed the overdue time, it will be deducted work hour and deemed late for work).The attendance data after 08:30 is valid attendance. 【Late Arrival】: “Late Arrival” refers to what can be set as late within the scope of “After Valid” of shift section 【Attend Work Card】 For example: Shift section 【Attend Work Card】is 08:00; set 【Late Arrival】 0 minute and 【After Valid】 30 minutes; if the staff as as signs at 08:01, this staff is deemed to be late for 1 minute. 【Early Out】 “Early Out” refers to what can be set as leaving earlier within the scope of “Previous Valid” of shift section 【Leave Work Card】 For example: Shift section 【Attend Work Card】is 12:00; set 【Early Out】as 0 minute and 【Previous Valid】 30 minutes; if the as staff signs at 11:59 this staff is deemed to leave earlier for 1 minute. 【Application Steps】: 1) Add “Shift” In the 【Shift Setting】window, click “Add”, and sequentially input the shift number, name and subordinate department.(The default subordinate department is the whole company) Page 24 Total 51 Pages
  • 25. Instruction Manual for Attendance Management System Set the parameter of 【Shift Section】. After the setting is completed, confirm it and click “Store” to complete the adding of shift. 2) Modify “Shift” In the 【Shift Setting】window, select the shift from the shift list whose parameters needs to be modified, click “Modify” to modify the shift. 3. Delete “Shift” In the 【Shift Setting】window, select the shift from the shift list whose parameters needs to be modified, click “delete” to delete the shift. 2.2 Set 【Shift Pattern】 Shift Pattern: it refers to the rules to attend work on a periodic basis. If the staff attend work on a periodic circulation, you can firstly set one or several “Shift Allotment Templates” in “Shift Pattern” module. If you arrange the shift according to the module, you will save much time. Click “Attendance Management” —> “Shift Pattern” or directly click the “Shift Pattern” icon in the directory to enter the setting module of “Shift Pattern”. Page 25 Total 51 Pages
  • 26. Instruction Manual for Attendance Management System As shown in the figure above, it has set an “Shift Pattern” on a weekly basis: rest on Saturday and Sunday, “Normal work” from Monday to Friday. 【Application Steps】: 1) Add “Shift Pattern” In the “Shift Pattern” window, click “Add”, manually input “Shift Pattern Name”, “Periodic Unit” and “Period”, then the “Shift Allotment” will display the Shift Pattern, click the pull-down menu, and select the shift allotment for the current day, click “Store”. “Shift Pattern” is successfully added. 2) Modify “Shift Pattern” In the “Shift Pattern” window, select the “Shift Pattern” from the “Shift Pattern List” which needs to be modified, and then click “Modify”. You can select the shift which needs to be modified from the “Shift Allotment” section, click “Store” to complete the modification to the “Shift Pattern”. 3) Delete “Shift Pattern” In the “Shift Pattern” window, select the “Shift Pattern” from the “Shift Pattern List” which needs to be deleted, and then click “Delete”. Click “Store” to complete the deletion of the “Shift Pattern”. 2.3 【Staff Shift Allotment】 【Shift Allotment】is the basis for a attendance management software to analyze data and acquire statistic report. This is because the system has to know how the work of certain staff is managed in certain day, and whether this staff is late or early out, or keep regular attendance. Therefore, “Shift Setting” and “Shift Allotment” are the core of attendance management system. Click “Start Shift Allotment” module, the system will pop up the dialog box “Shift Allotment”. The user can allot the shift according to the schedule template set in the Shift Pattern. Page 26 Total 51 Pages
  • 27. Instruction Manual for Attendance Management System 【Application Steps】: 1) Add Shift Allotment In the “Shift Allotment” window, click “Add” A、 Select staff Click “Select Staff”, the dialog box “Staff Option” will pop up, as shown in the figure below: In the “Staff Option” window, select the subordinate department of the staff whose shift needs to be allotted, then all the staff in the selected department will appear in the section “Staff to be Selected”. Click “Single Option” or choose multiply staff and put them on the Page 27 Total 51 Pages
  • 28. Instruction Manual for Attendance Management System “Selected Staff” section on the right, click “Ok” to complete the selection. B、 Select the start date and end date of the shift allotment C、 Select “Shift Pattern” D、 Click “Store” to complete the shift allotment made for a period of time based on certain shift pattern. 2) Delete Shift Allotment in the “Shift Allotment” window, drag the mouse to select the shift allotment which needs to be deleted, and then click “Delete” to complete the deletion of the shift allotment. 3) Review Shift Allotment in the “Shift Allotment” window, check “Display the Inquiry Toolbar”, the system will automatically display the inquiry of shift allotment. Select "Input Search Condition", you can review the specific shift allotment. 2.4 Set 【General Shift Allotment Table】 The “General Shift Allotment Table” can reflect and adjust the shift allotment of the staff. When the “Shift Allotment” is finished, you can check the result of the shift allotment; you can also adjust the result. Click “Attendance Management”—> “General Shift Allotment Table”, enter the setting module of “General Shift Allotment Table” Page 28 Total 51 Pages
  • 29. Instruction Manual for Attendance Management System Department List Staff List 【Application Steps】: 1) Review Firstly select the month for which the “shift allotment” is to be reviewed, and then select the “Department List” in the left to review or modify the department where the staff to be modified is located. Display the staff in the current department in the staff list, and then select the staff from the staff list. Display the shift allotment of this staff in the current month in the “Shift Allotment Table”. 2) Modify Shift Allotment Table When the shift allotment of the staff for the current month is displayed in the “Shift Allotment ” table, you can select certain day, and then click the pull-down menu, choose the shift which needs to be changed in the shift list, and then click “Store” to finish the modification to the shift of that day. 3) Delete Shift Allotment Table Firstly select the month, and then choose the staff from the staff list whose shift allotment is to be deleted ; click “Delete” to complete the deletion. Page 29 Total 51 Pages
  • 30. Instruction Manual for Attendance Management System 2.5 Holiday Registration Holiday Setting: set the fixed holidays and festivals of the company. Holidays and festivals refer to the non-work time. Click “Attendance Management”—> “Holiday Registration”, enter the setting module of “Holiday Registration” 【Application Steps】: 1) Add Holiday In the “Holiday Setting” window, click “Add”, and then manually input the holiday name; select the start time and end time of the holiday, and then click “Store” to complete the adding of holiday. 2) Modify Holiday In the “Holiday Setting” window select the holiday to be modified from the list; click “Modify”, and then modify the holiday content; click “Store” to complete the modification of the holiday 3) Delete Holiday In the “Holiday Setting” window select the holiday to be deleted from the list; click “Delete”, and then delete the holiday; click “Store” to complete the deletion of the holiday. 2.6 Leave or Sign-out Registration Click “Attendance Management”—> “Leave or Sign-out Registration”, enter the setting module of “Leave or Sign-out Registration” Page 30 Total 51 Pages
  • 31. Instruction Manual for Attendance Management System 【Application Steps】: 1) 2.6 Add Leave or Sign-out Registration In the “Leave or Sign-out Registration” window, click “Add”, and then click “Select Staff” to select the staff who wants to ask for leave; input the start date, end date, leave type and wages; input the leave reason, and then click “Store” to complete the leave registration. 2) Modify Leave or Sign-out Record In the “Leave or Sign-out Registration” window, select the leave or sign-out record to be modified; click “Modify” to modify the leave record or sign-out record; click “Store” to complete the modification. 3) Delete Leave or Sign-out Record In the “Leave or Sign-out Registration” window, select the leave or sign-out record to be deleted; click “Delete” to delete the leave record or sign-out record; click “Store” to complete the deletion. 2.7 Manual Adjustment 【Manual Adjustment】: It refers to the manual operation of adding attendance record in the attendance management software. It is mainly applied to one or more than one certain circumstances where the staff fails in signing in due to accidents. Click “Attendance Management”—> “Manual Adjustment”, enter the setting module of “Manual Adjustment” Page 31 Total 51 Pages
  • 32. Instruction Manual for Attendance Management System 【Application Steps】: 1) Add Manual Adjustment registration a. Click “Add” in the setting window of “Manual Adjustment”; b. Click “Select Staff” to select the staff who needs manual adjustment; c. Select the start date, end date and time; d. Input the reason for manual adjustment; e. Click “Store” to complete the adding of manual adjustment record. 2) Modify manual adjustment registration In the setting window of “Manual Adjustment”, select the manual adjustment record which needs to be modified; click “Modify”, and then modify the manual adjustment record; click “Store” to complete the modification to the manual adjustment record. 3) Delete manual make-up registration In the setting window of “Manual Adjustment”, select the manual adjustment record which needs to be deleted; click “Delete”, and then delete the manual adjustment record; click “Store” to complete the deletion of the manual adjustment record. 2.8 Set 【Computation Rule】 Computation Rule: it refers to the setting of Computation Rule for the overtime statistic report. Click “Attendance Management”—> “Computation Rule”, enter the setting module of “Computation Rule” Page 32 Total 51 Pages
  • 33. Instruction Manual for Attendance Management System Initial Value: it means the minimal time value from which the computation starts to count. Integer Value: it refers to the value which we can set to filter the trivial time. For example: if the initial value is set as 30 minutes in “Weekend OT”, the computation of overtime work will be started from 30th minute. Take the integer value as 20 minutes. If one staff have worked overtime for 65 minutes, because the overwork exceeding the initial value 30 minutes will be deemed overwork, while 65=20*3+5, 5 minutes is the residue less than 20 minutes, so it can be filtered. Therefore, the overwork displayed in the statistic report will be 60 minutes. 【Application Steps】: 1) Add “Computation Rule” a. Click “Add” in the setting window of “Computation Rule”; b. Select the category of “Computation Rule”; c. Manually set the “Initial Value” and “Integer Value”; d. Set "OT Rates" e. Click “Store” to complete the adding of computation rule. 2) Modify “Computation Rule” In the setting window of “Computation Rule”, select the category Page 33 Total 51 Pages
  • 34. Instruction Manual for Attendance Management System of the “Computation Rule” to be modified; click “Modify” and then click “Store” to complete the modification. 3) Add “Computation Rule” In the setting window of “Computation Rule”, select the category of the “Computation Rule” to be deleted; click “Delete” and then click “Store” to complete the Deletion. 3. Terminal Management “Terminal Management” is a management module for attendance device, including four modules namely “Data Collection”, “Staff Registration and Acquisition of Registration Information”, “Attendance Machine Setting” and “Ringing Setting”. Select the “Device Management” icon in the directory, and then you can enter the Terminal Management module. If you are to manage the attendance machine, you need firstly “connect the attendance machine” 3.1 Add Attendance Machine 1) Open the Main Interface Page 34 Total 51 Pages
  • 35. Instruction Manual for Attendance Management System A. Click “Add”, the following interface will appear; select the specific device model, and then click “Confirm” Page 35 Total 51 Pages
  • 36. Instruction Manual for Attendance Management System B. Select the connection method C. The machine number of the attendance machine should be consistent with the that of the attendance machine to be connected; D. Set the communication password and make it the same with the communication password of the attendance machine; generally the default value of fingerprint attendance machine is 0. E. Confirm whether the above settings are correct (generally to keep the default value). Click “Store” and “Connect”, then you can successfully connect it with the attendance machine. 3.2 Staff Information and Fingerprint Management The 【Staff Information and Fingerprint Management】 module includes the following content: A. 【 Download Staff Information 】 : to take the registration information from the attendance to the software. If it is a fingerprint attendance machine, it can take the fingerprint registration information from the attendance machine to the software; Page 36 Total 51 Pages
  • 37. Instruction Manual for Attendance Management System B. 【 Upload Staff Information 】 : to upload the registration information stored in the software to the attendance machine; if it is a fingerprint attendance machine, this operation must be carried out after 【Acquire Registration Information】(that is: only when the software has stored the fingerprint registration information can it be uploaded to the attendance machine). C. 【Modify User’s Jurisdiction】: With this function, you can modify the jurisdiction of certain staff to operate the attendance machine, and you can change the “Administrator” to “Common Staff”; or modify the “Common Staff” to “Administrator”. D. 【Delete Registration Information】: You can remove the information of certain staff in the attendance machine. 1. Download Staff Information Click “Download Staff Information” in the 【 Staff Information Management】module. The registration information list will appear when the download is completed, as shown in the picture below: You can acquire the fingerprint information registered at the Page 37 Total 51 Pages
  • 38. Instruction Manual for Attendance Management System attendance machine and input it in the software. And you can match the fingerprint registration number with the staff information. If the fingerprint attendance machine occurs catastrophic failure, you can upload the fingerprint information (and the name information) stored in the software to the attendance machine. 2. Upload Staff Information Click “Upload Staff Information” in the 【Staff Information and Fingerprint Management】module, and the registered staff information window will appear: Select the staff whose registration information is to be uploaded, and then click “Ok” to upload the registration stored in the software to the attendance machine. If it is a fingerprint attendance machine, because the user has already registered the fingerprint information at the fingerprint attendance machine, the user can select “Only Register Name” to upload the staff name to the fingerprint attendance machine. 3. 【Modify User’s Jurisdiction】 Page 38 Total 51 Pages
  • 39. Instruction Manual for Attendance Management System Select the staff whose jurisdiction needs to be modified from the user registration information list in the 【 Staff Information and Fingerprint Management 】module, and then click “Modify User’s Jurisdiction” to complete the modification; 4. 【Delete Registration Information】 Select the staff whose jurisdiction needs to be deleted from the user registration information list in the 【 Staff Information and Fingerprint Management】module, and then click “Delete Staff” to complete the deletion; Page 39 Total 51 Pages
  • 40. Instruction Manual for Attendance Management System 3.3. Attendance Machine Management The 【Attendance Machine Management】module is mainly used to review and modify the parameters of the attendance machine. 【Initialize Attendance Machine】 it will remove all the information : (registration information, attendance information) in the attendance machine, and restore it to the factory default status; 【Synchronize Sign-in Time】: it will synchronize the time of the attendance machine with the computer. 3.5 Download Attendance Data The 【 Download Attendance Data 】 function is to collect the attendance record of the attendance machine to the software. If you select “Collect New Data”, it will collect all the new data in the attendance machine and drop the attendance records which have once been collected, which saves time. If you select “Collect All Data”, it will collect all the attendance Page 40 Total 51 Pages
  • 41. Instruction Manual for Attendance Management System records stored in the attendance machine, and will not clarify the collected records with that having not been collected. “Clear All Attendance Record”: it will remove all the attendance record stored in the attendance machine. It cannot be restored after it is removed. Be Cautious! 4. Statistic Report 【 The Statistic Report】 【 includes Attendance Information Analysis】, 【Daily Attendance Report】 Monthly Attendance Report】 Original 【 , 【 , Data Report】and【Detailed Attendance Record】. 1) 【Attendance Information Analysis】: it will analyze and deal with the collected attendance records and acquire the Attendance Statistic Report (Daily Report and Monthly Report, etc.) Except that the “Original Record Sheet” is formed during the downloading of attendance data, all the other reports can not be reviewed prior to the 【Attendance Information Analysis】. 2) 【Original Data Report】: it refers to the original attendance record collected from the attendance machine to the software; 3) 【Detailed Attendance Record】: it refers to each record signed in by the staff in each time. 4) 【Daily Attendance Report】: it refers to the daily attendance of the staff. One record for each staff in one day (it only counts Page 41 Total 51 Pages
  • 42. Instruction Manual for Attendance Management System those that meets the attendance rules and the statistic conditions set in shift setting); 5) 【Monthly Attendance Report】:It refers to the attendance record of the staff within a month; one record for each staff for every one month; 5. Database Management On the top left corner of the software there is a pull-down menu of the “System”, which includes four modules namely 【 Backup 【Restore Database】 Database】, 【Compress Database】 【Upgrade , and Data Analysis】. 【Backup Database】: it will back up the database to a backup file. 【Restore Database】:it will restore the information stored in the database to the software. 【Compress Database】:The database will become large when the software has been used for a period of time, which slows down the Page 42 Total 51 Pages
  • 43. Instruction Manual for Attendance Management System running speed of the software. 1. Backup Database Backup Database: it will back up all the data in the attendance software to a file, and store it at the designated location. When the system appears catastrophic failure, it can restore the backup file. To ensure that all the data will not get lost. Select “Backup Database” module in the pull-down menu of the “System”, it will pop up a “Save As” window; select the backup path for the backup database, and then click “Save” to complete the backup. 2. Restore Database Select “Restore Database” module in the pull-down menu of the “System”, it will pop up a “Authentication” dialog box: Page 43 Total 51 Pages
  • 44. Instruction Manual for Attendance Management System Input the current “Users Name” and “Password”, and click “Confirm” to enter the “Restore Database” window; open the backup path of the database, and then select the database to be restored; click “Open” to restore the database. As shown in the following picture: 3. Compress Database Select “Compress Database” module in the pull-down menu of Page 44 Total 51 Pages
  • 45. Instruction Manual for Attendance Management System the “System”, it will compress the database. 6. System Maintenance The “System Maintenance” window includes "User Management" and “Remove Data”. 【User Management】: You can add, delete the administrator or modify the jurisdiction of the administrator; 【Remove Data】: You can remove the expired attendance data 6.1 User Management Click “User Management” module to enter the setting window of user management 【Application Steps】: A. 【Add】 In the “User Management” window, click “Add” to enter the “User Property Page”; input the “Login ID” and “Login Password”; select the operation jurisdiction for this administrator, and click “Save” to add an administrator. Page 45 Total 51 Pages
  • 46. Instruction Manual for Attendance Management System B. 【Modify】 Choose the administrator to be modified in the window of “User Management” Click “Modify” to enter the “User Property Page” window; modify the “Login ID”, “Login Password” and the “operation Jurisdiction”, click “Save” to finish the modification to the administrator. C. 【Modify】 Select the administrator to be deleted in the "User Management" window, and then click “Delete” to delete the administrator. Page 46 Total 51 Pages
  • 47. Instruction Manual for Attendance Management System 2. Remove Data Click “Remove Data” module, the “Authentication” window will pop up Input the active “User Name” and “Password”, and then click “Confirm” to enter “Remove the expired data in the database” window: Select the months with the expired data, and then click “Confirm” to remove the attendance data from the selected months. 2. Access Control a. The Access Device management is the same with the attendance device. Please refer to “Device Management” Page 47 Total 51 Pages
  • 48. Instruction Manual for Attendance Management System b. Time Slot Setting Step 1: Choose the machine Step 2: Read, modify and download time slot c. Lock Setting Step: Select machine, and then set Lock Mixture; lastly download Page 48 Total 51 Pages
  • 49. Instruction Manual for Attendance Management System d. Authorized Download Step 1: Choose the machine Page 49 Total 51 Pages
  • 50. Instruction Manual for Attendance Management System Step 2: select the tree-type department in the right side. Step 3: select time slot and division Step 4: select staff Step 5: click “Download” Page 50 Total 51 Pages
  • 51. Instruction Manual for Attendance Management System The End! Page 51 Total 51 Pages