SlideShare une entreprise Scribd logo
1  sur  45
Lightwave 3D
The Interface:
Having a look around
3D Animation I
Let’s Get Started
 Start Lightwave
Layout
 Select File > Clear
Scene
 Command N
 This allows you to
start with a fresh
scene at any time
The Interface
 What you see
 Tabs on top
 Selectable items on
left
 Based on tab
selection
 Timeline on bottom
 Play controls
Viewport
Tabs
Menu Items
Timeline
The Interface
 What you see
 Every new scene
starts with a light
and a camera
 The wireframe you
see in the viewport
is called the grid
 Used to help you
line up
objects, but is
not seen by the
camera
Light
Navigation Controls
Camera
Let’s Look at Something
 Make sure the Items
tab is selected
 On the left, select
Load More and then
select Object…
 Notice that the
shortcut to loading an
object is (+)
Let’s Look at Something
 In the Objects
directory, open the
Animals folder and
select
Triceratops.lwo
 Note that all objects
are .lwo
Looking Around
 Different views
 Displaying 3
dimensions on a 2D
screen
 Top, Bottom, Back,
Front, Right, Left,
Perspective, Light,
Camera views
 Shortcuts 1 - 6
Have a Look Around
 Click on the View
pop-up menu and
choose Top
 Shortcut (2)
Looking Around
 Changing your point
of view
 Selected item always
center
 Click on this will
keep whatever you
have selected in the
center of your view
Looking Around
 Changing your point
of view
 Dolly & Truck
 Moves your view
forward, backward,
side to side
Looking Around
 Changing your point
of view
 Rotate
 Allows you to swing
around the current
view up, down, left
or right
 Not available in
the top view
Looking Around
 Changing your point
of view
 Zoom
 Allows you to zoom
in and out on your
current view
 Shortcut (,) (.)
Have a Look Around
 Click & hold on the
Dolly button and
drag your cursor
 Keyboard shortcut
(Shift, Option)
 Click & hold on the
Zoom button and
drag your cursor
 Keyboard shortcut
(,)(.)
Have a Look Around
 In the View pop-up
menu choose
Perspective
 Keyboard shortcut (4)
 Click and hold on the
Rotate button and
drag your cursor
 Keyboard shortcut
(Option)
Have a Look Around
 In the View pop-up
menu choose Light
 Keyboard shortcut (5)
 This shows you what
the light is seeing
 Helpful when aiming
lights at certain
things
Have a Look Around
 In the View pop-up
menu choose
Camera
 Keyboard shortcut (6)
 This shows you what
the camera is seeing
 The most important
view
 When you render a
frame or your scene
this is what you get
Manipulating Objects
 Use the Modify tab
 Allows you to move,
rotate, scale and
stretch your object
 You can also move
and rotate your
camera or lights as
well
A Better View of Our Dino
 Select the Modify
tab
 Select Rotate
 Shortcut (y)
 Click on the Red
circle and rotate
the dino so you
have a better view
Manipulating Objects
 Numerics
 Bottom left
 Allows you to set specific
settings to the type of
manipulation you are doing
 Rotation
 Horizontal, Pitch, Bank
 Note the colors red, green
& blue match the control
rings on our dino
Tweak the Settings
 Using the Numerics, click
on the <> button and
change the horizontal
setting
 Change the pitch and bank
settings, then select inside
the setting window, type 0
and press Enter to reset
the pitch and bank
Timeline – Left Side
 Timeline Slider
 Drag this slider to the desired frame in your
animation
 Current frame is displayed on the left side of the
timeline
Timeline – Left Side
 Item Type
 Allows you to choose the kind of item in your
scene you would like to modify
 Object, Bones (things you add inside an object),
Lights, and Camera
Timeline – Left Side
 Current Item pop-up menu
 Once you have chosen the kind of item you would
like, then you can choose which of those items you
wish to modify
 Since we only have one object in our scene, our
Triceratops is the only object we can select
Timeline – Left Side
 Item Properties
 This allows you to change
features of the selected element
 Object properties allow you to
change its opacity, morph into
something and other tricks
Timeline – Right Side
 Total frames in scene
 This is how long the scene is
 Measured in frames
 30 frames per second  this scene is 4 seconds
long
 Type in any value you need to set the duration
Change the Scene
Duration
 Select inside the
Scene Duration
window and type 300
and press Enter
 Scene is now 300
frames long = 10
seconds
Timeline – Right Side
 Auto Key
 When checked, every time you change an item at
any frame, LW will make a key frame to remember
that change
 Handy feature, but sometimes you need to turn this
off
 Leave it on for now
Timeline – Right Side
 Create Key
 Allows you to manually create a key frame when
Auto Key is turned off
 Shortcut (Enter)
Let’s Make a Simple
Animation
 Make sure the Timeline
slider is at frame 0
 Using the Modify tab in
Camera view, select
Move, then move the
dino back away from
the camera and to the
right
 With Auto Key on, the
new position is
memorized
Let’s Make a Simple
Animation
 Move the slider to
frame 300
 While Move is still
selected, move the
dino closer to the
camera and to the
left
Let’s Make a Simple
Animation
 Move the slider to
frame 150
 While Move is still
selected, move the
dino to the left or
right of its current
location
 You now have 3 key
frames
Timeline – Right Side
 Navigation Controls
 Allows you to move your slider to specific frames in
your scene
 Go to the beginning, go to previous key frame of
selected item, go back 1 frame, go forward 1
frame, go to next key frame of selected item, go
to end of scene
Timeline – Right Side
 Navigation Controls
 Handy keyboard shortcuts
 Go forward or backward 1 frame =  
 Go to previous or next key frame = Shift  
Zip to Your Key Frames
 Use the navigation
controls to go to the
beginning and end of
your scene
 Use the navigation
controls to go to
your key frames
 Try out the shortcuts
Timeline – Right Side
 Preview pop-up menu
 Allows you to make a preview of your animation
without rendering out a movie
 Much faster – allows you to find problem areas in
your scene without wasting too much time
Make a Preview
 Click on the Preview
button and select
Make Preview
 1st frame = 0
 Last frame = 300
 Frame Step = 1
 Viewport = Camera
View
 Press OK
Play the Preview
 Click the play button
to play your preview
 You can scrub, step,
go to beginning, end,
set the frame rate
 When done, click
End Preview
Timeline – Right Side
 Viewport playback
 Plays the scene forward or backward
 Playback speed depends on the complexity of the scene
 Step
 Plays back each frame (1) or any interval of frames you
choose
 2 = every other frame
 10 = every 10th frame
Rendering
 Render tab
 Render the current
frame
 F9
 Render the scene
 F10
 Can render a
selected range of
frames or the whole
thing
Render a Frame
 Using the timeline
slider, select a frame
you would like to
render out
 Select the Render
tab, then click
Render Frame
 Or just press F9
Rendering
 Render Status
Window
 Shows you what
Lightwave is doing
when rendering your
frame
 Watch Lightwave
build your frame
 Slows down
rendering time & can
be turned off
Rendering
 Render Frame
 In its own window
 Allows you to save the
image if you like
Save a Frame
 On the Render
Window, select Save
RGBA > LW_JPEG
(.jpg) and save your
frame to the desktop
Save Your Scene
 Select File > Save
Scene As…
 Select the Scenes
folder (if necessary)
and create a new
folder ‘My Scenes’
 Title your animation
and Save
Lightwave 3D
The Interface:
Having a look around
3D Animation I

Contenu connexe

Tendances

M5 - Graphical Animation - Lesson 2
M5 - Graphical Animation - Lesson 2M5 - Graphical Animation - Lesson 2
M5 - Graphical Animation - Lesson 2Jamie Hutt
 
Power Point Animation
Power Point AnimationPower Point Animation
Power Point Animationfirstaidelady
 
Balloons tutorial by rokas petskevicius visualpelican
Balloons tutorial by rokas petskevicius visualpelicanBalloons tutorial by rokas petskevicius visualpelican
Balloons tutorial by rokas petskevicius visualpelicanRokas Petškevičius
 
Adobe Flash Professional CS5.5 screen shots
Adobe Flash Professional CS5.5 screen shotsAdobe Flash Professional CS5.5 screen shots
Adobe Flash Professional CS5.5 screen shotsClaire Armitage
 
How to start a simple animation.
How to start a simple animation.How to start a simple animation.
How to start a simple animation.TOA
 
M5 - Graphical Animation - Lesson 2
M5 - Graphical Animation - Lesson 2M5 - Graphical Animation - Lesson 2
M5 - Graphical Animation - Lesson 2Jamie Hutt
 
Paths, Masks And Blend Modes
Paths, Masks And Blend ModesPaths, Masks And Blend Modes
Paths, Masks And Blend ModesShan
 
Graphical Animation - Lesson 2
Graphical Animation - Lesson 2Graphical Animation - Lesson 2
Graphical Animation - Lesson 2Jamie Hutt
 
Tutorial 1 - Lightsaber Effect
Tutorial 1 - Lightsaber EffectTutorial 1 - Lightsaber Effect
Tutorial 1 - Lightsaber Effectairidascironka
 
How to add a drop shadow to your product images in Adobe Photoshop
How to add a drop shadow to your product images in Adobe PhotoshopHow to add a drop shadow to your product images in Adobe Photoshop
How to add a drop shadow to your product images in Adobe PhotoshopPixc
 
Adding a feathered border
Adding a feathered borderAdding a feathered border
Adding a feathered bordercollins27023
 
Getting Started with GoAnimate for a Whiteboard Video
Getting Started with GoAnimate for a Whiteboard VideoGetting Started with GoAnimate for a Whiteboard Video
Getting Started with GoAnimate for a Whiteboard VideoKarl Kapp
 
Intro storyboard 2
Intro storyboard 2Intro storyboard 2
Intro storyboard 2tomaog
 
Rotating banner and hotspots
Rotating banner and hotspotsRotating banner and hotspots
Rotating banner and hotspotsRick Butterworth
 
Ghost Effect
Ghost EffectGhost Effect
Ghost Effectshalace09
 

Tendances (20)

M5 - Graphical Animation - Lesson 2
M5 - Graphical Animation - Lesson 2M5 - Graphical Animation - Lesson 2
M5 - Graphical Animation - Lesson 2
 
Power Point Animation
Power Point AnimationPower Point Animation
Power Point Animation
 
Balloons tutorial by rokas petskevicius visualpelican
Balloons tutorial by rokas petskevicius visualpelicanBalloons tutorial by rokas petskevicius visualpelican
Balloons tutorial by rokas petskevicius visualpelican
 
Adobe Flash Professional CS5.5 screen shots
Adobe Flash Professional CS5.5 screen shotsAdobe Flash Professional CS5.5 screen shots
Adobe Flash Professional CS5.5 screen shots
 
How to start a simple animation.
How to start a simple animation.How to start a simple animation.
How to start a simple animation.
 
M5 - Graphical Animation - Lesson 2
M5 - Graphical Animation - Lesson 2M5 - Graphical Animation - Lesson 2
M5 - Graphical Animation - Lesson 2
 
Paths, Masks And Blend Modes
Paths, Masks And Blend ModesPaths, Masks And Blend Modes
Paths, Masks And Blend Modes
 
Advanced Digital Photography
Advanced Digital PhotographyAdvanced Digital Photography
Advanced Digital Photography
 
Tutorial 3
Tutorial 3Tutorial 3
Tutorial 3
 
Graphical Animation - Lesson 2
Graphical Animation - Lesson 2Graphical Animation - Lesson 2
Graphical Animation - Lesson 2
 
Tutorial 1 - Lightsaber Effect
Tutorial 1 - Lightsaber EffectTutorial 1 - Lightsaber Effect
Tutorial 1 - Lightsaber Effect
 
How to add a drop shadow to your product images in Adobe Photoshop
How to add a drop shadow to your product images in Adobe PhotoshopHow to add a drop shadow to your product images in Adobe Photoshop
How to add a drop shadow to your product images in Adobe Photoshop
 
Tutorial 2 - Light
Tutorial 2 - LightTutorial 2 - Light
Tutorial 2 - Light
 
Adding a feathered border
Adding a feathered borderAdding a feathered border
Adding a feathered border
 
Getting Started with GoAnimate for a Whiteboard Video
Getting Started with GoAnimate for a Whiteboard VideoGetting Started with GoAnimate for a Whiteboard Video
Getting Started with GoAnimate for a Whiteboard Video
 
Video editing
Video editingVideo editing
Video editing
 
Intro storyboard 2
Intro storyboard 2Intro storyboard 2
Intro storyboard 2
 
Rotating banner and hotspots
Rotating banner and hotspotsRotating banner and hotspots
Rotating banner and hotspots
 
Ghost Effect
Ghost EffectGhost Effect
Ghost Effect
 
Chromakey effect
Chromakey effectChromakey effect
Chromakey effect
 

Similaire à NewTek Lightwave 3D: Learning the Layout

Power pointlabs quick tutorial
Power pointlabs quick tutorialPower pointlabs quick tutorial
Power pointlabs quick tutorialDa Huang
 
3Dimention_lessonA_introMayaModeling.pptx
3Dimention_lessonA_introMayaModeling.pptx3Dimention_lessonA_introMayaModeling.pptx
3Dimention_lessonA_introMayaModeling.pptxFaris Abuhashish
 
Ppt exercise
Ppt exercisePpt exercise
Ppt exercisekaz naqvi
 
Flash cs4 tutorials_2009
Flash cs4 tutorials_2009Flash cs4 tutorials_2009
Flash cs4 tutorials_2009techbed
 
Photomanipulation in the Style of a Famous Artist
Photomanipulation in the Style of a Famous ArtistPhotomanipulation in the Style of a Famous Artist
Photomanipulation in the Style of a Famous ArtistJeremy Smith
 
Microsoft Office PowerPoint 2007 - Lesson 2
Microsoft Office PowerPoint 2007 - Lesson 2Microsoft Office PowerPoint 2007 - Lesson 2
Microsoft Office PowerPoint 2007 - Lesson 2Samantha TerBeest
 
Final Cut Pro X Weynand Certification Lesson 6
Final Cut Pro X Weynand Certification Lesson 6Final Cut Pro X Weynand Certification Lesson 6
Final Cut Pro X Weynand Certification Lesson 6Samuel Edsall
 
LESSON POWERPOINT, LEARN HOW TO DO POWERPOINT LESSON 2
LESSON POWERPOINT, LEARN HOW TO DO POWERPOINT LESSON 2LESSON POWERPOINT, LEARN HOW TO DO POWERPOINT LESSON 2
LESSON POWERPOINT, LEARN HOW TO DO POWERPOINT LESSON 2ElijahSantos4
 
Final Cut Pro X Certification Lesson 6
Final Cut Pro X Certification Lesson 6Final Cut Pro X Certification Lesson 6
Final Cut Pro X Certification Lesson 6Samuel Edsall
 
Libre Office Impress Lesson 5: Slide shows and animations
Libre Office Impress Lesson 5: Slide shows and animationsLibre Office Impress Lesson 5: Slide shows and animations
Libre Office Impress Lesson 5: Slide shows and animationsSmart Chicago Collaborative
 
𝕬𝖓𝖎𝖒𝖆𝖙𝖎𝖓𝖌 𝖙𝖊𝖝𝖙 𝖆𝖓𝖉 𝖔𝖇𝖏𝖊𝖈𝖙 𝖇𝖞 𝕽𝖔𝖓𝖊𝖑𝖑 𝕸𝖔𝖍𝖆𝖓 7𝖙𝖍 𝕭.pptx
𝕬𝖓𝖎𝖒𝖆𝖙𝖎𝖓𝖌 𝖙𝖊𝖝𝖙 𝖆𝖓𝖉 𝖔𝖇𝖏𝖊𝖈𝖙 𝖇𝖞 𝕽𝖔𝖓𝖊𝖑𝖑 𝕸𝖔𝖍𝖆𝖓 7𝖙𝖍 𝕭.pptx𝕬𝖓𝖎𝖒𝖆𝖙𝖎𝖓𝖌 𝖙𝖊𝖝𝖙 𝖆𝖓𝖉 𝖔𝖇𝖏𝖊𝖈𝖙 𝖇𝖞 𝕽𝖔𝖓𝖊𝖑𝖑 𝕸𝖔𝖍𝖆𝖓 7𝖙𝖍 𝕭.pptx
𝕬𝖓𝖎𝖒𝖆𝖙𝖎𝖓𝖌 𝖙𝖊𝖝𝖙 𝖆𝖓𝖉 𝖔𝖇𝖏𝖊𝖈𝖙 𝖇𝖞 𝕽𝖔𝖓𝖊𝖑𝖑 𝕸𝖔𝖍𝖆𝖓 7𝖙𝖍 𝕭.pptxUshaCr4
 
Smoke 2 marking clips
Smoke 2   marking clipsSmoke 2   marking clips
Smoke 2 marking clipsSamuel Edsall
 
Animation in powerpoint part 1
Animation in powerpoint part 1Animation in powerpoint part 1
Animation in powerpoint part 1JAIDEVPAUL
 
Power Point 2000 Advanced
Power Point 2000  AdvancedPower Point 2000  Advanced
Power Point 2000 Advancedguestdeb471
 

Similaire à NewTek Lightwave 3D: Learning the Layout (20)

Power pointlabs quick tutorial
Power pointlabs quick tutorialPower pointlabs quick tutorial
Power pointlabs quick tutorial
 
3Dimention_lessonA_introMayaModeling.pptx
3Dimention_lessonA_introMayaModeling.pptx3Dimention_lessonA_introMayaModeling.pptx
3Dimention_lessonA_introMayaModeling.pptx
 
Snagit910
Snagit910Snagit910
Snagit910
 
Ppt exercise
Ppt exercisePpt exercise
Ppt exercise
 
Edtech PP.
Edtech PP.Edtech PP.
Edtech PP.
 
Flash cs4 tutorials_2009
Flash cs4 tutorials_2009Flash cs4 tutorials_2009
Flash cs4 tutorials_2009
 
Photomanipulation in the Style of a Famous Artist
Photomanipulation in the Style of a Famous ArtistPhotomanipulation in the Style of a Famous Artist
Photomanipulation in the Style of a Famous Artist
 
Microsoft Office PowerPoint 2007 - Lesson 2
Microsoft Office PowerPoint 2007 - Lesson 2Microsoft Office PowerPoint 2007 - Lesson 2
Microsoft Office PowerPoint 2007 - Lesson 2
 
Final Cut Pro X Weynand Certification Lesson 6
Final Cut Pro X Weynand Certification Lesson 6Final Cut Pro X Weynand Certification Lesson 6
Final Cut Pro X Weynand Certification Lesson 6
 
LESSON POWERPOINT, LEARN HOW TO DO POWERPOINT LESSON 2
LESSON POWERPOINT, LEARN HOW TO DO POWERPOINT LESSON 2LESSON POWERPOINT, LEARN HOW TO DO POWERPOINT LESSON 2
LESSON POWERPOINT, LEARN HOW TO DO POWERPOINT LESSON 2
 
Final Cut Pro X Certification Lesson 6
Final Cut Pro X Certification Lesson 6Final Cut Pro X Certification Lesson 6
Final Cut Pro X Certification Lesson 6
 
Tutorial
TutorialTutorial
Tutorial
 
Presentation.pptx
Presentation.pptxPresentation.pptx
Presentation.pptx
 
Poser presentation1
Poser presentation1Poser presentation1
Poser presentation1
 
Libre Office Impress Lesson 5: Slide shows and animations
Libre Office Impress Lesson 5: Slide shows and animationsLibre Office Impress Lesson 5: Slide shows and animations
Libre Office Impress Lesson 5: Slide shows and animations
 
𝕬𝖓𝖎𝖒𝖆𝖙𝖎𝖓𝖌 𝖙𝖊𝖝𝖙 𝖆𝖓𝖉 𝖔𝖇𝖏𝖊𝖈𝖙 𝖇𝖞 𝕽𝖔𝖓𝖊𝖑𝖑 𝕸𝖔𝖍𝖆𝖓 7𝖙𝖍 𝕭.pptx
𝕬𝖓𝖎𝖒𝖆𝖙𝖎𝖓𝖌 𝖙𝖊𝖝𝖙 𝖆𝖓𝖉 𝖔𝖇𝖏𝖊𝖈𝖙 𝖇𝖞 𝕽𝖔𝖓𝖊𝖑𝖑 𝕸𝖔𝖍𝖆𝖓 7𝖙𝖍 𝕭.pptx𝕬𝖓𝖎𝖒𝖆𝖙𝖎𝖓𝖌 𝖙𝖊𝖝𝖙 𝖆𝖓𝖉 𝖔𝖇𝖏𝖊𝖈𝖙 𝖇𝖞 𝕽𝖔𝖓𝖊𝖑𝖑 𝕸𝖔𝖍𝖆𝖓 7𝖙𝖍 𝕭.pptx
𝕬𝖓𝖎𝖒𝖆𝖙𝖎𝖓𝖌 𝖙𝖊𝖝𝖙 𝖆𝖓𝖉 𝖔𝖇𝖏𝖊𝖈𝖙 𝖇𝖞 𝕽𝖔𝖓𝖊𝖑𝖑 𝕸𝖔𝖍𝖆𝖓 7𝖙𝖍 𝕭.pptx
 
Smoke 2 marking clips
Smoke 2   marking clipsSmoke 2   marking clips
Smoke 2 marking clips
 
Animation in powerpoint part 1
Animation in powerpoint part 1Animation in powerpoint part 1
Animation in powerpoint part 1
 
Lesson 3 motion tween
Lesson 3 motion tweenLesson 3 motion tween
Lesson 3 motion tween
 
Power Point 2000 Advanced
Power Point 2000  AdvancedPower Point 2000  Advanced
Power Point 2000 Advanced
 

Plus de Samuel Edsall

Teaching in the Distracted Age: What Students Expect from Online Courses - P...
Teaching in the Distracted Age:  What Students Expect from Online Courses - P...Teaching in the Distracted Age:  What Students Expect from Online Courses - P...
Teaching in the Distracted Age: What Students Expect from Online Courses - P...Samuel Edsall
 
Securing Attention: How to Teach the Selfie Culture - Serena Carpenter
Securing Attention: How to Teach the Selfie Culture - Serena CarpenterSecuring Attention: How to Teach the Selfie Culture - Serena Carpenter
Securing Attention: How to Teach the Selfie Culture - Serena CarpenterSamuel Edsall
 
Digitizing the Classroom for the Online Environment - John Hebbeler
Digitizing the Classroom for the Online Environment  - John HebbelerDigitizing the Classroom for the Online Environment  - John Hebbeler
Digitizing the Classroom for the Online Environment - John HebbelerSamuel Edsall
 
Applying Classroom Research to Improve Online Course Communication - Paul He...
Applying Classroom Research to Improve Online Course Communication -  Paul He...Applying Classroom Research to Improve Online Course Communication -  Paul He...
Applying Classroom Research to Improve Online Course Communication - Paul He...Samuel Edsall
 
NewTek Lightwave 3D - Modeler I
NewTek Lightwave 3D - Modeler INewTek Lightwave 3D - Modeler I
NewTek Lightwave 3D - Modeler ISamuel Edsall
 
Education on the Move: Mobile Technologies, Online Platforms, and Pedagogy - ...
Education on the Move: Mobile Technologies, Online Platforms, and Pedagogy - ...Education on the Move: Mobile Technologies, Online Platforms, and Pedagogy - ...
Education on the Move: Mobile Technologies, Online Platforms, and Pedagogy - ...Samuel Edsall
 
Social Media: Expanding Pedagogic Opportunities in Film and Television Produc...
Social Media: Expanding Pedagogic Opportunities in Film and Television Produc...Social Media: Expanding Pedagogic Opportunities in Film and Television Produc...
Social Media: Expanding Pedagogic Opportunities in Film and Television Produc...Samuel Edsall
 
Mobile Technologies as Course Research Tools - BEA 2014 Presentation by Dr. D...
Mobile Technologies as Course Research Tools - BEA 2014 Presentation by Dr. D...Mobile Technologies as Course Research Tools - BEA 2014 Presentation by Dr. D...
Mobile Technologies as Course Research Tools - BEA 2014 Presentation by Dr. D...Samuel Edsall
 
Video Project Grading Rubric - BEA 214 Presentation by Sam Edsall
Video Project Grading Rubric - BEA 214 Presentation by Sam EdsallVideo Project Grading Rubric - BEA 214 Presentation by Sam Edsall
Video Project Grading Rubric - BEA 214 Presentation by Sam EdsallSamuel Edsall
 
Final Cut Pro X Weynand Certification Lesson 12
Final Cut Pro X Weynand Certification Lesson 12Final Cut Pro X Weynand Certification Lesson 12
Final Cut Pro X Weynand Certification Lesson 12Samuel Edsall
 
Final Cut Pro X Weynand Certification Lesson 11
Final Cut Pro X Weynand Certification Lesson 11Final Cut Pro X Weynand Certification Lesson 11
Final Cut Pro X Weynand Certification Lesson 11Samuel Edsall
 
Final Cut Pro X Weynand Certification Lesson 10
Final Cut Pro X Weynand Certification Lesson 10Final Cut Pro X Weynand Certification Lesson 10
Final Cut Pro X Weynand Certification Lesson 10Samuel Edsall
 
Final Cut Pro X Weynand Certification Lesson 9
Final Cut Pro X Weynand Certification Lesson 9 Final Cut Pro X Weynand Certification Lesson 9
Final Cut Pro X Weynand Certification Lesson 9 Samuel Edsall
 
Final Cut Pro X Weynand Certification Lesson 1
Final Cut Pro X Weynand Certification Lesson 1Final Cut Pro X Weynand Certification Lesson 1
Final Cut Pro X Weynand Certification Lesson 1Samuel Edsall
 
Final Cut Pro X Weynand Certification Lesson 7
Final Cut Pro X Weynand Certification Lesson 7Final Cut Pro X Weynand Certification Lesson 7
Final Cut Pro X Weynand Certification Lesson 7Samuel Edsall
 
Final Cut Pro X Weynand Certification Lesson 5
Final Cut Pro X Weynand Certification Lesson 5Final Cut Pro X Weynand Certification Lesson 5
Final Cut Pro X Weynand Certification Lesson 5Samuel Edsall
 
Final Cut Pro X Weynand Certification Lesson 4
Final Cut Pro X Weynand Certification Lesson 4Final Cut Pro X Weynand Certification Lesson 4
Final Cut Pro X Weynand Certification Lesson 4Samuel Edsall
 
Final Cut Pro X Weynand Certification Lesson 3
Final Cut Pro X Weynand Certification Lesson 3Final Cut Pro X Weynand Certification Lesson 3
Final Cut Pro X Weynand Certification Lesson 3Samuel Edsall
 
Final Cut Pro X Weynand Certification Lesson 2
Final Cut Pro X Weynand Certification Lesson 2Final Cut Pro X Weynand Certification Lesson 2
Final Cut Pro X Weynand Certification Lesson 2Samuel Edsall
 
Final Cut Pro X Weynand Certification Lesson 8
Final Cut Pro X Weynand Certification Lesson 8Final Cut Pro X Weynand Certification Lesson 8
Final Cut Pro X Weynand Certification Lesson 8Samuel Edsall
 

Plus de Samuel Edsall (20)

Teaching in the Distracted Age: What Students Expect from Online Courses - P...
Teaching in the Distracted Age:  What Students Expect from Online Courses - P...Teaching in the Distracted Age:  What Students Expect from Online Courses - P...
Teaching in the Distracted Age: What Students Expect from Online Courses - P...
 
Securing Attention: How to Teach the Selfie Culture - Serena Carpenter
Securing Attention: How to Teach the Selfie Culture - Serena CarpenterSecuring Attention: How to Teach the Selfie Culture - Serena Carpenter
Securing Attention: How to Teach the Selfie Culture - Serena Carpenter
 
Digitizing the Classroom for the Online Environment - John Hebbeler
Digitizing the Classroom for the Online Environment  - John HebbelerDigitizing the Classroom for the Online Environment  - John Hebbeler
Digitizing the Classroom for the Online Environment - John Hebbeler
 
Applying Classroom Research to Improve Online Course Communication - Paul He...
Applying Classroom Research to Improve Online Course Communication -  Paul He...Applying Classroom Research to Improve Online Course Communication -  Paul He...
Applying Classroom Research to Improve Online Course Communication - Paul He...
 
NewTek Lightwave 3D - Modeler I
NewTek Lightwave 3D - Modeler INewTek Lightwave 3D - Modeler I
NewTek Lightwave 3D - Modeler I
 
Education on the Move: Mobile Technologies, Online Platforms, and Pedagogy - ...
Education on the Move: Mobile Technologies, Online Platforms, and Pedagogy - ...Education on the Move: Mobile Technologies, Online Platforms, and Pedagogy - ...
Education on the Move: Mobile Technologies, Online Platforms, and Pedagogy - ...
 
Social Media: Expanding Pedagogic Opportunities in Film and Television Produc...
Social Media: Expanding Pedagogic Opportunities in Film and Television Produc...Social Media: Expanding Pedagogic Opportunities in Film and Television Produc...
Social Media: Expanding Pedagogic Opportunities in Film and Television Produc...
 
Mobile Technologies as Course Research Tools - BEA 2014 Presentation by Dr. D...
Mobile Technologies as Course Research Tools - BEA 2014 Presentation by Dr. D...Mobile Technologies as Course Research Tools - BEA 2014 Presentation by Dr. D...
Mobile Technologies as Course Research Tools - BEA 2014 Presentation by Dr. D...
 
Video Project Grading Rubric - BEA 214 Presentation by Sam Edsall
Video Project Grading Rubric - BEA 214 Presentation by Sam EdsallVideo Project Grading Rubric - BEA 214 Presentation by Sam Edsall
Video Project Grading Rubric - BEA 214 Presentation by Sam Edsall
 
Final Cut Pro X Weynand Certification Lesson 12
Final Cut Pro X Weynand Certification Lesson 12Final Cut Pro X Weynand Certification Lesson 12
Final Cut Pro X Weynand Certification Lesson 12
 
Final Cut Pro X Weynand Certification Lesson 11
Final Cut Pro X Weynand Certification Lesson 11Final Cut Pro X Weynand Certification Lesson 11
Final Cut Pro X Weynand Certification Lesson 11
 
Final Cut Pro X Weynand Certification Lesson 10
Final Cut Pro X Weynand Certification Lesson 10Final Cut Pro X Weynand Certification Lesson 10
Final Cut Pro X Weynand Certification Lesson 10
 
Final Cut Pro X Weynand Certification Lesson 9
Final Cut Pro X Weynand Certification Lesson 9 Final Cut Pro X Weynand Certification Lesson 9
Final Cut Pro X Weynand Certification Lesson 9
 
Final Cut Pro X Weynand Certification Lesson 1
Final Cut Pro X Weynand Certification Lesson 1Final Cut Pro X Weynand Certification Lesson 1
Final Cut Pro X Weynand Certification Lesson 1
 
Final Cut Pro X Weynand Certification Lesson 7
Final Cut Pro X Weynand Certification Lesson 7Final Cut Pro X Weynand Certification Lesson 7
Final Cut Pro X Weynand Certification Lesson 7
 
Final Cut Pro X Weynand Certification Lesson 5
Final Cut Pro X Weynand Certification Lesson 5Final Cut Pro X Weynand Certification Lesson 5
Final Cut Pro X Weynand Certification Lesson 5
 
Final Cut Pro X Weynand Certification Lesson 4
Final Cut Pro X Weynand Certification Lesson 4Final Cut Pro X Weynand Certification Lesson 4
Final Cut Pro X Weynand Certification Lesson 4
 
Final Cut Pro X Weynand Certification Lesson 3
Final Cut Pro X Weynand Certification Lesson 3Final Cut Pro X Weynand Certification Lesson 3
Final Cut Pro X Weynand Certification Lesson 3
 
Final Cut Pro X Weynand Certification Lesson 2
Final Cut Pro X Weynand Certification Lesson 2Final Cut Pro X Weynand Certification Lesson 2
Final Cut Pro X Weynand Certification Lesson 2
 
Final Cut Pro X Weynand Certification Lesson 8
Final Cut Pro X Weynand Certification Lesson 8Final Cut Pro X Weynand Certification Lesson 8
Final Cut Pro X Weynand Certification Lesson 8
 

Dernier

Student login on Anyboli platform.helpin
Student login on Anyboli platform.helpinStudent login on Anyboli platform.helpin
Student login on Anyboli platform.helpinRaunakKeshri1
 
Sports & Fitness Value Added Course FY..
Sports & Fitness Value Added Course FY..Sports & Fitness Value Added Course FY..
Sports & Fitness Value Added Course FY..Disha Kariya
 
Grant Readiness 101 TechSoup and Remy Consulting
Grant Readiness 101 TechSoup and Remy ConsultingGrant Readiness 101 TechSoup and Remy Consulting
Grant Readiness 101 TechSoup and Remy ConsultingTechSoup
 
Beyond the EU: DORA and NIS 2 Directive's Global Impact
Beyond the EU: DORA and NIS 2 Directive's Global ImpactBeyond the EU: DORA and NIS 2 Directive's Global Impact
Beyond the EU: DORA and NIS 2 Directive's Global ImpactPECB
 
Arihant handbook biology for class 11 .pdf
Arihant handbook biology for class 11 .pdfArihant handbook biology for class 11 .pdf
Arihant handbook biology for class 11 .pdfchloefrazer622
 
Paris 2024 Olympic Geographies - an activity
Paris 2024 Olympic Geographies - an activityParis 2024 Olympic Geographies - an activity
Paris 2024 Olympic Geographies - an activityGeoBlogs
 
The Most Excellent Way | 1 Corinthians 13
The Most Excellent Way | 1 Corinthians 13The Most Excellent Way | 1 Corinthians 13
The Most Excellent Way | 1 Corinthians 13Steve Thomason
 
Explore beautiful and ugly buildings. Mathematics helps us create beautiful d...
Explore beautiful and ugly buildings. Mathematics helps us create beautiful d...Explore beautiful and ugly buildings. Mathematics helps us create beautiful d...
Explore beautiful and ugly buildings. Mathematics helps us create beautiful d...christianmathematics
 
Kisan Call Centre - To harness potential of ICT in Agriculture by answer farm...
Kisan Call Centre - To harness potential of ICT in Agriculture by answer farm...Kisan Call Centre - To harness potential of ICT in Agriculture by answer farm...
Kisan Call Centre - To harness potential of ICT in Agriculture by answer farm...Krashi Coaching
 
APM Welcome, APM North West Network Conference, Synergies Across Sectors
APM Welcome, APM North West Network Conference, Synergies Across SectorsAPM Welcome, APM North West Network Conference, Synergies Across Sectors
APM Welcome, APM North West Network Conference, Synergies Across SectorsAssociation for Project Management
 
A Critique of the Proposed National Education Policy Reform
A Critique of the Proposed National Education Policy ReformA Critique of the Proposed National Education Policy Reform
A Critique of the Proposed National Education Policy ReformChameera Dedduwage
 
BASLIQ CURRENT LOOKBOOK LOOKBOOK(1) (1).pdf
BASLIQ CURRENT LOOKBOOK  LOOKBOOK(1) (1).pdfBASLIQ CURRENT LOOKBOOK  LOOKBOOK(1) (1).pdf
BASLIQ CURRENT LOOKBOOK LOOKBOOK(1) (1).pdfSoniaTolstoy
 
Russian Escort Service in Delhi 11k Hotel Foreigner Russian Call Girls in Delhi
Russian Escort Service in Delhi 11k Hotel Foreigner Russian Call Girls in DelhiRussian Escort Service in Delhi 11k Hotel Foreigner Russian Call Girls in Delhi
Russian Escort Service in Delhi 11k Hotel Foreigner Russian Call Girls in Delhikauryashika82
 
microwave assisted reaction. General introduction
microwave assisted reaction. General introductionmicrowave assisted reaction. General introduction
microwave assisted reaction. General introductionMaksud Ahmed
 
Z Score,T Score, Percential Rank and Box Plot Graph
Z Score,T Score, Percential Rank and Box Plot GraphZ Score,T Score, Percential Rank and Box Plot Graph
Z Score,T Score, Percential Rank and Box Plot GraphThiyagu K
 
Web & Social Media Analytics Previous Year Question Paper.pdf
Web & Social Media Analytics Previous Year Question Paper.pdfWeb & Social Media Analytics Previous Year Question Paper.pdf
Web & Social Media Analytics Previous Year Question Paper.pdfJayanti Pande
 
SOCIAL AND HISTORICAL CONTEXT - LFTVD.pptx
SOCIAL AND HISTORICAL CONTEXT - LFTVD.pptxSOCIAL AND HISTORICAL CONTEXT - LFTVD.pptx
SOCIAL AND HISTORICAL CONTEXT - LFTVD.pptxiammrhaywood
 
Introduction to Nonprofit Accounting: The Basics
Introduction to Nonprofit Accounting: The BasicsIntroduction to Nonprofit Accounting: The Basics
Introduction to Nonprofit Accounting: The BasicsTechSoup
 

Dernier (20)

Student login on Anyboli platform.helpin
Student login on Anyboli platform.helpinStudent login on Anyboli platform.helpin
Student login on Anyboli platform.helpin
 
Sports & Fitness Value Added Course FY..
Sports & Fitness Value Added Course FY..Sports & Fitness Value Added Course FY..
Sports & Fitness Value Added Course FY..
 
Grant Readiness 101 TechSoup and Remy Consulting
Grant Readiness 101 TechSoup and Remy ConsultingGrant Readiness 101 TechSoup and Remy Consulting
Grant Readiness 101 TechSoup and Remy Consulting
 
Beyond the EU: DORA and NIS 2 Directive's Global Impact
Beyond the EU: DORA and NIS 2 Directive's Global ImpactBeyond the EU: DORA and NIS 2 Directive's Global Impact
Beyond the EU: DORA and NIS 2 Directive's Global Impact
 
Arihant handbook biology for class 11 .pdf
Arihant handbook biology for class 11 .pdfArihant handbook biology for class 11 .pdf
Arihant handbook biology for class 11 .pdf
 
Paris 2024 Olympic Geographies - an activity
Paris 2024 Olympic Geographies - an activityParis 2024 Olympic Geographies - an activity
Paris 2024 Olympic Geographies - an activity
 
The Most Excellent Way | 1 Corinthians 13
The Most Excellent Way | 1 Corinthians 13The Most Excellent Way | 1 Corinthians 13
The Most Excellent Way | 1 Corinthians 13
 
Explore beautiful and ugly buildings. Mathematics helps us create beautiful d...
Explore beautiful and ugly buildings. Mathematics helps us create beautiful d...Explore beautiful and ugly buildings. Mathematics helps us create beautiful d...
Explore beautiful and ugly buildings. Mathematics helps us create beautiful d...
 
Kisan Call Centre - To harness potential of ICT in Agriculture by answer farm...
Kisan Call Centre - To harness potential of ICT in Agriculture by answer farm...Kisan Call Centre - To harness potential of ICT in Agriculture by answer farm...
Kisan Call Centre - To harness potential of ICT in Agriculture by answer farm...
 
APM Welcome, APM North West Network Conference, Synergies Across Sectors
APM Welcome, APM North West Network Conference, Synergies Across SectorsAPM Welcome, APM North West Network Conference, Synergies Across Sectors
APM Welcome, APM North West Network Conference, Synergies Across Sectors
 
A Critique of the Proposed National Education Policy Reform
A Critique of the Proposed National Education Policy ReformA Critique of the Proposed National Education Policy Reform
A Critique of the Proposed National Education Policy Reform
 
BASLIQ CURRENT LOOKBOOK LOOKBOOK(1) (1).pdf
BASLIQ CURRENT LOOKBOOK  LOOKBOOK(1) (1).pdfBASLIQ CURRENT LOOKBOOK  LOOKBOOK(1) (1).pdf
BASLIQ CURRENT LOOKBOOK LOOKBOOK(1) (1).pdf
 
Russian Escort Service in Delhi 11k Hotel Foreigner Russian Call Girls in Delhi
Russian Escort Service in Delhi 11k Hotel Foreigner Russian Call Girls in DelhiRussian Escort Service in Delhi 11k Hotel Foreigner Russian Call Girls in Delhi
Russian Escort Service in Delhi 11k Hotel Foreigner Russian Call Girls in Delhi
 
microwave assisted reaction. General introduction
microwave assisted reaction. General introductionmicrowave assisted reaction. General introduction
microwave assisted reaction. General introduction
 
Advance Mobile Application Development class 07
Advance Mobile Application Development class 07Advance Mobile Application Development class 07
Advance Mobile Application Development class 07
 
Z Score,T Score, Percential Rank and Box Plot Graph
Z Score,T Score, Percential Rank and Box Plot GraphZ Score,T Score, Percential Rank and Box Plot Graph
Z Score,T Score, Percential Rank and Box Plot Graph
 
INDIA QUIZ 2024 RLAC DELHI UNIVERSITY.pptx
INDIA QUIZ 2024 RLAC DELHI UNIVERSITY.pptxINDIA QUIZ 2024 RLAC DELHI UNIVERSITY.pptx
INDIA QUIZ 2024 RLAC DELHI UNIVERSITY.pptx
 
Web & Social Media Analytics Previous Year Question Paper.pdf
Web & Social Media Analytics Previous Year Question Paper.pdfWeb & Social Media Analytics Previous Year Question Paper.pdf
Web & Social Media Analytics Previous Year Question Paper.pdf
 
SOCIAL AND HISTORICAL CONTEXT - LFTVD.pptx
SOCIAL AND HISTORICAL CONTEXT - LFTVD.pptxSOCIAL AND HISTORICAL CONTEXT - LFTVD.pptx
SOCIAL AND HISTORICAL CONTEXT - LFTVD.pptx
 
Introduction to Nonprofit Accounting: The Basics
Introduction to Nonprofit Accounting: The BasicsIntroduction to Nonprofit Accounting: The Basics
Introduction to Nonprofit Accounting: The Basics
 

NewTek Lightwave 3D: Learning the Layout

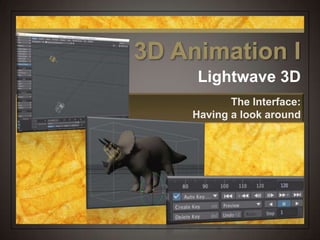
  • 1. Lightwave 3D The Interface: Having a look around 3D Animation I
  • 2. Let’s Get Started  Start Lightwave Layout  Select File > Clear Scene  Command N  This allows you to start with a fresh scene at any time
  • 3. The Interface  What you see  Tabs on top  Selectable items on left  Based on tab selection  Timeline on bottom  Play controls Viewport Tabs Menu Items Timeline
  • 4. The Interface  What you see  Every new scene starts with a light and a camera  The wireframe you see in the viewport is called the grid  Used to help you line up objects, but is not seen by the camera Light Navigation Controls Camera
  • 5. Let’s Look at Something  Make sure the Items tab is selected  On the left, select Load More and then select Object…  Notice that the shortcut to loading an object is (+)
  • 6. Let’s Look at Something  In the Objects directory, open the Animals folder and select Triceratops.lwo  Note that all objects are .lwo
  • 7. Looking Around  Different views  Displaying 3 dimensions on a 2D screen  Top, Bottom, Back, Front, Right, Left, Perspective, Light, Camera views  Shortcuts 1 - 6
  • 8. Have a Look Around  Click on the View pop-up menu and choose Top  Shortcut (2)
  • 9. Looking Around  Changing your point of view  Selected item always center  Click on this will keep whatever you have selected in the center of your view
  • 10. Looking Around  Changing your point of view  Dolly & Truck  Moves your view forward, backward, side to side
  • 11. Looking Around  Changing your point of view  Rotate  Allows you to swing around the current view up, down, left or right  Not available in the top view
  • 12. Looking Around  Changing your point of view  Zoom  Allows you to zoom in and out on your current view  Shortcut (,) (.)
  • 13. Have a Look Around  Click & hold on the Dolly button and drag your cursor  Keyboard shortcut (Shift, Option)  Click & hold on the Zoom button and drag your cursor  Keyboard shortcut (,)(.)
  • 14. Have a Look Around  In the View pop-up menu choose Perspective  Keyboard shortcut (4)  Click and hold on the Rotate button and drag your cursor  Keyboard shortcut (Option)
  • 15. Have a Look Around  In the View pop-up menu choose Light  Keyboard shortcut (5)  This shows you what the light is seeing  Helpful when aiming lights at certain things
  • 16. Have a Look Around  In the View pop-up menu choose Camera  Keyboard shortcut (6)  This shows you what the camera is seeing  The most important view  When you render a frame or your scene this is what you get
  • 17. Manipulating Objects  Use the Modify tab  Allows you to move, rotate, scale and stretch your object  You can also move and rotate your camera or lights as well
  • 18. A Better View of Our Dino  Select the Modify tab  Select Rotate  Shortcut (y)  Click on the Red circle and rotate the dino so you have a better view
  • 19. Manipulating Objects  Numerics  Bottom left  Allows you to set specific settings to the type of manipulation you are doing  Rotation  Horizontal, Pitch, Bank  Note the colors red, green & blue match the control rings on our dino
  • 20. Tweak the Settings  Using the Numerics, click on the <> button and change the horizontal setting  Change the pitch and bank settings, then select inside the setting window, type 0 and press Enter to reset the pitch and bank
  • 21. Timeline – Left Side  Timeline Slider  Drag this slider to the desired frame in your animation  Current frame is displayed on the left side of the timeline
  • 22. Timeline – Left Side  Item Type  Allows you to choose the kind of item in your scene you would like to modify  Object, Bones (things you add inside an object), Lights, and Camera
  • 23. Timeline – Left Side  Current Item pop-up menu  Once you have chosen the kind of item you would like, then you can choose which of those items you wish to modify  Since we only have one object in our scene, our Triceratops is the only object we can select
  • 24. Timeline – Left Side  Item Properties  This allows you to change features of the selected element  Object properties allow you to change its opacity, morph into something and other tricks
  • 25. Timeline – Right Side  Total frames in scene  This is how long the scene is  Measured in frames  30 frames per second  this scene is 4 seconds long  Type in any value you need to set the duration
  • 26. Change the Scene Duration  Select inside the Scene Duration window and type 300 and press Enter  Scene is now 300 frames long = 10 seconds
  • 27. Timeline – Right Side  Auto Key  When checked, every time you change an item at any frame, LW will make a key frame to remember that change  Handy feature, but sometimes you need to turn this off  Leave it on for now
  • 28. Timeline – Right Side  Create Key  Allows you to manually create a key frame when Auto Key is turned off  Shortcut (Enter)
  • 29. Let’s Make a Simple Animation  Make sure the Timeline slider is at frame 0  Using the Modify tab in Camera view, select Move, then move the dino back away from the camera and to the right  With Auto Key on, the new position is memorized
  • 30. Let’s Make a Simple Animation  Move the slider to frame 300  While Move is still selected, move the dino closer to the camera and to the left
  • 31. Let’s Make a Simple Animation  Move the slider to frame 150  While Move is still selected, move the dino to the left or right of its current location  You now have 3 key frames
  • 32. Timeline – Right Side  Navigation Controls  Allows you to move your slider to specific frames in your scene  Go to the beginning, go to previous key frame of selected item, go back 1 frame, go forward 1 frame, go to next key frame of selected item, go to end of scene
  • 33. Timeline – Right Side  Navigation Controls  Handy keyboard shortcuts  Go forward or backward 1 frame =    Go to previous or next key frame = Shift  
  • 34. Zip to Your Key Frames  Use the navigation controls to go to the beginning and end of your scene  Use the navigation controls to go to your key frames  Try out the shortcuts
  • 35. Timeline – Right Side  Preview pop-up menu  Allows you to make a preview of your animation without rendering out a movie  Much faster – allows you to find problem areas in your scene without wasting too much time
  • 36. Make a Preview  Click on the Preview button and select Make Preview  1st frame = 0  Last frame = 300  Frame Step = 1  Viewport = Camera View  Press OK
  • 37. Play the Preview  Click the play button to play your preview  You can scrub, step, go to beginning, end, set the frame rate  When done, click End Preview
  • 38. Timeline – Right Side  Viewport playback  Plays the scene forward or backward  Playback speed depends on the complexity of the scene  Step  Plays back each frame (1) or any interval of frames you choose  2 = every other frame  10 = every 10th frame
  • 39. Rendering  Render tab  Render the current frame  F9  Render the scene  F10  Can render a selected range of frames or the whole thing
  • 40. Render a Frame  Using the timeline slider, select a frame you would like to render out  Select the Render tab, then click Render Frame  Or just press F9
  • 41. Rendering  Render Status Window  Shows you what Lightwave is doing when rendering your frame  Watch Lightwave build your frame  Slows down rendering time & can be turned off
  • 42. Rendering  Render Frame  In its own window  Allows you to save the image if you like
  • 43. Save a Frame  On the Render Window, select Save RGBA > LW_JPEG (.jpg) and save your frame to the desktop
  • 44. Save Your Scene  Select File > Save Scene As…  Select the Scenes folder (if necessary) and create a new folder ‘My Scenes’  Title your animation and Save
  • 45. Lightwave 3D The Interface: Having a look around 3D Animation I