Report on speed control of d.c. motor using pwm method
•Télécharger en tant que DOCX, PDF•
55 j'aime•58,942 vues

MINI PROJECT FOR SEM-4 ,DEGREE ELECTRICAL

Recommandé
Recommandé
Contenu connexe
Tendances
Tendances (20)
En vedette
En vedette (8)
Similaire à Report on speed control of d.c. motor using pwm method
Similaire à Report on speed control of d.c. motor using pwm method (20)
Plus de shivam singh
Dernier
Dernier (20)
Report on speed control of d.c. motor using pwm method
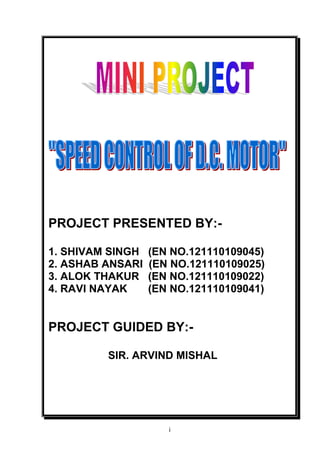
- 1. i PROJECT PRESENTED BY:- 1. SHIVAM SINGH (EN NO.121110109045) 2. ASHAB ANSARI (EN NO.121110109025) 3. ALOK THAKUR (EN NO.121110109022) 4. RAVI NAYAK (EN NO.121110109041) PROJECT GUIDED BY:- SIR. ARVIND MISHAL
- 2. ii I WOULD LIKE TO GIVE MY SPECIAL THANKS TO SIR. MR ARVIND MISHAL, FOR HELPING AND GUIDING US IN MAKING THIS MINI PROJECT. THE TOPIC OF MINI PROJECT “SPEED CONTROL OF D.C. MOTOR USING PWM METHOD” WAS TAKEN BY OUR GROUP MEMBERS IN GUIDANCE OF SIR. ARVIND MISHAL ,SO WE HAVE HEREBY COMPLETED OUR MINI PROJECT SUCCESSFULLY AND HOPE OUR PROJECT IS MADE AS REQUIRED BY THE ELECTRICAL AND ELECTRONIC WORKSHOP SUBJET IN SEMESTER 4 OF DEGREE ELECTRICAL (GTU). WE ALSO THANKS ALL OUR SUPPORTING MEMBERS ,WHO EVER GET INDULGED IN MAKING OUT NEW IDEAS AND TECHNIQUES RELATED TO THE PROJECT. THUS HEREBY WE THANK ALMIGHTY IN ORDER OF COMPLETING THIS MINI PROJECT AS REQUIRED.
- 3. iii ABSTRACT The aim of development of this project is towards providing efficient and simple method for control speed of DC motor using pulse width modulation technique. The modulation of pulse width is obtained using cd4010b Schmitt trigger and rectifier 1n4140. There are several methods for controlling the speed of DC motors. One simple method is to add series resistance using a rheostat. As considerable power is consumed in the rheostat, this method is not economical. Another method is to use a series switch that can be closed or opened rapidly. This type of control is termed as chopper control. The PWM based chopper circuit smoothly controls the speed of general purpose DC motors. To get desired modulation of pulse width as output, we have used Schmitt trigger cd40106b and rectifier 1n4010b with regulator as the source of varying output.
- 4. iv TABLE OF CONTENTS ACKNOWLEDGEMENT ......................................................Error! Bookmark not defined. ABSTRACT ……………………………………………………………………………………………………………………………………………………iiii TABLE OF CONTENTS.....................................................Error! Bookmark not defined. GLOSSARY OF TERMS .............................................................................................. vv 1. INTRODUCTION TO PWM TECHNIQUE 1.1 GOAL.......................................................................................................7 1.2 PULSE WIDTH MODULATION (PWM) BASICS ......................................7 2. THEORY 2.1 COMPONENTS IN MINI PROJECT .......................................................10 2.2 GOAL(CD40106B)……………………………………………………………………………………………………………… 12 2.3 INTRODUCTION………………………………………………………………………………………………………….12 2.4 IFEATURES………………………………………………………………………………………………………………… 12 2.5 DIAGRAM……………………………………………………………………………………………………………… 13 2.6 REGULAR(CD40106B) ……………………………………………………………………………………… 14 2.7 APPLICATION…………………………………………………………………………………………………14 2.8 GOAL(1N4148)…………………………………………………………………………………….16 2.9 INTRODUCTION.................................................................16 2.10 FEATURES........................................................16 2.11 REGULAR(1N4148)...................................................17 2.12 APPLICATION......................................................................17 3. CIRCUIT DESIGN 3.1 CIRCUIT DESIGN OF MINI PROJECT ..........Error! Bookmark not defined. 4. CIRCUIT DESCRIPTION AND WORKING 4.1 EXPLANATION......................................................................................19 4.2 GOAL(PWM )…………………………………………………………………………………………….20 4.3 BLOCK DIAGRAM OF PWM……………………………………………………..20Error! Bookmark not defined. 5. CONCLUTION 5.1 GOAL.....................................................................................................24 5.2 CONCLUSION .......................................................................................24 6. FUTURE MODIFICATIONS 6.1 GOAL.....................................................................................................26 6.2 POSSIBLE MODIFICATIONS ................................................................26
- 5. v GLOSSARY OF TERMS AC - Alternating Current NPT - Non – Punch Through CRO - Cathode Ray Oscilloscope DC - Direct Current IC - Integrated Circuit PWM - Pulse Width Modulation VR -Voltage Regulator
- 7. 7 1.1 GOAL “To explain PULSE WIDTH MODULATION technique in brief.” 1.2 Pulse Width Modulation (PWM) Basics There are many forms of modulation used for communicating information. When a high frequency signal has amplitude varied in response to a lower frequency signal we have AM (amplitude modulation). When the signal frequency is varied in response to the modulating signal we have FM (frequency modulation. These signals are used for radio modulation because the high frequency carrier signal is needs for efficient radiation of the signal. When communication by pulses was introduced, the amplitude, frequency and pulse width become possible modulation options. In many power electronic converters where the output voltage can be one of two values the only option is modulation of average conduction time. Fig. 1.1 Unmodulated, sine modulated pulses 1. Linear Modulation The simplest modulation to interpret is where the average ON time of the pulses varies proportionally with the modulating signal. The advantage of linear processing for this application lies in the ease of de-modulation. The modulating signal can be recovered from the PWM by low pass filtering. For a single low frequency sine wave as modulating signal modulating the width of a fixed frequency (fs) pulse train the spectra is as shown in Fig 1.2. Clearly a low pass filter can extract the modulating component fm.
- 8. 8 Fig. 1.2 Spectra of PWM 2. Sawtooth PWM The simplest analog form of generating fixed frequency PWM is by comparison with a linear slope waveform such as a saw tooth. As seen in Fig 1.2 the output signal goes high when the sine wave is higher than the saw tooth. This is implemented using a comparitor whose output voltage goes to logic HIGH when ne input is greater than the other. Other signals with straight edges can be used for modulation a rising ramp carrier will generate PWM with Trailing Edge Modulation. Fig. 1.3 Sine Sawtooth PWM It is easier to have an integrator with a reset to generate the ramp in Fig1.4 but the modulation is inferior to double edge modulation.
- 9. 9 Fig. 1.4 Trailing Edge Modulation 3. Regular Sampled PWM The scheme illustrated above generates a switching edge at the instant of crossing of the sine wave and the triangle. This is an easy scheme to implement using analog electronics but suffers the imprecision and drift of all analog computation as well as having difficulties of generating multiple edges when the signal has even a small added noise. Many modulators are now implemented digitally but there is difficulty is computing the precise intercept of the modulating wave and the carrier. Regular sampled PWM makes the width of the pulse proportional to the value of the modulating signal at the beginning of the carrier period. In Fig 1.5 the intercept of the sample values with the triangle determine the edges of the Pulses. For a saw tooth wave of frequency fs the samples are at 2fs. Fig. 1.5 Regular Sampled PWM
- 10. 10 There are many ways to generate a Pulse Width Modulated signal other than fixed frequency sine sawtooth. For three phase systems the modulation of a Voltage Source Inverter can generate a PWM signal for each phase leg by comparison of the desired output voltage waveform for each phase with the same sawtooth. One alternative which is easier to implement in a computer and gives a larger modulation depth is using space vector modulation. 4. Modulation Depth Fig. 1.6 Saturated Pulse Width Modulation For a single phase inverter modulated by a sine-sawtooth comparison, if we compare a sine wave of magnitude from -2 to +2 with a triangle from -1 to +1 the linear relation between the input signal and the average output signal will be lost. Once the sine wave reaches the peak of the transgle the pulses will be of maximum width and the modulation will then saturate. The Modulation depth is the ratio of the current signal to the case when saturation is just starting. Thus sine wave of peak 1.2 compared with a triangle with peak 2.0 will have a modulation depth of m=0.6.
- 11. 11 2. THEORY
- 12. 12 2.1 COMPONENTS USED IN MINI PROJECT “SPEED CONTROL OF D.C. MOTOR USING PWM METHOD” BATTERY CAPACITOR VARIABLE REGULATOR HIGH SPEED DOIDE 1N4140 SCHMITT TRIGGER CD40106B RESISTOR MOTOR AMPLIFIER TRANSISTOR
- 14. 14 2.2 GOAL “To study about Schmitt trigger CD40106B and its function in the circuit.” 2.3 INTRODUCTION CD40106B consists of six Schmitt trigger circuits. Each circuit functions as an inverter with Schmitt trigger action on the input. The trigger switches at different points for positive and negative-going signals. The difference between the positive-going voltage (VP) and the negative-going voltage(VN)is defined as hysteresis voltage(VH). The CD40106B types are supplied in 14 lead hermetic dual-in-line ceramic packages (D and F suffixes),14-lead dual-in-line plastic package(E suffix), and in chip form (H suffix). 2.4 Features Schmitt-trigger action with no external components Hysteresis voltage(typ.) 0.9V at VDD=5V, 2.3V at VDD=10V, and 3.5V at VDD=15V Noise immunity greater than 50% No limit on input rise and fall times Standardized, symmetrical output characteristics 100% tested for quiescent current at 20V Maximum input current of 1mA at 18V over full package-temperature range;100nA at 18V and25°C Low VDD to VSS current during slow input rampl 5V, 10V, and 15V parametric ratings
- 15. 15 2.5 Functional diagram and logic diagram of inverter CD40106B Fig.Logic diagram (1 of 6 Schmitt triggers)
- 16. 16 2.6 REGULAR CD40106B CD40106B SCHMITT TRIGGER BY TEXAS INSTRUMENTS 2.7 Applications Wave and pulse shapers High-noise-environment systems Monostable multivibrators Astable multivibrators
- 18. 18 2.8 GOAL “To study about high speed diode 1N4148” 2.9 INTRODUCTION The 1N4148 is a standard silicon switching diode. It is one of the most popular and long-lived switching diodes because of its dependable specifications and low cost. Its name follows the JEDEC nomenclature. The 1N4148 is useful in switching applications up to about 100 MHz with a reverse-recovery time of no more than 4 ns. The 1N4148 comes in a DO-35 glass package for thru- hole mounting. This is useful for breadboarding of circuits. A surface mount device, 1N4148WS, is available in a plastic SOD package. 2.10 FEATURES • Hermetically sealed leaded glass SOD27 (DO-35) package • High switching speed: max. 4 ns • General application • Continuous reverse voltage: max. 100 V • Repetitive peak reverse voltage: max. 100 V • Repetitive peak forward current: max. 450 mA.
- 19. 19 2.11 REGULAR 1N4148 2.12 APPLICATION High-speed switching.
- 20. 20 3. CIRCUIT DESIGN 3.1 “Circuit design of speed control of d.c. motor”
- 21. 21 4. CIRCUIT DESCRIPTION AND WORKING 4.1 EXPLANATION: Here is a simple PWM motor speed controller circuit that can be used for varying the speed of low power DC motors . The variation in speed is achieved by varying the duty cycle of the pulse supplied to drive the motor. Of the two gates of IC CD40106B , N1 is wired as an inverting Schmitt Trigger astable multi vibrator for producing pulses and N2 as an inverting buffer to drive the transistor during positive cycles at base. The duty cycle is set from resistor R2. R1 limits the base current of transistor SL 100. The circuit is ideal for controlling toy motors,hand held mini fans , small blowers etc.
- 22. 22 4.2 GOAL “To explain working of the PWM circuit.” 4.3 BASIC BLOCK DIAGRAM As shown in block diagram there are mainly three blocks: Astable Multivibrator, Monostable Multivibrator and Driving Circuit. Fig. 4.1 Block Diagram The Basic Blocks are explained below: Astable Multivibrator: This block produce square pulses of same frequency according to time constant RC. These pulses are fed to next block as triggering pulses. Monostable Multivibrator: This block produces square pulses of variable frequencies. The frequency of output pulse can be varied by changing the value of resistor shown in figure. These pulses are fed to the driving circuit. Driving Circuit: This block provides power required to drive the motor. As the frequency of output pulses of Monostable multivibrator changes, the average voltage supplied to motor changes. Hence, the speed of motor changes.
- 23. 23 5. CONCLUSION
- 24. 24 5.1 GOAL “To conclude the work carried out.” 5.2 CONCLUSION From the project work, following points can be concluded. 1.It fulfils all the requirements for its application. 2.The motor responds to the average value of the pulses and not to the individual pulses as the chopper works at high frequency. 3.Changing the duty-cycle of the pulse by changing the speed of regulator changes the average voltage level. 4.It is possible to improve overall performance of the motor speed.
- 26. 26 6.1 GOAL “To highlight possible modifications that can be made in the project for improving performance”. 6.2 POSSIBLE MODIFICATIONS Following are the possible future modifications in our project work. TABLE 10-1 FUTURE MODIFICATIONS Sr. No. Modification Purpose 1 Use of micro- controller/micro-processor for closed loop operation Constant speed variation 2 Use of MOSFET or IGBT Higher voltage and power requirement