The document provides an overview of calendar features in Outlook, including different types of calendar entries and how to create meetings and tasks. Appointments involve only the user, while meetings invite other people. All-day events don't block calendar time. Creating a meeting involves including attendees, time, and location. Tasks can be assigned to others and tracked through task requests.
This presentation will take you on a tour of the Outlook Program we are currently using in the office; and show you new ways in which you can utilize it. The first item we will be covering is the Calendar. After you open MS Outlook On the left toolbar, click on the icon marked ‘Calendar” You can view the calendar several ways….monthly….weekly…daily and so on For the purpose of this meeting we will be viewing the Calendar using the Daily view
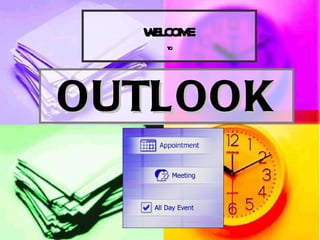
Getting to Know Your Calendar In Outlook, when you enter an item in your Calendar, you'll choose one of three types of entry. Appointment An appointment is an activity that involves only you. Meeting A meeting is similar to an appointment. The difference is that you invite other people to it. All Day Event This event is an activity that lasts all day long but doesn't block out time in your Calendar. With an event, you can still have other items appear in your schedule for that day.
Appointment can be created three different ways. Click in the main Calendar grid to select the time for your appointment, richt-click and then click New appointment on the shortcut menu Use the New Appointment button on the Standard Toolbar (show them where it is) Use the New Appointment on the Actions Menu (show this) With practice you will use whichever seems more comfortable to you. Tip: Did you know you can drag a message from your Inbox to your calendar to make it into a calendar entry? Well you do now!
The comings and goings of meeting requests and their related calendar entries are tracked in Outlook by something nick-names the ‘sniffer’. You can see the work of the sniffer by looking at the infobar of a meeting request in your inbox or by looking at a meeting entry in your Calendar NOTE: Requests and responses need to linger in the Inbox for a short period of time so that the sniffer has time to notice them and add them to your Calendar If you are a meeting organizer the meeting requests you send out, as well as their responses are detected by the sniffer as they sit in your Inbox. The Sniffer then updates the Calendar and the requests themselves with the relevant information . For example, you can look in the Infobar to see the responses that the sniffer has counted in your inbox. When you receive a meeting request the sniffer automatically enters that request as a tentative items to reduce your chance of doublebooking . If it gets reschedules, the sniffer tracks that as well
Find Time with Scheduling Tab Location Sending the Meeting Request and Track Responses How to Change Information
There are three ways in which you can accomplish this task On the Actions menu, click New Meeting Request . This method gives you a blank slate for the mt’g & starts you off in the To box of the meeting request. When you use this method, you’ll need to fill in all of the meeting details yourself. On the Actions menu, click Plan a Meeting . Use this method when your first goal is to find a time that’s free in everyone’s schedule. (Suggested method for Land Use) Right-click a selected time in your calendar and click New Meeting Request . You can use this method when you want to book the meeting at a specific time. Because you select the time first, that part of the request will be filled in when it opens.
One nice thing, the process is flexible. Once you are in the Calendar, the exact steps you take to create the request and include these details can vary depending on your specific needs.
When you schedule an appointment or a meeting setting the reminder is a click of the mouse. You may set it on the preset intervals or type over it to schedule a specific time to remind you.
If you look at the lower left of your outlook screen you will see a word task. Click on that icon and a field comes up where you may enter tasks and deadlines for yourself. For example, you want to complete specs for a project and they have to be 75% complete by Thursday at 3:00pm for a meeting… In the subject line you would type something like Specs 75% by 3:30…then you schedule the deadline by entering the due date, the percent, and the reminder time. It’s that easy !
On the File menu, point to New , and then click Task . Keyboard shortcut To create a new task, press CTRL+SHIFT+K. In the Subject box, type a name for the task. Note You have now entered enough information to create a task. The following steps are optional, but will help you better manage your tasks in Outlook. On the Task tab, in the Actions group, click Save & Close or continue with the following steps to customize your task. If you want, set the Start date and the Due date for the task. If you specify a Start date, the Due date field is automatically set to the same day. You can change the Due date field to any date that you want. If you want to make the task recur, on the Task tab, in the Options group, click Recurrence . In the Task Recurrence dialog box, click the frequency ( Daily , Weekly , Monthly or Yearly ) with which the task should recur, and then do one of the following: Make the task recur based on a regular interval In the Recurrence pattern section, select the options for the frequency interval that you want. Do not select Regenerate new task , or the task will not recur at regular intervals. Make the task recur based on completion date Select Regenerate new task , and in the box, type the amount of time after which a new task must be generated. Each time that you mark the task complete, a new task will be created based on your specifications. Tip This is your best choice when you do not want the next reminder for a task to appear until the previous one is marked as complete. If you do not mark the item complete, the next reminder will never appear. For example, if you have a reminder to pay your utility bill on the 15th of each month and you do not mark the occurrence on April 15th as complete, in May you will still see the not yet completed April 15th task. Only after you mark the April 15th task as complete does the May 15th occurrence of the task appear. Click OK to close the Task Recurrence dialog box. If you want to add a reminder alert, select the Reminder check box, and then enter the date and time for the reminder. You can specify a custom sound to be played with your reminder. Click , click Browse , select the sound file to play, click Open , and then click OK . This changes the reminder sound only for this task. If you want to track your progress on this task, in the Status , Priority , and % Complete boxes, enter the values that you want. The Status and % Complete fields are linked. When you change the value in either field, the value in the other field changes accordingly. Status % Complete Not Started 0 In Progress 1-99 Completed 100 Waiting on someone else 0-100 Deferred 0-100
After you create a task and assign it to someone, you might have some management duties to perform in maintaining it until it is complete. For example, you might want status reports and updates on the progress of the task. Also, if the person to whom you assign the task rejects it, you might want to reassign it to someone else. To assign a task, you first create the task, and then send it as a task request to someone. The person who receives the task request becomes the temporary owner of the task. This person can decline the task, accept the task, or assign the task to someone else. If the task is declined, it is returned to you. If you assign a task to more than one person at a time, you cannot keep an updated copy of that task in your task list. Therefore, to assign a project that involves more than one person and still have Outlook keep you informed of its progress, divide the project into separate tasks and assign each task individually
In the To box, enter the name or e-mail address of the person to whom you want to assign the task. To select the name from a list, click the To button. In the Subject box, type a name for the task. Note For an existing task, the Subject box is already filled in. Select the Due date and the Status options that you want. Select or clear the Keep an updated copy of this task on my task list check box and the Send me a status report when this task is complete check box. If you want the task to repeat, on the Task tab, in the Options group, click Recurrence , select the options that you want, and then click OK . In the body of the recurring task, type any information that you want to include in the task. Click Send . Note If you assign a recurring task, a copy of the task will remain in your task list, but it will not be updated. If you select the Send me a status report when this task is complete check box, you will receive a status report for each completed occurrence of the task.
There are three ways to track the tasks that you have assigned to other people: Automatically keep copies of tasks that you assign, and receive automated status reports On the Tools menu, click Options . Click Task Options . Select the Keep updated copies of assigned tasks on my task list check box. Select the Send status reports when assigned tasks are completed check box. View tasks that you have assigned to others Click Tasks . On the View menu, point to Current View , and then click Assignment . View the list of people who receive updated copies of an assigned task Open the assigned task for which you want to view the list. On the Details tab, view the names in the Update list box.
![[object Object],[object Object],[object Object],[object Object],[object Object],[object Object],[object Object],[object Object]](data:image/gif;base64,R0lGODlhAQABAIAAAAAAAP///yH5BAEAAAAALAAAAAABAAEAAAIBRAA7)