Contenu connexe
Plus de webhostingguy (20)
Email Hosting Control Panel
- 1. Copyright © 2008 Document Authors. Some Rights Reserved.
Email Mailboxes
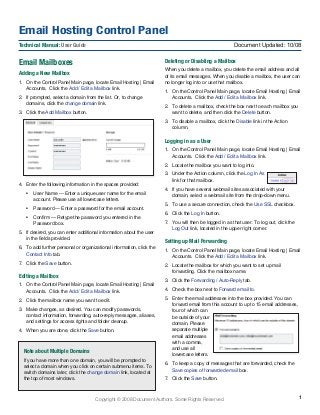
Adding a New Mailbox
1. On the Control Panel Main page, locate Email Hosting | Email
Accounts. Click the Add / Edit a Mailbox link.
2. If prompted, select a domain from the list. Or, to change
domains, click the change domain link.
3. Click the Add Mailbox button.
4. Enter the following information in the spaces provided:
• User Name — Enter a unique user name for the email
account. Please use all lowercase letters.
• Password — Enter a password for the email account.
• Confirm — Retype the password you entered in the
Password box.
5. If desired, you can enter additional information about the user
in the fields provided.
6. To add further personal or organizational information, click the
Contact Info tab.
7. Click the Save button.
Editing a Mailbox
1. On the Control Panel Main page, locate Email Hosting | Email
Accounts. Click the Add / Edit a Mailbox link.
2. Click the mailbox name you want to edit.
3. Make changes, as desired. You can modify passwords,
contact information, forwarding, auto-reply messages, aliases,
and settings for access rights and folder cleanup.
4. When you are done, click the Save button.
Deleting or Disabling a Mailbox
When you delete a mailbox, you delete the email address and all
of its email messages. When you disable a mailbox, the user can
no longer log into or use that mailbox.
1. On the Control Panel Main page, locate Email Hosting | Email
Accounts. Click the Add / Edit a Mailbox link.
2. To delete a mailbox, check the box next to each mailbox you
want to delete, and then click the Delete button.
3. To disable a mailbox, click the Disable link in the Action
column.
Logging in as a User
1. On the Control Panel Main page, locate Email Hosting | Email
Accounts. Click the Add / Edit a Mailbox link.
2. Locate the mailbox you want to log into.
3. Under the Action column, click the Log In As
link for that mailbox.
4. If you have several webmail sites associated with your
domain, select a webmail site from the drop-down menu.
5. To use a secure connection, check the Use SSL checkbox.
6. Click the Log In button.
7. You will then be logged in as that user. To log out, click the
Log Out link, located in the upper right corner.
Setting up Mail Forwarding
1. On the Control Panel Main page, locate Email Hosting | Email
Accounts. Click the Add / Edit a Mailbox link.
2. Locate the mailbox for which you want to set up mail
forwarding. Click the mailbox name.
3. Click the Forwarding / Auto-Reply tab.
4. Check the box next to Forward email to.
5. Enter the email addresses into the box provided. You can
forward email from this account to up to 15 email addresses,
four of which can
be outside of your
domain. Please
separate multiple
email addresses
with a comma,
and use all
lowercase letters.
6. To keep a copy of messages that are forwarded, check the
Save copies of forwarded email box.
7. Click the Save button.
Email Hosting Control Panel
Document Updated: 10/08Technical Manual: User Guide
1
Note about Multiple Domains
If you have more than one domain, you will be prompted to
select a domain when you click on certain submenu items. To
switch domains later, click the change domain link, located at
the top of most windows.
- 2. Copyright © 2008 Document Authors. Some Rights Reserved.
Aliases
Creating an Alias
When you create an alias, you are creating an email address that
points to an actual email mailbox or mailboxes. For example, the
alias sales@mydomain.com can point to joe@mydomain.com,
mary@mydomain.com, and bill@mydomain.com. Each of those
recipients (Mary, Joe, and Bill) would receive the message that
was sent to sales@mydomain.com.
1. On the Control Panel Main page, locate Email Hosting | Email
Accounts. Click the Manage Aliases link.
2. Click the Add Alias button.
3. Enter a unique alias name in the Create New Alias box.
4. Select the address(es) you want to associate with the alias,
and then click the Add button. You may need to use the Filter
or Search tools to locate the desired address(es).
5. You can send email from this alias to up to 50 total email
addresses, four of which can be outside of your domain. To
add an address outside of your domain, enter it in the Add
members outside this domain section.
We do not recommend delivering an alias’ messages to an
account outside of your domain because the messages will
bypass your domain’s spam filters.
6. Click the Save button.
Note: To manage aliases for a specific mailbox, click the
Add / Edit Mailbox link; click the mailbox name, and then click the
Aliases tab.
Creating an Auto-Reply / Vacation Message
When a user will be out of the office, you can automatically send
a message to each person who sends the user an email, letting
the sender know the person is away and when he/she will return.
Users can also create and manage their vacation message from
within webmail (via Settings / Incoming Email / Auto-Reply).
1. On the Control Panel Main page, locate Email Hosting | Email
Accounts. Click the Add / Edit a Mailbox link.
2. Locate the mailbox for which you want to set up a vacation
message. Click the mailbox name.
3. Click the Forwarding / Auto-Reply tab.
4. Check the Activate Auto-Reply Message below box.
5. Enter the
auto-reply
message in the
box. This is the
text that will be
sent to each
person who sends
this user an email
message.
6. Click the Save button.
7. To turn off the vacation message, uncheck the Activate Auto-
Reply Message below box.
Note: Each person who sends a user an email message will
receive the auto-reply message only once. To reset the vacation
message, turn the vacation message off; click the Save button,
and then follow the steps above to re-enable the message.
2
Archiving
Archiving Mailboxes
If you have purchased Bcc Archiving, the Archiving feature
allows you to archive incoming and/or outgoing email — for
all email accounts in your domain, or just specific accounts.
1. On the Control Panel Main page, locate the Email
Hosting section. Click the More ... link.
2. On the Email Hosting Home page, locate Email Accounts
| Email Archiving. Click the Archiving link.
3. Click the Manage Bcc Archiving link.
4. In the Default Destination Mailboxes section, click the
Edit link to enter the email address that should receive
incoming and/or outgoing archived email.
5. Indicate whether you want to archive the entire domain,
or archive only specific mailboxes.
6. Choose one of the following:
• If you chose to archive the entire domain, you can
create exceptions by clicking the Add to Exclusion List
button. In the resulting window, you can turn incoming
and/or outgoing archiving on or off for specific
mailboxes.
• If you chose to archive specific mailboxes, click
the Add Mailboxes to Archiving button to select the
mailboxes you want to archive. You can archive
incoming and/or outgoing email to a specific email
address.
7. To make changes to your Archived or Exclusion lists, click
the checkbox next to the mailbox(es) you want to change,
and then select an action from the Select Action drop-
down menu.
Note: If you are archiving an entire domain, you can turn off
incoming and/or outgoing archiving by clearing the email
address in the Default Destination Mailboxes section.
- 3. Copyright © 2008 Document Authors. Some Rights Reserved.
Group Lists
Creating a Group List
When you create a group list, you can send email to an unlimited
number of email addresses within your domain, and up to 50
external email addresses. You can also specify which email
addresses can send email to the group list.
1. On the Control Panel Main page, locate Email Hosting | Email
Accounts. Click the Manage Group Lists link.
2. Click the Add List button.
3. Enter a name for the group list.
4. Enter a subject line tag, which will be added to all email sent
to the group list.
5. Specify whether, by default, the sender or the list should
receive replies to group list email.
6. In the Group List Recipients area, select the users that should
be included in the group list.
7. In the Group List Senders area, select the users that should
be allowed to send email to the group list.
8. Click the Save button.
Restores
Restoring Mailboxes
You can restore data from a backup, within the past 14 days.
1. On the Control Panel Main page, locate the Email Hosting
section. Click the More ... link.
2. On the Email Hosting Home page, locate Email Accounts |
Email Archiving, and click the Restores link.
3. Click the Start New Restore button.
4. Select a mailbox you want to restore. Click the Next button.
5. Select a restore date, and then click the Next button.
6. Make changes to the options, and then click the Next button.
7. Review details, and then click the Start Restore button.
3
Collaboration
Creating a Company Directory
The company directory allows your users to share and view
company contact information, via the Contacts link in webmail.
1. On the Control Panel Main page, locate the Email Hosting
section. Click the More ... link.
2. On the Email Hosting Home page, locate Collaboration.
Click the Company Directory link.
3. Click the Create Directory button.
4. Enter a unique name in the Directory Name box.
5. To allow users to edit their personal contact information,
check the Allow users to edit their profile in webmail box.
6. In the Domains section, click once on a domain you want
to add to the directory, and then click the Add button. You
can add several domains to the same directory, but each
domain can belong to only one directory.
7. Click the Save button.
8. In the next window, select [all] from the Show filter drop-
down menu.
9. In the Select Mailboxes section, click once on the
mailbox(es) you want to include, and then click the Add
button. Multiple mailboxes can be selected by Ctrl-clicking
different mailboxes, or Shift-click to select a range of
mailboxes.
10. To add mailboxes that are outside your domain, click the
Add an External Email Address link, and then enter the
user’s information in the Name and Email boxes. Enter
additional information as needed, and then click the Save
button.
11. Click the Save button.
Note: Users in your domain can access the company directory
by clicking the Contacts tab in webmail. There, they can view
contact information for other users in the directory, and can edit
their own profile information.
Managing Shared Calendars
The shared calendar feature enables users to view one
another’s calendars and event details. Users cannot, however,
edit or add events to another user’s calendar.
1. On the Control Panel Main page, locate the Email Hosting
section. Click the More ... link.
2. On the Email Hosting Home page, locate Collaboration.
Click the Shared Calendar link.
3. Choose one of the following:
• Do not allow users to share their personal calendar.
• Require users to shared their calendar with all users in
the domain only.
• Allow users to share their calendar with the users they
specify.
4. Click the Save button.
Enabling and Managing Sync
The Sync service allows you to synchronize a range of PIM
data (including contacts, calendar events, and tasks) between
our sync servers and your software or device.
1. On the Control Panel Main page, locate the Email Hosting
section. Click the More ... link.
2. On the Email Hosting Home page, locate Collaboration.
Click the Sync link.
3. From the Sync page, you can manage Sync and download
user guides that will walk you through the setup and
management of Sync.
- 4. Copyright © 2008 Document Authors. Some Rights Reserved.
Settings
Adjusting Storage Space
If you have purchased additional storage space, you can allocate
storage for each user. (If you have not purchased additional
storage space, this feature will not be visible in the control panel.)
1. On the Control Panel Main page, locate the Email Hosting
section. Click the Add / Edit Mailbox link.
2. Click the Settings link at the top of the page.
3. Click the Adjust Storage link.
4. Your total allocatable storage will be displayed, as well as
how much of the storage has not yet been allocated. You can
assign extra storage to each user by entering a MB value in
the spaces provided.
5. Click the Save button when you are done.
Adjusting Folder Cleanup Settings
1. On the Control Panel Main page, locate the Email Hosting
section. Click the Add / Edit Mailbox link.
2. Click the Settings link at the top of the page.
3. Click the Folder Cleanup link.
4. To apply cleanup settings, check the box next to the folder
name, and enter a value in the days or total messages boxes.
5. You can click Save to save the preferences for all users who
do not have customized folder cleanup settings. Or click
Override to override settings for all users.
Adjusting Access Rights
Control how your users access services and check their mail,
such as requiring SSL or disabling POP and IMAP.
1. On the Control Panel Main page, locate the Email Hosting
section. Click the Add / Edit Mailbox link.
2. Click the Settings link at the top of the page.
3. Click the Global Access Rights link.
4. You can grant or restrict access to each of the services, and
then apply them in one of three ways.
5. Click the Save button.
4
Setting Up Storage Notification
When a mailbox is nearing its capacity, the Storage Notification
feature can automatically send the user a notification email.
1. On the Control Panel Main page, locate the Email Hosting
section. Click the Add / Edit Mailbox link.
2. Click the Settings link at the top of the page.
3. Click the Storage Notification link.
4. Check the Activate full mailbox notification box.
5. Select a capacity from the drop-down menu.
6. If you would like to send a copy of this notification to another
account (e.g., the administrator’s mailbox), enter that address
in the Send Cc to this email address box.
7. Make changes to the notification message, as desired.
8. Click the Save button when you are done.
Adjusting Language and Time Settings
1. On the Control Panel Main page, locate the Email Hosting
section. Click the Add / Edit Mailbox link.
2. Click the Settings link at the top of the page.
3. Click the Webmail Settings link.
4. Make changes, as desired, and then click the Save button.
Changes will be applied to the entire domain, except if a user
has already customized their settings (via webmail’s settings).