HI 84a - How to Build an Accessible Environment in Developing Countries : Manual #3 – Free Movement (English)

HI 84a - How to Build an Accessible Environment in Developing Countries : Manual #3 – Free Movement (English) Auteur: DAVID Vincent, LAST Ulrike, PAPON Lucile, PLANTIER ROYON Eric Pays: Cambodge Date: 2008 Public: Spécialisé Type: Ouvrage, Rapport Phnom Pemh : Handicap International France, Cambodia Program, 2008. – 43 p. Cette série de manuels donne des techniques de construction prenant en compte l'accessibilité des personnes en situation de handicap dans des pays en développement. Il est destiné à des techniciens (ingénieurs, architectes, société de construction...). Toutefois, ce document reste intéressant pour les personnes sans connaissances techniques en leurs permettant de comprendre les principes généraux et les standards de ces installations. Ce troisième volume s'attarde sur les aménagements urbains pour faciliter la circulation des personnes en situation d'handicap, notamment sur des techniques de construction de rampes d'accès. Avec l'aimable autorisation de Handicap International : URL de la source du document : http://www.handicap-international.fr/ © Droits d'auteur réservés et strictement limités. - Tous droits de traduction, reproducteur et adaptation réservés pour tous pays.

Recommandé
Contenu connexe
En vedette
En vedette (12)
Similaire à HI 84a - How to Build an Accessible Environment in Developing Countries : Manual #3 – Free Movement (English)
Similaire à HI 84a - How to Build an Accessible Environment in Developing Countries : Manual #3 – Free Movement (English) (20)
Plus de Bernard hardy
Plus de Bernard hardy (20)
Dernier
Dernier (20)
HI 84a - How to Build an Accessible Environment in Developing Countries : Manual #3 – Free Movement (English)
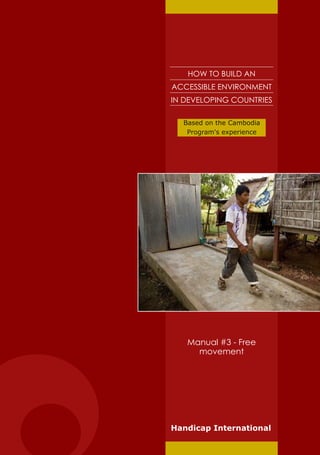
- 1. HOW TO BUILD AN ACCESSIBLE ENVIRONMENT IN DEVELOPING COUNTRIES Based on the Cambodia Program's experience Manual #3 - Free movement Handicap International
- 3. HOW TO BUILD AN ACCESSIBLE ENVIRONMENT IN DEVELOPING COUNTRIES Manual #3 – Free movement
- 4. Published in: December 2008 Published by: Handicap International France, Cambodia Program #6, St. 348, BKK3, Chomkarmon, Phnom Pemh office@hicambodia.org Content developed by: Vincent DAVID, Cambodia, Accessibility and Infrastructures Coordinator Supervised by: Ulrike LAST, Cambodia, Inclusion & Rights Coordinator Lucile PAPON, Cambodia, Program Director Eric PLANTIER ROYON, Head Quarters, Accessibility Technical Advisor Design, layout and translation: Eric JARLÉGAN Photographs and illustrations credits: © Handicap International – French Section The technical content developed in this set of manuals is the property of Handicap International. You can use its content, such as technical drawings, estimations, etc. freely, provided that you cite HI's manual as the source. Handicap International cannot be held responsible for any misuse of the content.
- 5. Table of contents Introduction 6 Access ramps 8 Various ramp layouts 9 Access ramps in concrete and brickwork 12 Access ramp in brickwork only 15 Access ramp in laterite 18 Access ramp in wood 22 Circulation ramps 24 Circulation ramp in reinforced concrete 24 Circulation ramp in laterite 28 Circulation ramp in bricks 30 Accessible layouts for ramps 33 Handrails 33 Tactile warning markings 37 Guide stripes 40 Signalization 42
- 6. Handicap International – French section Introduction Introduction T his booklet is part of the set called “How to build an accessible environment in developing countries” and represents the last technical manual on how to build accessible infrastructures in concrete terms. Because of its very technical content, this manual aims mainly to be used by technicians (engineers, architects, building companies, NGOs with technical background...), but people with no technical knowledge should also take some interest in it for the pictures and 3D drawings, in order to understand what means to conceive and build accessible facilities. All around the world, and especially in developing countries, people with disabilities face physical barriers in both urban and rural. These barriers prevent them to participate in the society on an equal footing with other citizens, and preventing them from enjoying their civil, political and human rights. One of these barriers is the numerous obstacles faced when you want to go from one place to another. The right of movement is fundamental, and people with disabilities should have the opportunity to go where they want to go, and not feel restricted by the non- accessibility of the environment. We will focus in this manual on how to make this built environment more accessible, by mainly considering different construction techniques for circulation and access ramps. It is important to stress upon the fact that an accessible environment cannot be summed up to the building an access ramp, as many people are thinking. The ramp (access or circulation) is only a part the global process. As for the access to water and sanitation facilities, personal mobility is a right recognized by the UN Convention, underlined is article 20: “State Parties should take effective measures to ensure personal mobility with the greatest possible independence for persons with disabilities, including by facilitating the personal mobility of persons with disabilities in the manner and at the time of their choice, and at affordable cost.” 6
- 7. How to build an accessible environment – Free movement Introduction Nota Bene: For each technical solution, you will find a clue about its difficulty: ▪ “High difficulty” means that it requires special skills that H uig h lt y must have been learnt, such as brickwork, or making f ic d if reinforced concrete. The whole construction process must be supervised by a technician. ▪ “Medium difficulty” means that a part of the construction d iu m t y process will require the intervention of a technician (most M e ic u l f d if probably brickwork and/or concrete), but the remaining can be realized by beneficiaries themselves. ▪ “Easy” means that everyone (sometimes even children) E as y can implement the design proposed. It does not require any particular skills. 7
- 8. Handicap International – French section Access ramps Access ramps A n access ramp is an infrastructure that provides a smooth transition between two different ground levels (at the entrance of a raised building for example). Access ramps are the most inclusive way to make a raised place accessible, because it can be used by the largest range of people: wheelchair users, elders, people with a visual impairment, pregnant women, people carrying heavy loads. However, the main drawback of building access ramps is that it takes space, and at times even a lot of space. Indeed, the ideal slope for a ramp is less than 5%, but up to 12% is acceptable if it is for short distances. In this document, we will generally consider a slope of 8%. To take a concrete example: Imagine that you want to make a building 50 cm higher than the ground level accessible. Using a slope of 8% the ramp would reach 6 meters. In addition, resting areas should be provided every 6 meters in order to allow the users to catch their breath. They will also allow them to maneuver better and slow down when rolling or walking down. NB: Each acces ramp should be equipped with handrails respecting the accessibility standards, we will develop this subject at page 33. 8
- 9. How to build an accessible environment – Free movement Access ramps Various ramp layouts As mentioned before, access ramps can take a lot of space. Therefore, we recommend you to think carefully about their design in order to come up with the best way also of adapting them to specific context they are meant to be for. You will find here various examples of ramp designs, offering you different solutions to design and build an access to a building. Parallel design This design offers the advantage of being quite compact compared to the design in line (see after). The disadvantage is it forces people to make multiple turns, which can be quite tiring for some wheelchair users. 9
- 10. Handicap International – French section Access ramps Line design 10
- 11. How to build an accessible environment – Free movement Access ramps Angle design 11
- 12. Handicap International – French section Access ramps Access ramps in concrete and brickwork M d if f e d iu m ic u Because of the materials and the building lt y techniques used, this kind of ramps offers the best lifespan but at the expense of a much higher cost. For that matter they are well adapted to administration buildings and other frequented public buildings. Technical drawings Side view Top view 12
- 13. How to build an accessible environment – Free movement Access ramps he o ti c e t You can n C tu b e o f a PV a m p . p re s e n c e er o u g h th g o i ng th r i s to a l y lo w I ts p u rp o s e o w f re e l t h e wa te r to f l he e of t o ne si d , f ro m a no th e r s t ru c t u re t o e i ng th th u s mi n i mi z i pi n g . ri s k o f p Construction steps 1. Earthwork: excavation of the ground on a depth of 10 cm and with length and width 20 cm bigger than the dimensions of the ramp. 2. Creation of a compacted granular fill (pebbles 4x6) on the bottom of the cleared area where the side walls are supposed to be built. 3. Building in brickwork the side walls of the access ramp, coated with mortar on one face. 4. Filling the walls by random fill, watery and highly compacted. 5. On this fill, placing of a compacted granular fill (pebbles 4x6) covered by a layer of sand for cleanliness. 6. Then, reinforcing and concreting above this compacted granular fill (you should groove the surface to make the surface less slippery). NB: if necessary, you must add a PVC tube to allow the water to run off through the structure. 13
- 14. Handicap International – French section Access ramps Iron mesh, work in progress Bricks 4 holes, jointed and coated Compacted sand for cleanliness rg e t ! D o n ' t f o s e a b a m- u You can re i n - bo o me sh to e te . e c o nc r f o rc e t h p e r a n d h ea I t i s c s a me j o b e do e s th h e re . Compacted random fill, work in progress 14
- 15. How to build an accessible environment – Free movement Access ramps Cost estimation : e ra mp C o n c re t lo n g ta g es: - A d v a n re d u c e d ma i n , l i f e s pa n e te na nc v e, e x pe n s i D ra w ba c ks: e c h ni - y of a t ne c e ssi t cian M Access ramp in brickwork only d if f e d iu m ic u lt y Unlike the previous construction technique, no reinforced concrete will be used to make the hard surface ramp here, but bricks (either bricks 4 holes 100x100x200 mm or full bricks 100x50x200 mm). The remaining of the construction process is however the same. In order to have a adequate ramp surface, bricks will be disposed with sand in the joints. It is the same way you pave a street (see technical drawings for bricks disposition). 15
- 16. Handicap International – French section Access ramps Technical drawings Side view Top view Front view 16
- 17. How to build an accessible environment – Free movement Access ramps Construction steps 1. Earthwork: excavation of the ground on a depth of 10 cm and with length and width 20 cm bigger than the dimensions of the ramp. 2. Creation of a compacted granular fill (pebbles 4x6) on the bottom of the cleared area where the side walls are supposed to be built. 3. Building in brickwork the side walls of the access ramp, coated with mortar on one face. 4. Filling the walls by random fill, watery and highly compacted. 5. On this fill, placing of a layer of compacted sand for cleanliness. 6. Then, paving with the bricks following the motif seen on the technical drawings. NB: if necessary, you must add a PVC tube to allow the water to run off through the structure. Pavement in Compacted sand PVC pipe for brickwork water run-off Side walls in coated brickwork Compacted random fill Compacted granular fill under the side walls 17
- 18. Handicap International – French section Access ramps Cost estimation i n b ri c k wo r k Acce s s ra mp c ti o n e: c o n s t ru c e d ta g nf o r A d v a n a n f o r a re i th ea si er e ra mp c o n c re t e na nc e ma i n t a c k: D r a wb i e r av a ls o h e M Access ramp in laterite d if f e d iu m ic u lt y Compared to the two first technical solutions, this one is also very similar. The only difference is that the surface is no more made of concrete or bricks but of compacted laterite. Though cheaper, this solution has a limited lifespan. Without proper maintenance, it will not last more than 2 years, even less if the climatic conditions are tough. 18
- 19. How to build an accessible environment – Free movement Access ramps Technical drawings Side view Top view C No te a PV a g a i n a t th e H e re pl a c e d th e pi pe i s of r c e n t e r e f o r wa t e ur s t ru c t f Front view ru n - o f 19
- 20. Handicap International – French section Access ramps Construction steps 1. Earthwork: excavation of the ground on a depth of 10 cm and with length and width 20 cm bigger than the dimensions of the ramp. 2. Creation of a compacted granular fill (pebbles 4x6) on the bottom of the cleared area where the side walls are supposed to be built. 3. Building in brickwork the side walls of the access ramp, coated with mortar on one face. 4. Filling the walls by random fill, watery and highly compacted. 5. On this fill, creation of a compacted granular fill (pebbles 4x6) to hold the compacted laterite. 6. Then, realization of the layer of compacted laterite (thickness 10 cm). NB: in many cases, you must add a PVC tube to allow the water to run off through the structure. Side walls in coated Compacted random fill brickwork Compacted Pavement in granular fill compacted laterite Compacted granular 20 fill under the side walls
- 21. How to build an accessible environment – Free movement Access ramps Cost estimation t e ri t e mp i n l a A c c e s s ra le a f f o rd a b A dv a n ta g e s: t o b u i ld a nd e a sy re d u c e d D ra w ba c ks: h ea v y a nd li f e s pa n a nc e ma i n t e n Variation: access ramp in laterite and pebbles A variation of the technique to build an access ramp in laterite is to mix this laterite with some gravels (size between 1 mm and 64 mm). This increases the hardness of the ramp surface. But be careful, there must be enough laterite to constitute an efficient binder between the gravels. Otherwise you will notice the apparition of a tracking phenomenon, especially when wheelchair users use the ramp. 21
- 22. Handicap International – French section Access ramps Access ramp in wood M d if f e d iu m ic u Although generally quite cheap, the lt y solution of building an access ramp in wood can be problematic, particularly in Cambodia. Indeed there is a difficulty to find wood of quality at an affordable price. In addition, in a tropical climate wood structures rot rapidly. However, this kind of construction can be very useful in isolated areas where it is very difficult to bring other building materials, yet wood is easily available. Technical drawings Side view Top view 22
- 23. How to build an accessible environment – Free movement Access ramps mp i n wo o d A c c e s s ra in h ea p ta g e s: c f f i c i e nt A d v a n wi t h su a re a s c ti o n a pi d c o n s t ru wo o d , r d re d u c e a c ks : to D r a wb t i b le n ( su sc ep s k i lls l i f e s pa e c h n i c a l t ro t ) , ry ne c e ssa Cost estimation 23
- 24. Handicap International – French section Circulation ramps Circulation ramps Circulation ramps are quite similar to access ramps regarding the building process. They only differ in their aim: whereas access ramps are built to make the transition at a change of ground level, circulation ramps are built on an even ground to allow people to move without facing any obstacles or difficulties. In any case, the surface must be smooth, even, firm and non slippery even when it rains. To be comfortable and safe, pathways should not be banked with a gradient higher than 2%. The slope of an accessible path should not exceed 5 %. Not all the possible solutions are presented here. You can for example think of asphalt pathways. However, these kinds of construction are usually expensive. We have not taken them into account in this booklet which is meant for the context of developing countries. M Circulation ramp in reinforced concrete d if f e d iu m ic u lt y This is the most classic design in order to build an accessible circulation ramp. Although expensive, this is the solution which has the longest lifespan and which will resist the best to climatic hazards. Technical drawings me s h B a mb o o for b e f o re , ti o ne d , A s me n o f c o n s t ru c t i o n pe b a mb o o th i s ty u se a n n y o u c a e a d o f a n i ro me s h i nst e m o re h o u ld b o ne , wh i c h s le . 24 a f f o rd a b
- 25. How to build an accessible environment – Free movement Circulation ramps Section view Top view Front view 25
- 26. Handicap International – French section Circulation ramps Side walls in brickwork Compacted random fill Compacted granular fill Reinforced concrete slab 26
- 27. How to build an accessible environment – Free movement Circulation ramps Construction shape 1. Earthwork: excavation of the ground on a depth of 10 cm and with length and width 20 cm bigger than the dimensions of the ramp. 2. Filling of the cleared space by a compacted random fill. 3. Creation of a compacted granular fill (pebbles 4x6) over the compacted random fill. 4. Building in brickwork of the side borders of the circulation ramp, coated with mortar on one face. 5. Putting in place of the iron mesh on chocks. 6. Pouring of the smooth concrete, being careful not to forget dilatation areas. NB: be careful, it may be necessary to add a PVC tube to allow the water to run off through the structure. Cost estimation : e ra mp C o n c re t lo n g ta g e s: - A d v a n re d u c e d ma i n , l i f e s pa n e te na nc , pe n s i v e a c k s: e x c h ni - D r a wb a te n ec e ss i ty o f cian 27
- 28. Handicap International – French section Circulation ramps Variation: non reinforced concrete In case of a very stable ground layer, it is not necessary to reinforce the concrete. The remaining construction process stays exactly the same. M Circulation ramp in laterite d if f e d iu m ic u lt y Thanks to the materials used, this type of construction is much cheaper than the previous one in reinforced concrete. The main drawback is that it has a limited lifespan. Such a structure will not last more than 2 years without proper maintenance, mainly because of the rain taking away the laterite. Laterite is a material easily obtainable in Cambodia and many other countries. Technical drawings Front view 28
- 29. How to build an accessible environment – Free movement Circulation ramps Top view Construction steps 1. Earthwork: excavation of the ground on a depth of 10 cm and with length and width 20 cm bigger than the dimensions of the ramp. 2. Filling of the cleared space by a compacted random fill. 3. On the sides of the ramp, putting in place of stones 15 x 25 for blocking. 4. Creation of a compacted granular fill (pebbles 4x6) over the compacted random fill. 5. Creation of the top layer made of watery and highly compacted laterite (with a mechanical or manual soil compactor). NB: be careful and do not forget to place PVC pipes (diam.4") in order to let the rain water flow through the structure and avoid the problems of piping. 29
- 30. Handicap International – French section Circulation ramps Cost estimation Variation: circulation ramp in gravels In order to increase the surface hardness, you can also mix some gravels (from 1 to 60 mm) with the laterite. Be careful to have enough of it in this mix in order to bind all the materials sufficiently. This mix must of course be watered and highly compacted. However, keep in mind the longevity: it will not last more than 2 years without proper maintenance. Circulation ramp in bricks M d if f e d iu m ic u In Cambodia as well as in some other lt y countries, bricks are a common and affordable material of good quality. In this case it is recommendable to build circulation ramps made of such bricks. However, due to its sensibility to rainfalls and to the plants than can germinate in the joints, it will require regular maintenance. 30
- 31. How to build an accessible environment – Free movement Circulation ramps Technical drawings Section view Top view Front view 31
- 32. Handicap International – French section Circulation ramps Construction steps ricks Ramp in b 1. Earthwork: excavation of the nd es: hard a natural ground. A dv a nta g c e, ry surfa 2. Placing of the layer of sand. non-slippe o n- , easy c 3. Construction of the side walls a f f o rd a b l e delimiting the ramp. struction 4. Construction of the ramp surface re d u c e d s: with bricks in staggered rows, using D r a wb a c k vy main- sand in the joints and using a rubber life span, hea hammer in order to tamp down the te na nc e structure. Layer of sand Natural Bricks ordered in ground a special way Cost estimation 32
- 33. How to build an accessible environment – Free movement Accessible layouts Accessible layouts for ramps I n a compound composed by several buildings (in a school or health center for instance), it is necessary to build an access ramp for each building and a circulation ramp making the link between them. Thus, you will create a more accessible environment for everyone. There are some simple and affordable layouts that you can add in order to improve their accessibility, particularly for people with a visual or intellectual impairment. M Handrails d if f e d iu m ic u lt y Handrails are very important features for ramps (as well as inside the buildings, but this is not our subject here) because they will help some people to maintain their balance and avoid falling. They should: ▪ Be fixed between 800mm and 1000 mm above the ground. ▪ Be continuous along the ramp/ stairs, and continue past the end of the ramp or stairway by at least 300mm. ▪ Be made from circular tubing 40 to 50 mm in diameter, be smooth and without any sharp edges. ▪ Be fixed at least 50mm from the adjacent wall to prevent hands being caught between rail and wall. ▪ Contrast with its surroundings (painted bright yellow for instance) to assist partially sighted users. 33
- 34. Handicap International – French section Accessible layouts Technical drawings Side view Front view Top view 34
- 35. How to build an accessible environment – Free movement Accessible layouts Detail A Detail B 35
- 36. Handicap International – French section Accessible layouts Specific design: handrails fixed on a wall Adapted end fitting for wall handrails 36
- 37. How to build an accessible environment – Free movement Accessible layouts Cost estimation o rt a n t a n i mp a t l y i l s a re re H a n d r a t h a t wi l l g o f a ty f e a t u re h e a c c e s s i b i l i t a t e et esi i mp ro v , s o d o n o t h be p a t h wa y Bu t i ld t h e m. s t ro n g t o b u h e y mu s t b e n i n , t ve c a re f u l o t t o b re a k ( e a n c e n st e n o u g h d i t i o n s , f o r i n pl a y on l r o u g h c o o l k i d s wi l c h in a s wi t h t h e m) Tactile warning markings In order to help people with a visual impairment to find their way and not to hurt themselves, it is recommended to use tactile warning areas next to each obstacles. This kind of area is called tactile because is texture is in relief and can be felt by the sole of the foot. You should put such tactile markings at the bottom and at the top of each change in level (access ramps or stairs), but also at each crossroad that the user can encounter when circulating. 37
- 38. Handicap International – French section Accessible layouts Example of a tactile marking: textured concrete d if f H ig h To make such specific textured ic u lt y concrete is technically quite difficult. Yet, it will provide a sustainable warning signal for people with a visual impairment. Side view Top view 38
- 39. How to build an accessible environment – Free movement Accessible layouts Constructional detail Front view Cost estimation Implementation example 39
- 40. Handicap International – French section Accessible layouts Guiding stripes Guiding stripes are special layouts destined to help people with visual impairments. They are tools allowing the user to orientate easily and safely when moving. There are two types: ▪ Either the guiding stripe can be made a straight continuous line off detectable objects and defined edges (i.e. building frontages, curbs, grass verges, raised platforms, low barriers, etc.). This kind of guiding stripe is well adapted to an urban environment. ▪ Or it can be made by a stripe presenting a different texture than the surrounding ground, and a good color contrast. Thus, users will be able to detect the guiding stripe using the sole of their foot and follow it safely. A good color contrast allows people to spot obstacles more easily. This case is adapted to the context of access and circulation ramps. A different texture can be also be obtained by tiling the ground with textured tiles. They are quite easy to find. Look for tiles with a typical surface that can be felt with the sole of the foot. A textured tile 40
- 41. How to build an accessible environment – Free movement Accessible layouts Guiding stripes should be laid in a simple and logical manner. They should not be located close to manholes or drains to avoid confusing people. You can also play on a set of different colors corresponding to different types of buildings. In a school compound for instance, you can pick the yellow for classrooms buildings, green for administrative buildings, blue for watsan infrastructure and purple for the library. You will create an orientation system that will help people with a visual and intellectual impairments. It will be easier for them to find their way, especially if you add a good signalization system, see next chapter. A guide stripe made from colored and textured tiles In the picture above, you can see an example using a color code in order to help people to find their way. You can also notice that the guiding stripe is larger at the level of the crossroad in order to warn people of a choice of direction ahead. Be careful, a guiding stripe must be safe to use. The tiles must be inserted in the circulation and not only laid onto it. If they are only laid, they can create an obstacle which can firstly be an barrier for a wheelchair user and secondly be dangerous for everyone (one may stumble upon it). 41
- 42. Handicap International – French section Accessible layouts Signalization We will finish this booklet by developing the subject of signalization. It includes direction signs, indication signs in and out public buildings, but also all the panels that one can find within the urban environment (names of the streets, of the cities, directions, information signs…). A good and adapted signalization is mandatory, improving the orientation for everyone. It prevents us from making useless displacements and moves. Signs disposed on the pathway used by pedestrians can create a physical obstacle. Thus, it needs to be spotted easily. Direction signs should be present whenever you encounter a change in direction. Here are some main ideas on how to create an accessible signing system: ▪ In a closed compound, there should be first a global orientation map at the entrance, coupled with direction signs in the compound and door panels so that people can easily anticipate. ▪ Since the sign is the first thing we see (rather than what is written on it) the color of signs should be in contrast with the surrounding. Be careful, the sign surface should be processed to prevent glare. Signs should not be placed behind glass because of possible reflection. ▪ The size of letters should be in proportion to the reading distance (it is recommended to use character which height is between 100 and 170 mm, visible from 3 m away). ▪ Relief prints are advisable: The letters and signs should preferably be raised at least 1 mm from the background, to enable sightless people to read the information using the tips of their fingers. ▪ Pictograms are also a good practice, the use of standardized symbols and pictograms can also prove useful, especially in places where illiteracy rates are high. 42
- 43. How to build an accessible environment – Free movement Accessible layouts Accessible places and facilities should be clearly identified by the International Accessibility Symbol. Direction panel with a good color contrast and slightly raised letters 43
- 46. Handicap International French Section Head Quarters 14, avenue Berthelot, 69361 Lyon cedex 07, France Tel: + 33 (0) 4 78 69 79 79 Fax: + 33 (0) 4 78 69 79 94 E-mail: contact@handicap-international.org Internet: www.handicap-international.fr Cambodia Program #6, St. 348, BKK3 Chomkarmon, Phnom Penh Tel: +855 (0) 23 212 897 / 214 504 E-mail: office@hicambodia.org