SlideShare une entreprise Scribd logo
1  sur  44
MODULE 5

Microsoft Word 2010

Chapter 1: Creating Documents
Chapter 2: Formatting Documents

Chapter 3: Working with Tables and Objects
Chapter 4: Polishing and Publishing Your
Documents

© Paradigm Publishing, Inc.

1
Chapter 3

WORKING WITH TABLES
AND OBJECTS
© Paradigm Publishing, Inc.

2
Skills You Learn
• Create tables
• Convert text to tables
• Change page orientation
• Insert a row in a table
• Merge rows or columns in a table

• Format tables
© Paradigm Publishing, Inc.

3
Skills You Learn
• Insert shapes
• Insert clip art objects
• Resize objects

• Rotate objects

© Paradigm Publishing, Inc.

4
What You Will Create
• Create the recipe document including:
– a table of ingredients
– fun illustrations and pictures of hot chocolate
– recipe instructions
• You will build the recipe in Word using Word’s
table and column features to organize the recipe
contents.
• Add a shape and a clip art object for visual
interest.
© Paradigm Publishing, Inc.

5
Skill 1: Create Tables
• Click in the document where you wish to insert the table.
• Click the Insert tab.
• Click the Table button in the Tables group and then click
Insert Table.
• In the Insert Table dialog box that appears, type the
Number of columns and the Number of rows you would like
to insert.
• Click OK.
• Click in the cells of the table and enter the text.
• Save the file.

© Paradigm Publishing, Inc.

6
Click the Insert
tab.

Click the Table
button in the Tables
group and then
click Insert Table.
Click in the
document where you
would like the table
inserted.

© Paradigm Publishing, Inc.

7
The Insert Table Dialog Box
Enter the Number of
columns
and the Number of
rows.

Click OK.

© Paradigm Publishing, Inc.

8
Formatting Tables To save yourself some
formatting time, try the Quick Tables feature.

© Paradigm Publishing, Inc.

9
Skill 2: Convert Text to Tables
• Select the text to be converted.
• Click the Insert tab and then click the Table
button.
• Click Convert Text to Table.
• In the Convert Text to Table dialog box, be
sure that the correct option is selected under
the Separate text at section.
• Click OK.
• Save the file.
© Paradigm Publishing, Inc.

10
2. Click the Insert
tab and then click
the Table button.

3. Click
Convert Text
to Table.

© Paradigm Publishing, Inc.

1. Select the
text under
the heading
Steps.

11
The Insert Table Dialog Box

Make sure the correct
option is selected under
the Separate text at
section.

Click OK.
© Paradigm Publishing, Inc.

12
© Paradigm Publishing, Inc.

13
Converting a Table to Text You may also
select the text in a table and convert it
back to plain text.
© Paradigm Publishing, Inc.

14
Skill 3: Change Page Orientation
• Click the Page Layout tab.
• Click the Orientation button in the Page
Setup group.
• Click the appropriate orientation. The
text in the document shifts to
accommodate the margins of a new
orientation.
• Save the file.
© Paradigm Publishing, Inc.

15
1. Click the Page
Layout tab.

2. Click the Orientation button
in the Page Setup group.

© Paradigm Publishing, Inc.

16
© Paradigm Publishing, Inc.

17
Fitting Text on a Page You may also fit
more text on a page by narrowing the
margins in the document.

© Paradigm Publishing, Inc.

18
Skill 4: Insert a Row in a Table
• Click in the row of the table below
where you wish a row inserted.
• Click the Table Tools Layout tab.
• Click the Insert Above button in the
Rows & Columns group. A row is
inserted above the selected row.
• Save the file.
© Paradigm Publishing, Inc.

19
3. Click the Insert
Above button in the
Rows & Columns
group. A row is
inserted above the
selected row.

2. Click the Table
Tools Layout tab.

1. Click in the first row
of the first table.

© Paradigm Publishing, Inc.

20
Click the divider to
adjust column
widths.

© Paradigm Publishing, Inc.

21
Deleting Table Content You can also use
the Delete Table button in the Table Tools
Layout tab to perform the same action.
© Paradigm Publishing, Inc.

22
Checkpoint 1
1)

Tables are made up of
a. numbered lists.
b. bulleted lists.
c. rows and columns.
d. formulas.

3)

Answer
2)

The following can indicate where a
new column begins when converting
text to a table.
a. tab
b. comma
c. paragraph
d. All of the above

Which orientation has the shorter
side of the document running across
the top and bottom?
a.
landscape
b.
portrait
c.
horizontal
d.
None of the above
Answer

4)

You can insert a new row above the
selected row by
a. displaying the Table Tools Layout tab
and clicking the Insert Above button.
b. displaying the Table Tools Layout tab
and clicking the Insert Below button.
c. pressing Ctrl + Alt + A.
d. You cannot add rows to tables after
you’ve created them.
Answer

Answer
© Paradigm Publishing, Inc.

Next Slide
23
Skill 5: Merge Rows or Columns in a Table
• Select the row you wish to merge.
• Click the Table Tools Layout tab.
• Click the Merge Cells button in the
Merge group. Clicking this button
merges all of the selected cells.
• Save the file.
© Paradigm Publishing, Inc.

24
2. Click the Table
Tools Layout tab.
3. Click the Merge
Cells button in the
Merge group.

1. Select the cells to
be merged.

© Paradigm Publishing, Inc.

25
Formatting with Tables The following table is an
example of a resume. Once the information is
organized, you can hide the borders, if you wish.
Languages spoken

© Paradigm Publishing, Inc.

French

Spanish

References

English

Italian

John Cartwright, Acme Products.
Additional references provided upon
request.
26
Skill 6: Format Tables
• Select the table.
• Click the Table Tools Design tab.
• Click the appropriate formatting for
the cells in the table.
• Save the file.

© Paradigm Publishing, Inc.

27
Select a table by right-clicking
within the table and pointing to
Select, then clicking Table.

© Paradigm Publishing, Inc.

28
Click the Table Tools
Design tab.
Click the arrow on
the Borders button
in the Table Styles
group and select the
appropriate
formatting.

© Paradigm Publishing, Inc.

29
Previewing the Table Styles Table styles
offer a great way to add formatting pizzazz
to tables with just a click.
© Paradigm Publishing, Inc.

30
Skill 7: Insert Shapes
• Click the Insert tab.
• Click the Shapes button in the Illustrations group.
• Click the required shape in the appropriate
section.
• Click and drag on the page to draw the shape.
• In the Drawing Tools Format tab, click the Shape
Fill button in the Shape Styles group.
• Click the format option from the color palette.
• Drag the shape to the proper placement on the
page.
• Save the file.
© Paradigm Publishing, Inc.

31
Click the Shapes button
in the Illustrations group.
Click the Insert
tab.
Click the appropriate
shape.

© Paradigm Publishing, Inc.

32
Creating a Diagram If you want to
draw a diagram, you can use a shortcut
rather than drawing individual shapes.
© Paradigm Publishing, Inc.

33
Skill 8: Insert Clip Art Objects
• Click in the document to place the insertion
point.
• Click the Insert tab.
• Click the Clip Art button in the Illustrations
group.
• Make sure there is a check mark in the Include
Office.com content check box.
• Click the Go button.
• Scroll down the previews of clip art images and
click the image to insert it in your document.
• Save the file.
© Paradigm Publishing, Inc.

34
Go button

Insert tab

Clip Art button in the
Illustrations group

Make sure there is a
check mark in the
Include Office.com
content check box.

Click an image to
insert it in your
document.

© Paradigm Publishing, Inc.

35
Inserting Audio and Video Clips The
Clip Art task pane also contains video and
audio clips.
© Paradigm Publishing, Inc.

36
Skill 9: Resize Objects
• Select the object.
• Click and drag one of the handles located in
each corner or along the sides of the selected
object until the image appears to be about the
size preferred.
• With the object selected, you can use one of
the alignment buttons in the Paragraph group
on the Home tab to align the object on the
page.
• Save the file.
© Paradigm Publishing, Inc.

37
Alignment buttons in the
Paragraph group on the Home
tab

Sizing handles

© Paradigm Publishing, Inc.

38
Wrapping Styles Play with these settings to
learn about their different effects in your
documents.

© Paradigm Publishing, Inc.

39
Skill 10: Rotate Objects
• Click the object.
• A green rotation handle appears at
the top of the object.
• Click the rotation handle and drag it to
the right or left to rotate the
illustration at an angle.
• Save the file.
© Paradigm Publishing, Inc.

40
Click the rotation handle and drag it
to the left or right to rotate the
illustration at an angle.

Select the object.

© Paradigm Publishing, Inc.

41
Creating WordArt You can further
enhance Word documents by using WordArt.

© Paradigm Publishing, Inc.

42
Checkpoint 2
5)

The process of combining cells in
rows or columns is called
a. combining.
b. mail merge.
c. merging.
d. None of the above

7)

Answer
6)

A table can be made to look like
columnar text by
a. removing the cell borders.
b. changing the font colors.
c. modifying the line spacing.
d. changing the paragraph spacing.

The Shapes feature in Word allows
you to insert various shapes by
a. choosing them from clip art.
b. drawing them on your page.
c. inserting pictures.
d. All of the above
Answer

8)

The Clip art task pane allows you to
insert
a. illustrations.
b. photos.
c. audio and video.
d. All of the above
Answer

Answer
© Paradigm Publishing, Inc.

Next Slide
43
Tasks Summary

© Paradigm Publishing, Inc.

44

Contenu connexe

Tendances

Open Office.org
Open Office.orgOpen Office.org
Open Office.orginternscpu
 
Introduction to InDesign
Introduction to InDesignIntroduction to InDesign
Introduction to InDesignDUSPviz
 
Creating charts and graphics
Creating charts and graphicsCreating charts and graphics
Creating charts and graphicsum5ashm
 
PowerPoint Chapter 2
PowerPoint Chapter 2PowerPoint Chapter 2
PowerPoint Chapter 2xtin101
 
Saw13 ch04-ppt
Saw13 ch04-pptSaw13 ch04-ppt
Saw13 ch04-pptCEPadgett
 
InDesign CS5 Tutorial
InDesign CS5 TutorialInDesign CS5 Tutorial
InDesign CS5 TutorialZaxapias
 
Lecture 06 insert tab word 2007
Lecture 06  insert  tab  word 2007Lecture 06  insert  tab  word 2007
Lecture 06 insert tab word 2007VTC
 
Sw13 ch01-presentation
Sw13 ch01-presentationSw13 ch01-presentation
Sw13 ch01-presentationCEPadgett
 
Paradigm Publishing Benchmark Series Microsoft Office Word chapter 1
Paradigm Publishing Benchmark Series Microsoft Office Word chapter 1Paradigm Publishing Benchmark Series Microsoft Office Word chapter 1
Paradigm Publishing Benchmark Series Microsoft Office Word chapter 1ceverman
 
Business Process Training, Tips and Tricks for Visio 2013
Business Process Training, Tips and Tricks for Visio 2013Business Process Training, Tips and Tricks for Visio 2013
Business Process Training, Tips and Tricks for Visio 2013Allegient
 

Tendances (19)

Excel ch07
Excel ch07Excel ch07
Excel ch07
 
Open Office.org
Open Office.orgOpen Office.org
Open Office.org
 
Excel ch05
Excel ch05Excel ch05
Excel ch05
 
Introduction to InDesign
Introduction to InDesignIntroduction to InDesign
Introduction to InDesign
 
Creating charts and graphics
Creating charts and graphicsCreating charts and graphics
Creating charts and graphics
 
PowerPoint Chapter 2
PowerPoint Chapter 2PowerPoint Chapter 2
PowerPoint Chapter 2
 
Saw13 ch04-ppt
Saw13 ch04-pptSaw13 ch04-ppt
Saw13 ch04-ppt
 
InDesign CS5 Tutorial
InDesign CS5 TutorialInDesign CS5 Tutorial
InDesign CS5 Tutorial
 
Excel ch04
Excel ch04Excel ch04
Excel ch04
 
Newest-indesign
Newest-indesignNewest-indesign
Newest-indesign
 
Excel ch09
Excel ch09Excel ch09
Excel ch09
 
Word chapter 3
Word chapter 3Word chapter 3
Word chapter 3
 
Lecture 06 insert tab word 2007
Lecture 06  insert  tab  word 2007Lecture 06  insert  tab  word 2007
Lecture 06 insert tab word 2007
 
Sw13 ch01-presentation
Sw13 ch01-presentationSw13 ch01-presentation
Sw13 ch01-presentation
 
Slide Design
Slide DesignSlide Design
Slide Design
 
Paradigm Publishing Benchmark Series Microsoft Office Word chapter 1
Paradigm Publishing Benchmark Series Microsoft Office Word chapter 1Paradigm Publishing Benchmark Series Microsoft Office Word chapter 1
Paradigm Publishing Benchmark Series Microsoft Office Word chapter 1
 
Ms word 2007 PPT
Ms word 2007 PPTMs word 2007 PPT
Ms word 2007 PPT
 
Excel ch08
Excel ch08Excel ch08
Excel ch08
 
Business Process Training, Tips and Tricks for Visio 2013
Business Process Training, Tips and Tricks for Visio 2013Business Process Training, Tips and Tricks for Visio 2013
Business Process Training, Tips and Tricks for Visio 2013
 

Similaire à Gl2010 m5 wd3-presentation

Similaire à Gl2010 m5 wd3-presentation (20)

Gl13 m5-c3-presentation
Gl13 m5-c3-presentationGl13 m5-c3-presentation
Gl13 m5-c3-presentation
 
Gl2010 m6 ex4_presentation
Gl2010 m6 ex4_presentationGl2010 m6 ex4_presentation
Gl2010 m6 ex4_presentation
 
Word ch10
Word ch10Word ch10
Word ch10
 
Word Chapter 04
Word Chapter 04Word Chapter 04
Word Chapter 04
 
Gl13 m6-c4-presentation
Gl13 m6-c4-presentationGl13 m6-c4-presentation
Gl13 m6-c4-presentation
 
Word Chapter 03
Word Chapter 03Word Chapter 03
Word Chapter 03
 
Word Chapter 01
Word Chapter 01Word Chapter 01
Word Chapter 01
 
Word ch05
Word ch05Word ch05
Word ch05
 
CorelDraw%20Tutorial%203
CorelDraw%20Tutorial%203CorelDraw%20Tutorial%203
CorelDraw%20Tutorial%203
 
CorelDraw%20Tutorial%203
CorelDraw%20Tutorial%203CorelDraw%20Tutorial%203
CorelDraw%20Tutorial%203
 
Msword module 3
Msword  module 3Msword  module 3
Msword module 3
 
Ppt2013 ch10
Ppt2013 ch10Ppt2013 ch10
Ppt2013 ch10
 
Ppt2013 ch10
Ppt2013 ch10Ppt2013 ch10
Ppt2013 ch10
 
Word Chapter 1
Word Chapter 1Word Chapter 1
Word Chapter 1
 
Word 2010 Chap 1
Word 2010 Chap 1Word 2010 Chap 1
Word 2010 Chap 1
 
Microsoft PowerPoint 2010 Ch. 1
Microsoft PowerPoint 2010 Ch. 1Microsoft PowerPoint 2010 Ch. 1
Microsoft PowerPoint 2010 Ch. 1
 
PowerPoint 2013 ch04
PowerPoint 2013 ch04PowerPoint 2013 ch04
PowerPoint 2013 ch04
 
PowerPoint Chapter 01
PowerPoint Chapter 01PowerPoint Chapter 01
PowerPoint Chapter 01
 
dr_3
dr_3dr_3
dr_3
 
dr_3
dr_3dr_3
dr_3
 

Plus de Tracie King

The career search project
The career search projectThe career search project
The career search projectTracie King
 
The career search project word
The career search project wordThe career search project word
The career search project wordTracie King
 
Roles and Responsibilities: Developing the Team
Roles and Responsibilities: Developing the TeamRoles and Responsibilities: Developing the Team
Roles and Responsibilities: Developing the TeamTracie King
 
Interface: Creating the connection
Interface: Creating the connectionInterface: Creating the connection
Interface: Creating the connectionTracie King
 
Gameplay: Creating the Experience
Gameplay:  Creating the ExperienceGameplay:  Creating the Experience
Gameplay: Creating the ExperienceTracie King
 
Game Story and Character Development
Game Story and Character DevelopmentGame Story and Character Development
Game Story and Character DevelopmentTracie King
 
Production and Management: Developing the Process
Production and Management: Developing the ProcessProduction and Management: Developing the Process
Production and Management: Developing the ProcessTracie King
 
98 374 Lesson 02-slides
98 374 Lesson 02-slides98 374 Lesson 02-slides
98 374 Lesson 02-slidesTracie King
 
98 374 Lesson 01-slides
98 374 Lesson 01-slides98 374 Lesson 01-slides
98 374 Lesson 01-slidesTracie King
 
98 374 Lesson 06-slides
98 374 Lesson 06-slides98 374 Lesson 06-slides
98 374 Lesson 06-slidesTracie King
 
98 374 Lesson 05-slides
98 374 Lesson 05-slides98 374 Lesson 05-slides
98 374 Lesson 05-slidesTracie King
 
98 374 Lesson 04-slides
98 374 Lesson 04-slides98 374 Lesson 04-slides
98 374 Lesson 04-slidesTracie King
 
98 374 Lesson 03-slides
98 374 Lesson 03-slides98 374 Lesson 03-slides
98 374 Lesson 03-slidesTracie King
 

Plus de Tracie King (20)

The career search project
The career search projectThe career search project
The career search project
 
The career search project word
The career search project wordThe career search project word
The career search project word
 
Roles and Responsibilities: Developing the Team
Roles and Responsibilities: Developing the TeamRoles and Responsibilities: Developing the Team
Roles and Responsibilities: Developing the Team
 
Interface: Creating the connection
Interface: Creating the connectionInterface: Creating the connection
Interface: Creating the connection
 
Gameplay: Creating the Experience
Gameplay:  Creating the ExperienceGameplay:  Creating the Experience
Gameplay: Creating the Experience
 
Game Story and Character Development
Game Story and Character DevelopmentGame Story and Character Development
Game Story and Character Development
 
Production and Management: Developing the Process
Production and Management: Developing the ProcessProduction and Management: Developing the Process
Production and Management: Developing the Process
 
98 374 Lesson 02-slides
98 374 Lesson 02-slides98 374 Lesson 02-slides
98 374 Lesson 02-slides
 
98 374 Lesson 01-slides
98 374 Lesson 01-slides98 374 Lesson 01-slides
98 374 Lesson 01-slides
 
98 374 Lesson 06-slides
98 374 Lesson 06-slides98 374 Lesson 06-slides
98 374 Lesson 06-slides
 
98 374 Lesson 05-slides
98 374 Lesson 05-slides98 374 Lesson 05-slides
98 374 Lesson 05-slides
 
98 374 Lesson 04-slides
98 374 Lesson 04-slides98 374 Lesson 04-slides
98 374 Lesson 04-slides
 
98 374 Lesson 03-slides
98 374 Lesson 03-slides98 374 Lesson 03-slides
98 374 Lesson 03-slides
 
Max2015 ch01
Max2015 ch01Max2015 ch01
Max2015 ch01
 
Max2015 ch03
Max2015 ch03Max2015 ch03
Max2015 ch03
 
Max2015 ch02
Max2015 ch02Max2015 ch02
Max2015 ch02
 
Max2015 ch05
Max2015 ch05Max2015 ch05
Max2015 ch05
 
Max2015 ch04
Max2015 ch04Max2015 ch04
Max2015 ch04
 
Max2015 ch06
Max2015 ch06Max2015 ch06
Max2015 ch06
 
Max2015 ch07
Max2015 ch07Max2015 ch07
Max2015 ch07
 

Dernier

Introduction to Nonprofit Accounting: The Basics
Introduction to Nonprofit Accounting: The BasicsIntroduction to Nonprofit Accounting: The Basics
Introduction to Nonprofit Accounting: The BasicsTechSoup
 
1029 - Danh muc Sach Giao Khoa 10 . pdf
1029 -  Danh muc Sach Giao Khoa 10 . pdf1029 -  Danh muc Sach Giao Khoa 10 . pdf
1029 - Danh muc Sach Giao Khoa 10 . pdfQucHHunhnh
 
Basic Civil Engineering first year Notes- Chapter 4 Building.pptx
Basic Civil Engineering first year Notes- Chapter 4 Building.pptxBasic Civil Engineering first year Notes- Chapter 4 Building.pptx
Basic Civil Engineering first year Notes- Chapter 4 Building.pptxDenish Jangid
 
Holdier Curriculum Vitae (April 2024).pdf
Holdier Curriculum Vitae (April 2024).pdfHoldier Curriculum Vitae (April 2024).pdf
Holdier Curriculum Vitae (April 2024).pdfagholdier
 
APM Welcome, APM North West Network Conference, Synergies Across Sectors
APM Welcome, APM North West Network Conference, Synergies Across SectorsAPM Welcome, APM North West Network Conference, Synergies Across Sectors
APM Welcome, APM North West Network Conference, Synergies Across SectorsAssociation for Project Management
 
PROCESS RECORDING FORMAT.docx
PROCESS      RECORDING        FORMAT.docxPROCESS      RECORDING        FORMAT.docx
PROCESS RECORDING FORMAT.docxPoojaSen20
 
Key note speaker Neum_Admir Softic_ENG.pdf
Key note speaker Neum_Admir Softic_ENG.pdfKey note speaker Neum_Admir Softic_ENG.pdf
Key note speaker Neum_Admir Softic_ENG.pdfAdmir Softic
 
Grant Readiness 101 TechSoup and Remy Consulting
Grant Readiness 101 TechSoup and Remy ConsultingGrant Readiness 101 TechSoup and Remy Consulting
Grant Readiness 101 TechSoup and Remy ConsultingTechSoup
 
Russian Escort Service in Delhi 11k Hotel Foreigner Russian Call Girls in Delhi
Russian Escort Service in Delhi 11k Hotel Foreigner Russian Call Girls in DelhiRussian Escort Service in Delhi 11k Hotel Foreigner Russian Call Girls in Delhi
Russian Escort Service in Delhi 11k Hotel Foreigner Russian Call Girls in Delhikauryashika82
 
Measures of Central Tendency: Mean, Median and Mode
Measures of Central Tendency: Mean, Median and ModeMeasures of Central Tendency: Mean, Median and Mode
Measures of Central Tendency: Mean, Median and ModeThiyagu K
 
Ecological Succession. ( ECOSYSTEM, B. Pharmacy, 1st Year, Sem-II, Environmen...
Ecological Succession. ( ECOSYSTEM, B. Pharmacy, 1st Year, Sem-II, Environmen...Ecological Succession. ( ECOSYSTEM, B. Pharmacy, 1st Year, Sem-II, Environmen...
Ecological Succession. ( ECOSYSTEM, B. Pharmacy, 1st Year, Sem-II, Environmen...Shubhangi Sonawane
 
How to Give a Domain for a Field in Odoo 17
How to Give a Domain for a Field in Odoo 17How to Give a Domain for a Field in Odoo 17
How to Give a Domain for a Field in Odoo 17Celine George
 
Explore beautiful and ugly buildings. Mathematics helps us create beautiful d...
Explore beautiful and ugly buildings. Mathematics helps us create beautiful d...Explore beautiful and ugly buildings. Mathematics helps us create beautiful d...
Explore beautiful and ugly buildings. Mathematics helps us create beautiful d...christianmathematics
 
Unit-V; Pricing (Pharma Marketing Management).pptx
Unit-V; Pricing (Pharma Marketing Management).pptxUnit-V; Pricing (Pharma Marketing Management).pptx
Unit-V; Pricing (Pharma Marketing Management).pptxVishalSingh1417
 
SOCIAL AND HISTORICAL CONTEXT - LFTVD.pptx
SOCIAL AND HISTORICAL CONTEXT - LFTVD.pptxSOCIAL AND HISTORICAL CONTEXT - LFTVD.pptx
SOCIAL AND HISTORICAL CONTEXT - LFTVD.pptxiammrhaywood
 
Accessible design: Minimum effort, maximum impact
Accessible design: Minimum effort, maximum impactAccessible design: Minimum effort, maximum impact
Accessible design: Minimum effort, maximum impactdawncurless
 
An Overview of Mutual Funds Bcom Project.pdf
An Overview of Mutual Funds Bcom Project.pdfAn Overview of Mutual Funds Bcom Project.pdf
An Overview of Mutual Funds Bcom Project.pdfSanaAli374401
 
Z Score,T Score, Percential Rank and Box Plot Graph
Z Score,T Score, Percential Rank and Box Plot GraphZ Score,T Score, Percential Rank and Box Plot Graph
Z Score,T Score, Percential Rank and Box Plot GraphThiyagu K
 

Dernier (20)

Introduction to Nonprofit Accounting: The Basics
Introduction to Nonprofit Accounting: The BasicsIntroduction to Nonprofit Accounting: The Basics
Introduction to Nonprofit Accounting: The Basics
 
1029 - Danh muc Sach Giao Khoa 10 . pdf
1029 -  Danh muc Sach Giao Khoa 10 . pdf1029 -  Danh muc Sach Giao Khoa 10 . pdf
1029 - Danh muc Sach Giao Khoa 10 . pdf
 
Basic Civil Engineering first year Notes- Chapter 4 Building.pptx
Basic Civil Engineering first year Notes- Chapter 4 Building.pptxBasic Civil Engineering first year Notes- Chapter 4 Building.pptx
Basic Civil Engineering first year Notes- Chapter 4 Building.pptx
 
Holdier Curriculum Vitae (April 2024).pdf
Holdier Curriculum Vitae (April 2024).pdfHoldier Curriculum Vitae (April 2024).pdf
Holdier Curriculum Vitae (April 2024).pdf
 
APM Welcome, APM North West Network Conference, Synergies Across Sectors
APM Welcome, APM North West Network Conference, Synergies Across SectorsAPM Welcome, APM North West Network Conference, Synergies Across Sectors
APM Welcome, APM North West Network Conference, Synergies Across Sectors
 
PROCESS RECORDING FORMAT.docx
PROCESS      RECORDING        FORMAT.docxPROCESS      RECORDING        FORMAT.docx
PROCESS RECORDING FORMAT.docx
 
Key note speaker Neum_Admir Softic_ENG.pdf
Key note speaker Neum_Admir Softic_ENG.pdfKey note speaker Neum_Admir Softic_ENG.pdf
Key note speaker Neum_Admir Softic_ENG.pdf
 
Grant Readiness 101 TechSoup and Remy Consulting
Grant Readiness 101 TechSoup and Remy ConsultingGrant Readiness 101 TechSoup and Remy Consulting
Grant Readiness 101 TechSoup and Remy Consulting
 
Russian Escort Service in Delhi 11k Hotel Foreigner Russian Call Girls in Delhi
Russian Escort Service in Delhi 11k Hotel Foreigner Russian Call Girls in DelhiRussian Escort Service in Delhi 11k Hotel Foreigner Russian Call Girls in Delhi
Russian Escort Service in Delhi 11k Hotel Foreigner Russian Call Girls in Delhi
 
Mehran University Newsletter Vol-X, Issue-I, 2024
Mehran University Newsletter Vol-X, Issue-I, 2024Mehran University Newsletter Vol-X, Issue-I, 2024
Mehran University Newsletter Vol-X, Issue-I, 2024
 
Advance Mobile Application Development class 07
Advance Mobile Application Development class 07Advance Mobile Application Development class 07
Advance Mobile Application Development class 07
 
Measures of Central Tendency: Mean, Median and Mode
Measures of Central Tendency: Mean, Median and ModeMeasures of Central Tendency: Mean, Median and Mode
Measures of Central Tendency: Mean, Median and Mode
 
Ecological Succession. ( ECOSYSTEM, B. Pharmacy, 1st Year, Sem-II, Environmen...
Ecological Succession. ( ECOSYSTEM, B. Pharmacy, 1st Year, Sem-II, Environmen...Ecological Succession. ( ECOSYSTEM, B. Pharmacy, 1st Year, Sem-II, Environmen...
Ecological Succession. ( ECOSYSTEM, B. Pharmacy, 1st Year, Sem-II, Environmen...
 
How to Give a Domain for a Field in Odoo 17
How to Give a Domain for a Field in Odoo 17How to Give a Domain for a Field in Odoo 17
How to Give a Domain for a Field in Odoo 17
 
Explore beautiful and ugly buildings. Mathematics helps us create beautiful d...
Explore beautiful and ugly buildings. Mathematics helps us create beautiful d...Explore beautiful and ugly buildings. Mathematics helps us create beautiful d...
Explore beautiful and ugly buildings. Mathematics helps us create beautiful d...
 
Unit-V; Pricing (Pharma Marketing Management).pptx
Unit-V; Pricing (Pharma Marketing Management).pptxUnit-V; Pricing (Pharma Marketing Management).pptx
Unit-V; Pricing (Pharma Marketing Management).pptx
 
SOCIAL AND HISTORICAL CONTEXT - LFTVD.pptx
SOCIAL AND HISTORICAL CONTEXT - LFTVD.pptxSOCIAL AND HISTORICAL CONTEXT - LFTVD.pptx
SOCIAL AND HISTORICAL CONTEXT - LFTVD.pptx
 
Accessible design: Minimum effort, maximum impact
Accessible design: Minimum effort, maximum impactAccessible design: Minimum effort, maximum impact
Accessible design: Minimum effort, maximum impact
 
An Overview of Mutual Funds Bcom Project.pdf
An Overview of Mutual Funds Bcom Project.pdfAn Overview of Mutual Funds Bcom Project.pdf
An Overview of Mutual Funds Bcom Project.pdf
 
Z Score,T Score, Percential Rank and Box Plot Graph
Z Score,T Score, Percential Rank and Box Plot GraphZ Score,T Score, Percential Rank and Box Plot Graph
Z Score,T Score, Percential Rank and Box Plot Graph
 

Gl2010 m5 wd3-presentation

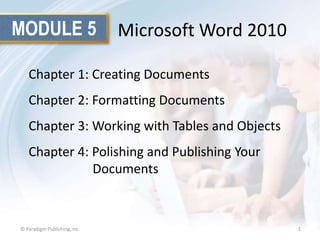
  • 1. MODULE 5 Microsoft Word 2010 Chapter 1: Creating Documents Chapter 2: Formatting Documents Chapter 3: Working with Tables and Objects Chapter 4: Polishing and Publishing Your Documents © Paradigm Publishing, Inc. 1
  • 2. Chapter 3 WORKING WITH TABLES AND OBJECTS © Paradigm Publishing, Inc. 2
  • 3. Skills You Learn • Create tables • Convert text to tables • Change page orientation • Insert a row in a table • Merge rows or columns in a table • Format tables © Paradigm Publishing, Inc. 3
  • 4. Skills You Learn • Insert shapes • Insert clip art objects • Resize objects • Rotate objects © Paradigm Publishing, Inc. 4
  • 5. What You Will Create • Create the recipe document including: – a table of ingredients – fun illustrations and pictures of hot chocolate – recipe instructions • You will build the recipe in Word using Word’s table and column features to organize the recipe contents. • Add a shape and a clip art object for visual interest. © Paradigm Publishing, Inc. 5
  • 6. Skill 1: Create Tables • Click in the document where you wish to insert the table. • Click the Insert tab. • Click the Table button in the Tables group and then click Insert Table. • In the Insert Table dialog box that appears, type the Number of columns and the Number of rows you would like to insert. • Click OK. • Click in the cells of the table and enter the text. • Save the file. © Paradigm Publishing, Inc. 6
  • 7. Click the Insert tab. Click the Table button in the Tables group and then click Insert Table. Click in the document where you would like the table inserted. © Paradigm Publishing, Inc. 7
  • 8. The Insert Table Dialog Box Enter the Number of columns and the Number of rows. Click OK. © Paradigm Publishing, Inc. 8
  • 9. Formatting Tables To save yourself some formatting time, try the Quick Tables feature. © Paradigm Publishing, Inc. 9
  • 10. Skill 2: Convert Text to Tables • Select the text to be converted. • Click the Insert tab and then click the Table button. • Click Convert Text to Table. • In the Convert Text to Table dialog box, be sure that the correct option is selected under the Separate text at section. • Click OK. • Save the file. © Paradigm Publishing, Inc. 10
  • 11. 2. Click the Insert tab and then click the Table button. 3. Click Convert Text to Table. © Paradigm Publishing, Inc. 1. Select the text under the heading Steps. 11
  • 12. The Insert Table Dialog Box Make sure the correct option is selected under the Separate text at section. Click OK. © Paradigm Publishing, Inc. 12
  • 14. Converting a Table to Text You may also select the text in a table and convert it back to plain text. © Paradigm Publishing, Inc. 14
  • 15. Skill 3: Change Page Orientation • Click the Page Layout tab. • Click the Orientation button in the Page Setup group. • Click the appropriate orientation. The text in the document shifts to accommodate the margins of a new orientation. • Save the file. © Paradigm Publishing, Inc. 15
  • 16. 1. Click the Page Layout tab. 2. Click the Orientation button in the Page Setup group. © Paradigm Publishing, Inc. 16
  • 18. Fitting Text on a Page You may also fit more text on a page by narrowing the margins in the document. © Paradigm Publishing, Inc. 18
  • 19. Skill 4: Insert a Row in a Table • Click in the row of the table below where you wish a row inserted. • Click the Table Tools Layout tab. • Click the Insert Above button in the Rows & Columns group. A row is inserted above the selected row. • Save the file. © Paradigm Publishing, Inc. 19
  • 20. 3. Click the Insert Above button in the Rows & Columns group. A row is inserted above the selected row. 2. Click the Table Tools Layout tab. 1. Click in the first row of the first table. © Paradigm Publishing, Inc. 20
  • 21. Click the divider to adjust column widths. © Paradigm Publishing, Inc. 21
  • 22. Deleting Table Content You can also use the Delete Table button in the Table Tools Layout tab to perform the same action. © Paradigm Publishing, Inc. 22
  • 23. Checkpoint 1 1) Tables are made up of a. numbered lists. b. bulleted lists. c. rows and columns. d. formulas. 3) Answer 2) The following can indicate where a new column begins when converting text to a table. a. tab b. comma c. paragraph d. All of the above Which orientation has the shorter side of the document running across the top and bottom? a. landscape b. portrait c. horizontal d. None of the above Answer 4) You can insert a new row above the selected row by a. displaying the Table Tools Layout tab and clicking the Insert Above button. b. displaying the Table Tools Layout tab and clicking the Insert Below button. c. pressing Ctrl + Alt + A. d. You cannot add rows to tables after you’ve created them. Answer Answer © Paradigm Publishing, Inc. Next Slide 23
  • 24. Skill 5: Merge Rows or Columns in a Table • Select the row you wish to merge. • Click the Table Tools Layout tab. • Click the Merge Cells button in the Merge group. Clicking this button merges all of the selected cells. • Save the file. © Paradigm Publishing, Inc. 24
  • 25. 2. Click the Table Tools Layout tab. 3. Click the Merge Cells button in the Merge group. 1. Select the cells to be merged. © Paradigm Publishing, Inc. 25
  • 26. Formatting with Tables The following table is an example of a resume. Once the information is organized, you can hide the borders, if you wish. Languages spoken © Paradigm Publishing, Inc. French Spanish References English Italian John Cartwright, Acme Products. Additional references provided upon request. 26
  • 27. Skill 6: Format Tables • Select the table. • Click the Table Tools Design tab. • Click the appropriate formatting for the cells in the table. • Save the file. © Paradigm Publishing, Inc. 27
  • 28. Select a table by right-clicking within the table and pointing to Select, then clicking Table. © Paradigm Publishing, Inc. 28
  • 29. Click the Table Tools Design tab. Click the arrow on the Borders button in the Table Styles group and select the appropriate formatting. © Paradigm Publishing, Inc. 29
  • 30. Previewing the Table Styles Table styles offer a great way to add formatting pizzazz to tables with just a click. © Paradigm Publishing, Inc. 30
  • 31. Skill 7: Insert Shapes • Click the Insert tab. • Click the Shapes button in the Illustrations group. • Click the required shape in the appropriate section. • Click and drag on the page to draw the shape. • In the Drawing Tools Format tab, click the Shape Fill button in the Shape Styles group. • Click the format option from the color palette. • Drag the shape to the proper placement on the page. • Save the file. © Paradigm Publishing, Inc. 31
  • 32. Click the Shapes button in the Illustrations group. Click the Insert tab. Click the appropriate shape. © Paradigm Publishing, Inc. 32
  • 33. Creating a Diagram If you want to draw a diagram, you can use a shortcut rather than drawing individual shapes. © Paradigm Publishing, Inc. 33
  • 34. Skill 8: Insert Clip Art Objects • Click in the document to place the insertion point. • Click the Insert tab. • Click the Clip Art button in the Illustrations group. • Make sure there is a check mark in the Include Office.com content check box. • Click the Go button. • Scroll down the previews of clip art images and click the image to insert it in your document. • Save the file. © Paradigm Publishing, Inc. 34
  • 35. Go button Insert tab Clip Art button in the Illustrations group Make sure there is a check mark in the Include Office.com content check box. Click an image to insert it in your document. © Paradigm Publishing, Inc. 35
  • 36. Inserting Audio and Video Clips The Clip Art task pane also contains video and audio clips. © Paradigm Publishing, Inc. 36
  • 37. Skill 9: Resize Objects • Select the object. • Click and drag one of the handles located in each corner or along the sides of the selected object until the image appears to be about the size preferred. • With the object selected, you can use one of the alignment buttons in the Paragraph group on the Home tab to align the object on the page. • Save the file. © Paradigm Publishing, Inc. 37
  • 38. Alignment buttons in the Paragraph group on the Home tab Sizing handles © Paradigm Publishing, Inc. 38
  • 39. Wrapping Styles Play with these settings to learn about their different effects in your documents. © Paradigm Publishing, Inc. 39
  • 40. Skill 10: Rotate Objects • Click the object. • A green rotation handle appears at the top of the object. • Click the rotation handle and drag it to the right or left to rotate the illustration at an angle. • Save the file. © Paradigm Publishing, Inc. 40
  • 41. Click the rotation handle and drag it to the left or right to rotate the illustration at an angle. Select the object. © Paradigm Publishing, Inc. 41
  • 42. Creating WordArt You can further enhance Word documents by using WordArt. © Paradigm Publishing, Inc. 42
  • 43. Checkpoint 2 5) The process of combining cells in rows or columns is called a. combining. b. mail merge. c. merging. d. None of the above 7) Answer 6) A table can be made to look like columnar text by a. removing the cell borders. b. changing the font colors. c. modifying the line spacing. d. changing the paragraph spacing. The Shapes feature in Word allows you to insert various shapes by a. choosing them from clip art. b. drawing them on your page. c. inserting pictures. d. All of the above Answer 8) The Clip art task pane allows you to insert a. illustrations. b. photos. c. audio and video. d. All of the above Answer Answer © Paradigm Publishing, Inc. Next Slide 43
  • 44. Tasks Summary © Paradigm Publishing, Inc. 44

Notes de l'éditeur

  1. In Module 5, you learn about Microsoft Word 2010. Chapter 1 covers creating documents including entering and editing text. Chapter 2 deals with formatting tools that help improve the look of your documents. In Chapter 3, you work with tables to help organize information and objects to add visual appeal. Finally, Chapter 4 covers features for reviewing and finalizing your document and printing it or publishing it online.
  2. The third chapter in the Word module deals with working with tables and objects.
  3. There are several features in Word that help you organize information and add visual appeal to your documents. Tables organize information into rows and columns, allowing you to convey a great deal of data in a small, neat space. You can also insert visual objects, including photos, illustrations, and shapes to better illustrate a point or make your document more attractive.
  4. In this chapter, you will also learn how to build tables and insert and manipulate objects.
  5. You are helping to organize an open house to celebrate The Chocolate Museum’s 10th year in operation. The Museum will give each guest a small tote bag containing a pad and pen stamped with the Museum’s logo, a bar of chocolate from a local chocolate company, and a recipe for Mexican Hot Chocolate. Your boss has asked you to create the recipe document, including a table of ingredients, fun illustrations and pictures of hot chocolate, and recipe instructions.
  6. Tables use columns and rows to help organize sets of information and show relationships among separate pieces of information. For example, imagine a table used to compare the nutritional information for types of snacks. The first column of the table lists the name of each snack. The second column lists the quantity of calories in each snack. The third column lists the quantity of carbohydrates in each snack. The fourth column lists the quantity of fats in each snack. By reading down the table’s columns you could compare the nutritional ingredients of each type of snack, and might use that information to help you select which snack to eat.
  7. In this skill, you will use M5-C3-S1-HCRecipe.docx tocreate a table to list the amounts of each recipe ingredient in the first column and the type of ingredient in the second column. Click in the blank line between the words Ingredients and Steps. The insertion point will be resting where you want the table to be inserted. Another Way: You can also click the boxes that appear in order to insert a table containing up to eight rows and columns.
  8. Enter the desired number in to the Number of columns field and the Number of rows field. Click the OK button to create the table in your document. Another Way: Click the arrows on the right side of each of the number fields to change the number of rows and columns.
  9. You can access Quick Tables from the Table button in the Insert tab. Quick Tables includes common table styles that you might find useful, such as two column lists or calendars.
  10. If you have entered text outside of a table, you canconvert that information into table form. You must provide an indicator to mark where each new column begins. For these indicators, or separators, people often use tabs, but you can also use commas, paragraphs, or single characters such as hyphens.
  11. Notice inM5-C3-S1-HCRecipe.docx,the text under the heading Steps is selected from the start of Step 1 through the end of Step 7. The step list includes tabs to separate the step numbers from the step descriptions. Click the Insert tab and then click the Table button. Click Convert Text to Table.Tip:Before using the Convert Text to Table feature, verify that you have inserted column and row separators. Click the Show/Hide button in the Paragraph group on the Home tab to display the arrows that represent tabs and the paragraph symbols that indicate paragraph breaks.
  12. In the Convert Text to Table dialog box, be sure that the correct option is selected under the Separate text at section. Click the OK button to set the options selected.Tip:Note that the AutoFit behavior section of the Convert Text to Table dialog box defaults to Auto in the Fixed column width option. The Auto setting will adjust column widths to fit the text in them, as shown in the images on the next slide.
  13. Here you see that the text has been converted to a table.
  14. To convert a table back to text you click the Convert to Text button in the Data group in the Table Tools Layout tab. You will then get a choice of what to use as a separator in the text (tabs, paragraphs, commas, or another symbol you indicate).
  15. Sometimes in order to fit more text on a page or improve the design, you may want to change the page orientation of a document. Word offers two types of document orientations. By default, Word documents are set up in portrait orientation, where the height of a page is greater than the width. You can change this to landscape orientation, where the width of a page is greater than the height.Although you should try to set the page orientation before entering content, you may need to make a change once the content is entered. Tip:Apply the correct page orientation as early as you can while building a document so there are no surprises about how text or inserted objects, such as pictures, might shift on the page once the new margin settings are applied.
  16. Here is M5-C3-S3-HCRecipe.docx, in Portrait orientation. To change to Landscape orientation, go to the Page Layout tab and select the Orientation button in the Page Setup group.
  17. Here is the same document in Landscape orientation.Tip:You should view how your text balances on a page once you change the page orientation. Use the Print Preview feature (click the File tab and then Print) to see how your printed document will look. Check it over carefully and make necessary adjustments before printing.
  18. The standard page size for most documents is 8½” × 11”. Sometimes you may have a landscape orientation document that runs slightly longer than a single page. To fit it on one page, consider printing to another paper size, such as 8½” × 14”. See Module 5 Chapter 1 for more about adjusting margins in Word.
  19. At times you will need to add more data to an already-created table. To accommodate the additional data, you can easily insert new columns or rows. If it is not already open, open M5-C3-S3-HCRecipe.docx, the file you saved in the previous skill, and save the file as M5-C3-S4-HCRecipe.
  20. In this skill, you will insert a heading row in one of your tables. UsingM5-C3-S3-HCRecipe.docx,we will insert a row above the selected row.Tip:To insert a column rather than a row, simply select a column and then click the Insert Left or Insert Right button in the Table Tools Layout tab.
  21. Tip:When you insert a new column, you may find that the column width does not accommodate the data within it very well. You can resize columns by placing your cursor over a column dividing line until the cursor turns into two vertical lines with arrows facing left and right. Click and drag the divider to the right or left to adjust column widths.
  22. If you need to delete a row or column, there are a couple of ways to do so. Place your mouse pointer at the top of the column(s) or to the left of a row(s) until the pointer turns to a solid black arrow and click to select it. You may need to double-click to select a row. Right-click, and in the shortcut menu that appears, select either Delete Rows or Delete Columns.
  23. In Slide Show View, click the Answer button for Question 1 after you believe that you know the correct answer. The correct answer will be displayed. Then click the Answer button for Question 2 and the answer will appear. Continue repeating these steps for all four questions in order. When complete, click the Next Slide button.These Checkpoints are designed to provide you with an opportunity to reflect on a few concepts at a time.
  24. Not all tables are made up of consistent sets of rows and columns. Some may combine the top row into a single cell that contains a table title. In other cases, you may want to combine a set of cells so they create a larger block in a table based form, just as a passport has a large square for the person’s picture and other lines containing personal data. The process of combining rows or columns is called merging. If it is not already open, open M5-C3-S4-HCRecipe.docx, the file you saved in the previous skill, and save the file as M5-C3-S5-HCRecipe.
  25. Here, in M5-C3-S4-HCRecipe.docx, you will notice that the text in the first row of the second table is selected. Clicking the Layout tab and the Merge Cell button will merge the selected cells.Tip:You can merge rows, columns, or rows and columns, based on the combination of rows and/or columns you select before clicking Merge Cells.
  26. Use a table and the merge function to build forms or documents such as resumes.
  27. There are a variety of ways you can format a table. You can add shading or modify the thickness or color of the lines that define the table cells. You can also specify which border lines should be displayed and which should not.
  28. In this skill (using M5-C3-S5-HCRecipe.docx),you will learn how to alter a table so that it has no borders showing at all. To select the table, right-click within the table, point to Select, and then click Table. Another way: Click and drag to select all the cells of the table.
  29. Using the arrow on the Borders button in the Table Tools Design tab, select the appropriate formatting.Tip: You can apply shading to individual cells of your table to help visually separate cell contents instead of relying on borders to do so.
  30. The gallery of table styles is found on the Table Tools Design tab. Just click in a table and move your pointing device over the various style options in the gallery, which are simultaneously previewed on your table. When you see one that you like, click on it and the style is applied to your table instantly!
  31. Word includes a feature called Shapes that lets you easily draw a variety of shapes in your documents, from lines to stars and arrows. You can use these shapes to build flow charts or simple illustrations to help you make a point or add visual appeal. Open M5-C3-S7-HCRecipe.docx, the student data file, and save the file as M5-C3-S7-HCRecipe in your Module 5 working folder.
  32. Using M5-C3-S7-HCRecipe.docx,a shape has been selected from the Shapes button on the Insert tab.Another Way: Right-click an object and choose Format AutoShape to choose a fill color from the Format AutoShape dialog box.
  33. Use the SmartArt feature in the Illustrations group in the Insert tab to insert certain types of diagrams, such as an organizational chart or pyramid diagram. Once you have drawn a SmartArt object, you can click in individual elements of the diagram and entertext labels.
  34. Microsoft provides a rich repository of illustrations, pictures, and audio and video clips for use in your documents. These items can help you pack a design punch with very little effort. You use the Clip Art task pane to locate and insert objects installed with the Office program and from Office.com.
  35. Here you see theM5-C3-S7-HCRecipe.docx document with the Clip Art button selected. Make sure there is a check mark in the Include Office.com content check box and click the Go button to see the clip art images. Click the image to insert it in your document.
  36. Your documents can benefit from these clips if they will be published online where viewers can click on links to play audio and video content.
  37. Objects do not always appear in a size that suits your document. You can easily resize graphic objects by using the handles located in each corner or along the sides of the selected object. If you need to maintain the object’s original proportions, resize by dragging a corner handle. If you don’t want to retain the object’s original proportions, resize the image by dragging a side handle.
  38. Using M5-C3-S8-HCRecipe.docx, you can resize the object by clicking and dragging one of the corner or side handles. Use the alignment buttons in the Paragraph group on the Home tab to align the object on the page.Another Way: Right-click the object and select Format Picture. Change the settings in the Height and Width fields in the Crop section to half of the original number values.
  39. When you place an object in a document, the object is by default set off, or separated, from the text. Thus, you may have text above and below the object, but not next to or behind it. To adjust how the object and text are arranged, select the picture, then click the Wrap Text button in the Arrange group on the Picture Tools Format tab. In this drop-down menu you have many arrangement options such as placing the picture behind the text, in front of the text, or in line with the text.
  40. Some objects will contribute more clearly to your document’s message if they are rotated from their original orientation, either to fit with your page design and with other objects or to suggest a relationship between objects. You can also rotate an object to suggest movement. It is easy to rotate objects by using the rotation handle, which displays as a green circle above a selected object.
  41. In this document (M5-C3-S9-HCRecipe.docx), the saucepan is inserted as if it’s sitting flat on a stove. However, rotating it to bring the handle upward suggests that you are pouring the contents into cups, which is the result described in the recipe text. Another way: Select an object and click the Rotate button in the Arrange group on the Picture Tools Format tab. Tip:Rotating the object in this way may cause it to jump to the next page. You can fix or prevent this by either deleting any extra spacing before the object or resizing the object to be smaller.
  42. Click the WordArt button in the Text group on the Home tab and select a WordArt style to insert a text box that reads Your text here. Select the placeholder text and type to customize the text. Make further formatting changes to the WordArt text by clicking options in the Drawing Tools Format tab, which is available when the WordArt object is active.
  43. In Slide Show View, click the Answer button for Question 5 after you believe that you know the correct answer. The correct answer will be displayed. Then click the Answer button for Question 6 and the answer will appear. Continue repeating these steps for all four questions in order. When complete, click the Next Slide button.
  44. Here is a summary of the Word Chapter 3 tasks.