1. Final Project
by Andy Chu Lab Partners: Alan Buckley and Ares Hernandez
February 20, 2015
Abstract
After an entire semester of Physics 111, we have learned so much about
dierent circuits and endeavor on a journey to make a project that requires
knowledge on circuits and electrodynamics. The gauss gun was a perfect
choice for our nal project because building the gun uses knowledge of
magnetism and circuits concepts from Physics 111. We have seen amazing
designs by the Navy and hobbyists and decided to try to build one so we
can gure out how the gun works.
Part I
Introduction
To make our project, we started by looking up several designs that people have
made in the past. We saw many promising designs and divided the gun into
modules, so we could choose to build only the most reasonable circuit for each
module, since dierent designs may have one module better than a module from
another design. Some projects were really cool, but the cost was sometimes
unreasonable. One design we really liked was a gauss gun that cost $1500 in
total. We eventually had to scrap that idea even though we considered spending
that amount of money because that particular group spent an entire semester
on the gun and we have much less time to complete our project. Once we tried
to order our parts, we realized that a lot of parts that yielded a great muzzle
velocity were extremely expensive (capacitors 3900 microfarads were 400 dollars
for two). Expense was not the only factor to consider, other parts to a week and
up to ten days just to ship. We did not want to purchase parts that took too long
to be delivered because even though we may have our calculations, some parts
may fry because we overlooked a small detail and then we would be without
parts to construct our project. After we simplied our circuit, we also went to
Al Lasher's and the owner was nice enough to nd us a bunch of equivalent
cheaper parts that we could obtain the day of. Our parts that took a long
time to come were the capacitors and the MOSFET. The building process also
yielded many unforeseen hurdles. For instance, we needed a 50V power supply
and once we got it, we were not able to use single wires from BSC lab because
1
2. there is 2 amps that come out of the power supply and one wire would heat up
so quickly and cause safety hazards. To solve this problem, we had to get three
wires and twist them around each other. One end of these three twisted wires
would be connected to the power supply and the other end would be connected
to our capacitors. To have a good connection, we had to solder these wires to
the capacitors (these capacitors were part of our capacitor bank). Our gauss gun
is divided into the following modules: power supply, capacitor bank, and switch
and coil. Originally, we were going to use an SCR (silicon controlled rectier)
as part of our switch, but the SCR was slower than a MOSFET and switching
slowly will prevent the magnetic eld from turning o really quickly after the
projectile is past the halfway point of the coil and slow the projectile down, since
magnetic elds in inductors accelerate projectiles towards the center. Also, the
SCR needed an AC signal, so we would have to wait and nd just the right
time to re, which would complicate things even further. We used electrolytic
capacitors, so we wanted an SCR, since it acted also as a diode and prevented
back ow of current. It was not until after we calculated impedances that we
realized we our circuit behaved more like an RC circuit and not LC circuit.
Therefore, it was okay to replace our SCR with a MOSFET, since there was
no back ow of current and our electrolytic capacitors would not be damaged.
After constructing our circuit, we did some test shots and some steel projectiles
just did not go too far. Our rst test moved our projectile 1 mm. We made
smaller steel projectiles, since force is acceleration over mass and a smaller mass
would allow the projectile to accelerate and yielded better results. After we
were done constructing our gauss gun, we played with making a second stage,
but could not get the timing right to yield a projectile that traveled faster than
the rst stage.
Part II
Ciruit Diagrams
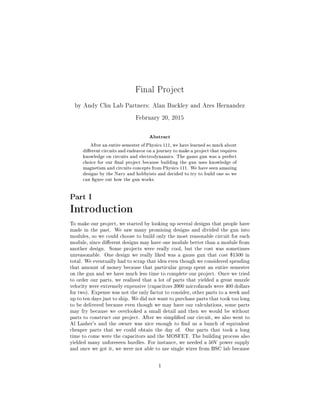
The block diagram shows the dif-
ferent modules in our circuit. Our power supply is a 50 V supply we borrowed
from the advanced lab. The 45V supply is used to charge our capacitor bank. It
could only charge our capacitors to a maximum of around 44.7V. Our capacitor
2
3. bank is where we store our charge and do not discharge until we are ready to
launch our projectile. We have a switch that allows us to complete our circuit,
which will allow the capacitor to discharge and pour current into our coil. Our
coil receives the current from the capacitor bank and then a magnetic eld will
be created due to the current through the coil. This magnetic eld will cause
our projectile that site halfway into our stage because when we use the analogy
of B → D and M → P we can see when the projectile is a little bit outside
of the back end of the coil (back is the side opposite the magnetic eld which
is determined by the right hand rule) and the projectile will accelerate towards
the magnetic eld.
Our circuit diagram for our capacitor bank is
shown. We have two capacitors in parallel because we would then have the ca-
pacitances added and more charge can be stored in this overall block. We charge
the capacitors with the 45V power supply borrowed from advanced laboratory.
Once we are ready to re, we discharge one of the capacitors with a wire.
Our switch and coil allow us to launch our
projectile. The IRPF450 is a MOSFET with a gate source voltage of 3V. Any
voltage above 3V will allow the MOSFET to turn on and once it is on, current
will ow from the drain to the source. We turn on the MOSFET by hitting a
switch on the breadboard. This switch keeps the circuit open, until will press the
button. Once we press the button, we will have 10V between the 2kΩ and 10kΩ
since voltage division with Vout = VinR2
R1R2
= 10kΩ(12V )
2kΩ+10kΩ = 10V .The gauss gun uses
the concept that inductors store energy in magnetic elds whenever there is
current through the coils. Current can be provided from capacitors, which not
3
4. only store charge, but can also discharge. Controlling the magnetic elds from
the inductors is important because objects such as steel will accelerate towards
a magnetic eld. Steel inside an inductor with a magnetic eld will accelerate
towards the center of the steel. Turning o the magnetic eld once the projectile
s halfway through the coil will allow the projectile to have maximum acceleration
through the stage because once the projectile passes the halfway point of the coil
and the magnetic eld is still on, the magnetic eld will accelerate the projectile
back into the center of the coil, which will end up slowing down our projectile.
After we press the switch, the circuit gets completed, and our MOSFET will
then receive a gate source voltage of 10 V. Our MOSFET will then turn on and
we will have current go from the drain to source and current will go through
the inductor. The inductor will then create a magnetic eld and our projectile
will then accelerate on our stage.
Part III
Theory
Using the analogy of B → D and M → P, we can see why the projectile will ac-
celerate towards the magnetic eld.
right hand rule, we determine the clockwise coil we wrapped and the current,
4
5. our thumb pointed in the direction of positive magnetic eld. We put our pro-
jectile on the side opposite our thumb. So we have the case on the left. Once
we have a magnetic eld in our inductor, the Electric eld analogy shows that
the Electric eld is stronger in the positive side of the magnetic eld and then
our projectile will acclerate up. Our magnetic eld was shortlived and once
the projectile passes the halfway point we have the second case (right side of
electric), but since our magnetic eld is o, our projectile will continue traveling
at the same speed with only air resistance to slow it down.
Looking at the oscilloscope, we have our τ = 12ms, so f = 1
12ms
= 83Hz.
Thus, according to our graph, each capacitor should have 1.4Ω impedance. We
have two capacitors in parallel and the Zcapbank = ( 1
1.4Ω + 1
1.4Ω ) = 0.7Ω. Our
coil was measured with the LCR to be 0.8Ω = Zcoil. Resistor is 0.1Ω = Zresistor.
Mosfet (D-s) is 0.4Ω = Zmosfet. Total impedance of our circuit is Z = (0.7 +
0.8 + 0.1 + 0.4)Ω = 2Ω. We initially thought that our circuit would oscillate
like a LC circuit, however after calculating the total impedance of the circuit,
we see that the Impedance is so high that the inductance rom the inductor is
so negligible that the circuit ends up behaving like a RC circuit. R = τ
C =
12ms
5600µF = 2.14Ω.
Part IV
Data
Below is work for the calculation of one of our projectiles. We calculated the
rest of the data for the other projectiles in the exact same way. Our time was
calculated by nding how tall our gauss gun was from our table (which is the
oor). That distance from the stage of our gun to our table is our value for
∆y. After we red each projectile, we calculated how far the projectile traveled
until it hit the table. This value was what we used for ∆x. DNLM means the
projectile did not leave the muzzle. This projectile was a bit too bulky and most
likely due to friction and not a large enough magnetic eld could not leave the
muzzle.
t = 2∆y
g = 2x.14m
9.8 m
s2
= 0.17s = timetofall Vtrial1 = ∆x
t = 0.51m
.17s = 3m
s
Vtrial2 = ∆x
t = 0.55m
.17s = 3.24m
s
Vtrial3 = ∆x
t = 0.74m
.17s = 4.35m
s
To see how accurate we were in our method of measurement, we used the
oscilloscope and measured the discharge voltage of our capacitor. Since the
5
6. voltage drop is the same in all of the components, it is okay for us to choose
to measure the second parallel capacitor (one that is closest to our switch),
we connected red to the plus terminal of our capacitor and black to the minus
terminal of our capacitor. Our oscilloscope was set to single and clicking on the
trigger menu, we changed the slope to down and the voltage to 3V. We also used
a 10 x 1 probe because our oscilloscope can only read 5V/div and we had a 50V
power supply and needed to see our entire signal. We measured the distance
of our stage and for the slope on the oscilloscope, we used the time for when
the nonzero slope existed. For speed of our projectile, we divided the distance
of our stage by the time because the time it takes the projectile to leave our
stage is the same amount of time it takes our capacitors to discharge. We know
this is true because our projectile left our stage and never attracted back into
the coil. This is possible when our projectile is past the halfway point of our
coil and the magnetic eld is turned o. Below is a picture of our oscilloscope
reading of our second capacitor when we red our projectile.
We see that the time is about 12 ms and the length of our stage is 33 mm.
This yields speed of 2.75 m/s. Our calculated speed for projectile one is 3 m/s.
The error in our method of measurement is about 9 percent.
Part V
Conclusion
Given more time, I would like to increase the muzzle velocity of our gauss
gun. We would make larger coils, and work on the timing for our second stage.
Time and money are denitely very key in making a project in real world jobs.
A lot of our project turned out the way it is because we could only choose
parts that would come in a timely fashion and were reasonably aordable for
us undergraduate students.
6
7. Part VI
Acknowledgements
Arielle Little, Eric Hunter, Celeste Carruth, Erik Urban, Michael Cole, Bob
Jacobsen, Donald Orlando, and Al Lasher's Owner.
Part VII
References
0.1 Carlton, B. (2011, January 1). How Does a Coilgun Work?
Retrieved,fromhttp://electronics.stackexchange.com/questions/8745/how-
does-a-coilgun-work
0.2 DeltaV. (2011, January 1). Portable 1.25 kJ Coilgun. . Re-
trieved,fromhttp://www.deltaveng.com/gauss-machine-gun/design/
0.3 Electromagnetic Projectile Accelerators. (2010, November 7).
. RetrievedApril13,2014,fromhttp://4hv.org/e107_plugins/forum/forum_viewtop
ic.php?100083.0
0.4 Griths, D. J. (2013). Electric Fields in Matter, Magneto
statics, Magnetic Fields in Matter. Introduction to electrody-
namics (Fourth ed., ). Glenview: PEARSON
0.5 Magnet. (n.d.). Retrieved,fromhttp://en.wikipedia.org/wiki/Magnet
0.6 Permeability(electromagnetism). (n.d.). Retrieved,fromhttps://en.wikipedia.org
/wiki/Magnetic_permeability
0.7 Saz43,U.(n.d.). Simulation. . Retrieved,fromhttp://s1226.photobucket.com/user
/Saz43/media/Sim.png.html
0.8 ST_Microelectronics. (n.d.). IRFP450 Datasheet. . Re-
trieved,fromhttp://www.datasheetcatalog.com/datasheets_pdf/I/R/F/P/
IRFP450.shtml
0.9 Steel. (n.d.). . Retrieved,fromhttps://en.wikipedia.org/wiki/Steel
7