SlideShare une entreprise Scribd logo
1  sur  8
Télécharger pour lire hors ligne
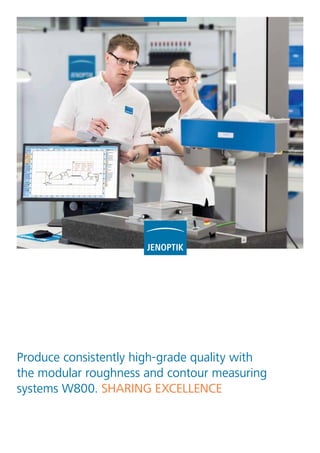
Produce consistently high-grade quality with
the modular roughness and contour measuring
systems W800. SHARING EXCELLENCE
2
Roughness and contour measurement
Modern system concept
for maximum flexibility
The Waveline W800 series has been designed to cover the
maximum spectrum of customer demands. All measuring
station configurations are designed on a modular basis and
can therefore be easily extended at a later stage.
Industrial production processes are very varied, as are the
requirements of metrology.
W800 measuring systems have been developed for rough-
ness and contour measuring tasks associated with typically
manual or semi-automatic measuring processes.
The systems are easy to operate and offer a great variety of
analyses thanks to the performant measuring and evalua-
tion software Evovis. The result is the highest standard of
measuring accuracy in the shortest time.
Wide range of accessories
for workpiece support
Tabletop, instrument
table or measuring cabin
Probing systems for roughness and/or contour measurement with quick-change
adapter for fast changing of the probing systems without tools
TKU400
Roughness measurement
Digiscan
Contour measurement
3
Modular in the equipment,
consistent in quality
Roughness and contour measurement
Granite plate with T groove
700 x 520 or
1000 x 520 mm
Traverse unit 120 or 200 mm with
display for status and position indication
Tilt unit ±45°
Measuring column 500 or 800 mm
Control panel for easy opera-
tion of the measuring station
Roughness or contour probe arms
with magnetic coupling
4
Waveline W800
W800. For reliable results in
the minimum amount of time
The measuring devices of the W800 series have been developed for complex professional roughness and contour
measuring tasks in an industrial manufacturing process setting.
Waveline W812C Digiscan with 500 mm measuring column, 120 mm traverse unit, control panel and accessories
The quick-change adapter enables probing systems to
be swapped over without having to use any tools. Probe
arms and probing system are equipped with magnetic
coupling making the exchange of probe arms easy and
fast. This means you can take a flexible approach towards
all of your measuring requirements.
The system automatically detects the intelligent contour
probe arms with RFID identification and adjusts the opti-
mal measurement conditions. This means that operating
errors and incorrect measurements can be practically
eliminated.
W800
Individually configurable
Versatile application
Quick-change adapter for probing systems
Probe arms easy to change
Excellent measuring accuracy
5
Waveline W800
Dual-tip probe arms (optional) for automated
top/bottom measurements
New calibration procedure with
improved accuracy specification
Control panel Movecontrol for comfortable
operation of the measuring systems
Depending on the intended purpose, our measuring
systems are optionally available with either an instrument
table or measuring cabin.
The instrument table, which has an innovative vibration
damping system combined with a robust base frame,
guarantees a reliable measurement operation regardless
of the environment.
The measuring cabin (not shown) is suitable for direct
connection to your production line and protects the
measuring system from negative environmental influence.
Waveline W820R with instrument table, 800 mm measuring column,
200 mm traverse unit, control panel and accessories
Contour measurement with Digiscan probing system Operation
Instrument table
Roughness measurement with TKU400 probing system
Easiest change of the probing systems
thanks to the quick-change adapter
Swiveling of the roughness probe for
transverse measurements
Probe arms TKU400 with magnetic coupling
for fast and secure probe arm swapping
6
Software and accessories
Evovis. Software for easy and precise evaluation
Measuring station control Wizard for selection of measuring conditions
Evovis measuring and evaluation software is easy to use
and offers a standardized interface for roughness and
contour measurement, regardless of the configuration of
the device.
Simple icons, supported by comprehensive help functions,
allow the operator to use the efficient measurement and
evaluation tools according to their own requirements.
Probe arms, quick-change adapter and accessories
TKU400 probe arms for roughness measurement Quick-change adapter for skidless probes Quick-change adapter for skid probes
Digiscan contour probe arms with RFID identification Measuring table PT120 (X, Y) 120 x 120 mm Measuring table PT200 (X, Y, C) 200 x 200 mm
7
Technical data
Waveline W800
Traverse unit XM120 and XM200
Straightness / 120 mm
Straightness / 200 mm
Positioning repeatability
Resolution X axis
Max. positioning speed
Max. basic disturbance Rz (0.2 mm/s)
0.4 µm
0.6 µm
<50 µm
0.1 µm
20 mm/s
<50 nm
Measuring column ZM500 and ZM800
Positioning repeatability
Max. positioning speed
<50 µm
20 mm/s
Tilt unit
Tilting range
Fine adjustment (optional)
± 45°
± 5°
Technical data
Probing system TKU400 Digiscan
Measurement of Roughness Contour
Measuring range/resolution (standard probe arm length) ± 400 µm/1 nm1)
60 mm/10 nm1)
Measuring range/resolution (2-fold probe arm length) ± 800 µm/2 nm1)
90 mm/15 nm1)
Top/bottom measurement No Optional
Measuring principle Analog Digital
Probe identification Yes Yes
Probe force setting Fixed -0.8 mN Electronic
Probe arm identification No Yes
Probe arm coupling Magnetic Magnetic
System configurations
System configuration Description
W800R Roughness measuring station with TKU400 probing system
W800C Digiscan Contour measuring station with Digiscan probing system
W800RC Digiscan Roughness and contour measuring station with TKU400 and Digiscan probing systems
Options Traverse unit 120 mm or 200 mm
Measuring column 500 mm or 800 mm
Granite plate 700 x 520 mm or 1000 x 520 mm
Control panel
Tabletop, instrument table, measuring cabin
1) Resolution over the entire measuring range
JENOPTIK Industrial Metrology Germany GmbH | Alte Tuttlinger Strasse 20 | 78056 Villingen-Schwenningen | Germany
Phone +49 7720 602-0 | Fax +49 7720 602-444 | metrology@jenoptik.com | www.jenoptik.com/metrology
Our qualified employees are available to assist you across the globe. We have subsidiaries and distribution partners in key
industrial nations, meaning that we are always close by to offer you optimum support as a reliable partner.
62267204/2018Copyright©JENOPTIKIndustrialMetrologyGermanyGmbH.Allrightsreserved.Subjecttochangewithoutnotice.Photosmayshowoptionsandarenotelegallybinding.

Contenu connexe

Tendances

Better Design Through Measurement: Contact vs. Non-Contact Technologies
Better Design Through Measurement: Contact vs. Non-Contact TechnologiesBetter Design Through Measurement: Contact vs. Non-Contact Technologies
Better Design Through Measurement: Contact vs. Non-Contact TechnologiesDesign World
 
Complexity simplified through Metal injection molding.
Complexity simplified through Metal injection molding.Complexity simplified through Metal injection molding.
Complexity simplified through Metal injection molding.Prashanth Rai
 
Coordinate Measuring Machine(CMM)
Coordinate Measuring Machine(CMM)Coordinate Measuring Machine(CMM)
Coordinate Measuring Machine(CMM)Tushar Makvana
 
ADVANCES IN METROLOGY
ADVANCES IN METROLOGYADVANCES IN METROLOGY
ADVANCES IN METROLOGYravikumarmrk
 
COORDINATE MEASURING MACHINE
COORDINATE MEASURING MACHINECOORDINATE MEASURING MACHINE
COORDINATE MEASURING MACHINEarunkumar6836
 
Chapter 7 measurement of surface finish
Chapter 7 measurement of surface finishChapter 7 measurement of surface finish
Chapter 7 measurement of surface finishVISHALM580
 
Mechanical measurement chapter 1
Mechanical measurement chapter 1Mechanical measurement chapter 1
Mechanical measurement chapter 1sudhanvavk
 
Machine maintenance presentation
Machine maintenance presentationMachine maintenance presentation
Machine maintenance presentationhimu_kamrul
 
6 CHAPTER SIX - COMPUTER AIDED INSPECTION.ppt
6 CHAPTER SIX - COMPUTER AIDED INSPECTION.ppt6 CHAPTER SIX - COMPUTER AIDED INSPECTION.ppt
6 CHAPTER SIX - COMPUTER AIDED INSPECTION.pptfahamkhan7
 
Unit 1 basics of metrology
Unit 1 basics of metrologyUnit 1 basics of metrology
Unit 1 basics of metrologyarul Kumar
 
Linear measurement
Linear measurementLinear measurement
Linear measurementShrey Patel
 
Degital vernier caliper kkk
Degital vernier caliper kkkDegital vernier caliper kkk
Degital vernier caliper kkkkunalbhoir5
 
Basics of Dimensional Metrology
Basics of Dimensional MetrologyBasics of Dimensional Metrology
Basics of Dimensional MetrologyHassan Habib
 
UNIVERSAL MEASURING MACHINE-PPT
UNIVERSAL MEASURING MACHINE-PPTUNIVERSAL MEASURING MACHINE-PPT
UNIVERSAL MEASURING MACHINE-PPTDharmas India
 
Basic Geometrical Dimensioning & Tolerancing Tranning
Basic Geometrical Dimensioning  & Tolerancing TranningBasic Geometrical Dimensioning  & Tolerancing Tranning
Basic Geometrical Dimensioning & Tolerancing TranningTimothy Wooi
 

Tendances (20)

Better Design Through Measurement: Contact vs. Non-Contact Technologies
Better Design Through Measurement: Contact vs. Non-Contact TechnologiesBetter Design Through Measurement: Contact vs. Non-Contact Technologies
Better Design Through Measurement: Contact vs. Non-Contact Technologies
 
Complexity simplified through Metal injection molding.
Complexity simplified through Metal injection molding.Complexity simplified through Metal injection molding.
Complexity simplified through Metal injection molding.
 
Coordinate Measuring Machine(CMM)
Coordinate Measuring Machine(CMM)Coordinate Measuring Machine(CMM)
Coordinate Measuring Machine(CMM)
 
ADVANCES IN METROLOGY
ADVANCES IN METROLOGYADVANCES IN METROLOGY
ADVANCES IN METROLOGY
 
COORDINATE MEASURING MACHINE
COORDINATE MEASURING MACHINECOORDINATE MEASURING MACHINE
COORDINATE MEASURING MACHINE
 
Chapter 7 measurement of surface finish
Chapter 7 measurement of surface finishChapter 7 measurement of surface finish
Chapter 7 measurement of surface finish
 
Mechanical measurement chapter 1
Mechanical measurement chapter 1Mechanical measurement chapter 1
Mechanical measurement chapter 1
 
UNIT 1 BASICS OF METRO LOGY
UNIT 1 BASICS OF METRO LOGYUNIT 1 BASICS OF METRO LOGY
UNIT 1 BASICS OF METRO LOGY
 
Machine maintenance presentation
Machine maintenance presentationMachine maintenance presentation
Machine maintenance presentation
 
6 CHAPTER SIX - COMPUTER AIDED INSPECTION.ppt
6 CHAPTER SIX - COMPUTER AIDED INSPECTION.ppt6 CHAPTER SIX - COMPUTER AIDED INSPECTION.ppt
6 CHAPTER SIX - COMPUTER AIDED INSPECTION.ppt
 
Unit 1 basics of metrology
Unit 1 basics of metrologyUnit 1 basics of metrology
Unit 1 basics of metrology
 
Linear measurement
Linear measurementLinear measurement
Linear measurement
 
Measurements and steel rules
Measurements and steel rulesMeasurements and steel rules
Measurements and steel rules
 
Metrology and Measuremenrt
Metrology and MeasuremenrtMetrology and Measuremenrt
Metrology and Measuremenrt
 
Degital vernier caliper kkk
Degital vernier caliper kkkDegital vernier caliper kkk
Degital vernier caliper kkk
 
Meterology
MeterologyMeterology
Meterology
 
Basics of Dimensional Metrology
Basics of Dimensional MetrologyBasics of Dimensional Metrology
Basics of Dimensional Metrology
 
UNIVERSAL MEASURING MACHINE-PPT
UNIVERSAL MEASURING MACHINE-PPTUNIVERSAL MEASURING MACHINE-PPT
UNIVERSAL MEASURING MACHINE-PPT
 
FORM MEASUREMENTS
FORM MEASUREMENTSFORM MEASUREMENTS
FORM MEASUREMENTS
 
Basic Geometrical Dimensioning & Tolerancing Tranning
Basic Geometrical Dimensioning  & Tolerancing TranningBasic Geometrical Dimensioning  & Tolerancing Tranning
Basic Geometrical Dimensioning & Tolerancing Tranning
 

Similaire à Consistently high-grade quality with modular W800 systems

T8000 C8000 Roughness and Contour by Jenoptik
T8000 C8000 Roughness and Contour by JenoptikT8000 C8000 Roughness and Contour by Jenoptik
T8000 C8000 Roughness and Contour by JenoptikHommel Etamic (Jenoptik)
 
IJSRED-V2I2P32
IJSRED-V2I2P32IJSRED-V2I2P32
IJSRED-V2I2P32IJSRED
 
LN_Series_brochure
LN_Series_brochureLN_Series_brochure
LN_Series_brochureFrank Baird
 
Keysight sycatus rin_measurement_system
Keysight sycatus rin_measurement_systemKeysight sycatus rin_measurement_system
Keysight sycatus rin_measurement_systemNIHON DENKEI SINGAPORE
 
Micro e systems_mercury1500v_datasheet
Micro e systems_mercury1500v_datasheetMicro e systems_mercury1500v_datasheet
Micro e systems_mercury1500v_datasheetElectromate
 
Micro e systems_mercury1500_datasheet
Micro e systems_mercury1500_datasheetMicro e systems_mercury1500_datasheet
Micro e systems_mercury1500_datasheetElectromate
 
Micro e systems_mercury1000v_datasheet
Micro e systems_mercury1000v_datasheetMicro e systems_mercury1000v_datasheet
Micro e systems_mercury1000v_datasheetElectromate
 
Micro e systems_mercury3000si_dual_axis_averager_datasheet
Micro e systems_mercury3000si_dual_axis_averager_datasheetMicro e systems_mercury3000si_dual_axis_averager_datasheet
Micro e systems_mercury3000si_dual_axis_averager_datasheetElectromate
 
Micro e systems_mercury1000_datasheet
Micro e systems_mercury1000_datasheetMicro e systems_mercury1000_datasheet
Micro e systems_mercury1000_datasheetElectromate
 
Micro e systems_ops_ds_datasheet
Micro e systems_ops_ds_datasheetMicro e systems_ops_ds_datasheet
Micro e systems_ops_ds_datasheetElectromate
 
Micro e systems_ops_2p_datasheet
Micro e systems_ops_2p_datasheetMicro e systems_ops_2p_datasheet
Micro e systems_ops_2p_datasheetElectromate
 
Micro e systems_mercury3000v_datasheet
Micro e systems_mercury3000v_datasheetMicro e systems_mercury3000v_datasheet
Micro e systems_mercury3000v_datasheetElectromate
 

Similaire à Consistently high-grade quality with modular W800 systems (20)

T8000 C8000 Roughness and Contour by Jenoptik
T8000 C8000 Roughness and Contour by JenoptikT8000 C8000 Roughness and Contour by Jenoptik
T8000 C8000 Roughness and Contour by Jenoptik
 
Waveline-W600 Perfilometro Manual
Waveline-W600 Perfilometro ManualWaveline-W600 Perfilometro Manual
Waveline-W600 Perfilometro Manual
 
Swissray ddRAura
Swissray ddRAuraSwissray ddRAura
Swissray ddRAura
 
IJSRED-V2I2P32
IJSRED-V2I2P32IJSRED-V2I2P32
IJSRED-V2I2P32
 
RUGOSIDAD Y CONTORNO PORTAFOLIO 2015
RUGOSIDAD Y CONTORNO PORTAFOLIO 2015RUGOSIDAD Y CONTORNO PORTAFOLIO 2015
RUGOSIDAD Y CONTORNO PORTAFOLIO 2015
 
W10_EN_10068606.pdf
W10_EN_10068606.pdfW10_EN_10068606.pdf
W10_EN_10068606.pdf
 
LN_Series_brochure
LN_Series_brochureLN_Series_brochure
LN_Series_brochure
 
OPTICLINE C200 C1000 BY JENOPTIK
OPTICLINE C200 C1000 BY JENOPTIKOPTICLINE C200 C1000 BY JENOPTIK
OPTICLINE C200 C1000 BY JENOPTIK
 
Keysight sycatus rin_measurement_system
Keysight sycatus rin_measurement_systemKeysight sycatus rin_measurement_system
Keysight sycatus rin_measurement_system
 
C8000 Digiscan Evovis
C8000 Digiscan EvovisC8000 Digiscan Evovis
C8000 Digiscan Evovis
 
Micro e systems_mercury1500v_datasheet
Micro e systems_mercury1500v_datasheetMicro e systems_mercury1500v_datasheet
Micro e systems_mercury1500v_datasheet
 
T1000 Roughness Tester "Powerfull"
T1000 Roughness Tester "Powerfull"T1000 Roughness Tester "Powerfull"
T1000 Roughness Tester "Powerfull"
 
Micro e systems_mercury1500_datasheet
Micro e systems_mercury1500_datasheetMicro e systems_mercury1500_datasheet
Micro e systems_mercury1500_datasheet
 
Micro e systems_mercury1000v_datasheet
Micro e systems_mercury1000v_datasheetMicro e systems_mercury1000v_datasheet
Micro e systems_mercury1000v_datasheet
 
Micro e systems_mercury3000si_dual_axis_averager_datasheet
Micro e systems_mercury3000si_dual_axis_averager_datasheetMicro e systems_mercury3000si_dual_axis_averager_datasheet
Micro e systems_mercury3000si_dual_axis_averager_datasheet
 
Micro e systems_mercury1000_datasheet
Micro e systems_mercury1000_datasheetMicro e systems_mercury1000_datasheet
Micro e systems_mercury1000_datasheet
 
Micro e systems_ops_ds_datasheet
Micro e systems_ops_ds_datasheetMicro e systems_ops_ds_datasheet
Micro e systems_ops_ds_datasheet
 
แค๊ตตาล็อก หัวโพรบ Renishaw omp400
แค๊ตตาล็อก หัวโพรบ Renishaw omp400แค๊ตตาล็อก หัวโพรบ Renishaw omp400
แค๊ตตาล็อก หัวโพรบ Renishaw omp400
 
Micro e systems_ops_2p_datasheet
Micro e systems_ops_2p_datasheetMicro e systems_ops_2p_datasheet
Micro e systems_ops_2p_datasheet
 
Micro e systems_mercury3000v_datasheet
Micro e systems_mercury3000v_datasheetMicro e systems_mercury3000v_datasheet
Micro e systems_mercury3000v_datasheet
 

Plus de Hommel Etamic (Jenoptik)

POINT OF USE SOLUCIONES PARA MEDIR RUGOSIDAD
POINT OF USE SOLUCIONES PARA MEDIR RUGOSIDADPOINT OF USE SOLUCIONES PARA MEDIR RUGOSIDAD
POINT OF USE SOLUCIONES PARA MEDIR RUGOSIDADHommel Etamic (Jenoptik)
 
Metrology Solutions Fuel injector brochure 2019
Metrology Solutions Fuel injector brochure 2019 Metrology Solutions Fuel injector brochure 2019
Metrology Solutions Fuel injector brochure 2019 Hommel Etamic (Jenoptik)
 
Jenoptik General brochure version 2018.10
Jenoptik General brochure version 2018.10 Jenoptik General brochure version 2018.10
Jenoptik General brochure version 2018.10 Hommel Etamic (Jenoptik)
 
Ips10 Optical inspection for small bores, by Jenoptik
Ips10  Optical inspection for small bores, by JenoptikIps10  Optical inspection for small bores, by Jenoptik
Ips10 Optical inspection for small bores, by JenoptikHommel Etamic (Jenoptik)
 
Ips100 Optic Technology for Bore Inspections
Ips100  Optic Technology for Bore InspectionsIps100  Optic Technology for Bore Inspections
Ips100 Optic Technology for Bore InspectionsHommel Etamic (Jenoptik)
 
OUR OFFER TO INDUSTRIAL DEVELOPMENT, BY JENOPTIK
OUR OFFER TO INDUSTRIAL DEVELOPMENT, BY JENOPTIKOUR OFFER TO INDUSTRIAL DEVELOPMENT, BY JENOPTIK
OUR OFFER TO INDUSTRIAL DEVELOPMENT, BY JENOPTIKHommel Etamic (Jenoptik)
 

Plus de Hommel Etamic (Jenoptik) (20)

Formline-Hommel-Etamic-2022-09-US.pdf
Formline-Hommel-Etamic-2022-09-US.pdfFormline-Hommel-Etamic-2022-09-US.pdf
Formline-Hommel-Etamic-2022-09-US.pdf
 
T3D-Opticline.pdf
T3D-Opticline.pdfT3D-Opticline.pdf
T3D-Opticline.pdf
 
Gageline brochure-Jenoptik
Gageline brochure-JenoptikGageline brochure-Jenoptik
Gageline brochure-Jenoptik
 
Waveline brochure-2020
Waveline brochure-2020Waveline brochure-2020
Waveline brochure-2020
 
Surface finish grr
Surface finish grrSurface finish grr
Surface finish grr
 
Otto flex-3a-optische-3d- BY Jenoptik
Otto flex-3a-optische-3d- BY JenoptikOtto flex-3a-optische-3d- BY Jenoptik
Otto flex-3a-optische-3d- BY Jenoptik
 
APLICACIONES MEDICAS JENOPTIK
APLICACIONES MEDICAS JENOPTIKAPLICACIONES MEDICAS JENOPTIK
APLICACIONES MEDICAS JENOPTIK
 
POINT OF USE SOLUCIONES PARA MEDIR RUGOSIDAD
POINT OF USE SOLUCIONES PARA MEDIR RUGOSIDADPOINT OF USE SOLUCIONES PARA MEDIR RUGOSIDAD
POINT OF USE SOLUCIONES PARA MEDIR RUGOSIDAD
 
New visionline
New visionlineNew visionline
New visionline
 
Metrology Solutions Fuel injector brochure 2019
Metrology Solutions Fuel injector brochure 2019 Metrology Solutions Fuel injector brochure 2019
Metrology Solutions Fuel injector brochure 2019
 
Jenoptik General brochure version 2018.10
Jenoptik General brochure version 2018.10 Jenoptik General brochure version 2018.10
Jenoptik General brochure version 2018.10
 
Opticline effect
Opticline effectOpticline effect
Opticline effect
 
New Jenoptik Opticline 2016
New  Jenoptik Opticline 2016New  Jenoptik Opticline 2016
New Jenoptik Opticline 2016
 
Opticline 2016 by Jenoptik
Opticline 2016 by JenoptikOpticline 2016 by Jenoptik
Opticline 2016 by Jenoptik
 
Twist Parameters "Roughness Measurement"
Twist Parameters "Roughness Measurement"Twist Parameters "Roughness Measurement"
Twist Parameters "Roughness Measurement"
 
INSPECCION DE INYECTORES BY JENOPTIK
INSPECCION DE INYECTORES BY JENOPTIKINSPECCION DE INYECTORES BY JENOPTIK
INSPECCION DE INYECTORES BY JENOPTIK
 
Ips10 Optical inspection for small bores, by Jenoptik
Ips10  Optical inspection for small bores, by JenoptikIps10  Optical inspection for small bores, by Jenoptik
Ips10 Optical inspection for small bores, by Jenoptik
 
Ips100 Optic Technology for Bore Inspections
Ips100  Optic Technology for Bore InspectionsIps100  Optic Technology for Bore Inspections
Ips100 Optic Technology for Bore Inspections
 
W5 ROUGHNESS TESTER MAKETING CAMPAING
W5 ROUGHNESS TESTER MAKETING CAMPAINGW5 ROUGHNESS TESTER MAKETING CAMPAING
W5 ROUGHNESS TESTER MAKETING CAMPAING
 
OUR OFFER TO INDUSTRIAL DEVELOPMENT, BY JENOPTIK
OUR OFFER TO INDUSTRIAL DEVELOPMENT, BY JENOPTIKOUR OFFER TO INDUSTRIAL DEVELOPMENT, BY JENOPTIK
OUR OFFER TO INDUSTRIAL DEVELOPMENT, BY JENOPTIK
 

Dernier

08448380779 Call Girls In Diplomatic Enclave Women Seeking Men
08448380779 Call Girls In Diplomatic Enclave Women Seeking Men08448380779 Call Girls In Diplomatic Enclave Women Seeking Men
08448380779 Call Girls In Diplomatic Enclave Women Seeking MenDelhi Call girls
 
Tata AIG General Insurance Company - Insurer Innovation Award 2024
Tata AIG General Insurance Company - Insurer Innovation Award 2024Tata AIG General Insurance Company - Insurer Innovation Award 2024
Tata AIG General Insurance Company - Insurer Innovation Award 2024The Digital Insurer
 
Data Cloud, More than a CDP by Matt Robison
Data Cloud, More than a CDP by Matt RobisonData Cloud, More than a CDP by Matt Robison
Data Cloud, More than a CDP by Matt RobisonAnna Loughnan Colquhoun
 
Presentation on how to chat with PDF using ChatGPT code interpreter
Presentation on how to chat with PDF using ChatGPT code interpreterPresentation on how to chat with PDF using ChatGPT code interpreter
Presentation on how to chat with PDF using ChatGPT code interpreternaman860154
 
CNv6 Instructor Chapter 6 Quality of Service
CNv6 Instructor Chapter 6 Quality of ServiceCNv6 Instructor Chapter 6 Quality of Service
CNv6 Instructor Chapter 6 Quality of Servicegiselly40
 
[2024]Digital Global Overview Report 2024 Meltwater.pdf
[2024]Digital Global Overview Report 2024 Meltwater.pdf[2024]Digital Global Overview Report 2024 Meltwater.pdf
[2024]Digital Global Overview Report 2024 Meltwater.pdfhans926745
 
2024: Domino Containers - The Next Step. News from the Domino Container commu...
2024: Domino Containers - The Next Step. News from the Domino Container commu...2024: Domino Containers - The Next Step. News from the Domino Container commu...
2024: Domino Containers - The Next Step. News from the Domino Container commu...Martijn de Jong
 
Apidays Singapore 2024 - Building Digital Trust in a Digital Economy by Veron...
Apidays Singapore 2024 - Building Digital Trust in a Digital Economy by Veron...Apidays Singapore 2024 - Building Digital Trust in a Digital Economy by Veron...
Apidays Singapore 2024 - Building Digital Trust in a Digital Economy by Veron...apidays
 
Real Time Object Detection Using Open CV
Real Time Object Detection Using Open CVReal Time Object Detection Using Open CV
Real Time Object Detection Using Open CVKhem
 
IAC 2024 - IA Fast Track to Search Focused AI Solutions
IAC 2024 - IA Fast Track to Search Focused AI SolutionsIAC 2024 - IA Fast Track to Search Focused AI Solutions
IAC 2024 - IA Fast Track to Search Focused AI SolutionsEnterprise Knowledge
 
Exploring the Future Potential of AI-Enabled Smartphone Processors
Exploring the Future Potential of AI-Enabled Smartphone ProcessorsExploring the Future Potential of AI-Enabled Smartphone Processors
Exploring the Future Potential of AI-Enabled Smartphone Processorsdebabhi2
 
Raspberry Pi 5: Challenges and Solutions in Bringing up an OpenGL/Vulkan Driv...
Raspberry Pi 5: Challenges and Solutions in Bringing up an OpenGL/Vulkan Driv...Raspberry Pi 5: Challenges and Solutions in Bringing up an OpenGL/Vulkan Driv...
Raspberry Pi 5: Challenges and Solutions in Bringing up an OpenGL/Vulkan Driv...Igalia
 
From Event to Action: Accelerate Your Decision Making with Real-Time Automation
From Event to Action: Accelerate Your Decision Making with Real-Time AutomationFrom Event to Action: Accelerate Your Decision Making with Real-Time Automation
From Event to Action: Accelerate Your Decision Making with Real-Time AutomationSafe Software
 
Breaking the Kubernetes Kill Chain: Host Path Mount
Breaking the Kubernetes Kill Chain: Host Path MountBreaking the Kubernetes Kill Chain: Host Path Mount
Breaking the Kubernetes Kill Chain: Host Path MountPuma Security, LLC
 
Strategies for Unlocking Knowledge Management in Microsoft 365 in the Copilot...
Strategies for Unlocking Knowledge Management in Microsoft 365 in the Copilot...Strategies for Unlocking Knowledge Management in Microsoft 365 in the Copilot...
Strategies for Unlocking Knowledge Management in Microsoft 365 in the Copilot...Drew Madelung
 
Driving Behavioral Change for Information Management through Data-Driven Gree...
Driving Behavioral Change for Information Management through Data-Driven Gree...Driving Behavioral Change for Information Management through Data-Driven Gree...
Driving Behavioral Change for Information Management through Data-Driven Gree...Enterprise Knowledge
 
Histor y of HAM Radio presentation slide
Histor y of HAM Radio presentation slideHistor y of HAM Radio presentation slide
Histor y of HAM Radio presentation slidevu2urc
 
A Year of the Servo Reboot: Where Are We Now?
A Year of the Servo Reboot: Where Are We Now?A Year of the Servo Reboot: Where Are We Now?
A Year of the Servo Reboot: Where Are We Now?Igalia
 
Handwritten Text Recognition for manuscripts and early printed texts
Handwritten Text Recognition for manuscripts and early printed textsHandwritten Text Recognition for manuscripts and early printed texts
Handwritten Text Recognition for manuscripts and early printed textsMaria Levchenko
 
Axa Assurance Maroc - Insurer Innovation Award 2024
Axa Assurance Maroc - Insurer Innovation Award 2024Axa Assurance Maroc - Insurer Innovation Award 2024
Axa Assurance Maroc - Insurer Innovation Award 2024The Digital Insurer
 

Dernier (20)

08448380779 Call Girls In Diplomatic Enclave Women Seeking Men
08448380779 Call Girls In Diplomatic Enclave Women Seeking Men08448380779 Call Girls In Diplomatic Enclave Women Seeking Men
08448380779 Call Girls In Diplomatic Enclave Women Seeking Men
 
Tata AIG General Insurance Company - Insurer Innovation Award 2024
Tata AIG General Insurance Company - Insurer Innovation Award 2024Tata AIG General Insurance Company - Insurer Innovation Award 2024
Tata AIG General Insurance Company - Insurer Innovation Award 2024
 
Data Cloud, More than a CDP by Matt Robison
Data Cloud, More than a CDP by Matt RobisonData Cloud, More than a CDP by Matt Robison
Data Cloud, More than a CDP by Matt Robison
 
Presentation on how to chat with PDF using ChatGPT code interpreter
Presentation on how to chat with PDF using ChatGPT code interpreterPresentation on how to chat with PDF using ChatGPT code interpreter
Presentation on how to chat with PDF using ChatGPT code interpreter
 
CNv6 Instructor Chapter 6 Quality of Service
CNv6 Instructor Chapter 6 Quality of ServiceCNv6 Instructor Chapter 6 Quality of Service
CNv6 Instructor Chapter 6 Quality of Service
 
[2024]Digital Global Overview Report 2024 Meltwater.pdf
[2024]Digital Global Overview Report 2024 Meltwater.pdf[2024]Digital Global Overview Report 2024 Meltwater.pdf
[2024]Digital Global Overview Report 2024 Meltwater.pdf
 
2024: Domino Containers - The Next Step. News from the Domino Container commu...
2024: Domino Containers - The Next Step. News from the Domino Container commu...2024: Domino Containers - The Next Step. News from the Domino Container commu...
2024: Domino Containers - The Next Step. News from the Domino Container commu...
 
Apidays Singapore 2024 - Building Digital Trust in a Digital Economy by Veron...
Apidays Singapore 2024 - Building Digital Trust in a Digital Economy by Veron...Apidays Singapore 2024 - Building Digital Trust in a Digital Economy by Veron...
Apidays Singapore 2024 - Building Digital Trust in a Digital Economy by Veron...
 
Real Time Object Detection Using Open CV
Real Time Object Detection Using Open CVReal Time Object Detection Using Open CV
Real Time Object Detection Using Open CV
 
IAC 2024 - IA Fast Track to Search Focused AI Solutions
IAC 2024 - IA Fast Track to Search Focused AI SolutionsIAC 2024 - IA Fast Track to Search Focused AI Solutions
IAC 2024 - IA Fast Track to Search Focused AI Solutions
 
Exploring the Future Potential of AI-Enabled Smartphone Processors
Exploring the Future Potential of AI-Enabled Smartphone ProcessorsExploring the Future Potential of AI-Enabled Smartphone Processors
Exploring the Future Potential of AI-Enabled Smartphone Processors
 
Raspberry Pi 5: Challenges and Solutions in Bringing up an OpenGL/Vulkan Driv...
Raspberry Pi 5: Challenges and Solutions in Bringing up an OpenGL/Vulkan Driv...Raspberry Pi 5: Challenges and Solutions in Bringing up an OpenGL/Vulkan Driv...
Raspberry Pi 5: Challenges and Solutions in Bringing up an OpenGL/Vulkan Driv...
 
From Event to Action: Accelerate Your Decision Making with Real-Time Automation
From Event to Action: Accelerate Your Decision Making with Real-Time AutomationFrom Event to Action: Accelerate Your Decision Making with Real-Time Automation
From Event to Action: Accelerate Your Decision Making with Real-Time Automation
 
Breaking the Kubernetes Kill Chain: Host Path Mount
Breaking the Kubernetes Kill Chain: Host Path MountBreaking the Kubernetes Kill Chain: Host Path Mount
Breaking the Kubernetes Kill Chain: Host Path Mount
 
Strategies for Unlocking Knowledge Management in Microsoft 365 in the Copilot...
Strategies for Unlocking Knowledge Management in Microsoft 365 in the Copilot...Strategies for Unlocking Knowledge Management in Microsoft 365 in the Copilot...
Strategies for Unlocking Knowledge Management in Microsoft 365 in the Copilot...
 
Driving Behavioral Change for Information Management through Data-Driven Gree...
Driving Behavioral Change for Information Management through Data-Driven Gree...Driving Behavioral Change for Information Management through Data-Driven Gree...
Driving Behavioral Change for Information Management through Data-Driven Gree...
 
Histor y of HAM Radio presentation slide
Histor y of HAM Radio presentation slideHistor y of HAM Radio presentation slide
Histor y of HAM Radio presentation slide
 
A Year of the Servo Reboot: Where Are We Now?
A Year of the Servo Reboot: Where Are We Now?A Year of the Servo Reboot: Where Are We Now?
A Year of the Servo Reboot: Where Are We Now?
 
Handwritten Text Recognition for manuscripts and early printed texts
Handwritten Text Recognition for manuscripts and early printed textsHandwritten Text Recognition for manuscripts and early printed texts
Handwritten Text Recognition for manuscripts and early printed texts
 
Axa Assurance Maroc - Insurer Innovation Award 2024
Axa Assurance Maroc - Insurer Innovation Award 2024Axa Assurance Maroc - Insurer Innovation Award 2024
Axa Assurance Maroc - Insurer Innovation Award 2024
 

Consistently high-grade quality with modular W800 systems

  • 1. Produce consistently high-grade quality with the modular roughness and contour measuring systems W800. SHARING EXCELLENCE
  • 2. 2 Roughness and contour measurement Modern system concept for maximum flexibility The Waveline W800 series has been designed to cover the maximum spectrum of customer demands. All measuring station configurations are designed on a modular basis and can therefore be easily extended at a later stage. Industrial production processes are very varied, as are the requirements of metrology. W800 measuring systems have been developed for rough- ness and contour measuring tasks associated with typically manual or semi-automatic measuring processes. The systems are easy to operate and offer a great variety of analyses thanks to the performant measuring and evalua- tion software Evovis. The result is the highest standard of measuring accuracy in the shortest time. Wide range of accessories for workpiece support Tabletop, instrument table or measuring cabin Probing systems for roughness and/or contour measurement with quick-change adapter for fast changing of the probing systems without tools TKU400 Roughness measurement Digiscan Contour measurement
  • 3. 3 Modular in the equipment, consistent in quality Roughness and contour measurement Granite plate with T groove 700 x 520 or 1000 x 520 mm Traverse unit 120 or 200 mm with display for status and position indication Tilt unit ±45° Measuring column 500 or 800 mm Control panel for easy opera- tion of the measuring station Roughness or contour probe arms with magnetic coupling
  • 4. 4 Waveline W800 W800. For reliable results in the minimum amount of time The measuring devices of the W800 series have been developed for complex professional roughness and contour measuring tasks in an industrial manufacturing process setting. Waveline W812C Digiscan with 500 mm measuring column, 120 mm traverse unit, control panel and accessories The quick-change adapter enables probing systems to be swapped over without having to use any tools. Probe arms and probing system are equipped with magnetic coupling making the exchange of probe arms easy and fast. This means you can take a flexible approach towards all of your measuring requirements. The system automatically detects the intelligent contour probe arms with RFID identification and adjusts the opti- mal measurement conditions. This means that operating errors and incorrect measurements can be practically eliminated. W800 Individually configurable Versatile application Quick-change adapter for probing systems Probe arms easy to change Excellent measuring accuracy
  • 5. 5 Waveline W800 Dual-tip probe arms (optional) for automated top/bottom measurements New calibration procedure with improved accuracy specification Control panel Movecontrol for comfortable operation of the measuring systems Depending on the intended purpose, our measuring systems are optionally available with either an instrument table or measuring cabin. The instrument table, which has an innovative vibration damping system combined with a robust base frame, guarantees a reliable measurement operation regardless of the environment. The measuring cabin (not shown) is suitable for direct connection to your production line and protects the measuring system from negative environmental influence. Waveline W820R with instrument table, 800 mm measuring column, 200 mm traverse unit, control panel and accessories Contour measurement with Digiscan probing system Operation Instrument table Roughness measurement with TKU400 probing system Easiest change of the probing systems thanks to the quick-change adapter Swiveling of the roughness probe for transverse measurements Probe arms TKU400 with magnetic coupling for fast and secure probe arm swapping
  • 6. 6 Software and accessories Evovis. Software for easy and precise evaluation Measuring station control Wizard for selection of measuring conditions Evovis measuring and evaluation software is easy to use and offers a standardized interface for roughness and contour measurement, regardless of the configuration of the device. Simple icons, supported by comprehensive help functions, allow the operator to use the efficient measurement and evaluation tools according to their own requirements. Probe arms, quick-change adapter and accessories TKU400 probe arms for roughness measurement Quick-change adapter for skidless probes Quick-change adapter for skid probes Digiscan contour probe arms with RFID identification Measuring table PT120 (X, Y) 120 x 120 mm Measuring table PT200 (X, Y, C) 200 x 200 mm
  • 7. 7 Technical data Waveline W800 Traverse unit XM120 and XM200 Straightness / 120 mm Straightness / 200 mm Positioning repeatability Resolution X axis Max. positioning speed Max. basic disturbance Rz (0.2 mm/s) 0.4 µm 0.6 µm <50 µm 0.1 µm 20 mm/s <50 nm Measuring column ZM500 and ZM800 Positioning repeatability Max. positioning speed <50 µm 20 mm/s Tilt unit Tilting range Fine adjustment (optional) ± 45° ± 5° Technical data Probing system TKU400 Digiscan Measurement of Roughness Contour Measuring range/resolution (standard probe arm length) ± 400 µm/1 nm1) 60 mm/10 nm1) Measuring range/resolution (2-fold probe arm length) ± 800 µm/2 nm1) 90 mm/15 nm1) Top/bottom measurement No Optional Measuring principle Analog Digital Probe identification Yes Yes Probe force setting Fixed -0.8 mN Electronic Probe arm identification No Yes Probe arm coupling Magnetic Magnetic System configurations System configuration Description W800R Roughness measuring station with TKU400 probing system W800C Digiscan Contour measuring station with Digiscan probing system W800RC Digiscan Roughness and contour measuring station with TKU400 and Digiscan probing systems Options Traverse unit 120 mm or 200 mm Measuring column 500 mm or 800 mm Granite plate 700 x 520 mm or 1000 x 520 mm Control panel Tabletop, instrument table, measuring cabin 1) Resolution over the entire measuring range
  • 8. JENOPTIK Industrial Metrology Germany GmbH | Alte Tuttlinger Strasse 20 | 78056 Villingen-Schwenningen | Germany Phone +49 7720 602-0 | Fax +49 7720 602-444 | metrology@jenoptik.com | www.jenoptik.com/metrology Our qualified employees are available to assist you across the globe. We have subsidiaries and distribution partners in key industrial nations, meaning that we are always close by to offer you optimum support as a reliable partner. 62267204/2018Copyright©JENOPTIKIndustrialMetrologyGermanyGmbH.Allrightsreserved.Subjecttochangewithoutnotice.Photosmayshowoptionsandarenotelegallybinding.