1. HORRORFILM ANNOTATIONS
BACKGROUND
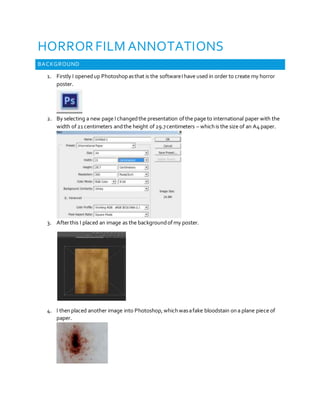
1. Firstly I openedup Photoshopasthat is the softwareI have used in order to create my horror
poster.
2. By selecting a new page I changedthe presentation ofthe page to international paper with the
width of 21 centimeters andthe height of29.7centimeters – whichis the size of an A4paper.
3. Afterthis I placed an image as the backgroundofmy poster.
4. I thenplaced another image into Photoshop,whichwasafake bloodstain ona plane piece of
paper.
2. 5. By usingthe Magnetic Lasso Tool I traced aroundthe section ofthe bloodstain I wanted touse,
then deleting the rest ofthe image whichwas nouse to me.
6. PressingCNTRL T I was then able to enlarge the bloodstain and place it where I wanted it
7. I thenchangedthe opacityof the bloodstain to 32%soit appeared as if the bloodstain was
already onthe backgroundimage.
3. 8. I thenrealized I wantedto remove more ofthe bloodstain and focusona certain part ofit, I
then used the Magnetic LassoTool again to croparoundthe image.
4. 9. Afterthis I placed it on the top left hand side of the backgroundata 60 degree angle.
HAND PRINT
1. I placed an image ofa bloodyhand print.
2. By selecting the Quick Selection Tool I wasable to delete the white backgroundsoI justhad the
handprint.
3. I thenchangedthe opacityof the handto 60%
TITLE
1. Forthe title of my poster – WoodendI placed a text boxby selecting the text boxtool and
typing “Woodend”
2. I thenchangedthe fontto Californian FB
5. 3. Inorder to make my title stand outI added effectsto it whichincluded; Bavel & Emboss,
Stroke, Innershadow,Outer glow and a Dropshadow
4. Underneath the title I added anothertexts box in the same fontCalifornian FB howeverI
changedthe size of the text to a smaller scale.
5. Effectswere the added; Bavel & emboss and a Dropshadow to the text.
6. I thenopened upthe Characterpanel so I wasable to changethe spacingbetween the letters in
the text box tomy preference.
TREE
1. Asthe film is based in the woodsI placed an image of a tree with branches.
2. I thenused the Magic wandtool to select the wholetree so I was able to delete the background
ofthe image.
3. Afterthis I selected the RoundFanStiffThin Bristle brushto paint parts ofthe tree in a
burgundycolourtofollow the theme of horrorand blood.
6. 4. I thenused the quickselection tool to select other parts ofthe tree and then usedthe Round
FanStiff Thin Bristle tool and changedthe colourto red andfilled the rest ofthe tree.
5. I thenchangedthe opacityof the image
TEXT
1. Inorder to add text to my poster I selected the text tool.
2. I thenplaced the text into the text boxformy posterstrapline.
7. 3. Formy Strapline ‘Youcan runbutyou can’thide’ I changedthe charactersto make the letters of
the wordsspace out
4. I thenadded a rectangle text box to create a dark effect formy credits text boxto sit ontop.
5. I thenchangedthe gradient ofthe box to create an effect.
6. By doingthis I wasable create a rise ofthe colourblack for the text boxto go withthe dark
colouredtheme ofhorror.
7. I thenadded the creditsby adding a text box ontop ofthe rectangle
8. By pressingCNTRL andT I was able to changethe positioning of the rectangle tool as I foundit
was toooverpowering.
8. Without With rectangle gradient box
HAND PRINT
1. Firstly I placed animage from my documentsontomy photoshop.
2. By selecting the quickselection tool I was able toremove the backgroundofthe image which
left me withjust the
3. I thenchangedthe opacityof the image
9. 4. By usingthe mouse I thendragged the image ontop the blood patchimage.
5. Inorder to make the handprintto appear more ‘bloody’ andto stand outI opened upthe layer
style, I then changedthe blend colorurfrom ‘grey’ to ‘red.’
6. By adjustingthe layer andthe underlyinglayer I wasable to adjustthe colour ofthe hand print
making it appear darker than it originally was.
7. I thendid the same with other colourswhichthe handprinthad elements of:
8. I thensaved these changesofthe handprint.
10. Before After
BIRD
1. Firstly I placed animage of a bird (crow) frommydocumentsontomy photoshop.
2. Oncethe image was inserted I beganto edit in a separate file to the poster, this consisted of
usingthe Magnetic Lasso tool to remove the bird image fromits white background.
3. I thenpasted the bird ontomy poster and pressed CNTRLand T soI wasable to rotate the
image as the bird originally wasfacing down.
11. 4. Afterthis I decided to place the bird ontop of the letter ‘D’ ofthe ‘WOODEND’ title, so it
appeared as if the bird’s footwaswrapped aroundit.
5. I thendecided to add effectonto the bird whichconsistedof adding a dropshadow.
6. OnceI did this I then added other effects ontothe bird.
Before After
12. GRASS
1. To create grass at the bottom ofthe poster underneath the tree I selected the grasstool.
2. I thenselected different shades ofbrownforthe grass.
SPONSERS
1. I researchedfilm sponsorsand thensaved them as an image to place in my poster.
2. I Thenpicked out companieswhichI felt were well recognized.
3. Afterthis I croppedoutmy selected film sponsors.
4. I theninverted the image sothe logowas black andthe backgroundwaswhite
5. AfterI did this I wasleft with an image like this, whichI then pasted onto my poster.
6. I thenclicked ‘multiply’ tothe image
13. 7. Afterthis I then changedthe colourofthe sponsorsasI felt that if the sponsorswerein white it
will gowith the theme ofthe white text, and repeated these stages whicheach sponsor.