Wordpress seo and digital marketing
•Télécharger en tant que PPTX, PDF•
1 j'aime•208 vues

This document provides information about optimizing a WordPress website for search engine optimization (SEO). It discusses topics like using permalinks and meta descriptions, optimizing images by adding titles and alt text, using headings properly for content structure, translating WordPress into other languages, adding Google AdSense, promoting RSS feeds, and installing plugins for SEO, analytics, and more. The document offers guidance on techniques and best practices to improve a website's visibility and rankings in search engines.

Recommandé
Contenu connexe
Tendances
Tendances (20)
Similaire à Wordpress seo and digital marketing
Similaire à Wordpress seo and digital marketing (20)
Dernier
Dernier (20)
Wordpress seo and digital marketing
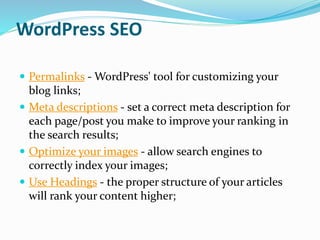
- 1. WordPress SEO Permalinks - WordPress' tool for customizing your blog links; Meta descriptions - set a correct meta description for each page/post you make to improve your ranking in the search results; Optimize your images - allow search engines to correctly index your images; Use Headings - the proper structure of your articles will rank your content higher;
- 2. WordPress SEO How to use Permalinks to optimize your WordPress website WordPress gives you the freedom to set your links the way you want them to look like. In the administrative area of WordPress go to Settings -> Permalinks. On this page you can choose from several predefined options or use a custom structure for your links.
- 4. WordPress SEO You can choose the Custom Structure option and enter /%postname%/ for example. This will make your links look like http://yourdomain.com/the-name-of-your- post/. Or you can enter /%category%/%postname%/ if you want to include the name of your category in the URL. You can also add custom text or other WordPress variables.
- 5. How to optimize your meta descriptions You should enter the meta description for each one of your pages. Use simple but informative sentences. The search engines will check how relevant your description is to the actual content of your page so make sure that you describe only the current page and avoid adding irrelevant information in this description. It is a good practice to categorize your posts in articles. Once you go to the Posts -> Categories page in your admin area, note the description field available for each category. WordPress will take what you enter in this field and insert it as meta description for the category.
- 6. How to optimize your meta descriptions
- 7. How to optimize your images It is essential to have the "title" and "alt" tags specified for each one of the images you use in your posts. The search engines will then know what this image is supposed to represent. Typing the title and alt tags for each image you use, however, can be a time-consuming task. Instead, you can use the handy SEO Friendly Images plugin. Once you install the plugin, go to Settings -> SEO Friendly Images in your WordPress admin area. On this page you can specify the ALT and TITLE tags for your images
- 8. How to optimize your images The plugin gives you the option to use internal variables such as %title, %name and %category. With them you can set the ALT and TITLE tags of your images to the title of your post for example. The plugin does the rest. This saves you a lot of time and keeps your images SEO-friendly .
- 9. How to optimize your images You should make sure that you use the <h1> tag only for the titles of your posts. You should use a few <h2> tags and as many <h3> tags as you need for the other headings in your posts. Doing this will allow the search engines to index the important information from your website better. A good document has headings and subheadings, because headings make it easier to determine the subject of the page. For blog websites the best SEO practice is to set the title of your post in a heading1 tag. Most of the good WordPress templates do that. If not, you should modify the theme in order to achieve a correct output of your pages.
- 10. Translate WordPress in Your Language WordPress has one of the largest if not the largest communities in the world of CMS applications.This community has translated WordPress into many languages and you can easily change the default language of your installation. To change the WordPress back and frontend language, open the wp-config.php file in your root folder. In it locate the following line: define ('WPLANG', ''); and replace it with: define ('WPLANG', 'bg_BG'); where bg_BG is the locale code of your country.
- 11. How to add Google AdSense to WordPress? With WordPress you can easily add your AdSense code to your blog. In order to do this, first login to the administrative end of your website. Then, go to the Appearance -> Widgets menu.
- 12. How to add Google AdSense to WordPress? In this page select to drag-and-drop a "Text" widget onto your registered sidebar.
- 13. How to add Google AdSense to WordPress? Then you should add a title (in our case - Advertisement) and right under it the actual code that you have obtained from Google. Finally, click on the on the "Save" button right under it.
- 14. How to add Google AdSense to WordPress? Well done! You have just added your AdSense code to your WordPress blog.
- 15. ShareThis Increase social activity on your site with ShareThis! Choose from 120 social channels, including Facebook, Twitter, LinkedIn, and Pinterest. Use small or large buttons, add counters or use one of the Sharing Bars Access to greater insights by creating a Social Analytics Dashboard account
- 16. Installation Download the ShareThis plugin archive and expand it. Put the 'sharethis.php' file into your wp- content/plugins/ directory. Go to the Plugins page in your WordPress Administration area and click 'Activate' for ShareThis. In the WordPress Administration area, open the ShareThis Options page, and customize the sharing buttons based on your need.
- 17. Screen Shot
- 18. Screen Shot
- 19. Screen Shot
- 20. All in One SEO Pack All in One SEO Pack is a WordPress SEO plugin to automatically optimize your WordPress blog for Search Engines such as Google. All in One SEO Pack Optimizes your WordPress blog for SEO (Search Engine Optimization).
- 21. Premium Support XML Sitemap support - submit your sitemap to Google and Bing and improve your SEO Google Analytics support Support for SEO on Custom Post Types Advanced Canonical URLs Fine tune Page Navigational Links Built-in API so other plugins/themes can access and extend functionality ONLY plugin to provide SEO Integration for WP e- Commerce sites
- 22. Premium Support Nonce Security built into All in One SEO Pack Support for CMS-style WordPress installations Automatically optimizes your titles for Google and other search engines Generates META tags automatically Avoids the typical duplicate content found on WordPress blogs For beginners, you don't even have to look at the options, it works out- of-the-box. Just install. For advanced users, you can fine-tune everything to optimize your SEO You can override any title and set any META description and any META keywords you want. Compatibility with many other plugins
- 23. Installation You can use the built in installer and upgrader, or you can install the plugin manually. You can either use the automatic plugin installer or your FTP program to upload it to your wp-content/plugins directory the top-level folder. Don't just upload all the php files and put them in /wp-content/plugins/. Activate the plugin through the 'Plugins' menu in WordPress Visit your SEO options (All in One SEO - General Settings) Configure any options as desired, and then enable the plugin
- 24. Screen Shot
- 25. What is RSS RSS stands for Really Simple Syndication or Rich Site Summary however it is often referred to as the feed or news feed. In the early days, if you wanted to keep track of updates on your favorite website, then you had to bookmark it in your browser and manually visit it frequently to see if there were any updates. Wouldn’t it be nice if you could tell your favorite websites to let you know every time they update? Well, this is exactly what RSS does. RSS allows users to keep track of their favorite websites without having to manually visit the website each time.
- 26. What is RSS RSS allowed publishers to automatically syndicate their content, so that people can read it in their mailboxes, feed reader and/or other devices. RSS is basically an structured XML document that includes full or summarized text along with other metadata such as published date, author name, etc. RSS feeds can be read by using programs called “RSS reader”, “feed reader”, or “aggregator” which can be web-based, desktop-based, and even mobile-based.
- 29. RSS feed looks like <?xml version="1.0" encoding="UTF-8"?> <channel> <title>WPBeginner</title> <link>http://www.wpbeginner.com</link> <description>Beginner's Guide for WordPress</description> <lastBuildDate>Tue, 02 Apr 2013 14:13:37 +0000</lastBuildDate> <language>en-US</language> <item> <title>How to Fix WordPress Posts Returning 404 Error</title> <link>http://feeds.wpbeginner.com/wpbeginner/</link> <pubDate>Tue, 02 Apr 2013 11:58:18 +0000</pubDate> <dc:creator>Editorial Staff</dc:creator> <category><![CDATA[Tutorials]]></category> <guid isPermaLink="false">http://www.wpbeginner.com/?p=10968</guid> <description><![CDATA[<p>Description of post goes here...]]></description> <content:encoded><![CDATA[<p>Post goeshere....]]></content:encoded> </item>
- 30. RSS Feed Many Web Content Management Systems such as WordPress has built in support for RSS feeds. By default each web page you publish using WordPress contains a meta tag that points to your website’s RSS feed location. You can disable RSS feeds in WordPress, but continue reading and you might change your mind about disabling them.
- 31. What are Benefits of RSS RSS makes it easier for other people to subscribe to your content. Using an RSS feed, they can receive updates from your blog or website directly in their web browsers (except Google Chrome), feed readers, desktop applications, and many other devices and services. Subscribers don’t have to remember your website URL because they can bring the content into a central location where they like to read all of their websites at once. Your content becomes portable and your subscribers can even take it with them for offline reading.
- 32. What are Benefits of RSS By using RSS feeds, you can subscribe to your favorite websites and read them all at one place in your feed reader. As a content publisher, it helps you quickly scan through your favorite news and blog sites. It also enables you to sort your reading lists into categories and groups. By using RSS efficiently, you can really maximize your reading time.
- 33. How to Use RSS Feeds You can subscribe to RSS feeds using a feed reader. We recommend using Feedly, It is available as a browser add-on as well as mobile app for iOS, Android, and Kindle devices. By using Feedly, you can sync your RSS subscriptions across your devices and resume reading wherever you left it. Adding your favorite websites to Feedly is really simple, just enter the url of the website and click the add button to subscribe.
- 34. How to Use RSS Feeds
- 35. How to Promote your RSS Feed As a WordPress user your website already publishes an RSS feed. You can encourage visitors to subscribe to your RSS feed by adding an RSS icon to your sidebar or another prominent location.
- 36. How to Promote your RSS Feed
- 37. Burn RSS Feed Burn your RSS feeds using a feed burning service like Feedburner or Feedblitz to get additional statistics regarding your feeds. We have a step by step guide to setup Feedburner for WordPress. Feedburner also offers email subscription box which you can add to your blog’s sidebar. But since there is a little bit uncertainity about the future of Feedburner, you might want to consider using other options to create daily or weekly newsletter in WordPress. Besides FeedBurner email subscription options are not very robust which is why we recommend using either Aweber or MailChimp.
- 38. This plugin provides a widget to Display a "Follow on Feedly" banner in your sidebar and a floating button at bottom. Feedly users can subscribe your RSS feed just by clicking the banner "Follow on Feedly" or the floating button that this plugin provides. You can show the banner in English, French or Spanish or whatever you want using custom text. Several sizes available for Floating button.
- 39. Uncompress the file and upload the folder 'add-to-feedly' to the '/wp-content/plugins/' directory Activate the plugin through the 'Plugins' menu in WordPress To activate the widget: 3. Go to 'Widgets' menu and drag and drop 'Add to Feedly' widget to your prefered sidebar 4. Configure the widget: select Language and fill in the URL of your RSS Feed 5. Click on "Save" To configure the floating button: 6. Go to "Add to feedly" menu button and check "active" checkbox. Then fill in the URL of your RSS Feed and select the position and the size of the button. 7. Click on "Save"
- 42. RSS Includes Pages Modifies RSS feeds so that they include pages and not just posts. Deactivating the plugin restores RSS feeds to their default state. Including pages in your feed is particularly useful if you're using WordPress as a CMS where pages represent a good portion of your content.
- 43. RSS Includes Pages : Installation Upload the rss-includes-feeds folder to the '/wp-content/plugins/' directory Activate the plugin through the 'Plugins' menu in WordPress
- 44. Google Analytics by Yoast Track your WordPress site easily with the latest tracking codes and lots added data for search result pages and error pages. Full list of features: Simple installation through integration with Google Analytics API: authenticate, select the site you want to track and you're done. This plugin uses the universal or the asynchronous Google Analytics tracking code, the fastest and most reliable tracking code Google Analytics offers. Gives you incredibly nice visitor metric dashboards right in your WordPress install. Option to enable demographics and interest reports.
- 45. Outbound link & downloads tracking. Configurable options to track outbound links either as pageviews or as events. Option to track just downloads as pageviews or events in Google Analytics. Option to track internal links with a particular format as outbound links, very useful for affiliate links that start with /out/, for instance. Possibility to ignore any user level and up, so all editors and higher for instance. Option to anonymize IP's for use in countries with stricter privacy regulations. Tracking of your search result pages and 404 pages. Full debug mode, including Firebug lite and ga_debug.js for debugging Google Analytics issues.
- 46. Installation This section describes how to install the plugin and get it working. Delete any existing gapp or google-analytics-for- wordpress folder from the /wp-content/plugins/ directory Upload google-analytics-for-wordpress folder to the /wp- content/plugins/directory Activate the plugin through the 'Plugins' menu in WordPress Go to the options panel under the 'Settings' menu and add your Analytics account number and set the settings you want.
- 47. Screen Shot
- 48. Screen Shot
- 49. Screen Shot
- 50. Screen Shot
- 51. Screen Shot