Video Camera techniques - A-level
•Télécharger en tant que PPTX, PDF•
1 j'aime•4,537 vues

This document discusses various camera techniques that can be applied to video footage, including: - Shots (e.g. close-up, wide) and mise-en-scene elements that can be used stylistically. - White balance and how it can be manually adjusted to add or remove blue or orange casts. - Depth of field and how adjusting the focus can make shots appear shallow or deep. - Using external microphones, manual focus and zoom to improve audio and shot composition. - Why in-camera digital effects should be avoided and done in editing instead. The overall learning outcome is for students to be able to apply these techniques to their coursework.

Recommandé
Recommandé
Contenu connexe
Tendances
Tendances (20)
En vedette
En vedette (20)
Similaire à Video Camera techniques - A-level
Similaire à Video Camera techniques - A-level (20)
Plus de alevelmedia
Plus de alevelmedia (9)
Dernier
Dernier (20)
Video Camera techniques - A-level
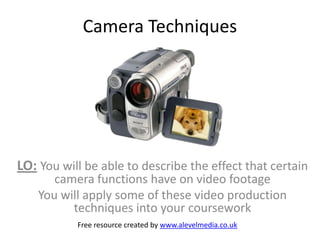
- 1. Camera Techniques LO: You will be able to describe the effect that certain camera functions have on video footage You will apply some of these video production techniques into your coursework Free resource created by www.alevelmedia.co.uk
- 2. Look at the following images • Describe, using appropriate media terminology, the type of shot and the stylistic mise-en-scene elements used. LO: You will be able to apply some of these techniques into your coursework
- 3. LO: You will be able to apply some of these techniques into your coursework
- 4. LO: You will be able to apply some of these techniques into your coursework
- 5. LO: You will be able to apply some of these techniques into your coursework
- 6. LO: You will be able to apply some of these techniques into your coursework
- 7. LO: You will be able to apply some of these techniques into your coursework
- 8. LO: You will be able to apply some of these techniques into your coursework
- 9. LO: You will be able to apply some of these techniques into your coursework
- 10. What colours make up white?
- 11. The light source is listed next to the degrees in Kelvin, both set against the colour of the light at each level. You will notice that the colour next to the Average noon daylight (5500K) is white. This is the colour temperature that colour film is balanced to which means that when shooting using daylight film the photograph will record white objects as white and all the colours in an image will appear natural on the film. If you shoot in conditions that measure a higher temperature the photo will start to become bluer and shoot in conditions below the 5500 temperature and they will increase in orange. The colours here don't just relate to daylight conditions artificial light also introduces a colour cast. With fluorescent lights this is often green and with tungsten lighting it will be yellow, while flash can be slightly blue.
- 12. White Balance Function • There are ways to manually adjust the white balance to add or remove blue or orange. • Using grey card, blue or orange paper can also help (point camera at paper and push WB button).
- 13. Depth of Field
- 15. Shallow or deep?
- 16. Shallow or deep focus?
- 17. Manual focus and zoom • You will learn how to adjust the automatic settings on the camera to alter things like depth of field • Be thinking about shot composition – what is in the frame, what are you revealing to the audience and what are you keeping hidden. • Experiment to see what happens when you get creative with how you compose shots (see gnome image as an example)
- 18. Audio • Bad audio can ruin a well filmed production • Using an external microphone will eliminate background noise and pick up dialogue clearer, but you still need to know how to connect up the mic up to the camera.
- 19. Digital Effects • Camcorders are built for home consumption, not for producing Hollywood movies • In camera effects should be avoided, they are low quality quick fixes • Experiment with them to get a feel, but do all your effects in the editing process because they can be undone!
- 20. Plenary • Watch the following student production (any example you have access to) • Identify what techniques have been used • Analyse what works well and what doesn’t • Suggest improvements Learning Outcome: You will be able to apply some of these techniques into your coursework
- 21. Feedback • Write down two ways in which today’s session will help you • One individual target • One group target • Place this on the blog/research and planning .ppt • HWK – continue to plan for filming next week Free resource created by www.alevelmedia.co.uk
Notes de l'éditeur
- Extreme long shot – composition of the shot and placement of actors in foreground and background to signify character. Light is quite bright/white in colour suggesting clarity – linked to the theme of the film. Can also comment on mise-en-scene and costume, colour.
- Natural lighting with strong blue hues. Character also has crumbled blue war paint to match his eyes – overall this connotes a moody, cold scene suggesting deep reflection. We are drawn to the character because of the use of close up – matted hair plaits suggests warrior status and possibly dates film
- Intertextual reference to Gladiator – walking through the corn fields. Quite poignant with rich, warm gold hues and colours. The lighting is rich and embellished on the acrtresses skin with no hard contrast. Connotations of nature and summer shown in a mid shot.
- Shallow focus on the subject. Slightly centred off frame with clear elements of his military uniform in shot. Juxtaposed against the background which remains light and out of focus, this is a contrast shot reflecting the character’s dark personality in a grand setting. Questions raised by the audience as to his rank and stature. Black and white used for effect.
- Low key lighting – not much of the wide shot is picked up from this image. Light is dull and highlights only snippets and shadows of a city backstreet, possibly late at night. Creates an eerie effect and makes the location seem deserted and run down, bins in foreground.
- High key, contrast lighting. The main subject is strongly lit emphasising his importance and the audience’s focus as a main character, juxtaposed against the coach who is in the dark and out of shot. Another good use of a mid shot revealing costume. Orange hues suggest a darkened room with one single bulb shining above the character, suggesting that he has had an epiphany or awakening.
- Another shallow depth of field shot showing our attention drawn to a long-shot of the gnome. This links to lighting and composition of objects to select our attention and consider the gnomes importance in the shot, who has been lit.
- The colour spectrum – light is made from all these colours
- This is important to know to understand why some camera footage looks blue and harsh and some orange and grainy.
- By experimenting with the white balance button and manually configuring it against different light sources, you can see how you can create rich orange tones in Winter and cold, blue light in Summer.
- This can affect where your attention is held – do you show everything or remain in control and selective. As a student, sometimes you don’t want your police interview room to look like it’s been filmed in sir’s office.
- Solarise effect and the good old sepia tone. Get students to use their camcorders on their phones to illustrate how basic everything auto is and ask them to find manual functions.