SlideShare une entreprise Scribd logo
1  sur  137
Télécharger pour lire hors ligne
A STEP-BY-STEP GUIDE TO LAUNCHING
YOUR FIRST MAKER PROGRAM
THE FUTURE IS
YOURS TO CREATE
This Starter Kit contains ideas on how you can create a maker program for your organization. It is not a guide for setting up a maker space or instructing you
how to join or participate in any Autodesk authorized or sponsored program.
Safety is an important consideration in any maker program and you are solely responsible for ensuring that your maker program is safe for you and your
participants. Autodesk provides ideas for setting up your maker program, but does not recommend or represent that any tools, equipment, projects, or
materials are safe or appropriate for any type of work space, type of participant or age group.
You may use this Guide for reference purposes only, and may view, download and print this Guide solely for personal, informational, non-commercial
purposes. You may not modify, license, sell or creative derivative works of the Guide. The Activity Documents made available to you separate from the
Guide are licensed to you under the Creative Commons Attribution-NonCommercial-ShareAlike 4.0 International License.  This license allows you to remix,
transform, or build upon the material, you must distribute your contributions to the Activity Documents under the same license as the original and you must
give appropriate credit, provide a link to the license, and indicate if changes were made. You may do so in any reasonable manner, but not in any way that
suggests Autodesk endorses you or your use.
Except for use of the Autodesk name solely in connection with providing Autodesk appropriate credit in use of Activity Documents under the Creative
Commons license above, you are not permitted to use the Autodesk name or logo in connection with your maker program or otherwise imply that Autodesk is
affiliated with your maker program. Any use of Autodesk trademarks should comply with Autodesk’s Trademark Guidelines.
Certain Autodesk products may only be used by individuals age 13 and older. You are responsible for complying with all software license agreement, terms
of service and other terms that accompany any Autodesk software or services you may use in connection with your maker space program and ensuring your
participants also comply with such terms when participating in your program.
You are responsible for complying with all laws, rules and regulations in operating your maker program, including without limitation, in connection with
your collection of any personal information from your participants or the marketing of your program. Autodesk does not represent that any of the ideas or
materials presented in this Starter Kit comply with the laws, rules or regulations of any country, state or other territory.
By using any portion of this Starter Kit, you agree to assume all of the risks and responsibilities in any way associated with the activities outlined in the
Starter Kit and you release Autodesk, its affiliates and their respective agents and employees from any and all liability, claims and actions that may arise
from injury or harm to you or your participants, from your death or from damage to your property in connection with my use of the Starter Kit. Much of
the information in this document was obtained from publically available third party resources and has not been independently verified by Autodesk. Third
party materials are simply provided as an additional resources you may want to reference when creating your maker program. Neither Autodesk, Inc. nor
any of its affiliates makes any representation or warranty, expressed or implied, as to the accuracy or completeness of any information contained in or
linked to in the Starter Kit or the results that may be achieved from using this Starter Kit. IN NO EVENT SHALL AUTODESK OR ITS AFFILIATES OR THEIR
RESPECTIVE DIRECTORS, OFFICERS, EMPLOYEES, AGENTS AND REPRESENTATIVES BE LIABLE FOR ANY DAMAGES, INCLUDING WITHOUT LIMITATION, SPECIAL,
INDIRECT, EXEMPLARY, INCIDENTAL, CONSEQUENTIAL OR PUNITIVE DAMAGES, OR LIABILITY WHATSOEVER RESULTING FROM OR RELATED TO YOUR USE OF
THIS STARTER KIT OR YOUR MAKER PROGRAM.
All information in this Starter Kit is provided as of November 4, 2016. Autodesk has no obligation to update this Starter Kit.
LEGAL STUFF
Introduction2
GO TO
STEP:
FRONTCOVER CONTENTS APPENDIX 02 03 04 05 0601 08 09 1007
Hello!
Autodesk makes software for
people who make things.
Across the manufacturing, architecture, building,
construction, media and entertainment industries,
Autodesk gives you the power to make anything.
Introduction3
GO TO
STEP:
FRONTCOVER CONTENTS APPENDIX 02 03 04 05 0601 08 09 1007
“How cool!
How do I get
my students
started?”
If you’re thinking, this guide is for you.
Introduction4
GO TO
STEP:
FRONTCOVER CONTENTS APPENDIX 02 03 04 05 0601 08 09 1007
WELCOME
TO THE
WORLD OF
MAKING!
Introduction5
GO TO
STEP:
FRONTCOVER CONTENTS APPENDIX 02 03 04 05 0601 08 09 1007
CONTENTS
Introduction6
GO TO
STEP:
STEP 5: SKILL UP 56
BUILDING A MAKER PROGRAM:
WHO, WHAT, WHY & HOW 10
STEP 1: GET IN THE MAKER
MINDSET 22
STEP 2: DEFINE YOUR VISION 28
How to Get Started 10
What is Maker Education? 11
Why is Maker Education
important? 13
Who should use this guide? 20
Activity 1: Get Sticky with
Group Brainstorming 30
Activity 2: Maker
Strengthsfinder
32
Activity 3: Document Your
Vision 36
STEP 3: DEFINE GOALS
& METRICS 38
Survey Templates 41
STEP 4: CHOOSE STRUCTURE
& ACTIVITIES 46
Activity 5: Map Your Learner
Journey 50
Activity 6: Explore & Choose
Activities 52
Activity 7: Outline Your
Program 54
Activity 4: Brainstorm for
Success 42
Activity 8: Share Your Vision 64
Activity 9: Survey Your
Community 66
STEP 6: COORDINATE
SUPPORT & LOGISTICS 62
STEP 7: MARKET YOUR
PROGRAM 72
Activity 10: Create
a Marketing Plan 76
STEP 8: PREP FOR
INCLUSIVITY 78
STEP 9: DIVE IN 84
STEP 10: REFLECT & REVISE 88
Activity 11: I Like, I Wish,
What if 89
APPENDIX: TEMPLATES 93
NEXT STEPS 91
FRONTCOVER CONTENTS APPENDIX 02 03 04 05 0601 08 09 1007
You spoke and
we listened.
This guide is
for you!
Introduction7
GO TO
STEP:
FRONTCOVER CONTENTS APPENDIX 02 03 04 05 0601 08 09 1007
After hearing so many educators tell us, “I want to bring making
into my classroom but I just don’t know where to begin,” we’ve
put together a comprehensive, easy to follow, step-by-step guide
to help you launch your first maker program. From defining your
vision and goals to marketing, professional development, and
reflection - it’s all here to demystify the process and put you on a
path to making something awesome!
Whether you’re a teacher, parent, or youth leader, we hope you’ll
use this guide as a tool to spur your own creativity while also
building game-changing experiences for learners.
Let’s get started!
Introduction8
GO TO
STEP:
FRONTCOVER CONTENTS APPENDIX 02 03 04 05 0601 08 09 1007
HERE’S YOUR ROADMAP:
COORDINATE SUPPORT
& LOGISTICS: How to
organize space, volunteers,
funding and more.
STEP 6
STEP 10
REFLECT & REVISE:
How to turn what
you’ve learned into
future improvements.
04
07
08
05
09
10
STEP 3
DEFINE YOUR GOALS:
How will you measure and
track success?
STEP 7
STEP 4
CHOOSE PROGRAM
STRUCTURE,
PROJECTS &
ACTIVITIES
STEP 2
DEFINE YOUR VISION:
Build a team and get clear
on what you’re creating.
STEP 5
SKILL UP: Build the
skills you’ll need to
run your program.
01
STEP 1
GET IN THE MAKER
MINDSET: What does
it take to be a maker
educator?
LET’S
DO THIS!
02
03
06
MARKET YOUR
PROGRAM: How to
recruit participants to
your program.
STEP 8
PREP FOR INCLUSIVITY:
How to run a program
that’s accessible to all
students.
STEP 9
DIVE IN: Tips to keep in
mind while running your
first program.
Introduction9
GO TO
STEP:
FRONTCOVER CONTENTS APPENDIX 02 03 04 05 0601 08 09 1007
HOW TO GET STARTED
This guide provides ten steps with eleven hands-on activities to guide you and your
team through the process of developing and launching a maker program in your
school, organization or community. The worksheets and templates referenced in
this Starter Kit can all be found in the appendix and in a Google Drive folder. These
resources are available for you to use and revise to suit the needs of your team.
As you are reviewing and working through all the fun steps and activities,
remember that this guide is for your reference. The activity sheets/
templates are licensed under the Creative Commons Attribution-NonCommercial-
ShareAlike 4.0 International License so feel free to remix, transform, or build
upon the material - just be sure to follow the guidelines outlined on page 2.
BUILDING A MAKER PROGRAM:
WHO, WHAT, WHY AND HOW
The Maker Program Starter Kit is an
actionable framework with step-by-
step instructions to guide new maker
educators through the process of
building their first maker program.
Introduction10
GO TO
STEP:
FRONTCOVER CONTENTS APPENDIX 02 03 04 05 0601 08 09 1007
If you’re reading this guide, the term “maker” is probably familiar to you. Maybe you’ve
attended a Maker Faire, dropped by a local makerspace, watched Dale Dougherty’s TED talk,
or read The Maker Movement Manifesto by Mark Hatch. Maybe you’re an electrical engineer or
maybe you crochet socks in your spare time. The bottom line is that there are many ways to be
a “maker.” At Autodesk, we believe anyone can be a maker. With a little bit of imagination and
the right tools you can make anything, you just have to try!
“WE ARE MAKERS”
TED TALK
Watch Dale Dougherty’s
TED talk at
http://autode.sk/DaleTED
SO WHAT IS A MAKER?
Maker education means different things to different people. For some, it’s an approach to
teaching core subjects with an emphasis on project-based learning. As teacher and maker-
education-evangelist Vicki Davis says, “Don’t treat making as a sidebar to an already overtaxed
curriculum.” Instead, she advocates that making can be used as a powerful approach to teaching
both STEAM and core subject matter. For others, maker education means helping learners build
advanced expertise in the technical skills often overlooked by traditional education. People
who ascribe to this approach may be more excited about teaching a specific skill set like
coding, microelectronics, or 3D printing. Both interpretations of “maker education” are correct;
your approach to maker education will depend on your unique situation and the resources
available to you. The bottom line is this: maker education transforms the passive model of
consuming information into an active model for creating new ideas.
WHAT IS MAKER EDUCATION?
Maker education is a hands-on approach to learning that
creates opportunities for anyone to develop creative
confidence while fostering interest and expertise in
science, technology, engineering, art, design, and/or
mathematics (STEAM).
A maker is a person who learns by doing; he or she
embraces a “do it yourself” mindset with an emphasis
on building original projects using both traditional and
cutting-edge technologies.
Introduction11
GO TO
STEP:
FRONTCOVER CONTENTS APPENDIX 02 03 04 05 0601 08 09 1007
Photo Credit: KIDmob
We’re teaching kids content and it’s time to
really teach kids how to think.
- Abby Cornelius, Maker Educator and High School Librarian
Introduction12
GO TO
STEP:
FRONTCOVER CONTENTS APPENDIX 02 03 04 05 0601 08 09 1007
In a system that can feel overpowered by standards and testing, maker education is an
approach to learning that fosters creativity and practical skill-building across the spectrum of
K-12 content. This is important, because the modern economy is changing in some pretty big
ways. Here are a few trends that play a role in the growing importance of maker education for
young people around the world:
WHY IS MAKER EDUCATION
SO IMPORTANT?
Maker education gives people the opportunity to build skills and
mindsets that will help them thrive in today’s highly technical and
creative workforce.
“In 1900, creative workers
made up only about
10% percent of the U.S.
workforce….Today, almost
40 million workers—
some 30 percent of the
workforce—are employed
in the creative sector.”
Source: Richard Florida
GROWTH OF
CREATIVE WORK
“There has been a rapid
increase in the use
of online platforms
by companies and
individuals who want to
engage remote workers
for piecemeal, short-
term or project-based
work delivered over the
internet.”
Source: The Guardian
DEMAND FOR
FLEXIBILITY
“80 percent of
manufacturers report
a moderate or serious
shortage of qualified
applicants for skilled and
highly-skilled production
positions.”
Source: Deloitte and the
Manufacturing Institute
DIGITAL
MANUFACTURING
Introduction13
GO TO
STEP:
FRONTCOVER CONTENTS APPENDIX 02 03 04 05 0601 08 09 1007
“I hear and I
forget. I see and
I remember. I do
andIunderstand.”
-Confucius, 6th Century BC
Introduction14
GO TO
STEP:
FRONTCOVER CONTENTS APPENDIX 02 03 04 05 0601 08 09 1007
LEARN MORE ABOUT
“THE FOUR C’S”
Check out P21’s
Framework for 21st
Century Learning at
http://autode.sk/
P21framework
The “4C’s” - Creativity, Collaboration, Communication, and Critical Thinking - will be crucial
competencies for 21st century jobs. These skills, however, will likely not be enough to ensure
employment for today’s youth. According to researcher Kevin Kelly, “You’ll be paid in the future
based on how well you work with robots.” In short, specialized technical expertise paired with
the 4C’s will be a winning combination for employability in the 21st century.
In this section, we’ll outline four specific (and powerful)
ways maker education helps build the skills that will be
most valuable in today’s rapidly-changing global economy:
1.	Engagement
2. 	 Self-Direction & Learning to Learn
3. 	 Deeper Learning
4. 	 Technical Specialization
“THE FOUR C’S”
Download the NEA’s “An
Educators Guide to the
‘Four C’s’” at
http://autode.sk/NEA4cs
Collaboration
Critical
Thinking Communication
Creativity
(Innovation)
Technical
Specialization
+ =
Introduction15
GO TO
STEP:
FRONTCOVER CONTENTS APPENDIX 02 03 04 05 0601 08 09 1007
By encouraging students to seek answers to their own
questions and modeling ways to effectively source and
vet information, maker educators can help learners build
confidence in their capacity for independent learning.
Photo Credit: Libby Falck
Introduction16
GO TO
STEP:
FRONTCOVER CONTENTS APPENDIX 02 03 04 05 0601 08 09 1007
By its nature, maker education is active, collaborative, cooperative and often project-
based. Researchers have been studying the effects of active learning since the
1960’s; these approaches have been shown to improve knowledge retention and
student engagement. Even the ancient philosophers knew this. A little more recently,
researchers at Harvard’s Derek Bok Center of Teaching and Learning shared that, “Active
learning pedagogies have been found to provide a significant advantage over passive
approaches in terms of acquiring subject matter knowledge and academic skills.”
ENGAGEMENT
MORE ABOUT
ACTIVE LEARNING
http://autode.sk/
ActiveLearning
INVENT TO LEARN
Published in 2013, this
book by Sylvia Libow
Martinez and Gary Stager
is one of the most popular
resources on maker
education and active
learning.
[S]tudents who are thus reputedly poor in mathematics
show an entirely different attitude when the problem
comes from a concrete situation and is related to other
interests.” - Jean Piaget, 1973
In short, we learn best when presented with active,
hands-on activities that are relevant to our lives.
Maker education does exactly this.
The increased student engagement enabled by maker education is particularly noteworthy
because it benefits all learners. Many maker programs focus on preparing students for jobs in
advanced STEAM fields. That’s great, but the benefits provided by active learning approaches
in maker programs are particularly special because they have the potential to help all students
master content more effectively, regardless of whether those students choose to enter a
STEAM field or build careers in business, human services or the humanities. Maker education is a
fantastic way for all students to learn.
As the authors of Invent to Learn explain, “Maker classrooms are active classrooms. In active
classrooms one will find engaged students, often working on multiple projects simultaneously,
and teachers unafraid of relinquishing their authoritarian role. The best way to activate your
classroom is for your classroom to make something.”
Introduction17
GO TO
STEP:
FRONTCOVER CONTENTS APPENDIX 02 03 04 05 0601 08 09 1007
Giving students real-world problems to solve
is a powerful way to motivate learning.
THE
IMPACT
OF
MAKING
Photo Credit: Libby Falck
This working prototoype of a piezoelectric footsole was created by a team
of high school students in The Resilience Challenge, a 9-week program that
teaches sudents to use design and technology to solve civic challenges. The
prototype can charge cell phones using the pressure of your steps.
Introduction18
GO TO
STEP:
FRONTCOVER CONTENTS APPENDIX 02 03 04 05 0601 08 09 1007
In our rapidly-changing world, learning to learn may be one of the most important competencies
for youth to develop. Maker education programs excel at enabling students to pursue their
own learning. The role of a maker educator is often less about providing technical training
than it is about coaching. Maker educators are in a unique position to foster a love for learning
and to help participants navigate the resources and possibilities available in the many fields
of “making.”
LEARNING TO LEARN
As described by researcher James Pellegrino, deeper learning allows students to “use knowledge
in ways that make it useful in new situations.” This ability to repurpose information is key to
innovation and creativity. Maker education encourages learners to experiment, prototype and
explore new connections between diverse ideas. Makers are people who not only possess technical
skills, but are also able to utilize their knowledge to address problems in unique ways.
DEEPER LEARNING
MEASURING
DEEPER LEARNING
KQED’s Mindshift team
wrote about ways to
define and measure
deeper learning at
http://autode.sk/
MeasureDeeperLearning
“Learning to learn
is to know how
to navigate in a
forest of facts,
ideas and theories,
a proliferation of
constantly changing
items of knowledge.
Learning to learn
is to know what
to ignore but at
the same time not
rejecting innovation
and research.”
-Author Raymond
Queneau
Increasingly in the twenty-first century, what you
know is far less important than what you do with what
you know. - Tony Wagner
As outsourcing and automation increasingly eliminate middle-skill jobs, today’s workers must
develop specialized expertise to compete in the global knowledge economy, particularly in
technical fields. Maker education is a fantastic way to quickly introduce learners to a variety of
STEAMskills.Thisexposurecanhelplearnersidentifytheirindividualinterestsandaptitudesand
begin specializing at a young age. For example, online portfolios are increasingly used by college
admissions boards and employers to identify promising candidates. As a Maker Educator, you
can also help your students learn the importance of documenting their work for these purposes.
TECHNICAL SPECIALIZATION
Introduction19
GO TO
STEP:
FRONTCOVER CONTENTS APPENDIX 02 03 04 05 0601 08 09 1007
This guide and its accompanying resources are designed to support educators and youth
organizers interested in creating new opportunities to engage with making. This can be
accomplished in a classroom setting, as an extracurricular or after school program, as part
of a summer camp, at a library, in combination with home schooling curriculum, or in a wide
variety of other settings. The options are endless!
You do not need to be an expert technologist or seasoned maker to take on this challenge; in fact we
recommend only four prerequisites:
WHO SHOULD USE THIS GUIDE?
1
2
3
Love for learning new skills and an understanding that failure is part of the
learning process.
Organizational and problem solving skills necessary to run a classroom or
extracurricular program.
Lesson 1
Tinkercad 101
Lesson 2
Lesson 3
Lesson 4
4
Experience and interest in working with youth.
Willingness to embrace the maker culture.
Introduction20
GO TO
STEP:
FRONTCOVER CONTENTS APPENDIX 02 03 04 05 0601 08 09 1007
ABOUT AUTODESK
EDUCATION
http://www.autodesk.
com/education
WHAT IS THE “FUTURE OF
MAKING THINGS?
http://autode.sk/
FutureOfMakingThings
Since 1982, Autodesk has been in the business of making software for people who make
things. If you’ve ever driven a high-performance car, admired a towering skyscraper, used a
smartphone, or watched a great film, chances are you’ve experienced what millions of Autodesk
customers are doing with our software. Autodesk gives you the power to make anything.
As an educator, you have tremendous capacity to inspire your students, and we want to show
you how making can help inspire a love of design and a desire to learn that will cultivate and
enrich your students’ creativity and future careers.
Whether you’re a beginner looking for simple exercises, a seasoned maker searching for a
new challenge, or a teacher in need of class materials, this guide has something for you.
We believe these tools will make it possible for the next generation of designers, engineers,
architects and entrprenuers to imagine, design and create a better world.
At Autodesk Education, we believe making can change the world.
Introduction21
GO TO
STEP:
WHO MADE THIS GUIDE?
FRONTCOVER CONTENTS APPENDIX 02 03 04 05 0601 08 09 1007
STEP 1
GET IN THE
MAKER
MINDSET
Step 1: Get in the Maker Mindset22
GO TO
STEP:
02 03 04 05 0601 08 09 1007FRONTCOVER CONTENTS APPENDIX
So you understand that maker education is important and you’re excited to get started. What
now?
We know that starting a maker program can be intimidating. Perhaps you’re a rockstar educator
and technical genius with no doubts about your ability to launch a maker program (if so, go get
‘em!), but it’s more likely that you’re a little bit unsure how to go about this. Don’t worry, you’re
not alone. Feeling unprepared and uncertain about how to build your first maker program is
normal. That’s why the first thing you should know is this:
Whether you’re a classroom teacher, librarian, scout leader, or
parent - as long as you enjoy working with kids (and are into making
things) - you can run a maker program.
To explain why, let’s clear up some common misconceptions about what a maker educator is
not. Running a maker program does not mean:
• You’re a math whiz
• You’re an engineer, physicist, or architect
• You’re a programmer
• You can take an engine apart and put it back together again
• You water your plants with an Arduino-controlled robot (or even know what an Arduino is)
To put it simply, you do not need to be an expert technologist to run a maker program.
A maker educator is a coach who inspires learners to build
technical skills and creative mindsets through hands-on projects
and experiential learning.
At the core, it’s really that simple. To help give you a better picture of what this looks like in
practice, let’s dig into some of the many hats you’ll wear as a maker educator...
STEP 1: GET IN THE MAKER MINDSET
You
can do
this
Step 1: Get in the Maker Mindset23
GO TO
STEP:
02 03 04 05 0601 08 09 1007FRONTCOVER CONTENTS APPENDIX
As a maker educator, you’ll wear many hats:
You’ll be a Coach.
The primary hat you’ll wear as a maker educator is that of a coach. This means you’ll provide
structure, motivation, materials and a safe environment that, together, enable your participants
to thrive. You’ll help your students set goals and deadlines and provide them with context for
the skills they’re building in your program.
You’ll be a Cheerleader.
A key component of the maker mindset is a willingness to try new things and fail. This can be
very difficult for some students to get used to. You can help your students feel excited about
failure by reframing it as learning. Keep a positive attitude toward problem solving. Most
importantly, have fun.
You’ll be a Learner.
Even if you have technical expertise in one area or another, at some point your students will
want to tackle something you’ve never done before. That’s great! Put your Learner Hat on and
try to let your students lead the way in tackling this new and tricky challenge. The idea of
“learning to learn” is core to making. If the students need support, learn alongside them.
You’ll be a Questioner.
You can help your students “learn to learn” by encouraging them to search for their own
answers before coming to you. One great way to do this is to ask questions. For example,
if a student is stuck, think of the steps you’d take to answer the question if you were in the
student’s position. Has the student taken any of those steps? If not, you can encourage him or
her to do so before you volunteer a solution. This approach helps learners build confidence in
their ability to learn independently.
THE MAKER EDUCATOR,
AKA “HAT JUGGLER”
Step 1: Get in the Maker Mindset24
GO TO
STEP:
02 03 04 05 0601 08 09 1007FRONTCOVER CONTENTS APPENDIX
You’ll be a Connector.
Another hat you’ll often wear is that of a connector. If you’re a librarian, this will come naturally
to you. As a connector you will help your students discover resources and people to accomplish
their learning goals. For example, if a student has progressed into advanced territory in the
Python programming language, perhaps you can connect her with a professional computer
scientist in your trusted community who can answer her questions. You might alternately
recommend online resources, books or other materials to help her advance.
Finally, Yes, You’ll be a Teacher.
As we’ll discuss in more detail in Step 4, there are many ways to structure and facilitate a
maker program. No matter how you choose to run yours, you can expect to deliver some level
of instruction. This is particularly true for young learners. To prepare, make sure you’ve gone
through each activity at least once and are familiar with software and equipment basics. If you
have questions, ask friends, colleagues or consult one of the many online maker communities
before your lesson begins.
The most important thing to remember when teaching is this: if a
question comes up during instruction that you can’t answer, that’s
okay.
You and your students can find the answer together. It’s likely that your students will often
surprise you with their existing knowledge. Peer teaching is an invaluable tool for the maker
educator. The best outcome you can hope for is to create an environment where everyone feels
comfortable taking turns between teaching and learning. The gaps you’ll encounter in your
own knowledge present a fantastic opportunity to model this behavior.
Step 1: Get in the Maker Mindset25
GO TO
STEP:
02 03 04 05 0601 08 09 1007FRONTCOVER CONTENTS APPENDIX
Here’s a secret: you can’t “teach” making like you can teach other subjects. There are no right
answers, no clear paths, and there are no comprehensive experts. No single individual could
master every tool and technique that might fall within the realm of “making.” This is why, more
than anything, making is a mindset.
The first thing you’ll have to do as a maker educator is embrace this maker mindset yourself.
To do so, keep the following in mind:
	 1. Be willing to try new things.
	 2. View mistakes with a positive lens; they are opportunities for learning.
	 3. “I can learn anything!” Embrace a growth mindset.
	 4. Be willing to say, “I don’t know, let’s find out!”
	 5. Be creative in seeking answers to tricky problems.
EMBRACE THE MAKER MINDSET
LEARN MORE ABOUT
GROWTH MINDSET
Check out Stanford
Psychology Professor
Carol Dweck’s research at
http://autode.sk/
GrowthMindset
If you find yourself feeling overwhelmed,
remember this:
Everyone gets overwhelmed.
You’re trying something new.
It’s worth it. Keep calm and
try a different hat.
Step 1: Get in the Maker Mindset26
GO TO
STEP:
02 03 04 05 0601 08 09 1007FRONTCOVER CONTENTS APPENDIX
Step 1: Get in the Maker Mindset27
GO TO
STEP:
02 03 04 05 0601 08 09 1007FRONTCOVER CONTENTS APPENDIX
STEP 2
DEFINE
YOUR
VISION
Step 2: Define Your Vision28
GO TO
STEP:
02 03 04 05 0601 08 09 1007FRONTCOVER CONTENTS APPENDIX
“Making” can mean many things. What does it mean to you?
Your maker program will be shaped by the people creating it and the resources you have
access to in your unique community. Your next step will be to define the type of program you’re
building. What do you imagine it will look and feel like for students? Who are your students?
How long will the program last? Why is building this program important to you? These are
critical questions for your team to discuss at the beginning of this process. Even if you’re
building your program single-handedly, taking the time to clearly outline your goals early-on
will prove invaluable as you move forward. Although the vision you craft now will undoubtedly
change over time, laying it out will make the following steps easier to achieve and future
changes simpler to communicate.
The following three activities are designed to help you and your team agree on an initial vision
for your program.
STEP 2: DEFINE YOUR VISION
Step 2: Define Your Vision29
GO TO
STEP:
02 03 04 05 0601 08 09 1007FRONTCOVER CONTENTS APPENDIX
This simple brainstorming activity is designed to build alignment and vision within your
program design team. Although best conducted with a group of 2-8 people, this can also be
useful as a solo exercise. You’ll be using the brainstorming process and rules developed by the
Stanford Design School (the d.school) to facilitate this activity.
ACTIVITY 1: GET STICKY WITH
GROUP BRAINSTORMING
GET THE STANFORD
D.SCHOOL RULES FOR
BRAINSTORMING
http://autode.sk/
StanfordBrainstorming
1
2
TIME: 20 minutes
PEOPLE: 3-8
MATERIALS: Post-it Notes, Markers, Timer
Introduce the activity. If anyone on your team is unfamiliar with the brainstorming
process, take a few minutes to introduce the rules. Remind participants that, at
this stage, all ideas are good ideas!
Distribute a sharpie marker and pad of post-it notes to each participant.
BRAINSTORMING QUESTIONS:
• What are you most excited about with this program?
• What does success look like (in the context of your maker program)?
• What are your biggest concerns about this program?
• Quickly sketch a logo or name for your program.
• What is your program’s “secret sauce” (what makes it special)?
Activity 1 : Get Sticky with Group Brainstorming
Step 2: Define Your Vision30
GO TO
STEP:
02 03 04 05 0601 08 09 1007FRONTCOVER CONTENTS APPENDIX
3
Introduce the question. Remind participants to only write or sketch
one idea per post-it note and to come up with as many ideas as
possible.
Set a timer for 90 seconds and invite the team to begin brainstorming.
Note: after a few trial rounds, you might try variations like a silent
round (no talking) or a visual round (pictures only).
When the timer buzzes, have everyone finish their current idea and
set down their markers.
Go around the table to share key ideas. Once everyone has shared,
group similar ideas together on the table or an empty wall (as a
variation, this can also be done as a silent activity).
Brainstorm answers to each of the questions one at a time. The tone of the activity
should be fun and fast-paced. Use a timer to limit the amount of time spent on
each question - we recommend 90 seconds per question. Feel free to add your
own questions! For each question, proceed as follows:
4
After you’ve finished brainstorming each question, take five minutes to debrief
by highlighting similarities and differences in the group’s vision for the program.
a
b
c
d
5 Take pictures of your brainstorming results and note key findings before cleaning
up.
Activity 1 : Get Sticky with Group Brainstorming
Step 2: Define Your Vision31
GO TO
STEP:
02 03 04 05 0601 08 09 1007FRONTCOVER CONTENTS APPENDIX
This activity is designed to help you identify potential strengths in your team and program.
You’ll walk through eight categories to inventory your existing skills, assets, equipment, and
materials. You’ll then generate a “score” for each category that will enable you to compare
yours strengths across all categories. At the end of this activity you’ll have a better idea where
to start when you begin selecting curriculum and activities for your program.
Here are the categories:
ACTIVITY 2: MAKER STRENGTHSFINDER
MAKER
STRENGTHSFINDER
WORKSHEET
This is a Maker Program
Starter Kit Resource,
available in the appendix
and on Google Drive.
TIME: 20 minutes
PEOPLE: 1-10
MATERIALS: Maker Strengthsfinder Worksheet (print one-sided), Markers
TAKE NOTE
You alone are responsible
for your maker program!
Starter Kit resources are
provided under a BY-NC-
SA Creative Commons
license. See pg. 2 for more
information.
Activity 2 : Maker Strengthsfinder
3D DESIGN &
PRINTING
Including additive manufacturing and
computer-aided design (CAD)
TEXTILES
Including sewing, leatherworking, and
e-textiles
ELECTRONICS
Including circuits, sensors, robotics,
Arduino, Raspberry Pi, Makey Makey and
more
CODING
Including programming for software, web,
apps, microcontrollers and videogames
DIGITAL MEDIA
Including video and audio production,
photography, and animation
GRAPHIC DESIGN
Including wireframing, data visualization,
and design for print, web, and media
GENERALFABRICATION
Including subtractive manufacturing,
metalwork, woodwork and lo-fi
prototyping
SPACE & STORAGE
We’ll also review requirements for space and storage.
Step 2: Define Your Vision32
GO TO
STEP:
02 03 04 05 0601 08 09 1007FRONTCOVER CONTENTS APPENDIX
1
2
3
Each of the eight maker categories is listed on a separate page in the Maker
Strengthsfinder Worksheet. Lay all nine pages out on a table or tape them to a
wall so all participants can easily view them.
You can place multiple check marks beside items listed under the
Facilitator Skills column. For example, if four people are completing
the activity and you all have experience using a 3D printer, you
should have four different-colored check marks beside that item in
the Facilitator Skills column.
You should only place one check mark beside items in the Resource
columns (basic, intermediate and advanced), as these resources will
likely be shared by your team. For example, you should not have four
check marks beside “drone” if you only have one drone.
4 Next, invite participants to add any relevant skills or resources that aren’t listed.
Write these in the best-fitting category.
a
b
Distribute markers to participants. Each person should have a different color.
Introduce the activity to the group and make sure everyone understands the
instructions. Each person is going to place check marks next to the skills or
resources your program has access to.
5 Finish by using the formula included in the worksheet to calculate a “score” for
each category. Anything over 0% is a win!
Activity 2 : Maker Strengthsfinder
Step 2: Define Your Vision33
GO TO
STEP:
02 03 04 05 0601 08 09 1007FRONTCOVER CONTENTS APPENDIX
 
❏   ❏  
 
❏  
 
❏  


Activity 2 : Maker Strengthsfinder
Step 2: Define Your Vision34
GO TO
STEP:
USE THIS!
See Appendix
02 03 04 05 0601 08 09 1007FRONTCOVER CONTENTS APPENDIX
Step 2: Define Your Vision35
GO TO
STEP:
02 03 04 05 0601 08 09 1007FRONTCOVER CONTENTS APPENDIX
Now that your team has completed some basic brainstorming and identified its strengths, it’s
time to get your ideas down on paper and begin documenting the vision for what you want
your program to be. This worksheet will you help you begin to hone in on the details in a way
that will help you tell a more cohesive story about your program vision and foster cohesion
within your team throughout the remaining process of building your program. A clearly defined
vision will also make explaining and building buy-in much easier and more effective.
ACTIVITY 3: DOCUMENT YOUR VISION
DOCUMENT YOUR
VISION WORKSHEETS
This is a Maker Program
Starter Kit Resource,
available in the appendix
and on Google Drive.
TIME: 30 minutes
PEOPLE: 1-8
MATERIALS: Printed “Document Your Vision” Worksheets, pens or pencils, timer
1
2
3
Distribute a Document Your Vision Worksheet to each person on your team. (You
should have one extra copy of the worksheet on hand as well.)
Set a timer for 10 minutes and have each person individually fill out their
worksheet. No talking! Alternately, these can be completed in advance.
Go around the table allowing each person to briefly share his or her answers. For
smaller groups, you can also simply swap worksheets.
4
5
Corroboratively complete a new worksheet as a team. Find consensus on as many
questions as possible.
After you’ve completed this activity, keep this document on hand for your team.
Especially if your team meets infrequently, you can review this worksheet at the
beginning of meetings to promote cohesion within the team and remind everyone
of your shared purpose. Feel free to change and add detail to your answers as you
advance in designing your program.
Activity 3: Document Your Vision
Step 2: Define Your Vision36
GO TO
STEP:
02 03 04 05 0601 08 09 1007FRONTCOVER CONTENTS APPENDIX
 
Document   Your   Vision 
 
Program   Name   ___________________________________________________________               Your   Name   ________________________________ 
 
Use   this   worksheet   to   outline   the   core   details   of   your   program.   Use   the   left   column   to   detail   what   you   can   do   in   the   next   six   months   and   the   right 
column   to   create   a   vision   for   five   years   from   now.   Remember,   there   are   no   right   answers   and   this   will   undoubtedly   change   over   time.   Answer   as 
thoroughly   as   possible. 
 
Your   1­Year   Vision 
Use   this   column   to   answer   each   question   based   on   a   program   you 
could    launch   within   the   next   6   months . 
Your   3­Year   Vision 
Use   this   column   to   answer   each   question   based   on   your   long­term 
vision   for   your   program. 
 
Participant   Ages: 
   
 
Circle   any/all   features   that   apply   to   your   target   audience.   Feel   free   to   add   to   this   list. 
Girls­only               Boys­only               high­risk               affluent               beginners   
 
experienced               techies               low­income               physical   disabilities 
 
learning   disabilities 
Girls­only               Boys­only               high­risk               affluent               beginners   
 
experienced               techies               low­income            physical   disabilities 
 
learning   disabilities 
 
1­2   sentence   summary   of   the   populations   you’ll   serve: 


Activity 3: Document Your Vision
Step 2: Define Your Vision37
GO TO
STEP:
USE THIS!
See Appendix
02 03 04 05 0601 08 09 1007FRONTCOVER CONTENTS APPENDIX
STEP 3
DEFINE
GOALS &
METRICS
Step 3: Define Goals & Metrics38
GO TO
STEP:
02 03 04 05 0601 08 09 1007FRONTCOVER CONTENTS APPENDIX
Identifying what success looks like for your program early-on is important for everyone.
Even if you’re putting your maker program together purely for fun, setting a few goals to
track along the way will prove valuable when you’re designing and recruiting for your next
program. Collecting and sharing this data can also help grow your program, engage sponsors
and parents, recruit new members, and successfully apply for grants in the future. Becoming
a local exemplar for maker education is a sure way to reach more students and increase your
impact. Good data drives it all. This section will help you identify easy ways to track success.
A NOTE ON STANDARDS
If you’re a teacher in a K-12 school, one of the goals you may wish to work toward is alignment
with your school’s standards. Fortunately, many maker activities now include lists of the
Common Core State Standards (CCSS) and Next Generation Science Standards (NGSS) addressed
in their content. With a little creativity, you can align maker activities to a wide variety of core
subject areas and standards.
STEP 3: DEFINE GOALS
AND METRICS
Step 3: Define Goals & Metrics39
GO TO
STEP:
02 03 04 05 0601 08 09 1007FRONTCOVER CONTENTS APPENDIX
Step 3: Define Goals & Metrics40
GO TO
STEP:
02 03 04 05 0601 08 09 1007FRONTCOVER CONTENTS APPENDIX
Track participant progress with
periodic benchmark surveys
that can be completed at the
beginning and end of your
program, or more frequently.
Track your own progress with
periodic benchmark surveys
that can be completed at the
beginning and end of your
program, or more frequently.
Use this form after each program
class/session to record stories
and observations. This will enable
you to quickly review the flow of
the program at its conclusion.
Never forget your exit survey! Get
feedback and suggestions from
your participants.
SURVEY TEMPLATES
FOR TRACKING SUCCESS
Step 3: Define Goals & Metrics41
GO TO
STEP:
USE
THESE!
See Appendix
02 03 04 05 0601 08 09 1007FRONTCOVER CONTENTS APPENDIX
This activity is designed to help your team identify the metrics you will track to know whether
or not your program was successful in meeting its goals.
ACTIVITY 4: BRAINSTORM FOR SUCCESS
INDICATORS OF
SUCCESS WORKSHEET
This is a Maker Program
Starter Kit Resource,
available in the appendix
and on Google Drive.
TIME: 30 minutes
PEOPLE: 1-8
MATERIALS:
•
•
•
•
1
2
3
Begin by introducing the activity and reviewing the same brainstorming rules
used in Activity 1.
As a group, briefly review your work from Step 1, including: a) Your answers to
the “What does success look like?” question in your initial brainstorm, and b)
the “Indicators of Success” portion of your team’s final Document Your Vision
Worksheet.
Now spend 3 minutes brainstorming as many answers as possible to the following
question: What are our goals for success in your program?
4
Group and sort these goals and themes by moving similar goals next to each other.
Are you noticing any trends? Use your grouped post-its to identify up to five
primary “indicators of success” for your program. These can be relatively vague;
for example: “participants have fun” or “students build 3D modeling skills.” They
can also be specific; for example: “75% of participants complete the program”
Post-in notes and markers
(1) Printed Indicators of Success Worksheet
Whiteboard, chalkboard or large sheet of butcher paper
If available, your completed Document Your Vision Worksheet from Activity 3 and post-it
notes from Activity 1
Activity 4: Brainstorm for Success
Step 3: Define Goals & Metrics42
GO TO
STEP:
02 03 04 05 0601 08 09 1007FRONTCOVER CONTENTS APPENDIX
5
Now you’ll run another 90-second brainstorm for each indicator of success with
the following questions: How will we know we’ve succeeded? Specifically, what
can you do, capture, test or observe to prove that you achieved your goal? Be
creative; there are no right or wrong answers.
On a whiteboard or a large piece of butcher paper, draw three quadrants. Label
them “Must,” Might” and “Later.”Now sort all the methods you identified in your
brainstorms for each Indicator into the following categories:
•
•
•
6
Must: important and easy to achieve
Might: metric is important but the method difficult to achieve
Later: metric is less essential to immediate success
7
8
Choose 1-2 methods from the “must” category to track for each of your important
indicators. If one of your indicators doesn’t have any methods that land in the
“must” category, consider putting it aside for future consideration.
Use the Indicators of Success Worksheet to assign responsibility for each method
and document progress throughout the program.
Activity 4: Brainstorm for Success
Step 3: Define Goals & Metrics43
GO TO
STEP:
02 03 04 05 0601 08 09 1007FRONTCOVER CONTENTS APPENDIX
 
Indicators   of   Success   Worksheet 
Use   this   wor ksheet   to   clearly   define   what   success   looks   like   for   your   program   and   how   you   will   track   it.   State   each   indicator   of   success 
in   a   complete   sentence   and   outline   the   methods   you   will   use   to   track   your   progress.    Be   as   specific   as   possible .  
 
Summary   of   Results: 
 
 
Method   1  Method   2 
 
Indicator   1:   Met   minimum   requirements   for   success?   (Y/N)     
Indicator   Succeeded?   
 
Indicator   2:   Met   minimum   requirements   for   success?   (Y/N)     
Indicator   Succeeded?   
 
Indicator   3:   Met   minimum   requirements   for   success?   (Y/N)     
Indicator   Succeeded?   
 
Indicator   4:   Met   minimum   requirements   for   success?   (Y/N)     
Indicator   Succeeded?   
 
Indicator   5:   Met   minimum   requirements   for   success?   (Y/N)     
Indicator   Succeeded?   


Activity 6: Brainstorm for Success
Step 3: Define Goals & Metrics44
GO TO
STEP:
USE THIS!
See Appendix
02 03 04 05 0601 08 09 1007FRONTCOVER CONTENTS APPENDIX
Step 3: Define Goals & Metrics45
GO TO
STEP:
02 03 04 05 0601 08 09 1007FRONTCOVER CONTENTS APPENDIX
STEP 4
CHOOSE
STRUCTURE &
ACTIVITIES
Step 4: Choose Structure, Projects & Activities46
GO TO
STEP:
02 03 04 05 0601 08 09 1007FRONTCOVER CONTENTS APPENDIX
Makerspaces are not just about tools; they’re about people,
culture and mindset.
This section will help you choose a program structure and content to best fit the needs of your space, community,
learners and team.
Depending on your unique circumstances, there are a variety of ways your maker program can be organized. On the
next page you’ll find a breakdown of common models we’ve seen over the years, but there’s always gray area when
it comes to making. Some programs may be combinations of the following models or completely different (literally
“off the chart,” you might say!). We offer this table as a tool to begin to define the structure for your program.
INSTRUCTIONAL APPROACHES
STEP 4: CHOOSE STRUCTURE,
PROJECTS AND ACTIVITIES
Step 4: Choose Structure, Projects & Activities47
GO TO
STEP:
02 03 04 05 0601 08 09 1007FRONTCOVER CONTENTS APPENDIX
Project-Based Design-Based Technical Drop-In
Description Project-based programs enable
students to master a specific set of
technical skills by completing a hands-
on project.
Design-based programs focus on
enabling students to improve creative
problem solving skills by tackling a
real-world issue; building technical
skills is a secondary goal.
Technical Programs enable students to
master a specific set of technical skills,
in depth.
Drop-In programs enable participants
to explore a range of technical skills in
a relatively unstructured environment.
Strengths of
Approach
Project-based learning can be
more engaging for “nontechnical”
participants; Good for beginners; Great
for elementary students
Design-based learning can be
more engaging for “nontechnical”
participants; Great for high school
students
Attractive to parents; Attractive to
learners with existing interest in
technology; students may have greater
intrinsic motivation to participate;
Structured progression makes
technical programs easier to plan
Creates space for self-motivated
students to explore; Good for high
school students
Weaknesses
of Approach
Tying together multiple “beginner”
projects with a common theme can be
difficult
Addressing a real-world problem often
requires a program of longer duration
Technical expertise required of
instructors; Difficult to engage learners
who don’t have an existing interest
in the technology; Depending on
technology, can be more expensive
than other program types
Difficult for younger students;
Unstructured environments can be
overwhelming for some students; will
not effectively serve learners who
struggle with self-direction
Hours of
Instruction
4-80 hours 8+ hours 2-30 hours N/A - open/flex hours
K-8
Program
Example
WIKISEAT
Build customizable chairs with learners
of all ages. WikiSeat is an open source
furniture project. That means that all of
the documentation for how to build a
WikiSeat is freely and openly published
online.
www.wikiseat.org/
SUPERHERO CYBORGS
Superhero Cyborgs is KIDmob’s build
your own body mod workshop for kids
ages 10-15 with limb differences. Kids
work with designers and engineers to
design and prototype their own body
modifications.
kidmob.org/superhero-cyborgs/
TINKERCAD
Tinkercad offers step-by-step digital
lessons in 3D design that are common-
core aligned and suitable for learners
as young as first grade.
https://www.tinkercad.com/
HOUR OF CODE
The Hour of Code is a global movement
reaching tens of millions of students in
180+ countries. Anyone, anywhere can
organize an Hour of Code event. One-
hour tutorials are available in over 45
languages for all ages.
https://code.org/learn
9-12
Program
Example
BUILD A PLAYGROUND
The 1881 Institute in New Orleans
trains students to design and build a
playground.
http://autode.sk/1881school
YOUTH CIVIC HACKATHON
Civic hackathons challenge groups of
teenagers to spend a weekend using
design and technology to solve civic
challenges. Read about San Francisco’s
first Youth Civic Hackathon, hosted at
Tech Shop SF:
http://autode.sk/YouthCivicHackathon
AUDIO: BUMP RECORDS
Participants in this program at the Bay
Area Video Coalition (BAVC) learn audio
engineering, digital recording and
mixing techniques.
http://autode.sk/BAVCyouth
THE MIX
The Mix at SFPL is an innovative,
youth-designed, 21st century teen
learning space that will provide
4,770-square feet of space and
equipment for youth ages 13-18 to
explore, create and develop digital
media and computer skills as well as
discover and engage with the Library’s
traditional books and materials.
themixatsfpl.org/
TYPES OF MAKER PROGRAMS:
Step 4: Choose Structure, Projects & Activities48
GO TO
STEP:
02 03 04 05 0601 08 09 1007FRONTCOVER CONTENTS APPENDIX
Photo Credit: Libby Falck
Step 4: Choose Structure, Projects & Activities49
GO TO
STEP:
02 03 04 05 0601 08 09 1007FRONTCOVER CONTENTS APPENDIX
Before you begin selecting specific activities for you program, it’s important to clearly outline
the experience your participants will move through as they progress. How will they feel on
the first day? On the last? When might they be frustrated? Excited? Defining exactly when
participants will master different mindsets and skills and how they’ll feel along the way will
help you choose the appropriate activities and structure for your program. This activity will
help you map your participants’ intended progression throughout your program, including
their skill development, behavior, attitudes and more.
ACTIVITY 5: MAP YOUR LEARNER JOURNEY
TIME: 30 minutes
PEOPLE: 1-4
MATERIALS: Learner Journey Worksheet and pens or pencils
Use the Learner Journey Worksheet to map the path your students will take.
LEARNER JOURNEY
WORKSHEET
This is a Maker Program
Starter Kit Resource,
available in the appendix
and on Google Drive.
TAKE NOTE
You alone are responsible
for your maker program!
Starter Kit resources are
provided under a BY-NC-
SA Creative Commons
license. See pg. 2 for more
information.
Activity 5: Map Your Learner Journey
Step 4: Choose Structure, Projects & Activities50
GO TO
STEP:
02 03 04 05 0601 08 09 1007FRONTCOVER CONTENTS APPENDIX
 
 
Step 4: Choose Structure, Projects & Activities51
GO TO
STEP:
USE THIS!
See Appendix
02 03 04 05 0601 08 09 1007FRONTCOVER CONTENTS APPENDIX
There are nearly limitless activity guides, tutorials, curriculum and resources available for use
in your maker program. Use the results from your Maker Strengthsfinder Worksheet to select
activities you feel confident including in your first maker program.
Remember to start with the lowest-hanging fruit.	
ACTIVITY 6: EXPLORE AND CHOOSE ACTIVITIES
TIME: 2-8 Hours
PEOPLE: 1-4
MATERIALS: Maker Program Activity Guide, computer, and internet connectivity
MAKER PROGRAM
ACTIVITY GUIDE
This is a Maker Program
Starter Kit Resource,
available in the appendix
and on Google Drive.
To help you get started, we’ve put together a Maker Program Activity Guide to help you quickly
identify beginner-level projects that match your strengths and the needs of your program.
This guide includes the following information for over eighty beginner-level maker activities:
•
•
•
•
•
•
•
•
•
•
•
Use the Maker Activity Guide to identify the specific activities that you’d like to incorporate
into your program. Of course, feel free to also use activities that aren’t included in this guide
or that are of your own invention!
“Even if you don’t
have access
to expensive…
hardware, every
classroom
can become a
makerspace where
kids and teachers
learn together
through direct
experience with
an assortment of
high and low tech
materials.”
~ Gary Stager and
Sylvia Martinez in
Invent to Learn
Title & Link
Description
Source/Author
Skills Learned
Type of content (kit, video, step-by-step guide, etc)
Target Grades
Estimated hours to complete
Difficulty to facilitate
Estimated cost of materials for 10 learners
Advanced software & equipment required (beyond standard classroom
materials like scissors, paper, markers, etc)
Potential Tie-ins to Core Subjects
Activity 6: Explore & Choose Activities
Step 4: Choose Structure, Projects & Activities52
GO TO
STEP:
02 03 04 05 0601 08 09 1007FRONTCOVER CONTENTS APPENDIX
Maker Program Activity Guide
1
Activity Title Brief Description Source Category Content Type Hours to CompleteDifficulty Grades
Potential
Subject Tie-
Ins
Advanced
Software &
Equipment
Required Link
Coding with Paper: Space
Race Game
The object of the Space Race game is to
navigate your rocket ship safely through the
galaxy of aliens and satellites, all the way to the
moon. Using the pre-made coding blocks
students can create a ‘program’ of directions
for their rocket to follow and complete its
mission.
Fractus
Learning Coding
Step-by-Step
Guide 1 Easy K-8
Science;
Space -
https://www.fractuslearning.
com/2014/11/18/coding-with-paper-
printable-game/
The Perfect Recipe
Do you have a favorite recipe that you want to
share with the world? With this project we will
use code to write a recipe that looks as good
as it tastes. Google
Creative Lab Coding
Step-by-Step
Guide 3 Intermediate 6-12
Computers with
internet
https://googlecreativelab.github.io/coder-
projects/projects/perfect_recipe/
Make Your Own Mondrian
Paint makes a mess. Code is so much cleaner.
Use this project to recreate a classic Modern
artwork, Piet Mondrian’s Composition II in Red,
Blue, and Yellow in your browser using basic
web building blocks.
Google
Creative Lab Coding
Step-by-Step
Guide 3 Intermediate 6-12 Art
Computers with
internet
https://googlecreativelab.github.io/coder-
projects/projects/mondrian/
Pop-Up Penguin Game
Make a simple game to play with your friends
and family. See if you can find all the penguins
without waking the yeti!
Google
Creative Lab Coding
Step-by-Step
Guide 3 Intermediate 6-12 Art
Computers with
internet
https://googlecreativelab.github.io/coder-
projects/projects/pop_up_penguins/
Interactive Space Wizard
Game and Controller
Remixing a game that is designed for
integration with a MaKey MaKey powered
controller is a great introduction to the key
concepts of building an interactive game! All
you need is a Scratch account, a MaKey
MaKey, and some basic construction items!
Digital Harbor
Foundation
Coding &
Electronics
Step-by-Step
Guide 2 Intermediate 3-8
Science;
Space
Computers with
internet and
acces to
Scratch, Makey
Makey
https://blueprint.digitalharbor.
org/projects/interactive-space-wizard-
game-and-controller/
5 Chairs Exercise
The 5 Chairs activity encourages students to
design models of chairs based on design
principles they pull from user profiles. This
activity also encourages students to iterate on
their designs and practice using different
materials. d.school
Design
Thinking
Step-by-Step
Guide 1 Intermediate 4-12 -
https://dschool.stanford.
edu/groups/k12/wiki/17761/5_Chairs_Exer
cise.html
Wallet Project
The Wallet Project is a one-hour overview of the
entire design process d.school
Design
Thinking
Step-by-Step
Guide 1 Intermediate 4-12 -
https://dschool.stanford.
edu/groups/k12/wiki/c739e/Wallet_Project
.html
Underwater Microphone Kit
Follow National Geographic Explorer, Shah
Selbe, on his adventure into the wilds of the
Okavango Delta in Botswana to listen for
wildlife. At home, you can have your own
adventure with an underwater microphone,
also known as a hydrophone, by listening to the
sounds in your local pond, river, ocean (or
bathtub). KitHub Digital Media Kit 2 Easy K-8
Science,
marine
science,
ecology Hydrphone Kit https://kithub.cc/hydrophone/
Make a Music Video
Students work together to create a short music
video for a familiar children's song.
Education
World Digital Media
Step-by-Step
Guide 5 Intermediate K-8
Art;
Launguage
Arts; activity is
standards-
aligned
Camcorder and
Computer with
basic video
editing
software
http://www.educationworld.
com/a_lesson/01-1/lp226_05.shtml
DIY Sound Effects
A basic overview of the art of sound effects,
including how to make them, how to record
them, and even how to automate them. Instructables Digital Media
Video
Instructions 2 Easy 3-12 Art Microphone
http://www.instructables.com/id/DIY-
Sound-Effects/
Activity 3: Program Vision WorksheetsActivity 6: Explore & Choose Activities
Step 4: Choose Structure, Projects & Activities53
GO TO
STEP:
USE THIS!
See Appendix
02 03 04 05 0601 08 09 1007FRONTCOVER CONTENTS APPENDIX
Once you’ve identified compelling activities, you can use the Program Outline Template to
break down a day-by-day plan for your program. This will be your go-to planning document
for the duration of your program. It will also be a useful tool to share with volunteers who are
helping to facilitate your program and for finalizing your budget.
ACTIVITY 7: OUTLINE YOUR PROGRAM
TIME: 2 hours
PEOPLE: 1-4
MATERIALS: Program Outline Template and computer with internet PROGRAM
OUTLINE TEMPLATE
This is a Maker Program
Starter Kit resource,
available on Google Drive.
Creating a compelling theme or story that weaves the activities in your program into a cohesive
experience will help to motivate engagement. Themes you might consider include:
•
•
•
•
•
•
•
CHOOSE A PROGRAM THEME
Exploring and building prototypes of solutions to address a specific problem in your
community or school
A subject-based theme, such as “Ancient Egypt” or “Marine Biology”
A multi-stage citizen science project; best done in partnership with a local nonprofit
or scientist
A theme that coincides with a community event series or school initiative; for example,
adding electronics and e-textiles to your homecoming float
Challenge-based projects or contests
Ask your students what’s important to them
Get creative! Use whatever will get your participants most excited
Activity 7: Outline Your Program
Step 4: Choose Structure, Projects & Activities54
GO TO
STEP:
02 03 04 05 0601 08 09 1007FRONTCOVER CONTENTS APPENDIX
 
●
●
●
●
●
 
This template is available as a Google Doc in the Maker
Program Starter Kit’s Google Drive Folder. This means all
you have to do is copy it, plug in your details, and you’re
ready to go! See the appendix for details.
Activity 7: Outline Your Program
Step 4: Choose Structure, Projects & Activities55
GO TO
STEP:
USE THIS!
See Appendix
02 03 04 05 0601 08 09 1007FRONTCOVER CONTENTS APPENDIX
STEP 5
SKILL UP
Step 5: Skill Up56
GO TO
STEP:
02 03 0601 08 09 100704 05FRONTCOVER CONTENTS APPENDIX
Congratulations, you’ve designed your maker program! Nice work. Now how will you go about
facilitating these exciting new activities? This section will help you identify methods and
opportunities to “skill up” before your program begins.
There’s a good chance that you were reminded of a few rusty maker skills during your Maker
Strengthsfinder Activity. Now’s the time to revisit those experiences and brush up!
Perhaps your mom was a seamstress who taught you basic stitches but you haven’t touched
needle and thread in years. Maybe you participated in a 3D printing workshop but the space
was crowded and you’re are fuzzy on the details. Perhaps you got really into screen printing
two summers ago but the tools have been collecting dust in your garage ever since. Whatever
you have experience with, run with it!
Block out 2-10 hours (depending on the skill and just how rusty you are), and prepare for some
catchup. Here are some tips to get started:
•
•
•
Dig out old tools and equipment you haven’t used in a while and complete a small project.
Connect with skilled friends and people in your community and request a 1-hour brush-up
Explore the communities listed in Step 9 to request specific advice or further resources
STEP 5: SKILL UP
BRUSH UP ON OLD SKILLS
Step 5: Skill Up57
GO TO
STEP:
02 03 0601 08 09 100704 05FRONTCOVER CONTENTS APPENDIX
In the previous step you may have decided to tackle a few activities that you’ve never
encountered before. That’s awesome! There are many maker skills you can begin to learn with
only a few hours of work. One great way to get started is to simply complete the activities
you’ve chosen for your student in advance. Most of the resources in the Activity Guide include
extensive instructions and documentation that will help you walk through each experience. If
you have questions, utilize the forums listed in Step 9 to discover answers within the maker
education community. Completing your activities in advance will help you build confidence
before introducing them to students.
As you saw in the Maker Program Activity Guide, many maker activities can be completed with
relatively low-tech resources. Cardboard, fabrics, duct tape, paper and pencils can take you
a surprisingly long way. On the other hand, if you’re incorporating technology and software
you’ve never used before, building foundational knowledge with those tools will enable you to
facilitate learning as smoothly as possible.
To help you get started, we’ve put together a List of Educator Learning Resources.. This list
includes the following information for over forty self-directed learning resources to help you
gain experience with new skills and tools before your program begins.
•
•
•
•
•
•
•
LEARN NEW SKILLS
LIST OF EDUCATOR
LEARNING RESOURCES
This is a Maker Program
Starter Kit Resource,
available in the appendix
and on Google Drive.
Tool/Skill
Description
Hours to learn basics
Difficulty to learn
Cost of necessary equipment, software and materials
Cost of instruction, if applicable
URL to resource
Step 5: Skill Up58
GO TO
STEP:
02 03 0601 08 09 100704 05FRONTCOVER CONTENTS APPENDIX
1
Tool/Skill Description Hours
Difficulty to
Learn Skill Category
Tinkercad, 3D modeling Tinkercad has a fantastic and fun seires of interactive lessons that teach all
the basics of navigating and using the software. https://www.tinkercad.com/learn/
1 Easy 3D Technology
123D Design, 3D modeling 123D Desing has a seies of videos for mastering the tool's interface.
http://www.123dapp.com/howto/design
2 Easy 3D Technology
123D Catch, 3D capture Videos and documentation to help you get started, or get more advanced with
123D Catch – a free app that turns photos into 3D models. http://www.123dapp.
com/howto/catch
2 Easy 3D Technology
123D Sculpt, 3D modeling 123D Sculpt+ includes in-app training. 2 Easy 3D Technology
Autodesk Fusion, 3D
modeling
Fusion has a great series of videos that will help you begin modeling quickly
and easily. http://www.autodesk.com/products/fusion-360/learn-training-tutorials;
After completing this you can dig deeper on the Autodesk Design Academy by
filtering for "Fusion 360": https://academy.autodesk.com/explore-and-learn
2 Easy 3D Technology
3D Printing Basics Follow the instructions provided by the manufacturer of your 3D printer to print
your first project.
6 Intermediate 3D Technology
3D Printing, Comprehensive
Introduction
If you don't have someone to teach you in person, take the online 3D printing
course offered by Instructables for a fantastic introduction. http://www.instructables.
com/class/3D-Printing-Class/
30 Intermediate 3D Technology
AutoCAD, 3D modeling The Autodesk Design Academy offers an extensive series of video tutorials to
help you get started at https://academy.autodesk.com/software/autocad
10 Difficult 3D Technology
Maya, 3D animation The Autodesk Design Academy offers an extensive series of video tutorials to
help you get started at https://academy.autodesk.com/software/maya
10 Difficult 3D Technology
3DS Max, 3D animation The Autodesk Design Academy offers an extensive series of video tutorials to
help you get started at https://academy.autodesk.com/software/3dsmax
10 Difficult 3D Technology
Autodesk Inventor, 3D
modeling
The Autodesk Design Academy offers an extensive series of video tutorials to
help you get started with Inventor. https://academy.autodesk.com/software/inventor
10 Difficult 3D Technology
Scratch, beginner game
design & coding
Scratch includes a well-designed series of starter tutorials when you open the tool.
If you need additonal support, the creators at MIT have made a very useful set of
guides and videos at https://scratch.mit.edu/help/
2 Easy Coding
HTML & CSS, web design Online interactive tutorials like those offered by Codecademy are a great way
to learn the basics of web design with HTML & CSS, as well as other programming
languages. https://www.codecademy.com/learn/make-a-website
4 Intermediate Coding
Powtoons, 2D Animation Powtoons offers a very easy to follow series of video tutorials to get you started.
https://www.powtoon.com/tutorials/
1 Easy Digital Media
Video Production A great resource to learn or review the basics of video production and editing
is the "Filmmaking 101" section of the Vimeo Video School. https://vimeo.
com/blog/category/video-school
3 Intermediate Digital Media
Step 5: Skill Up59
GO TO
STEP:
USE THIS!
See Appendix
02 03 0601 08 09 100704 05FRONTCOVER CONTENTS APPENDIX
If you’re seeking a more generalized introduction to maker education, you may want to consider
professional development. Here’s a list of professional development opportunities that may
be a fit for you:
PROFESSIONAL DEVELOPMENT OPPORTUNITIES
ONLINE PROFESSIONAL DEVELOPMENT
MAKER ED
Maker Ed offers a brand-new
online PD program in maker
education
http://autode.sk/MakerEdPD
ISTE
ISTE, the International Society
for Technology in Education,
offers online courses and
webinars
http://autode.sk/ISTEpd
HARVARD PROJECT ZERO
http://autode.sk/projectzero
SONOMA STATE
UNIVERSITY
Maker Certificate Course
http://autode.sk/makercert
COURSERA
Tinkering Fundamentals: A
Constructionist Approach to
STEM Learning
http://autode.sk/CourseraPD
BUCK INSTITUTE
http://www.bie.org/
LRNG
Maker Educator Playlist
http://autode.sk/LRNGplaylist
EDUCATION CLOSET
Assessment for Makers Online
Course
http://autode.sk/EduCloset
HIGH TECH HIGH MOOCS
http://autode.sk/
hightechhighmooc
Step 5: Skill Up60
GO TO
STEP:
02 03 0601 08 09 100704 05FRONTCOVER CONTENTS APPENDIX
IN-PERSON PROFESSIONAL DEVELOPMENT
IDEO TEACHERS GUILD
COACHES
https://teachersguild.org/
coaches
DIGITAL HARBOR
FOUNDATION
Educator Workshops
http://autode.sk/
DigitalHarborBlueprint
INVENT TO LEARN
Authors of Invent to Learn
http://inventtolearn.com/
workshops/
LIGHTHOUSE CREATIVITY
LAB
http://autode.sk/
LighthouseCreativityLab
THE EXPLORATORIUM
San Francisco, CA
Middle school and high school
math and science professional
development
http://autode.sk/
TeacherInstitute
NUVU INNOVATION CAMP
FOR EDUCATORS
http://autode.sk/
NUVUinnovation
UNPROFESSIONAL
DEVELOPMENT
Berkeley, CA
http://autode.sk/
berkeleyCreativity101
DISCOVERY EDUCATION
http://autode.sk/DiscoverySTEM
STANFORD D.SCHOOL
K12 LAB
Offers introductory workshops
on design thinking.
www.k12lab.org/
Step 5: Skill Up61
GO TO
STEP:
02 03 0601 08 09 100704 05FRONTCOVER CONTENTS APPENDIX
STEP 6
COORDINATE
SUPPORT &
LOGISTICS
Step 6: Coordiate Support & Logistics62
GO TO
STEP:
02 03 0501 08 09 100704 06FRONTCOVER CONTENTS APPENDIX
It’s time to begin sharing your ideas with potential supporters and pulling together the resources that will
bring your program to life.
Although you may be able to take on a lot by yourself, engaging your community will be crucial for your
program’s success and sustainability. Incorporating the unique resources and expertise of local businesses,
community members, and organizations can also give your program a unique flare for participants.
For example, can you get a female engineer from a local tech company to present to your group? Perhaps
a nearby factory would be willing to give your participants a tour? Maybe the department store down the
street has cardboard boxes you can use for an activity? Could a local graphic designer run a hands-on design
workshop for your participants? You’ll never know until you ask!
Beyond community support, much of the logistical work that goes into starting a makerspace or maker
program is well-documented in other fantastic resources. We’ll introduce several considerations you’ll want
to keep in mind as you move forward with your program, as well as dozens of existing resources to help you
do so. The logistics-focused categories we’ll review include safety, people organization, funding, and space.
STEP 6: COORDINATE
SUPPORT AND LOGISTICS
Step 6: Coordiate Support & Logistics63
GO TO
STEP:
02 03 0501 08 09 100704 06FRONTCOVER CONTENTS APPENDIX
Now that you’ve got your ideas organized, let’s put them into a format that will be easy to
share with others. You can use our template or create your own custom one-page document
to share your vision with the community. You could also create a website; tools like Weebly,
Strikingly and Squarespace have drag-and-drop editors that make it very easy to design and
build your first website.
ACTIVITY 8: SHARE YOUR VISION
ONE-PAGER
TEMPLATE
This is a Maker Program
Starter Kit resource,
available on Google Drive.
TIME: 30 minutes - 4 hours
PEOPLE: 1-6
MATERIALS: Computer with internet access
Here are a few things to keep in mind as you share your vision:
•
•
•
•
Other tools you might use to share your vision include:
•
•
•
•
•
•
•
•
•
•
Be visual. If possible, use high-quality photos of your students engaging in making activities
to capture viewer attention.
Be concise and use simple language (no need for techie speak here!).
Make your text easy to read by choosing simple fonts and using standard capitalization
(ALL-CAPS is harder to read).
If possible, share measurable success criteria (people love data!).
Google Sites (you can also create an affiliated Google Group)
Facebook page
Medium
Weebly
Wordpress
Squarespace
Strikingly
Piktochart
Powtoons
Freepik for free and low-cost graphics
Activity 8: Share Your Vision
Step 6: Coordiate Support & Logistics64
GO TO
STEP:
02 03 0501 08 09 100704 06FRONTCOVER CONTENTS APPENDIX
This template is available as a Google Doc in the Maker
Program Starter Kit’s Google Drive Folder. This means all
you have to do is copy it, plug in your details, and you’re
ready to go! See the appendix for details.
 
Activity 8: Share Your Vision
Step 6: Coordiate Support & Logistics65
GO TO
STEP:
USE THIS!
See Appendix
02 03 0501 08 09 100704 06FRONTCOVER CONTENTS APPENDIX
As discussed earlier, engaging your community will be crucial for building a thriving program.
Your next step will be to share a survey - along with your beautiful one-pager or website -
with potential supporters. Be sure to provide a brief introduction to your program in the body
of any email or message you send requesting support. You can create your own survey from
scratch, or get started with our template.
ACTIVITY 9: SURVEY YOUR COMMUNITY
COMMUNITY
SURVEY TEMPLATE
This is a Maker Program
Starter Kit resource,
available on Google Drive.
TIME: Varies
PEOPLE: 1-3
MATERIALS: Computer with internet access
Some of the key ways your community may be able to help include:
•
•
•
•
•
•
•
•
•
•
In addition to the immediate network at your school or organization, you may also reach out
to the following to explore possibilities for collaboration and partnership:
•
•
•
•
•
•
•
•
•
Volunteering (extra hands on deck during program)
Technology Instruction
Guest speaking
Mentorship for projects
Event organization
Outreach and promotion
Donating equipment and materials
Photography and/or videography
Writing an article about your program
Grant funding and monetary donations
Local library youth department
Boys and Girls Club
Girl Scouts
Boy Scouts
YMCA youth services
Youth Groups
College students (education students in particular may be great volunteers!)
Corporate partners (may be willing to donate goods/services)
Business Leaders & Chamber of Commerce
People
will want
to help!
Don’t be
afraid to
ask for
support.
Activity 9: Survey Your Community
Step 6: Coordiate Support & Logistics66
GO TO
STEP:
02 03 0501 08 09 100704 06FRONTCOVER CONTENTS APPENDIX
This template is available as a Google Doc in the Maker
Program Starter Kit’s Google Drive Folder. This means all
you have to do is copy it, plug in your details, and you’re
ready to go! See the appendix for details.
Activity 9: Survey Your Community
Step 6: Coordiate Support & Logistics67
GO TO
STEP:
USE THIS!
See Appendix
02 03 0501 08 09 100704 06FRONTCOVER CONTENTS APPENDIX
SPACE
When it comes to making, space matters. Do you have access to electricity? Wifi? Will using a
loud drill or vacuum disturb people in the next room? Will direct sunlight damage your projects?
There are many things to consider, and most depend on what you’re doing. For the most part,
you’ll simply have to use your best judgement, but there also are many fantastic resources to
help you avoid common mistakes as you get started.
MAKER ED RESOURCE
LIBRARY
Spaces & Places
http://autode.sk/MakerSpaces
PLACES
YouMakerspace Playbook,
pages 5-8
http://autode.sk/
MakerspacePlaybook
PLACES TO MAKE
Youth Makerspace Playbook,
pages 10-26
http://autode.sk/
MakerspacePlaybook
SHAPING THE LEARNING
ENVIRONMENT
Chapter 9, Invent to Learn
THE PHILOSOPHY
OF EDUCATIONAL
MAKERSPACES
Part 1 of Making an Educational
Maker Space
http://autode.sk/EdMakerspace
INFORMAL LEARNING
ENVIRONMENTS FOR
LIBRARIES
YALSA Making Playbook, page 7
http://autode.sk/YALSAmaking
Step 6: Coordiate Support & Logistics68
GO TO
STEP:
02 03 0501 08 09 100704 06FRONTCOVER CONTENTS APPENDIX
SAFETY CONSIDERATIONS
Makerspace Playbook, pages
13-16
http://autode.sk/
MakerspacePlaybook
SAMPLE LIABILITY
WAIVER
Makerspace Playbook, page 66
http://autode.sk/
MakerspacePlaybook
TIPS FOR TAKING APART
ELECTRONICS
Youth Makerspace Playbook,
pages 68-69
http://autode.sk/
YouthMakerPlaybook
SAFETY
Safety and liability are important considerations for your program. Your number one concern
should always be providing a safe environment for your participants. Be aware of the hazards
involved with using tools and equipment and take appropriate precautions. Please be sure all
of Makerspace users (of all ages) are properly trained in safely operating tools and machinery
before using them. It’s also a good idea to clearly post safety rules and requirements in your
makerspace. Here are some starter resources to help make sure you and your students are safe
during your program.
Step 6: Coordiate Support & Logistics69
GO TO
STEP:
02 03 0501 08 09 100704 06FRONTCOVER CONTENTS APPENDIX
ORGANIZING PEOPLE
As discussed earlier, finding the right people to help support and facilitate your program will
be a crucial step toward success. You’ll need people who can help with the following:
•
•
•
•
•
•
Here are some fantastic resources to help you build and maintain a great team:
Instruction and coaching
Logistics and scheduling
Equipment maintenance and materials purchasing
Budgeting and fundraising
Marketing and recruitment
Coaching and encouragement
SAMPLE JOB
DESCRIPTIONS FOR
VOLUNTEERS AND
MEMBERS
Maker Club Playbook,
pages 54-55 http://autode.sk/
MakerClubPlaybook
GETTING BUY-IN
YALSA Making Toolkit, page 8
http://autode.sk/YALSAmaking
SAMPLE EMAILS
Maker Club Playbook,
pages 68-77
http://autode.sk/
MakerClubPlaybook
PEOPLE & PARTNERS
Makerspace Playbook, pages
52-57
http://autode.sk/
MakerspacePlaybook
TIPS FOR MENTORS
Maker Club Playbook,
pages 20-22; 52
http://autode.sk/
MakerClubPlaybook
MAKER ROLES
Makerspace Playbook,
pages 17-20
http://autode.sk/
MakerspacePlaybook
Step 6: Coordiate Support & Logistics70
GO TO
STEP:
02 03 0501 08 09 100704 06FRONTCOVER CONTENTS APPENDIX
FUNDING AND BUDGET
There are many approaches to making, and many of them are relatively inexpensive to pursue.
At some point, however, you’ll likely want to find additional financial support. Grants, local
companies, crowdfunding platforms and fundraising drives can all be great ways to get started.
The below resources can help you create a realistic budget, reduce costs and find financial
support to get your program off the ground.
GETTING BUY-IN FOR
YOUR MAKERSPACE
http://autode.sk/getbuyin
LIST OF TOOLS &
MATERIALS
Cost breakdown
http://autode.sk/MakerTools
CHECKLIST FOR GRANT
PLANNING AND
DEVELOPMENT
Makerspace Playbook,
pages 43-44
http://autode.sk/
MakerspacePlaybook
LIST OF GRANTS FOR
MAKERSPACE SCHOOLS
http://makergrants.blogspot.
com/
SAMPLE BUDGET
Maker Club Playbook, page 53
http://autode.sk/
MakerClubPlaybook
DONORS CHOOSE
Crowdfunding for your program
https://www.donorschoose.org/
SIX STRATEGIES
FOR FUNDING A
MAKERSPACE
http://autode.sk/
FundMakerspace
FUNDING YOUR
MAKERSPACE
http://autode.sk/
FundMakerspace2
LIST OF AFTER-SCHOOL
PROGRAM FUNDERS
By Sphero
http://autode.sk/SpheroFunders
Step 6: Coordiate Support & Logistics71
GO TO
STEP:
02 03 0501 08 09 100704 06FRONTCOVER CONTENTS APPENDIX
STEP 7
MARKET
YOUR
PROGRAM
Step 7: Market Your Program72
GO TO
STEP:
02 03 05 0601 08 09 1004 07FRONTCOVER CONTENTS APPENDIX
STEP 7: MARKET YOUR PROGRAM
Unless you’re a teacher with a classroom of students, you’ll probably need to do some legwork
to recruit participants to your program. Planning the nuts and bolts of your program can be so
exciting that recruitment is often overlooked. Creating a plan to get participants in the door
and keep them coming back is as important as choosing the right equipment and volunteers.
Here are a few common ways maker educators recruit program participants:
•
•
	•
	•
•
•
•
•
•
•
Create a survey to collect contact information for interested participants.
Attend a local Maker Faire where you might:
	 Set up a booth to advertise your maker program
	 Distribute flyers or balloons to participants
Use Twitter, Facebook, Instagram and other social media platforms to share your 		
program with local educators and youth organizers.
Speak at conferences, networking events, and schools
Set up an information table at a local school; this can be particularly effective during the
lunch hour.
Use “guerilla marketing” tactics like chalk stencils to share information about your program
in locations frequented by youth and parents.
Create posters, postcards, flyers, sticker and distribute them to teachers, parents, and
community partners.
Engage your school, organization, volunteer and team to help distribute promotional
materials and recruit.
RECRUITMENT
Step 7: Market Your Program73
GO TO
STEP:
02 03 05 0601 08 09 1004 07FRONTCOVER CONTENTS APPENDIX
Intrinsic Motivation
A best-case scenario for a maker program is to be working with students who are intrinsically
motivated to take part. Some of your students will have a deep-seated interest in one or more
technologies that will keep them coming back class after class. Other students will require
more prompting. For learners without a natural interest in technology, problem-based learning
can be a fantastic tool to foster intrinsic interest in your program. Even for students as young
as 5 years old, the opportunity to use a new tool or technology to address a real-world problem
can be a powerful and life-changing experience.
Social Motivation
For middle school and high school students in particular, social motivation is a powerful tool.
Teamwork that requires the full participation of all members of the group can help engage the
full class. This approach is most effective in programs that are at least partially student-lead.
School Credit
Academically-driven students will be more likely to participate fully if they are able to receive
school credit for your program.
Competitions/Contests
Competition for small prizes can be a fun way to lighten the mood and encourage engagement,
particularly for group work. Applied learning opportunities that enable students to develop
and pitch solutions to real companies is a great way to not only motivate engagement from
students, but to also involve the broader community in your program.
COMMON METHODS TO
MOTIVATE PARTICIPATION
“HOW A BIGGER PURPOSE
CAN MOTIVATE STUDENTS
TO LEARN”
By KQED’s Mindshift team
http://bit.ly/
PurposeLearning
Step 7: Market Your Program74
GO TO
STEP:
02 03 05 0601 08 09 1004 07FRONTCOVER CONTENTS APPENDIX
Students Pay
Participants who are required to pay for a program are more likely to attend. Although free
programs can reduce barriers to entry, they often result in overblown registration numbers
that make them difficult to plan.
Application-Only
A selective application process can increase the perceived value of a program for participants
and increase attendance and participation.
Stipends
Some programs - particularly those targeting low-income and at-risk populations - have found
success with providing stipends to students who successfully complete programs. This means
participants are paid a predefined amount of money when they complete the program. This
approach enables learners who may otherwise need to work to make time for your program
(and valuable skill building!).
Step 7: Market Your Program75
GO TO
STEP:
02 03 05 0601 08 09 1004 07FRONTCOVER CONTENTS APPENDIX
One thing you can do to improve your chances of recruiting participants to your program is to
create a marketing plan that outlines your outreach efforts. You can get your plan started by
using the Marketing Plan Worksheet in the Maker Program Starter Kit.
ACTIVITY 10: CREATE A MARKETING PLAN
TIME: 2-4 hours
PEOPLE: 1
MATERIALS: Marketing Plan Worksheet and computer with internet
SUPERINTENDENT’S
GUIDE TO SOCIAL MEDIA
Check out this social
media guide at
http://bit.ly/
makermarketing
Activity 10: Create a Marketing Plan
MARKETING PLAN
WORKSHEET
This is a Maker Program
Starter Kit Resource,
available in the appendix
and on Google Drive.
Step 7: Market Your Program76
GO TO
STEP:
02 03 05 0601 08 09 1004 07FRONTCOVER CONTENTS APPENDIX


   Potential   Participants     Parents     Teachers     Youth   Organizations 
   _________________     ___________     ____________     _________________ 
 
 
   Email     Phone   Calls     Local   events 
   Mail     Facebook     Newspapers 
   Radio     Twitter     School   Presentation 
   Flyers     Instagram     Presentations   to   community   groups 
   _______________     __________________        ___________________________ 
   _______________        __________________        ___________________________ 
 
 
   Online   paid   advertising     Graphic   Design     Printing 
   Offline   paid   advertising     Video   Production     Photography 
   ______________________     ___________________     ______________________ 
   ______________________     ___________________     ______________________ 
 
 
Add your own ideas in the
blanks!
Activity 10: Create a Marketing Plan
Step 7: Market Your Program77
GO TO
STEP:
USE THIS!
See Appendix
02 03 05 0601 08 09 1004 07FRONTCOVER CONTENTS APPENDIX
STEP 8
PREP FOR
INCLUSIVITY
Step 8: Prep for Inclusivity78
GO TO
STEP:
02 03 05 0601 09 100704 08FRONTCOVER CONTENTS APPENDIX
Making is a fun and rewarding endeavor that should be available to all, regardless of gender,
age or physical or cognitive difference. One of the powerful things about the creative nature
of making is that it’s extremely well-suited for adaptation to meet the needs of a wide variety
of participants. Step 8 will take you through ways to weave inclusivity and adaptability into
your program.
STEP 8: PREP FOR INCLUSIVITY
WORKING WITH YOUTH WITH DISABILITIES
If possible, involve the learner in the adaptation process. It’s okay to describe the activity
and ask the learner for suggestions. Some students with disabilities will be eager to
participate in the adaptation process; others may require a great deal of encouragement
to even try the activity. In the latter case, you’ll need to be more proactive in preparing a
potential solution the learner can get excited about ahead of time.
Explore tools or technologies you might use to adapt the activity for the learner. This is a
maker program, after all!
If it makes sense, find ways to use pair and group work to enable peers to support learners
with disabilities.
People who live with disabilities spend a great deal of time inventing solutions to overcome
the unique barriers in their lives. This can range from wheelchair adaptations to navigate a
space more effectively to original approaches to work and learning.
In many ways, people with disabilities are natural makers.
As a maker educator, you can approach disabilities as an opportunity for creativity. With the
right mindset, you can adapt any activity for nearly any learner. Here are a few tips to help do
so:
•
•
•
ENCOURAGING
NEURODIVERSITY IN
YOUR MAKERSPACE
http://autode.sk/
neurodiversity
MAKERSPACES FOR
STUDENTS WITH SPECIAL
NEEDS
http://autode.sk/
MakerSpecialNeeds
Step 8: Prep for Inclusivity79
GO TO
STEP:
02 03 05 0601 09 100704 08FRONTCOVER CONTENTS APPENDIX
Photo Credit: KIDmob
PROGRAM SPOTLIGHT: SUPERHERO CYBORGS
Superhero Cyborgs worked with kids with upper limb differences to design and prototype their own
body modifications. Participants learned to use technology ranging from 3D printing, modeling,
and scanning to plaster casting, fabrics, and electronics, before creating their own super powered
device! This workshop seeks to reframe disability as an opportunity, asking the question: if not a
hand, then what? Participants drove their designs, with the support of professional designers and
engineers who asked great questions to guide them through the process. It’s a challenge that kids
care about, and helps them to understand the process and build confidence in coming up with ideas
and them bringing those ideas to reality.
Step 8: Prep for Inclusivity80
GO TO
STEP:
02 03 05 0601 09 100704 08FRONTCOVER CONTENTS APPENDIX
You don’t even know what
an impact this has had on
Sydney she feels so big right
now! I don’t know if that is the
right word. She has so much
confidence in herself now. She
feels smart and that she can
really make a difference. She
gave her siblings, dad and
neighbor a presentation about
what she learned. It was great
to see! Thank you to all of you
for the opportunity she is truly
a changed girl! Thank you thank
you thank you.
-Sydney’s Mother
Sydney
SUPERHERO CYBORGS
Kieran can not stop talking
about the wonder of so much he
experienced with all of you, as
he labeled you on the way home
his “ personal tech family” There
is no words or amount of money,
I could have paid for all you gave
to him and making him feel such
strong confidence as he states
now, he also claims is very
knowledgeable now in the tech
world because of all you willing
to share and teach him.
-Kieran’s Grandmother
KIERAN
SUPERHERO CYBORGS
Jordan literally told me
Superhero Cyborgs has changed
her life and how she thinks
about things. It’s an awesome
awakening. I told Kate [an
organizer] before the event
that Jordan was a direction
follower, she didn’t build stuff
beyond what was offered in
the directions. She’s thinking
outside of the box now. And I’m
super proud.
-Jordan’s Mother
JORDAN
SUPERHERO CYBORGS
SUPERHERO STORIES:
Step 8: Prep for Inclusivity81
GO TO
STEP:
02 03 05 0601 09 100704 08FRONTCOVER CONTENTS APPENDIX
“We need to ask students
which are the problems
they want to solve and we,
educators, have to make
sure we create the spaces
for them do it.”
- Rafranz Davis, Executive Director of Professional and Digital Learning for
Lufkin ISD
Step 8: Prep for Inclusivity82
GO TO
STEP:
02 03 05 0601 09 100704 08FRONTCOVER CONTENTS APPENDIX
Another crucial consideration for your program is how to foster a culture of inclusivity for
all genders and ethnicities. Since the 1950s, maker toys like robotics kits and remote-control
cars have been traditionally marketed toward boys. Be intentional about providing counter-
examples to help your students understand that anyone can be a maker, scientist, engineer or
technologist.
Here are a few ways you can support diversity and inclusivity in your program:
•
•
•
•
Choose gender-neutral activities. Particularly for younger learners, selecting activities that
don’t easily fall into “for boys” or “for girls” categories will encourage full engagement from
participants of both genders.
Include women and people of color as mentors or speakers in your program whenever
possible.
Be intentional in your choice of activities.
Share stories of diverse makers from a variety of backgrounds. People you might feature
include:
•
•
•
•
•
•
•
•
•
•
•
•
•
DIVERSITY
Mae Jemision, the first African-American woman in space
Marissa Mayer, President & CEO of Yahoo
Ime Archibong, Manager of Strategic Partnerships at Facebook
Reshma Saujani, Founder of Girls Who Code
Luis Von Ahn, CEO & Co-Founder of Duolingo
Megan Smith, Chief Technology Officer of the United States
Timothy Campos, Chief Information Officer at Facebook
Carolina Huaranca, Entrepreneur in Residence @KaporCSI
Malik Ducard, Director of Content Partnerships at Youtube
Ann Wojcicki, Co-Founder & CEO of 23andMe
Lixia Zhang, Profession of Computer Science at UCLA
Erica Joy Baker, Senior Engineer at Slack
Cynthia Breazeal, Co-Director of the Center for Future Storytelling at MIT
DIVERSITY DOES NOT
HAPPEN BY ACCIDENT
http://autode.sk/
NotByAccident
BRIDGING THE GAP
BETWEEN GIRLS AND
STEM
http://autode.sk/
GirlsAndSTEM
MAKING INCLUSIVITY
Meaningful Making,
page 50
http://autode.sk/
MakingInclusivity
COMPUTER SCIENCE
WOMEN’S NETWORK
https://www.cs.purdue.
edu/cswn/
Step 8: Prep for Inclusivity83
GO TO
STEP:
02 03 05 0601 09 100704 08FRONTCOVER CONTENTS APPENDIX
STEP 9
DIVE IN
Step 9: Dive In84
GO TO
STEP:
02 03 05 0601 08 100704 09FRONTCOVER CONTENTS APPENDIX
STEP 9: DIVE IN
A key thing to keep in the back of your mind as you run your program is documentation. This
will enable you to reflect on what worked (or didn’t work) during your program launch and
make improvements in the future. Here are a few tips to help:
Keep a Journal
It’s surprising how much you can forget throughout the course of a program. Whether you take
audio notes on your smartphone or scribble on loose-leaf paper, taking daily notes will be a
tremendous asset as you plan for your next program.
For example:
•
•
Track Your Indicators of Success
If you used the Indicators of Success worksheet, make sure you don’t forget to follow through
on the methods you designed
Take Photos and Videos of Everything
Yes, you definitely want to capture smiling faces and participants at work, but also remember
to document the things they make during your program. If you have time, take a minute or two
after each class to capture pictures of participant brainstorming notes, worksheets, projects
and prototypes. These will also help inform the development of your next program. Creating
short videos that overview your projects and program can also be helpful for future recruitment.
If you’re too busy to make this happen or are unfamiliar with video editing, consider having a
few of your students take this on.
“Brainstorming activity ran over. Need 30 minutes, not 20.”
“Student really enjoyed the TED talk. Def use this again!”
DOCUMENTING YOUR PROGRESS DOCUMENTATON
Explore more ways to
document projects in the
Makerspace Playbook,
pages 45-46
http://autode.sk/
MakerspacePlaybook
Step 9: Dive In85
GO TO
STEP:
02 03 05 0601 08 100704 09FRONTCOVER CONTENTS APPENDIX
At one point or another, you will get stuck. Good thing there’s a community for that! Many of
them, in fact...
Online Communities, Groups & Forums
•
•
•
•
•
•
•
WHAT TO DO WHEN YOU GET STUCK
Maker Ed Google Group:
https://plus.google.com/u/0/communities/108516741770696736815
The IDEO Teachers Guild:
https://collaborate.teachersguild.org/
K-12 Fab Labs and Makerspaces Google Group:
https://sites.google.com/site/k12makers/
Maker Movement EDU Google Group:
https://plus.google.com/collection/oE_wZ
Fabfoundation.org
International Society for Technology in Education:
iste.org
Fablearn.Stanford.edu/conferences
Skill-Specific Forums:
•
•
•
•
•
•
•
General forum for Autodesk products: forums.autodesk.com/
Instructables forums: http://www.instructables.com/community/
Autodesk Fusion 360 Forum:
https://forums.autodesk.com/t5/fusion-360/ct-p/1234
Community for Autodesk Media and Entertainment Products:
area.autodesk.com/
Sparkfun forum for electronics projects: https://forum.sparkfun.com/
Wiki for the Stanford Design School (d.school) K-12 Lab Community:
https://dschool.stanford.edu/groups/k12/search/?tag=educator+workshop
Scratch Community: scratched.gse.harvard.edu/discussions
Adobe Community: https://edex.adobe.com/search/global/?category=teach
Step 9: Dive In86
GO TO
STEP:
02 03 05 0601 08 100704 09FRONTCOVER CONTENTS APPENDIX
Local Groups & Meetups:
•
•
•
•
•
•
•
•
•
•
Search for “maker education” on Meetup.com to find related groups near you
Reach out to a local Maker Corps site:
http://makered.org/makercorps/about-maker-corps/program-partners/
Search the Design Thinking in Schools Map for local programs and resources:
www.designthinkinginschools.org/
Search The Maker Map for nearby makerspaces and related resources:
http://themakermap.com/
See if there’s a Fablearn K-12 Labs near you: http://fablearn.org/conferences/
Digital Harbor Maker Ed Meetups, Baltimore, MD:
http://www.meetup.com/DigitalHarbor
Bay Area Maker Educators Google Group:
https://plus.google.com/communities/112974120022463718222
Bay Area Youth and DIY Education Facebook Group:
https://www.facebook.com/groups/286189014822596/
Vancouver Maker Education Meetup:
http://www.meetup.com/Vancouver-Maker-Education-Community/
Remake Learning in Pittsburg: remakelearning.org/meetups/
Conferences
•
•
•
•
•
Remake Education, Sonoma CA: www.remakeeducation.org/
Maker Faire, locations around the world: makerfaire.com/
SXSWedu, Austin, TX: sxswedu.com
Maker Ed’s Maker Educator Convening, Oakland, CA: http://makered.org/pd-events
FabLearn: Palo Alto, CA: http://fablearn.org/conferences/
Of course, you don’t have to wait until you get stuck to take part. Introduce yourself on forums
and, if possible, meet a few other educators in person. Especially if you’re building your maker
program alone, you’ll benefit from the added support.
INFOGRAPHIC OF TOP
EDTECH CONFERENCES
by Edsurge
http://autode.sk/
EdtechConferences
Step 9: Dive In87
GO TO
STEP:
02 03 05 0601 08 100704 09FRONTCOVER CONTENTS APPENDIX
STEP 10
REFLECT &
REVISE
Step 10: Relfect & Revise88
GO TO
STEP:
02 03 05 0601 08 090704 10FRONTCOVER CONTENTS APPENDIX
Reflection is as important for you as it is for your students! After your program comes to an end
(and you’ve taken a nice, recuperative break), remember to return to your notes, Indicators of
Success Worksheet, and any surveys that were completed throughout the program to identify
your successes and opportunities for improvement. Even if you don’t plan to run another maker
program for a while, take time to reflect within a few weeks of your program’s conclusion.
STEP 10: REFLECT AND REVISE
One particularly generative activity that can be conducted with your team (or with students
in small groups) at the conclusion of your program is “I Like, I Wish, What If.” This format
of debriefing guides groups in a review of the successes and challenges of your program
and opportunities for future changes. Follow the instructions from Stanford d.school partner
ILikeIWish.org to complete this activity.
ACTIVITY 11: I LIKE, I WISH, WHAT IF
TIME: 1-3 hours
PEOPLE: 2-10, core team
MATERIALS: paper and pencils
“I LIKE, I WISH, WHAT IF”
INSTRUCTIONS
http://ilikeiwish.org/
Activity 11: I like, I wish, What if
Step 10: Relfect & Revise89
GO TO
STEP:
02 03 05 0601 08 090704 10FRONTCOVER CONTENTS APPENDIX
NEXT
STEPS
Conclusion & Next Steps90
GO TO
STEP:
FRONTCOVER CONTENTS APPENDIX 02 03 04 05 0601 08 09 1007
Maker program-starter-kit (Autodesk)

Contenu connexe

En vedette

24h.com.vn - Tai Lieu KH
24h.com.vn - Tai Lieu KH24h.com.vn - Tai Lieu KH
24h.com.vn - Tai Lieu KHPhi Jack
 
00164813
0016481300164813
00164813egsllp
 
Merit group general
Merit group   generalMerit group   general
Merit group generalMeritGroup
 
Dave Kissel - Zocalo Group
Dave Kissel - Zocalo GroupDave Kissel - Zocalo Group
Dave Kissel - Zocalo Grouphjmorris
 
Почта ukr.net
 Почта ukr.net Почта ukr.net
Почта ukr.netNataKvasha
 
iOS Development with RubyMotion
iOS Development with RubyMotioniOS Development with RubyMotion
iOS Development with RubyMotionInvisiblelines
 
From Sage 500 to 1000 ... Performance Testing myths exposed
From Sage 500 to 1000 ... Performance Testing myths exposedFrom Sage 500 to 1000 ... Performance Testing myths exposed
From Sage 500 to 1000 ... Performance Testing myths exposedTrust IV Ltd
 
OCRFeeder (FOSDEM 2010)
OCRFeeder (FOSDEM 2010)OCRFeeder (FOSDEM 2010)
OCRFeeder (FOSDEM 2010)Igalia
 
Dominic Bortolussi's Lean startup lessons
Dominic Bortolussi's Lean startup lessons Dominic Bortolussi's Lean startup lessons
Dominic Bortolussi's Lean startup lessons Jason Gendreau
 
Canvas brealtime[3]
Canvas brealtime[3]Canvas brealtime[3]
Canvas brealtime[3]cpxmarketing
 
iresearch&多盟:2012年第一季度移动互联网行业监测报告-移动应用广告部分
iresearch&多盟:2012年第一季度移动互联网行业监测报告-移动应用广告部分iresearch&多盟:2012年第一季度移动互联网行业监测报告-移动应用广告部分
iresearch&多盟:2012年第一季度移动互联网行业监测报告-移动应用广告部分中文互联网数据研究资讯中心--199it
 
Combining archetypes with FHIR in future-proof health information systems
Combining archetypes with FHIR in future-proof health information systemsCombining archetypes with FHIR in future-proof health information systems
Combining archetypes with FHIR in future-proof health information systemsyampeku
 
Streams API (Web Engines Hackfest 2015)
Streams API (Web Engines Hackfest 2015)Streams API (Web Engines Hackfest 2015)
Streams API (Web Engines Hackfest 2015)Igalia
 
1 QITCOM 2012 - Nilo Mitra (Iptv)
1  QITCOM 2012 - Nilo Mitra  (Iptv)1  QITCOM 2012 - Nilo Mitra  (Iptv)
1 QITCOM 2012 - Nilo Mitra (Iptv)QITCOM
 

En vedette (18)

Plastic Mulches & Row Covers on Growth & Production of Summer Squash; Gardeni...
Plastic Mulches & Row Covers on Growth & Production of Summer Squash; Gardeni...Plastic Mulches & Row Covers on Growth & Production of Summer Squash; Gardeni...
Plastic Mulches & Row Covers on Growth & Production of Summer Squash; Gardeni...
 
24h.com.vn - Tai Lieu KH
24h.com.vn - Tai Lieu KH24h.com.vn - Tai Lieu KH
24h.com.vn - Tai Lieu KH
 
00164813
0016481300164813
00164813
 
Merit group general
Merit group   generalMerit group   general
Merit group general
 
Dave Kissel - Zocalo Group
Dave Kissel - Zocalo GroupDave Kissel - Zocalo Group
Dave Kissel - Zocalo Group
 
Почта ukr.net
 Почта ukr.net Почта ukr.net
Почта ukr.net
 
iOS Development with RubyMotion
iOS Development with RubyMotioniOS Development with RubyMotion
iOS Development with RubyMotion
 
From Sage 500 to 1000 ... Performance Testing myths exposed
From Sage 500 to 1000 ... Performance Testing myths exposedFrom Sage 500 to 1000 ... Performance Testing myths exposed
From Sage 500 to 1000 ... Performance Testing myths exposed
 
OCRFeeder (FOSDEM 2010)
OCRFeeder (FOSDEM 2010)OCRFeeder (FOSDEM 2010)
OCRFeeder (FOSDEM 2010)
 
Oipf
OipfOipf
Oipf
 
Dominic Bortolussi's Lean startup lessons
Dominic Bortolussi's Lean startup lessons Dominic Bortolussi's Lean startup lessons
Dominic Bortolussi's Lean startup lessons
 
NaRFU mai 2010
NaRFU mai 2010NaRFU mai 2010
NaRFU mai 2010
 
Canvas brealtime[3]
Canvas brealtime[3]Canvas brealtime[3]
Canvas brealtime[3]
 
iresearch&多盟:2012年第一季度移动互联网行业监测报告-移动应用广告部分
iresearch&多盟:2012年第一季度移动互联网行业监测报告-移动应用广告部分iresearch&多盟:2012年第一季度移动互联网行业监测报告-移动应用广告部分
iresearch&多盟:2012年第一季度移动互联网行业监测报告-移动应用广告部分
 
Quasar - Credentials
Quasar - CredentialsQuasar - Credentials
Quasar - Credentials
 
Combining archetypes with FHIR in future-proof health information systems
Combining archetypes with FHIR in future-proof health information systemsCombining archetypes with FHIR in future-proof health information systems
Combining archetypes with FHIR in future-proof health information systems
 
Streams API (Web Engines Hackfest 2015)
Streams API (Web Engines Hackfest 2015)Streams API (Web Engines Hackfest 2015)
Streams API (Web Engines Hackfest 2015)
 
1 QITCOM 2012 - Nilo Mitra (Iptv)
1  QITCOM 2012 - Nilo Mitra  (Iptv)1  QITCOM 2012 - Nilo Mitra  (Iptv)
1 QITCOM 2012 - Nilo Mitra (Iptv)
 

Similaire à Maker program-starter-kit (Autodesk)

International Agile Product Owner Foundation - Study guide (1).pdf
International Agile Product Owner Foundation - Study guide (1).pdfInternational Agile Product Owner Foundation - Study guide (1).pdf
International Agile Product Owner Foundation - Study guide (1).pdfa_xavier5
 
How to Launch Mobile Apps by Oracle Director of Product Manager
How to Launch Mobile Apps by Oracle Director of Product ManagerHow to Launch Mobile Apps by Oracle Director of Product Manager
How to Launch Mobile Apps by Oracle Director of Product ManagerProduct School
 
Tech Startup Newsletter by Slidesgo .pptx
Tech Startup Newsletter by Slidesgo .pptxTech Startup Newsletter by Slidesgo .pptx
Tech Startup Newsletter by Slidesgo .pptxRodrigoMoura694349
 
Horror Film Project Proposal by Slidesgo.pptx
Horror Film Project Proposal by Slidesgo.pptxHorror Film Project Proposal by Slidesgo.pptx
Horror Film Project Proposal by Slidesgo.pptxDebyHelma1
 
[DevRelCon Earth 2020] Developers, be the evangelist
[DevRelCon Earth 2020] Developers, be the evangelist[DevRelCon Earth 2020] Developers, be the evangelist
[DevRelCon Earth 2020] Developers, be the evangelistWoohyeok Kim
 
Industrial Preliminary Project by Slidesgo.pptx
Industrial Preliminary Project by Slidesgo.pptxIndustrial Preliminary Project by Slidesgo.pptx
Industrial Preliminary Project by Slidesgo.pptxAhmedRamzy389488
 
Evolving the Creative Process
Evolving the Creative ProcessEvolving the Creative Process
Evolving the Creative Processcreed
 
horror-film-fearless-project-proposal.pptx
horror-film-fearless-project-proposal.pptxhorror-film-fearless-project-proposal.pptx
horror-film-fearless-project-proposal.pptxthevdiya451
 
leadershiggcggvvbhhp-seminar-proposal.pptx
leadershiggcggvvbhhp-seminar-proposal.pptxleadershiggcggvvbhhp-seminar-proposal.pptx
leadershiggcggvvbhhp-seminar-proposal.pptxFelipeVanegas14
 
Tech Startup Newsletter by Slidesgo .pptx
Tech Startup Newsletter by Slidesgo .pptxTech Startup Newsletter by Slidesgo .pptx
Tech Startup Newsletter by Slidesgo .pptxnenengwindayati
 
Arnold Serrano (Chapter 12)
Arnold Serrano (Chapter 12)Arnold Serrano (Chapter 12)
Arnold Serrano (Chapter 12)Jaypee Tan
 
AI Tech Project free template by Slidesgo.pptx
AI Tech Project  free template by Slidesgo.pptxAI Tech Project  free template by Slidesgo.pptx
AI Tech Project free template by Slidesgo.pptxhalaswamyHs
 
Delivering beautiful software & web products efficiently 2022_Sep.pdf
Delivering beautiful software & web products efficiently 2022_Sep.pdfDelivering beautiful software & web products efficiently 2022_Sep.pdf
Delivering beautiful software & web products efficiently 2022_Sep.pdfLaSoft
 
Rewind 2022 : A Year of Resilience, Grit and Growth
Rewind 2022 : A Year of Resilience, Grit and GrowthRewind 2022 : A Year of Resilience, Grit and Growth
Rewind 2022 : A Year of Resilience, Grit and GrowthpCloudy
 
A+ Complete Study Guide by David Groth 3rd ED.pdf
A+ Complete Study Guide by David Groth 3rd ED.pdfA+ Complete Study Guide by David Groth 3rd ED.pdf
A+ Complete Study Guide by David Groth 3rd ED.pdfNamitMehta7
 
Near east university
Near east universityNear east university
Near east universityDerrickDusabe
 
How UX Research Hit It Big in Las Vegas (Melissa Schmidt and Adam Menter at E...
How UX Research Hit It Big in Las Vegas (Melissa Schmidt and Adam Menter at E...How UX Research Hit It Big in Las Vegas (Melissa Schmidt and Adam Menter at E...
How UX Research Hit It Big in Las Vegas (Melissa Schmidt and Adam Menter at E...Rosenfeld Media
 
How to create a quick start guide
How to create a quick start guideHow to create a quick start guide
How to create a quick start guideMake it Clear
 

Similaire à Maker program-starter-kit (Autodesk) (20)

International Agile Product Owner Foundation - Study guide (1).pdf
International Agile Product Owner Foundation - Study guide (1).pdfInternational Agile Product Owner Foundation - Study guide (1).pdf
International Agile Product Owner Foundation - Study guide (1).pdf
 
How to Launch Mobile Apps by Oracle Director of Product Manager
How to Launch Mobile Apps by Oracle Director of Product ManagerHow to Launch Mobile Apps by Oracle Director of Product Manager
How to Launch Mobile Apps by Oracle Director of Product Manager
 
Roadmap to Development
Roadmap to DevelopmentRoadmap to Development
Roadmap to Development
 
Tech Startup Newsletter by Slidesgo .pptx
Tech Startup Newsletter by Slidesgo .pptxTech Startup Newsletter by Slidesgo .pptx
Tech Startup Newsletter by Slidesgo .pptx
 
Horror Film Project Proposal by Slidesgo.pptx
Horror Film Project Proposal by Slidesgo.pptxHorror Film Project Proposal by Slidesgo.pptx
Horror Film Project Proposal by Slidesgo.pptx
 
[DevRelCon Earth 2020] Developers, be the evangelist
[DevRelCon Earth 2020] Developers, be the evangelist[DevRelCon Earth 2020] Developers, be the evangelist
[DevRelCon Earth 2020] Developers, be the evangelist
 
Industrial Preliminary Project by Slidesgo.pptx
Industrial Preliminary Project by Slidesgo.pptxIndustrial Preliminary Project by Slidesgo.pptx
Industrial Preliminary Project by Slidesgo.pptx
 
Evolving the Creative Process
Evolving the Creative ProcessEvolving the Creative Process
Evolving the Creative Process
 
horror-film-fearless-project-proposal.pptx
horror-film-fearless-project-proposal.pptxhorror-film-fearless-project-proposal.pptx
horror-film-fearless-project-proposal.pptx
 
leadershiggcggvvbhhp-seminar-proposal.pptx
leadershiggcggvvbhhp-seminar-proposal.pptxleadershiggcggvvbhhp-seminar-proposal.pptx
leadershiggcggvvbhhp-seminar-proposal.pptx
 
Tech Startup Newsletter by Slidesgo .pptx
Tech Startup Newsletter by Slidesgo .pptxTech Startup Newsletter by Slidesgo .pptx
Tech Startup Newsletter by Slidesgo .pptx
 
Arnold Serrano (Chapter 12)
Arnold Serrano (Chapter 12)Arnold Serrano (Chapter 12)
Arnold Serrano (Chapter 12)
 
AI Tech Project free template by Slidesgo.pptx
AI Tech Project  free template by Slidesgo.pptxAI Tech Project  free template by Slidesgo.pptx
AI Tech Project free template by Slidesgo.pptx
 
Delivering beautiful software & web products efficiently 2022_Sep.pdf
Delivering beautiful software & web products efficiently 2022_Sep.pdfDelivering beautiful software & web products efficiently 2022_Sep.pdf
Delivering beautiful software & web products efficiently 2022_Sep.pdf
 
Rewind 2022 : A Year of Resilience, Grit and Growth
Rewind 2022 : A Year of Resilience, Grit and GrowthRewind 2022 : A Year of Resilience, Grit and Growth
Rewind 2022 : A Year of Resilience, Grit and Growth
 
Clicksmart
ClicksmartClicksmart
Clicksmart
 
A+ Complete Study Guide by David Groth 3rd ED.pdf
A+ Complete Study Guide by David Groth 3rd ED.pdfA+ Complete Study Guide by David Groth 3rd ED.pdf
A+ Complete Study Guide by David Groth 3rd ED.pdf
 
Near east university
Near east universityNear east university
Near east university
 
How UX Research Hit It Big in Las Vegas (Melissa Schmidt and Adam Menter at E...
How UX Research Hit It Big in Las Vegas (Melissa Schmidt and Adam Menter at E...How UX Research Hit It Big in Las Vegas (Melissa Schmidt and Adam Menter at E...
How UX Research Hit It Big in Las Vegas (Melissa Schmidt and Adam Menter at E...
 
How to create a quick start guide
How to create a quick start guideHow to create a quick start guide
How to create a quick start guide
 

Dernier

Class 11th Physics NEET formula sheet pdf
Class 11th Physics NEET formula sheet pdfClass 11th Physics NEET formula sheet pdf
Class 11th Physics NEET formula sheet pdfAyushMahapatra5
 
Q4-W6-Restating Informational Text Grade 3
Q4-W6-Restating Informational Text Grade 3Q4-W6-Restating Informational Text Grade 3
Q4-W6-Restating Informational Text Grade 3JemimahLaneBuaron
 
The Most Excellent Way | 1 Corinthians 13
The Most Excellent Way | 1 Corinthians 13The Most Excellent Way | 1 Corinthians 13
The Most Excellent Way | 1 Corinthians 13Steve Thomason
 
Sports & Fitness Value Added Course FY..
Sports & Fitness Value Added Course FY..Sports & Fitness Value Added Course FY..
Sports & Fitness Value Added Course FY..Disha Kariya
 
Presentation by Andreas Schleicher Tackling the School Absenteeism Crisis 30 ...
Presentation by Andreas Schleicher Tackling the School Absenteeism Crisis 30 ...Presentation by Andreas Schleicher Tackling the School Absenteeism Crisis 30 ...
Presentation by Andreas Schleicher Tackling the School Absenteeism Crisis 30 ...EduSkills OECD
 
Paris 2024 Olympic Geographies - an activity
Paris 2024 Olympic Geographies - an activityParis 2024 Olympic Geographies - an activity
Paris 2024 Olympic Geographies - an activityGeoBlogs
 
Activity 01 - Artificial Culture (1).pdf
Activity 01 - Artificial Culture (1).pdfActivity 01 - Artificial Culture (1).pdf
Activity 01 - Artificial Culture (1).pdfciinovamais
 
Software Engineering Methodologies (overview)
Software Engineering Methodologies (overview)Software Engineering Methodologies (overview)
Software Engineering Methodologies (overview)eniolaolutunde
 
Unit-IV- Pharma. Marketing Channels.pptx
Unit-IV- Pharma. Marketing Channels.pptxUnit-IV- Pharma. Marketing Channels.pptx
Unit-IV- Pharma. Marketing Channels.pptxVishalSingh1417
 
Beyond the EU: DORA and NIS 2 Directive's Global Impact
Beyond the EU: DORA and NIS 2 Directive's Global ImpactBeyond the EU: DORA and NIS 2 Directive's Global Impact
Beyond the EU: DORA and NIS 2 Directive's Global ImpactPECB
 
9548086042 for call girls in Indira Nagar with room service
9548086042  for call girls in Indira Nagar  with room service9548086042  for call girls in Indira Nagar  with room service
9548086042 for call girls in Indira Nagar with room servicediscovermytutordmt
 
Explore beautiful and ugly buildings. Mathematics helps us create beautiful d...
Explore beautiful and ugly buildings. Mathematics helps us create beautiful d...Explore beautiful and ugly buildings. Mathematics helps us create beautiful d...
Explore beautiful and ugly buildings. Mathematics helps us create beautiful d...christianmathematics
 
IGNOU MSCCFT and PGDCFT Exam Question Pattern: MCFT003 Counselling and Family...
IGNOU MSCCFT and PGDCFT Exam Question Pattern: MCFT003 Counselling and Family...IGNOU MSCCFT and PGDCFT Exam Question Pattern: MCFT003 Counselling and Family...
IGNOU MSCCFT and PGDCFT Exam Question Pattern: MCFT003 Counselling and Family...PsychoTech Services
 
Ecosystem Interactions Class Discussion Presentation in Blue Green Lined Styl...
Ecosystem Interactions Class Discussion Presentation in Blue Green Lined Styl...Ecosystem Interactions Class Discussion Presentation in Blue Green Lined Styl...
Ecosystem Interactions Class Discussion Presentation in Blue Green Lined Styl...fonyou31
 
Student login on Anyboli platform.helpin
Student login on Anyboli platform.helpinStudent login on Anyboli platform.helpin
Student login on Anyboli platform.helpinRaunakKeshri1
 
Interactive Powerpoint_How to Master effective communication
Interactive Powerpoint_How to Master effective communicationInteractive Powerpoint_How to Master effective communication
Interactive Powerpoint_How to Master effective communicationnomboosow
 
SOCIAL AND HISTORICAL CONTEXT - LFTVD.pptx
SOCIAL AND HISTORICAL CONTEXT - LFTVD.pptxSOCIAL AND HISTORICAL CONTEXT - LFTVD.pptx
SOCIAL AND HISTORICAL CONTEXT - LFTVD.pptxiammrhaywood
 
Z Score,T Score, Percential Rank and Box Plot Graph
Z Score,T Score, Percential Rank and Box Plot GraphZ Score,T Score, Percential Rank and Box Plot Graph
Z Score,T Score, Percential Rank and Box Plot GraphThiyagu K
 
Grant Readiness 101 TechSoup and Remy Consulting
Grant Readiness 101 TechSoup and Remy ConsultingGrant Readiness 101 TechSoup and Remy Consulting
Grant Readiness 101 TechSoup and Remy ConsultingTechSoup
 

Dernier (20)

Class 11th Physics NEET formula sheet pdf
Class 11th Physics NEET formula sheet pdfClass 11th Physics NEET formula sheet pdf
Class 11th Physics NEET formula sheet pdf
 
Q4-W6-Restating Informational Text Grade 3
Q4-W6-Restating Informational Text Grade 3Q4-W6-Restating Informational Text Grade 3
Q4-W6-Restating Informational Text Grade 3
 
The Most Excellent Way | 1 Corinthians 13
The Most Excellent Way | 1 Corinthians 13The Most Excellent Way | 1 Corinthians 13
The Most Excellent Way | 1 Corinthians 13
 
Sports & Fitness Value Added Course FY..
Sports & Fitness Value Added Course FY..Sports & Fitness Value Added Course FY..
Sports & Fitness Value Added Course FY..
 
Presentation by Andreas Schleicher Tackling the School Absenteeism Crisis 30 ...
Presentation by Andreas Schleicher Tackling the School Absenteeism Crisis 30 ...Presentation by Andreas Schleicher Tackling the School Absenteeism Crisis 30 ...
Presentation by Andreas Schleicher Tackling the School Absenteeism Crisis 30 ...
 
Paris 2024 Olympic Geographies - an activity
Paris 2024 Olympic Geographies - an activityParis 2024 Olympic Geographies - an activity
Paris 2024 Olympic Geographies - an activity
 
Activity 01 - Artificial Culture (1).pdf
Activity 01 - Artificial Culture (1).pdfActivity 01 - Artificial Culture (1).pdf
Activity 01 - Artificial Culture (1).pdf
 
Software Engineering Methodologies (overview)
Software Engineering Methodologies (overview)Software Engineering Methodologies (overview)
Software Engineering Methodologies (overview)
 
Unit-IV- Pharma. Marketing Channels.pptx
Unit-IV- Pharma. Marketing Channels.pptxUnit-IV- Pharma. Marketing Channels.pptx
Unit-IV- Pharma. Marketing Channels.pptx
 
Beyond the EU: DORA and NIS 2 Directive's Global Impact
Beyond the EU: DORA and NIS 2 Directive's Global ImpactBeyond the EU: DORA and NIS 2 Directive's Global Impact
Beyond the EU: DORA and NIS 2 Directive's Global Impact
 
9548086042 for call girls in Indira Nagar with room service
9548086042  for call girls in Indira Nagar  with room service9548086042  for call girls in Indira Nagar  with room service
9548086042 for call girls in Indira Nagar with room service
 
Explore beautiful and ugly buildings. Mathematics helps us create beautiful d...
Explore beautiful and ugly buildings. Mathematics helps us create beautiful d...Explore beautiful and ugly buildings. Mathematics helps us create beautiful d...
Explore beautiful and ugly buildings. Mathematics helps us create beautiful d...
 
IGNOU MSCCFT and PGDCFT Exam Question Pattern: MCFT003 Counselling and Family...
IGNOU MSCCFT and PGDCFT Exam Question Pattern: MCFT003 Counselling and Family...IGNOU MSCCFT and PGDCFT Exam Question Pattern: MCFT003 Counselling and Family...
IGNOU MSCCFT and PGDCFT Exam Question Pattern: MCFT003 Counselling and Family...
 
Ecosystem Interactions Class Discussion Presentation in Blue Green Lined Styl...
Ecosystem Interactions Class Discussion Presentation in Blue Green Lined Styl...Ecosystem Interactions Class Discussion Presentation in Blue Green Lined Styl...
Ecosystem Interactions Class Discussion Presentation in Blue Green Lined Styl...
 
Student login on Anyboli platform.helpin
Student login on Anyboli platform.helpinStudent login on Anyboli platform.helpin
Student login on Anyboli platform.helpin
 
Interactive Powerpoint_How to Master effective communication
Interactive Powerpoint_How to Master effective communicationInteractive Powerpoint_How to Master effective communication
Interactive Powerpoint_How to Master effective communication
 
Código Creativo y Arte de Software | Unidad 1
Código Creativo y Arte de Software | Unidad 1Código Creativo y Arte de Software | Unidad 1
Código Creativo y Arte de Software | Unidad 1
 
SOCIAL AND HISTORICAL CONTEXT - LFTVD.pptx
SOCIAL AND HISTORICAL CONTEXT - LFTVD.pptxSOCIAL AND HISTORICAL CONTEXT - LFTVD.pptx
SOCIAL AND HISTORICAL CONTEXT - LFTVD.pptx
 
Z Score,T Score, Percential Rank and Box Plot Graph
Z Score,T Score, Percential Rank and Box Plot GraphZ Score,T Score, Percential Rank and Box Plot Graph
Z Score,T Score, Percential Rank and Box Plot Graph
 
Grant Readiness 101 TechSoup and Remy Consulting
Grant Readiness 101 TechSoup and Remy ConsultingGrant Readiness 101 TechSoup and Remy Consulting
Grant Readiness 101 TechSoup and Remy Consulting
 

Maker program-starter-kit (Autodesk)

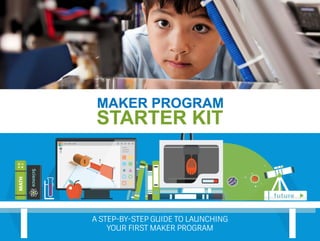
  • 1. A STEP-BY-STEP GUIDE TO LAUNCHING YOUR FIRST MAKER PROGRAM
  • 2. THE FUTURE IS YOURS TO CREATE This Starter Kit contains ideas on how you can create a maker program for your organization. It is not a guide for setting up a maker space or instructing you how to join or participate in any Autodesk authorized or sponsored program. Safety is an important consideration in any maker program and you are solely responsible for ensuring that your maker program is safe for you and your participants. Autodesk provides ideas for setting up your maker program, but does not recommend or represent that any tools, equipment, projects, or materials are safe or appropriate for any type of work space, type of participant or age group. You may use this Guide for reference purposes only, and may view, download and print this Guide solely for personal, informational, non-commercial purposes. You may not modify, license, sell or creative derivative works of the Guide. The Activity Documents made available to you separate from the Guide are licensed to you under the Creative Commons Attribution-NonCommercial-ShareAlike 4.0 International License.  This license allows you to remix, transform, or build upon the material, you must distribute your contributions to the Activity Documents under the same license as the original and you must give appropriate credit, provide a link to the license, and indicate if changes were made. You may do so in any reasonable manner, but not in any way that suggests Autodesk endorses you or your use. Except for use of the Autodesk name solely in connection with providing Autodesk appropriate credit in use of Activity Documents under the Creative Commons license above, you are not permitted to use the Autodesk name or logo in connection with your maker program or otherwise imply that Autodesk is affiliated with your maker program. Any use of Autodesk trademarks should comply with Autodesk’s Trademark Guidelines. Certain Autodesk products may only be used by individuals age 13 and older. You are responsible for complying with all software license agreement, terms of service and other terms that accompany any Autodesk software or services you may use in connection with your maker space program and ensuring your participants also comply with such terms when participating in your program. You are responsible for complying with all laws, rules and regulations in operating your maker program, including without limitation, in connection with your collection of any personal information from your participants or the marketing of your program. Autodesk does not represent that any of the ideas or materials presented in this Starter Kit comply with the laws, rules or regulations of any country, state or other territory. By using any portion of this Starter Kit, you agree to assume all of the risks and responsibilities in any way associated with the activities outlined in the Starter Kit and you release Autodesk, its affiliates and their respective agents and employees from any and all liability, claims and actions that may arise from injury or harm to you or your participants, from your death or from damage to your property in connection with my use of the Starter Kit. Much of the information in this document was obtained from publically available third party resources and has not been independently verified by Autodesk. Third party materials are simply provided as an additional resources you may want to reference when creating your maker program. Neither Autodesk, Inc. nor any of its affiliates makes any representation or warranty, expressed or implied, as to the accuracy or completeness of any information contained in or linked to in the Starter Kit or the results that may be achieved from using this Starter Kit. IN NO EVENT SHALL AUTODESK OR ITS AFFILIATES OR THEIR RESPECTIVE DIRECTORS, OFFICERS, EMPLOYEES, AGENTS AND REPRESENTATIVES BE LIABLE FOR ANY DAMAGES, INCLUDING WITHOUT LIMITATION, SPECIAL, INDIRECT, EXEMPLARY, INCIDENTAL, CONSEQUENTIAL OR PUNITIVE DAMAGES, OR LIABILITY WHATSOEVER RESULTING FROM OR RELATED TO YOUR USE OF THIS STARTER KIT OR YOUR MAKER PROGRAM. All information in this Starter Kit is provided as of November 4, 2016. Autodesk has no obligation to update this Starter Kit. LEGAL STUFF Introduction2 GO TO STEP: FRONTCOVER CONTENTS APPENDIX 02 03 04 05 0601 08 09 1007
  • 3. Hello! Autodesk makes software for people who make things. Across the manufacturing, architecture, building, construction, media and entertainment industries, Autodesk gives you the power to make anything. Introduction3 GO TO STEP: FRONTCOVER CONTENTS APPENDIX 02 03 04 05 0601 08 09 1007
  • 4. “How cool! How do I get my students started?” If you’re thinking, this guide is for you. Introduction4 GO TO STEP: FRONTCOVER CONTENTS APPENDIX 02 03 04 05 0601 08 09 1007
  • 5. WELCOME TO THE WORLD OF MAKING! Introduction5 GO TO STEP: FRONTCOVER CONTENTS APPENDIX 02 03 04 05 0601 08 09 1007
  • 6. CONTENTS Introduction6 GO TO STEP: STEP 5: SKILL UP 56 BUILDING A MAKER PROGRAM: WHO, WHAT, WHY & HOW 10 STEP 1: GET IN THE MAKER MINDSET 22 STEP 2: DEFINE YOUR VISION 28 How to Get Started 10 What is Maker Education? 11 Why is Maker Education important? 13 Who should use this guide? 20 Activity 1: Get Sticky with Group Brainstorming 30 Activity 2: Maker Strengthsfinder 32 Activity 3: Document Your Vision 36 STEP 3: DEFINE GOALS & METRICS 38 Survey Templates 41 STEP 4: CHOOSE STRUCTURE & ACTIVITIES 46 Activity 5: Map Your Learner Journey 50 Activity 6: Explore & Choose Activities 52 Activity 7: Outline Your Program 54 Activity 4: Brainstorm for Success 42 Activity 8: Share Your Vision 64 Activity 9: Survey Your Community 66 STEP 6: COORDINATE SUPPORT & LOGISTICS 62 STEP 7: MARKET YOUR PROGRAM 72 Activity 10: Create a Marketing Plan 76 STEP 8: PREP FOR INCLUSIVITY 78 STEP 9: DIVE IN 84 STEP 10: REFLECT & REVISE 88 Activity 11: I Like, I Wish, What if 89 APPENDIX: TEMPLATES 93 NEXT STEPS 91 FRONTCOVER CONTENTS APPENDIX 02 03 04 05 0601 08 09 1007
  • 7. You spoke and we listened. This guide is for you! Introduction7 GO TO STEP: FRONTCOVER CONTENTS APPENDIX 02 03 04 05 0601 08 09 1007
  • 8. After hearing so many educators tell us, “I want to bring making into my classroom but I just don’t know where to begin,” we’ve put together a comprehensive, easy to follow, step-by-step guide to help you launch your first maker program. From defining your vision and goals to marketing, professional development, and reflection - it’s all here to demystify the process and put you on a path to making something awesome! Whether you’re a teacher, parent, or youth leader, we hope you’ll use this guide as a tool to spur your own creativity while also building game-changing experiences for learners. Let’s get started! Introduction8 GO TO STEP: FRONTCOVER CONTENTS APPENDIX 02 03 04 05 0601 08 09 1007
  • 9. HERE’S YOUR ROADMAP: COORDINATE SUPPORT & LOGISTICS: How to organize space, volunteers, funding and more. STEP 6 STEP 10 REFLECT & REVISE: How to turn what you’ve learned into future improvements. 04 07 08 05 09 10 STEP 3 DEFINE YOUR GOALS: How will you measure and track success? STEP 7 STEP 4 CHOOSE PROGRAM STRUCTURE, PROJECTS & ACTIVITIES STEP 2 DEFINE YOUR VISION: Build a team and get clear on what you’re creating. STEP 5 SKILL UP: Build the skills you’ll need to run your program. 01 STEP 1 GET IN THE MAKER MINDSET: What does it take to be a maker educator? LET’S DO THIS! 02 03 06 MARKET YOUR PROGRAM: How to recruit participants to your program. STEP 8 PREP FOR INCLUSIVITY: How to run a program that’s accessible to all students. STEP 9 DIVE IN: Tips to keep in mind while running your first program. Introduction9 GO TO STEP: FRONTCOVER CONTENTS APPENDIX 02 03 04 05 0601 08 09 1007
  • 10. HOW TO GET STARTED This guide provides ten steps with eleven hands-on activities to guide you and your team through the process of developing and launching a maker program in your school, organization or community. The worksheets and templates referenced in this Starter Kit can all be found in the appendix and in a Google Drive folder. These resources are available for you to use and revise to suit the needs of your team. As you are reviewing and working through all the fun steps and activities, remember that this guide is for your reference. The activity sheets/ templates are licensed under the Creative Commons Attribution-NonCommercial- ShareAlike 4.0 International License so feel free to remix, transform, or build upon the material - just be sure to follow the guidelines outlined on page 2. BUILDING A MAKER PROGRAM: WHO, WHAT, WHY AND HOW The Maker Program Starter Kit is an actionable framework with step-by- step instructions to guide new maker educators through the process of building their first maker program. Introduction10 GO TO STEP: FRONTCOVER CONTENTS APPENDIX 02 03 04 05 0601 08 09 1007
  • 11. If you’re reading this guide, the term “maker” is probably familiar to you. Maybe you’ve attended a Maker Faire, dropped by a local makerspace, watched Dale Dougherty’s TED talk, or read The Maker Movement Manifesto by Mark Hatch. Maybe you’re an electrical engineer or maybe you crochet socks in your spare time. The bottom line is that there are many ways to be a “maker.” At Autodesk, we believe anyone can be a maker. With a little bit of imagination and the right tools you can make anything, you just have to try! “WE ARE MAKERS” TED TALK Watch Dale Dougherty’s TED talk at http://autode.sk/DaleTED SO WHAT IS A MAKER? Maker education means different things to different people. For some, it’s an approach to teaching core subjects with an emphasis on project-based learning. As teacher and maker- education-evangelist Vicki Davis says, “Don’t treat making as a sidebar to an already overtaxed curriculum.” Instead, she advocates that making can be used as a powerful approach to teaching both STEAM and core subject matter. For others, maker education means helping learners build advanced expertise in the technical skills often overlooked by traditional education. People who ascribe to this approach may be more excited about teaching a specific skill set like coding, microelectronics, or 3D printing. Both interpretations of “maker education” are correct; your approach to maker education will depend on your unique situation and the resources available to you. The bottom line is this: maker education transforms the passive model of consuming information into an active model for creating new ideas. WHAT IS MAKER EDUCATION? Maker education is a hands-on approach to learning that creates opportunities for anyone to develop creative confidence while fostering interest and expertise in science, technology, engineering, art, design, and/or mathematics (STEAM). A maker is a person who learns by doing; he or she embraces a “do it yourself” mindset with an emphasis on building original projects using both traditional and cutting-edge technologies. Introduction11 GO TO STEP: FRONTCOVER CONTENTS APPENDIX 02 03 04 05 0601 08 09 1007
  • 12. Photo Credit: KIDmob We’re teaching kids content and it’s time to really teach kids how to think. - Abby Cornelius, Maker Educator and High School Librarian Introduction12 GO TO STEP: FRONTCOVER CONTENTS APPENDIX 02 03 04 05 0601 08 09 1007
  • 13. In a system that can feel overpowered by standards and testing, maker education is an approach to learning that fosters creativity and practical skill-building across the spectrum of K-12 content. This is important, because the modern economy is changing in some pretty big ways. Here are a few trends that play a role in the growing importance of maker education for young people around the world: WHY IS MAKER EDUCATION SO IMPORTANT? Maker education gives people the opportunity to build skills and mindsets that will help them thrive in today’s highly technical and creative workforce. “In 1900, creative workers made up only about 10% percent of the U.S. workforce….Today, almost 40 million workers— some 30 percent of the workforce—are employed in the creative sector.” Source: Richard Florida GROWTH OF CREATIVE WORK “There has been a rapid increase in the use of online platforms by companies and individuals who want to engage remote workers for piecemeal, short- term or project-based work delivered over the internet.” Source: The Guardian DEMAND FOR FLEXIBILITY “80 percent of manufacturers report a moderate or serious shortage of qualified applicants for skilled and highly-skilled production positions.” Source: Deloitte and the Manufacturing Institute DIGITAL MANUFACTURING Introduction13 GO TO STEP: FRONTCOVER CONTENTS APPENDIX 02 03 04 05 0601 08 09 1007
  • 14. “I hear and I forget. I see and I remember. I do andIunderstand.” -Confucius, 6th Century BC Introduction14 GO TO STEP: FRONTCOVER CONTENTS APPENDIX 02 03 04 05 0601 08 09 1007
  • 15. LEARN MORE ABOUT “THE FOUR C’S” Check out P21’s Framework for 21st Century Learning at http://autode.sk/ P21framework The “4C’s” - Creativity, Collaboration, Communication, and Critical Thinking - will be crucial competencies for 21st century jobs. These skills, however, will likely not be enough to ensure employment for today’s youth. According to researcher Kevin Kelly, “You’ll be paid in the future based on how well you work with robots.” In short, specialized technical expertise paired with the 4C’s will be a winning combination for employability in the 21st century. In this section, we’ll outline four specific (and powerful) ways maker education helps build the skills that will be most valuable in today’s rapidly-changing global economy: 1. Engagement 2. Self-Direction & Learning to Learn 3. Deeper Learning 4. Technical Specialization “THE FOUR C’S” Download the NEA’s “An Educators Guide to the ‘Four C’s’” at http://autode.sk/NEA4cs Collaboration Critical Thinking Communication Creativity (Innovation) Technical Specialization + = Introduction15 GO TO STEP: FRONTCOVER CONTENTS APPENDIX 02 03 04 05 0601 08 09 1007
  • 16. By encouraging students to seek answers to their own questions and modeling ways to effectively source and vet information, maker educators can help learners build confidence in their capacity for independent learning. Photo Credit: Libby Falck Introduction16 GO TO STEP: FRONTCOVER CONTENTS APPENDIX 02 03 04 05 0601 08 09 1007
  • 17. By its nature, maker education is active, collaborative, cooperative and often project- based. Researchers have been studying the effects of active learning since the 1960’s; these approaches have been shown to improve knowledge retention and student engagement. Even the ancient philosophers knew this. A little more recently, researchers at Harvard’s Derek Bok Center of Teaching and Learning shared that, “Active learning pedagogies have been found to provide a significant advantage over passive approaches in terms of acquiring subject matter knowledge and academic skills.” ENGAGEMENT MORE ABOUT ACTIVE LEARNING http://autode.sk/ ActiveLearning INVENT TO LEARN Published in 2013, this book by Sylvia Libow Martinez and Gary Stager is one of the most popular resources on maker education and active learning. [S]tudents who are thus reputedly poor in mathematics show an entirely different attitude when the problem comes from a concrete situation and is related to other interests.” - Jean Piaget, 1973 In short, we learn best when presented with active, hands-on activities that are relevant to our lives. Maker education does exactly this. The increased student engagement enabled by maker education is particularly noteworthy because it benefits all learners. Many maker programs focus on preparing students for jobs in advanced STEAM fields. That’s great, but the benefits provided by active learning approaches in maker programs are particularly special because they have the potential to help all students master content more effectively, regardless of whether those students choose to enter a STEAM field or build careers in business, human services or the humanities. Maker education is a fantastic way for all students to learn. As the authors of Invent to Learn explain, “Maker classrooms are active classrooms. In active classrooms one will find engaged students, often working on multiple projects simultaneously, and teachers unafraid of relinquishing their authoritarian role. The best way to activate your classroom is for your classroom to make something.” Introduction17 GO TO STEP: FRONTCOVER CONTENTS APPENDIX 02 03 04 05 0601 08 09 1007
  • 18. Giving students real-world problems to solve is a powerful way to motivate learning. THE IMPACT OF MAKING Photo Credit: Libby Falck This working prototoype of a piezoelectric footsole was created by a team of high school students in The Resilience Challenge, a 9-week program that teaches sudents to use design and technology to solve civic challenges. The prototype can charge cell phones using the pressure of your steps. Introduction18 GO TO STEP: FRONTCOVER CONTENTS APPENDIX 02 03 04 05 0601 08 09 1007
  • 19. In our rapidly-changing world, learning to learn may be one of the most important competencies for youth to develop. Maker education programs excel at enabling students to pursue their own learning. The role of a maker educator is often less about providing technical training than it is about coaching. Maker educators are in a unique position to foster a love for learning and to help participants navigate the resources and possibilities available in the many fields of “making.” LEARNING TO LEARN As described by researcher James Pellegrino, deeper learning allows students to “use knowledge in ways that make it useful in new situations.” This ability to repurpose information is key to innovation and creativity. Maker education encourages learners to experiment, prototype and explore new connections between diverse ideas. Makers are people who not only possess technical skills, but are also able to utilize their knowledge to address problems in unique ways. DEEPER LEARNING MEASURING DEEPER LEARNING KQED’s Mindshift team wrote about ways to define and measure deeper learning at http://autode.sk/ MeasureDeeperLearning “Learning to learn is to know how to navigate in a forest of facts, ideas and theories, a proliferation of constantly changing items of knowledge. Learning to learn is to know what to ignore but at the same time not rejecting innovation and research.” -Author Raymond Queneau Increasingly in the twenty-first century, what you know is far less important than what you do with what you know. - Tony Wagner As outsourcing and automation increasingly eliminate middle-skill jobs, today’s workers must develop specialized expertise to compete in the global knowledge economy, particularly in technical fields. Maker education is a fantastic way to quickly introduce learners to a variety of STEAMskills.Thisexposurecanhelplearnersidentifytheirindividualinterestsandaptitudesand begin specializing at a young age. For example, online portfolios are increasingly used by college admissions boards and employers to identify promising candidates. As a Maker Educator, you can also help your students learn the importance of documenting their work for these purposes. TECHNICAL SPECIALIZATION Introduction19 GO TO STEP: FRONTCOVER CONTENTS APPENDIX 02 03 04 05 0601 08 09 1007
  • 20. This guide and its accompanying resources are designed to support educators and youth organizers interested in creating new opportunities to engage with making. This can be accomplished in a classroom setting, as an extracurricular or after school program, as part of a summer camp, at a library, in combination with home schooling curriculum, or in a wide variety of other settings. The options are endless! You do not need to be an expert technologist or seasoned maker to take on this challenge; in fact we recommend only four prerequisites: WHO SHOULD USE THIS GUIDE? 1 2 3 Love for learning new skills and an understanding that failure is part of the learning process. Organizational and problem solving skills necessary to run a classroom or extracurricular program. Lesson 1 Tinkercad 101 Lesson 2 Lesson 3 Lesson 4 4 Experience and interest in working with youth. Willingness to embrace the maker culture. Introduction20 GO TO STEP: FRONTCOVER CONTENTS APPENDIX 02 03 04 05 0601 08 09 1007
  • 21. ABOUT AUTODESK EDUCATION http://www.autodesk. com/education WHAT IS THE “FUTURE OF MAKING THINGS? http://autode.sk/ FutureOfMakingThings Since 1982, Autodesk has been in the business of making software for people who make things. If you’ve ever driven a high-performance car, admired a towering skyscraper, used a smartphone, or watched a great film, chances are you’ve experienced what millions of Autodesk customers are doing with our software. Autodesk gives you the power to make anything. As an educator, you have tremendous capacity to inspire your students, and we want to show you how making can help inspire a love of design and a desire to learn that will cultivate and enrich your students’ creativity and future careers. Whether you’re a beginner looking for simple exercises, a seasoned maker searching for a new challenge, or a teacher in need of class materials, this guide has something for you. We believe these tools will make it possible for the next generation of designers, engineers, architects and entrprenuers to imagine, design and create a better world. At Autodesk Education, we believe making can change the world. Introduction21 GO TO STEP: WHO MADE THIS GUIDE? FRONTCOVER CONTENTS APPENDIX 02 03 04 05 0601 08 09 1007
  • 22. STEP 1 GET IN THE MAKER MINDSET Step 1: Get in the Maker Mindset22 GO TO STEP: 02 03 04 05 0601 08 09 1007FRONTCOVER CONTENTS APPENDIX
  • 23. So you understand that maker education is important and you’re excited to get started. What now? We know that starting a maker program can be intimidating. Perhaps you’re a rockstar educator and technical genius with no doubts about your ability to launch a maker program (if so, go get ‘em!), but it’s more likely that you’re a little bit unsure how to go about this. Don’t worry, you’re not alone. Feeling unprepared and uncertain about how to build your first maker program is normal. That’s why the first thing you should know is this: Whether you’re a classroom teacher, librarian, scout leader, or parent - as long as you enjoy working with kids (and are into making things) - you can run a maker program. To explain why, let’s clear up some common misconceptions about what a maker educator is not. Running a maker program does not mean: • You’re a math whiz • You’re an engineer, physicist, or architect • You’re a programmer • You can take an engine apart and put it back together again • You water your plants with an Arduino-controlled robot (or even know what an Arduino is) To put it simply, you do not need to be an expert technologist to run a maker program. A maker educator is a coach who inspires learners to build technical skills and creative mindsets through hands-on projects and experiential learning. At the core, it’s really that simple. To help give you a better picture of what this looks like in practice, let’s dig into some of the many hats you’ll wear as a maker educator... STEP 1: GET IN THE MAKER MINDSET You can do this Step 1: Get in the Maker Mindset23 GO TO STEP: 02 03 04 05 0601 08 09 1007FRONTCOVER CONTENTS APPENDIX
  • 24. As a maker educator, you’ll wear many hats: You’ll be a Coach. The primary hat you’ll wear as a maker educator is that of a coach. This means you’ll provide structure, motivation, materials and a safe environment that, together, enable your participants to thrive. You’ll help your students set goals and deadlines and provide them with context for the skills they’re building in your program. You’ll be a Cheerleader. A key component of the maker mindset is a willingness to try new things and fail. This can be very difficult for some students to get used to. You can help your students feel excited about failure by reframing it as learning. Keep a positive attitude toward problem solving. Most importantly, have fun. You’ll be a Learner. Even if you have technical expertise in one area or another, at some point your students will want to tackle something you’ve never done before. That’s great! Put your Learner Hat on and try to let your students lead the way in tackling this new and tricky challenge. The idea of “learning to learn” is core to making. If the students need support, learn alongside them. You’ll be a Questioner. You can help your students “learn to learn” by encouraging them to search for their own answers before coming to you. One great way to do this is to ask questions. For example, if a student is stuck, think of the steps you’d take to answer the question if you were in the student’s position. Has the student taken any of those steps? If not, you can encourage him or her to do so before you volunteer a solution. This approach helps learners build confidence in their ability to learn independently. THE MAKER EDUCATOR, AKA “HAT JUGGLER” Step 1: Get in the Maker Mindset24 GO TO STEP: 02 03 04 05 0601 08 09 1007FRONTCOVER CONTENTS APPENDIX
  • 25. You’ll be a Connector. Another hat you’ll often wear is that of a connector. If you’re a librarian, this will come naturally to you. As a connector you will help your students discover resources and people to accomplish their learning goals. For example, if a student has progressed into advanced territory in the Python programming language, perhaps you can connect her with a professional computer scientist in your trusted community who can answer her questions. You might alternately recommend online resources, books or other materials to help her advance. Finally, Yes, You’ll be a Teacher. As we’ll discuss in more detail in Step 4, there are many ways to structure and facilitate a maker program. No matter how you choose to run yours, you can expect to deliver some level of instruction. This is particularly true for young learners. To prepare, make sure you’ve gone through each activity at least once and are familiar with software and equipment basics. If you have questions, ask friends, colleagues or consult one of the many online maker communities before your lesson begins. The most important thing to remember when teaching is this: if a question comes up during instruction that you can’t answer, that’s okay. You and your students can find the answer together. It’s likely that your students will often surprise you with their existing knowledge. Peer teaching is an invaluable tool for the maker educator. The best outcome you can hope for is to create an environment where everyone feels comfortable taking turns between teaching and learning. The gaps you’ll encounter in your own knowledge present a fantastic opportunity to model this behavior. Step 1: Get in the Maker Mindset25 GO TO STEP: 02 03 04 05 0601 08 09 1007FRONTCOVER CONTENTS APPENDIX
  • 26. Here’s a secret: you can’t “teach” making like you can teach other subjects. There are no right answers, no clear paths, and there are no comprehensive experts. No single individual could master every tool and technique that might fall within the realm of “making.” This is why, more than anything, making is a mindset. The first thing you’ll have to do as a maker educator is embrace this maker mindset yourself. To do so, keep the following in mind: 1. Be willing to try new things. 2. View mistakes with a positive lens; they are opportunities for learning. 3. “I can learn anything!” Embrace a growth mindset. 4. Be willing to say, “I don’t know, let’s find out!” 5. Be creative in seeking answers to tricky problems. EMBRACE THE MAKER MINDSET LEARN MORE ABOUT GROWTH MINDSET Check out Stanford Psychology Professor Carol Dweck’s research at http://autode.sk/ GrowthMindset If you find yourself feeling overwhelmed, remember this: Everyone gets overwhelmed. You’re trying something new. It’s worth it. Keep calm and try a different hat. Step 1: Get in the Maker Mindset26 GO TO STEP: 02 03 04 05 0601 08 09 1007FRONTCOVER CONTENTS APPENDIX
  • 27. Step 1: Get in the Maker Mindset27 GO TO STEP: 02 03 04 05 0601 08 09 1007FRONTCOVER CONTENTS APPENDIX
  • 28. STEP 2 DEFINE YOUR VISION Step 2: Define Your Vision28 GO TO STEP: 02 03 04 05 0601 08 09 1007FRONTCOVER CONTENTS APPENDIX
  • 29. “Making” can mean many things. What does it mean to you? Your maker program will be shaped by the people creating it and the resources you have access to in your unique community. Your next step will be to define the type of program you’re building. What do you imagine it will look and feel like for students? Who are your students? How long will the program last? Why is building this program important to you? These are critical questions for your team to discuss at the beginning of this process. Even if you’re building your program single-handedly, taking the time to clearly outline your goals early-on will prove invaluable as you move forward. Although the vision you craft now will undoubtedly change over time, laying it out will make the following steps easier to achieve and future changes simpler to communicate. The following three activities are designed to help you and your team agree on an initial vision for your program. STEP 2: DEFINE YOUR VISION Step 2: Define Your Vision29 GO TO STEP: 02 03 04 05 0601 08 09 1007FRONTCOVER CONTENTS APPENDIX
  • 30. This simple brainstorming activity is designed to build alignment and vision within your program design team. Although best conducted with a group of 2-8 people, this can also be useful as a solo exercise. You’ll be using the brainstorming process and rules developed by the Stanford Design School (the d.school) to facilitate this activity. ACTIVITY 1: GET STICKY WITH GROUP BRAINSTORMING GET THE STANFORD D.SCHOOL RULES FOR BRAINSTORMING http://autode.sk/ StanfordBrainstorming 1 2 TIME: 20 minutes PEOPLE: 3-8 MATERIALS: Post-it Notes, Markers, Timer Introduce the activity. If anyone on your team is unfamiliar with the brainstorming process, take a few minutes to introduce the rules. Remind participants that, at this stage, all ideas are good ideas! Distribute a sharpie marker and pad of post-it notes to each participant. BRAINSTORMING QUESTIONS: • What are you most excited about with this program? • What does success look like (in the context of your maker program)? • What are your biggest concerns about this program? • Quickly sketch a logo or name for your program. • What is your program’s “secret sauce” (what makes it special)? Activity 1 : Get Sticky with Group Brainstorming Step 2: Define Your Vision30 GO TO STEP: 02 03 04 05 0601 08 09 1007FRONTCOVER CONTENTS APPENDIX
  • 31. 3 Introduce the question. Remind participants to only write or sketch one idea per post-it note and to come up with as many ideas as possible. Set a timer for 90 seconds and invite the team to begin brainstorming. Note: after a few trial rounds, you might try variations like a silent round (no talking) or a visual round (pictures only). When the timer buzzes, have everyone finish their current idea and set down their markers. Go around the table to share key ideas. Once everyone has shared, group similar ideas together on the table or an empty wall (as a variation, this can also be done as a silent activity). Brainstorm answers to each of the questions one at a time. The tone of the activity should be fun and fast-paced. Use a timer to limit the amount of time spent on each question - we recommend 90 seconds per question. Feel free to add your own questions! For each question, proceed as follows: 4 After you’ve finished brainstorming each question, take five minutes to debrief by highlighting similarities and differences in the group’s vision for the program. a b c d 5 Take pictures of your brainstorming results and note key findings before cleaning up. Activity 1 : Get Sticky with Group Brainstorming Step 2: Define Your Vision31 GO TO STEP: 02 03 04 05 0601 08 09 1007FRONTCOVER CONTENTS APPENDIX
  • 32. This activity is designed to help you identify potential strengths in your team and program. You’ll walk through eight categories to inventory your existing skills, assets, equipment, and materials. You’ll then generate a “score” for each category that will enable you to compare yours strengths across all categories. At the end of this activity you’ll have a better idea where to start when you begin selecting curriculum and activities for your program. Here are the categories: ACTIVITY 2: MAKER STRENGTHSFINDER MAKER STRENGTHSFINDER WORKSHEET This is a Maker Program Starter Kit Resource, available in the appendix and on Google Drive. TIME: 20 minutes PEOPLE: 1-10 MATERIALS: Maker Strengthsfinder Worksheet (print one-sided), Markers TAKE NOTE You alone are responsible for your maker program! Starter Kit resources are provided under a BY-NC- SA Creative Commons license. See pg. 2 for more information. Activity 2 : Maker Strengthsfinder 3D DESIGN & PRINTING Including additive manufacturing and computer-aided design (CAD) TEXTILES Including sewing, leatherworking, and e-textiles ELECTRONICS Including circuits, sensors, robotics, Arduino, Raspberry Pi, Makey Makey and more CODING Including programming for software, web, apps, microcontrollers and videogames DIGITAL MEDIA Including video and audio production, photography, and animation GRAPHIC DESIGN Including wireframing, data visualization, and design for print, web, and media GENERALFABRICATION Including subtractive manufacturing, metalwork, woodwork and lo-fi prototyping SPACE & STORAGE We’ll also review requirements for space and storage. Step 2: Define Your Vision32 GO TO STEP: 02 03 04 05 0601 08 09 1007FRONTCOVER CONTENTS APPENDIX
  • 33. 1 2 3 Each of the eight maker categories is listed on a separate page in the Maker Strengthsfinder Worksheet. Lay all nine pages out on a table or tape them to a wall so all participants can easily view them. You can place multiple check marks beside items listed under the Facilitator Skills column. For example, if four people are completing the activity and you all have experience using a 3D printer, you should have four different-colored check marks beside that item in the Facilitator Skills column. You should only place one check mark beside items in the Resource columns (basic, intermediate and advanced), as these resources will likely be shared by your team. For example, you should not have four check marks beside “drone” if you only have one drone. 4 Next, invite participants to add any relevant skills or resources that aren’t listed. Write these in the best-fitting category. a b Distribute markers to participants. Each person should have a different color. Introduce the activity to the group and make sure everyone understands the instructions. Each person is going to place check marks next to the skills or resources your program has access to. 5 Finish by using the formula included in the worksheet to calculate a “score” for each category. Anything over 0% is a win! Activity 2 : Maker Strengthsfinder Step 2: Define Your Vision33 GO TO STEP: 02 03 04 05 0601 08 09 1007FRONTCOVER CONTENTS APPENDIX
  • 34.   ❏   ❏     ❏     ❏             Activity 2 : Maker Strengthsfinder Step 2: Define Your Vision34 GO TO STEP: USE THIS! See Appendix 02 03 04 05 0601 08 09 1007FRONTCOVER CONTENTS APPENDIX
  • 35. Step 2: Define Your Vision35 GO TO STEP: 02 03 04 05 0601 08 09 1007FRONTCOVER CONTENTS APPENDIX
  • 36. Now that your team has completed some basic brainstorming and identified its strengths, it’s time to get your ideas down on paper and begin documenting the vision for what you want your program to be. This worksheet will you help you begin to hone in on the details in a way that will help you tell a more cohesive story about your program vision and foster cohesion within your team throughout the remaining process of building your program. A clearly defined vision will also make explaining and building buy-in much easier and more effective. ACTIVITY 3: DOCUMENT YOUR VISION DOCUMENT YOUR VISION WORKSHEETS This is a Maker Program Starter Kit Resource, available in the appendix and on Google Drive. TIME: 30 minutes PEOPLE: 1-8 MATERIALS: Printed “Document Your Vision” Worksheets, pens or pencils, timer 1 2 3 Distribute a Document Your Vision Worksheet to each person on your team. (You should have one extra copy of the worksheet on hand as well.) Set a timer for 10 minutes and have each person individually fill out their worksheet. No talking! Alternately, these can be completed in advance. Go around the table allowing each person to briefly share his or her answers. For smaller groups, you can also simply swap worksheets. 4 5 Corroboratively complete a new worksheet as a team. Find consensus on as many questions as possible. After you’ve completed this activity, keep this document on hand for your team. Especially if your team meets infrequently, you can review this worksheet at the beginning of meetings to promote cohesion within the team and remind everyone of your shared purpose. Feel free to change and add detail to your answers as you advance in designing your program. Activity 3: Document Your Vision Step 2: Define Your Vision36 GO TO STEP: 02 03 04 05 0601 08 09 1007FRONTCOVER CONTENTS APPENDIX
  • 37.   Document   Your   Vision    Program   Name   ___________________________________________________________               Your   Name   ________________________________    Use   this   worksheet   to   outline   the   core   details   of   your   program.   Use   the   left   column   to   detail   what   you   can   do   in   the   next   six   months   and   the   right  column   to   create   a   vision   for   five   years   from   now.   Remember,   there   are   no   right   answers   and   this   will   undoubtedly   change   over   time.   Answer   as  thoroughly   as   possible.    Your   1­Year   Vision  Use   this   column   to   answer   each   question   based   on   a   program   you  could    launch   within   the   next   6   months .  Your   3­Year   Vision  Use   this   column   to   answer   each   question   based   on   your   long­term  vision   for   your   program.    Participant   Ages:        Circle   any/all   features   that   apply   to   your   target   audience.   Feel   free   to   add   to   this   list.  Girls­only               Boys­only               high­risk               affluent               beginners      experienced               techies               low­income               physical   disabilities    learning   disabilities  Girls­only               Boys­only               high­risk               affluent               beginners      experienced               techies               low­income            physical   disabilities    learning   disabilities    1­2   sentence   summary   of   the   populations   you’ll   serve:              Activity 3: Document Your Vision Step 2: Define Your Vision37 GO TO STEP: USE THIS! See Appendix 02 03 04 05 0601 08 09 1007FRONTCOVER CONTENTS APPENDIX
  • 38. STEP 3 DEFINE GOALS & METRICS Step 3: Define Goals & Metrics38 GO TO STEP: 02 03 04 05 0601 08 09 1007FRONTCOVER CONTENTS APPENDIX
  • 39. Identifying what success looks like for your program early-on is important for everyone. Even if you’re putting your maker program together purely for fun, setting a few goals to track along the way will prove valuable when you’re designing and recruiting for your next program. Collecting and sharing this data can also help grow your program, engage sponsors and parents, recruit new members, and successfully apply for grants in the future. Becoming a local exemplar for maker education is a sure way to reach more students and increase your impact. Good data drives it all. This section will help you identify easy ways to track success. A NOTE ON STANDARDS If you’re a teacher in a K-12 school, one of the goals you may wish to work toward is alignment with your school’s standards. Fortunately, many maker activities now include lists of the Common Core State Standards (CCSS) and Next Generation Science Standards (NGSS) addressed in their content. With a little creativity, you can align maker activities to a wide variety of core subject areas and standards. STEP 3: DEFINE GOALS AND METRICS Step 3: Define Goals & Metrics39 GO TO STEP: 02 03 04 05 0601 08 09 1007FRONTCOVER CONTENTS APPENDIX
  • 40. Step 3: Define Goals & Metrics40 GO TO STEP: 02 03 04 05 0601 08 09 1007FRONTCOVER CONTENTS APPENDIX
  • 41. Track participant progress with periodic benchmark surveys that can be completed at the beginning and end of your program, or more frequently. Track your own progress with periodic benchmark surveys that can be completed at the beginning and end of your program, or more frequently. Use this form after each program class/session to record stories and observations. This will enable you to quickly review the flow of the program at its conclusion. Never forget your exit survey! Get feedback and suggestions from your participants. SURVEY TEMPLATES FOR TRACKING SUCCESS Step 3: Define Goals & Metrics41 GO TO STEP: USE THESE! See Appendix 02 03 04 05 0601 08 09 1007FRONTCOVER CONTENTS APPENDIX
  • 42. This activity is designed to help your team identify the metrics you will track to know whether or not your program was successful in meeting its goals. ACTIVITY 4: BRAINSTORM FOR SUCCESS INDICATORS OF SUCCESS WORKSHEET This is a Maker Program Starter Kit Resource, available in the appendix and on Google Drive. TIME: 30 minutes PEOPLE: 1-8 MATERIALS: • • • • 1 2 3 Begin by introducing the activity and reviewing the same brainstorming rules used in Activity 1. As a group, briefly review your work from Step 1, including: a) Your answers to the “What does success look like?” question in your initial brainstorm, and b) the “Indicators of Success” portion of your team’s final Document Your Vision Worksheet. Now spend 3 minutes brainstorming as many answers as possible to the following question: What are our goals for success in your program? 4 Group and sort these goals and themes by moving similar goals next to each other. Are you noticing any trends? Use your grouped post-its to identify up to five primary “indicators of success” for your program. These can be relatively vague; for example: “participants have fun” or “students build 3D modeling skills.” They can also be specific; for example: “75% of participants complete the program” Post-in notes and markers (1) Printed Indicators of Success Worksheet Whiteboard, chalkboard or large sheet of butcher paper If available, your completed Document Your Vision Worksheet from Activity 3 and post-it notes from Activity 1 Activity 4: Brainstorm for Success Step 3: Define Goals & Metrics42 GO TO STEP: 02 03 04 05 0601 08 09 1007FRONTCOVER CONTENTS APPENDIX
  • 43. 5 Now you’ll run another 90-second brainstorm for each indicator of success with the following questions: How will we know we’ve succeeded? Specifically, what can you do, capture, test or observe to prove that you achieved your goal? Be creative; there are no right or wrong answers. On a whiteboard or a large piece of butcher paper, draw three quadrants. Label them “Must,” Might” and “Later.”Now sort all the methods you identified in your brainstorms for each Indicator into the following categories: • • • 6 Must: important and easy to achieve Might: metric is important but the method difficult to achieve Later: metric is less essential to immediate success 7 8 Choose 1-2 methods from the “must” category to track for each of your important indicators. If one of your indicators doesn’t have any methods that land in the “must” category, consider putting it aside for future consideration. Use the Indicators of Success Worksheet to assign responsibility for each method and document progress throughout the program. Activity 4: Brainstorm for Success Step 3: Define Goals & Metrics43 GO TO STEP: 02 03 04 05 0601 08 09 1007FRONTCOVER CONTENTS APPENDIX
  • 44.   Indicators   of   Success   Worksheet  Use   this   wor ksheet   to   clearly   define   what   success   looks   like   for   your   program   and   how   you   will   track   it.   State   each   indicator   of   success  in   a   complete   sentence   and   outline   the   methods   you   will   use   to   track   your   progress.    Be   as   specific   as   possible .     Summary   of   Results:      Method   1  Method   2    Indicator   1:   Met   minimum   requirements   for   success?   (Y/N)      Indicator   Succeeded?      Indicator   2:   Met   minimum   requirements   for   success?   (Y/N)      Indicator   Succeeded?      Indicator   3:   Met   minimum   requirements   for   success?   (Y/N)      Indicator   Succeeded?      Indicator   4:   Met   minimum   requirements   for   success?   (Y/N)      Indicator   Succeeded?      Indicator   5:   Met   minimum   requirements   for   success?   (Y/N)      Indicator   Succeeded?          Activity 6: Brainstorm for Success Step 3: Define Goals & Metrics44 GO TO STEP: USE THIS! See Appendix 02 03 04 05 0601 08 09 1007FRONTCOVER CONTENTS APPENDIX
  • 45. Step 3: Define Goals & Metrics45 GO TO STEP: 02 03 04 05 0601 08 09 1007FRONTCOVER CONTENTS APPENDIX
  • 46. STEP 4 CHOOSE STRUCTURE & ACTIVITIES Step 4: Choose Structure, Projects & Activities46 GO TO STEP: 02 03 04 05 0601 08 09 1007FRONTCOVER CONTENTS APPENDIX
  • 47. Makerspaces are not just about tools; they’re about people, culture and mindset. This section will help you choose a program structure and content to best fit the needs of your space, community, learners and team. Depending on your unique circumstances, there are a variety of ways your maker program can be organized. On the next page you’ll find a breakdown of common models we’ve seen over the years, but there’s always gray area when it comes to making. Some programs may be combinations of the following models or completely different (literally “off the chart,” you might say!). We offer this table as a tool to begin to define the structure for your program. INSTRUCTIONAL APPROACHES STEP 4: CHOOSE STRUCTURE, PROJECTS AND ACTIVITIES Step 4: Choose Structure, Projects & Activities47 GO TO STEP: 02 03 04 05 0601 08 09 1007FRONTCOVER CONTENTS APPENDIX
  • 48. Project-Based Design-Based Technical Drop-In Description Project-based programs enable students to master a specific set of technical skills by completing a hands- on project. Design-based programs focus on enabling students to improve creative problem solving skills by tackling a real-world issue; building technical skills is a secondary goal. Technical Programs enable students to master a specific set of technical skills, in depth. Drop-In programs enable participants to explore a range of technical skills in a relatively unstructured environment. Strengths of Approach Project-based learning can be more engaging for “nontechnical” participants; Good for beginners; Great for elementary students Design-based learning can be more engaging for “nontechnical” participants; Great for high school students Attractive to parents; Attractive to learners with existing interest in technology; students may have greater intrinsic motivation to participate; Structured progression makes technical programs easier to plan Creates space for self-motivated students to explore; Good for high school students Weaknesses of Approach Tying together multiple “beginner” projects with a common theme can be difficult Addressing a real-world problem often requires a program of longer duration Technical expertise required of instructors; Difficult to engage learners who don’t have an existing interest in the technology; Depending on technology, can be more expensive than other program types Difficult for younger students; Unstructured environments can be overwhelming for some students; will not effectively serve learners who struggle with self-direction Hours of Instruction 4-80 hours 8+ hours 2-30 hours N/A - open/flex hours K-8 Program Example WIKISEAT Build customizable chairs with learners of all ages. WikiSeat is an open source furniture project. That means that all of the documentation for how to build a WikiSeat is freely and openly published online. www.wikiseat.org/ SUPERHERO CYBORGS Superhero Cyborgs is KIDmob’s build your own body mod workshop for kids ages 10-15 with limb differences. Kids work with designers and engineers to design and prototype their own body modifications. kidmob.org/superhero-cyborgs/ TINKERCAD Tinkercad offers step-by-step digital lessons in 3D design that are common- core aligned and suitable for learners as young as first grade. https://www.tinkercad.com/ HOUR OF CODE The Hour of Code is a global movement reaching tens of millions of students in 180+ countries. Anyone, anywhere can organize an Hour of Code event. One- hour tutorials are available in over 45 languages for all ages. https://code.org/learn 9-12 Program Example BUILD A PLAYGROUND The 1881 Institute in New Orleans trains students to design and build a playground. http://autode.sk/1881school YOUTH CIVIC HACKATHON Civic hackathons challenge groups of teenagers to spend a weekend using design and technology to solve civic challenges. Read about San Francisco’s first Youth Civic Hackathon, hosted at Tech Shop SF: http://autode.sk/YouthCivicHackathon AUDIO: BUMP RECORDS Participants in this program at the Bay Area Video Coalition (BAVC) learn audio engineering, digital recording and mixing techniques. http://autode.sk/BAVCyouth THE MIX The Mix at SFPL is an innovative, youth-designed, 21st century teen learning space that will provide 4,770-square feet of space and equipment for youth ages 13-18 to explore, create and develop digital media and computer skills as well as discover and engage with the Library’s traditional books and materials. themixatsfpl.org/ TYPES OF MAKER PROGRAMS: Step 4: Choose Structure, Projects & Activities48 GO TO STEP: 02 03 04 05 0601 08 09 1007FRONTCOVER CONTENTS APPENDIX
  • 49. Photo Credit: Libby Falck Step 4: Choose Structure, Projects & Activities49 GO TO STEP: 02 03 04 05 0601 08 09 1007FRONTCOVER CONTENTS APPENDIX
  • 50. Before you begin selecting specific activities for you program, it’s important to clearly outline the experience your participants will move through as they progress. How will they feel on the first day? On the last? When might they be frustrated? Excited? Defining exactly when participants will master different mindsets and skills and how they’ll feel along the way will help you choose the appropriate activities and structure for your program. This activity will help you map your participants’ intended progression throughout your program, including their skill development, behavior, attitudes and more. ACTIVITY 5: MAP YOUR LEARNER JOURNEY TIME: 30 minutes PEOPLE: 1-4 MATERIALS: Learner Journey Worksheet and pens or pencils Use the Learner Journey Worksheet to map the path your students will take. LEARNER JOURNEY WORKSHEET This is a Maker Program Starter Kit Resource, available in the appendix and on Google Drive. TAKE NOTE You alone are responsible for your maker program! Starter Kit resources are provided under a BY-NC- SA Creative Commons license. See pg. 2 for more information. Activity 5: Map Your Learner Journey Step 4: Choose Structure, Projects & Activities50 GO TO STEP: 02 03 04 05 0601 08 09 1007FRONTCOVER CONTENTS APPENDIX
  • 51.     Step 4: Choose Structure, Projects & Activities51 GO TO STEP: USE THIS! See Appendix 02 03 04 05 0601 08 09 1007FRONTCOVER CONTENTS APPENDIX
  • 52. There are nearly limitless activity guides, tutorials, curriculum and resources available for use in your maker program. Use the results from your Maker Strengthsfinder Worksheet to select activities you feel confident including in your first maker program. Remember to start with the lowest-hanging fruit. ACTIVITY 6: EXPLORE AND CHOOSE ACTIVITIES TIME: 2-8 Hours PEOPLE: 1-4 MATERIALS: Maker Program Activity Guide, computer, and internet connectivity MAKER PROGRAM ACTIVITY GUIDE This is a Maker Program Starter Kit Resource, available in the appendix and on Google Drive. To help you get started, we’ve put together a Maker Program Activity Guide to help you quickly identify beginner-level projects that match your strengths and the needs of your program. This guide includes the following information for over eighty beginner-level maker activities: • • • • • • • • • • • Use the Maker Activity Guide to identify the specific activities that you’d like to incorporate into your program. Of course, feel free to also use activities that aren’t included in this guide or that are of your own invention! “Even if you don’t have access to expensive… hardware, every classroom can become a makerspace where kids and teachers learn together through direct experience with an assortment of high and low tech materials.” ~ Gary Stager and Sylvia Martinez in Invent to Learn Title & Link Description Source/Author Skills Learned Type of content (kit, video, step-by-step guide, etc) Target Grades Estimated hours to complete Difficulty to facilitate Estimated cost of materials for 10 learners Advanced software & equipment required (beyond standard classroom materials like scissors, paper, markers, etc) Potential Tie-ins to Core Subjects Activity 6: Explore & Choose Activities Step 4: Choose Structure, Projects & Activities52 GO TO STEP: 02 03 04 05 0601 08 09 1007FRONTCOVER CONTENTS APPENDIX
  • 53. Maker Program Activity Guide 1 Activity Title Brief Description Source Category Content Type Hours to CompleteDifficulty Grades Potential Subject Tie- Ins Advanced Software & Equipment Required Link Coding with Paper: Space Race Game The object of the Space Race game is to navigate your rocket ship safely through the galaxy of aliens and satellites, all the way to the moon. Using the pre-made coding blocks students can create a ‘program’ of directions for their rocket to follow and complete its mission. Fractus Learning Coding Step-by-Step Guide 1 Easy K-8 Science; Space - https://www.fractuslearning. com/2014/11/18/coding-with-paper- printable-game/ The Perfect Recipe Do you have a favorite recipe that you want to share with the world? With this project we will use code to write a recipe that looks as good as it tastes. Google Creative Lab Coding Step-by-Step Guide 3 Intermediate 6-12 Computers with internet https://googlecreativelab.github.io/coder- projects/projects/perfect_recipe/ Make Your Own Mondrian Paint makes a mess. Code is so much cleaner. Use this project to recreate a classic Modern artwork, Piet Mondrian’s Composition II in Red, Blue, and Yellow in your browser using basic web building blocks. Google Creative Lab Coding Step-by-Step Guide 3 Intermediate 6-12 Art Computers with internet https://googlecreativelab.github.io/coder- projects/projects/mondrian/ Pop-Up Penguin Game Make a simple game to play with your friends and family. See if you can find all the penguins without waking the yeti! Google Creative Lab Coding Step-by-Step Guide 3 Intermediate 6-12 Art Computers with internet https://googlecreativelab.github.io/coder- projects/projects/pop_up_penguins/ Interactive Space Wizard Game and Controller Remixing a game that is designed for integration with a MaKey MaKey powered controller is a great introduction to the key concepts of building an interactive game! All you need is a Scratch account, a MaKey MaKey, and some basic construction items! Digital Harbor Foundation Coding & Electronics Step-by-Step Guide 2 Intermediate 3-8 Science; Space Computers with internet and acces to Scratch, Makey Makey https://blueprint.digitalharbor. org/projects/interactive-space-wizard- game-and-controller/ 5 Chairs Exercise The 5 Chairs activity encourages students to design models of chairs based on design principles they pull from user profiles. This activity also encourages students to iterate on their designs and practice using different materials. d.school Design Thinking Step-by-Step Guide 1 Intermediate 4-12 - https://dschool.stanford. edu/groups/k12/wiki/17761/5_Chairs_Exer cise.html Wallet Project The Wallet Project is a one-hour overview of the entire design process d.school Design Thinking Step-by-Step Guide 1 Intermediate 4-12 - https://dschool.stanford. edu/groups/k12/wiki/c739e/Wallet_Project .html Underwater Microphone Kit Follow National Geographic Explorer, Shah Selbe, on his adventure into the wilds of the Okavango Delta in Botswana to listen for wildlife. At home, you can have your own adventure with an underwater microphone, also known as a hydrophone, by listening to the sounds in your local pond, river, ocean (or bathtub). KitHub Digital Media Kit 2 Easy K-8 Science, marine science, ecology Hydrphone Kit https://kithub.cc/hydrophone/ Make a Music Video Students work together to create a short music video for a familiar children's song. Education World Digital Media Step-by-Step Guide 5 Intermediate K-8 Art; Launguage Arts; activity is standards- aligned Camcorder and Computer with basic video editing software http://www.educationworld. com/a_lesson/01-1/lp226_05.shtml DIY Sound Effects A basic overview of the art of sound effects, including how to make them, how to record them, and even how to automate them. Instructables Digital Media Video Instructions 2 Easy 3-12 Art Microphone http://www.instructables.com/id/DIY- Sound-Effects/ Activity 3: Program Vision WorksheetsActivity 6: Explore & Choose Activities Step 4: Choose Structure, Projects & Activities53 GO TO STEP: USE THIS! See Appendix 02 03 04 05 0601 08 09 1007FRONTCOVER CONTENTS APPENDIX
  • 54. Once you’ve identified compelling activities, you can use the Program Outline Template to break down a day-by-day plan for your program. This will be your go-to planning document for the duration of your program. It will also be a useful tool to share with volunteers who are helping to facilitate your program and for finalizing your budget. ACTIVITY 7: OUTLINE YOUR PROGRAM TIME: 2 hours PEOPLE: 1-4 MATERIALS: Program Outline Template and computer with internet PROGRAM OUTLINE TEMPLATE This is a Maker Program Starter Kit resource, available on Google Drive. Creating a compelling theme or story that weaves the activities in your program into a cohesive experience will help to motivate engagement. Themes you might consider include: • • • • • • • CHOOSE A PROGRAM THEME Exploring and building prototypes of solutions to address a specific problem in your community or school A subject-based theme, such as “Ancient Egypt” or “Marine Biology” A multi-stage citizen science project; best done in partnership with a local nonprofit or scientist A theme that coincides with a community event series or school initiative; for example, adding electronics and e-textiles to your homecoming float Challenge-based projects or contests Ask your students what’s important to them Get creative! Use whatever will get your participants most excited Activity 7: Outline Your Program Step 4: Choose Structure, Projects & Activities54 GO TO STEP: 02 03 04 05 0601 08 09 1007FRONTCOVER CONTENTS APPENDIX
  • 55.   ● ● ● ● ●   This template is available as a Google Doc in the Maker Program Starter Kit’s Google Drive Folder. This means all you have to do is copy it, plug in your details, and you’re ready to go! See the appendix for details. Activity 7: Outline Your Program Step 4: Choose Structure, Projects & Activities55 GO TO STEP: USE THIS! See Appendix 02 03 04 05 0601 08 09 1007FRONTCOVER CONTENTS APPENDIX
  • 56. STEP 5 SKILL UP Step 5: Skill Up56 GO TO STEP: 02 03 0601 08 09 100704 05FRONTCOVER CONTENTS APPENDIX
  • 57. Congratulations, you’ve designed your maker program! Nice work. Now how will you go about facilitating these exciting new activities? This section will help you identify methods and opportunities to “skill up” before your program begins. There’s a good chance that you were reminded of a few rusty maker skills during your Maker Strengthsfinder Activity. Now’s the time to revisit those experiences and brush up! Perhaps your mom was a seamstress who taught you basic stitches but you haven’t touched needle and thread in years. Maybe you participated in a 3D printing workshop but the space was crowded and you’re are fuzzy on the details. Perhaps you got really into screen printing two summers ago but the tools have been collecting dust in your garage ever since. Whatever you have experience with, run with it! Block out 2-10 hours (depending on the skill and just how rusty you are), and prepare for some catchup. Here are some tips to get started: • • • Dig out old tools and equipment you haven’t used in a while and complete a small project. Connect with skilled friends and people in your community and request a 1-hour brush-up Explore the communities listed in Step 9 to request specific advice or further resources STEP 5: SKILL UP BRUSH UP ON OLD SKILLS Step 5: Skill Up57 GO TO STEP: 02 03 0601 08 09 100704 05FRONTCOVER CONTENTS APPENDIX
  • 58. In the previous step you may have decided to tackle a few activities that you’ve never encountered before. That’s awesome! There are many maker skills you can begin to learn with only a few hours of work. One great way to get started is to simply complete the activities you’ve chosen for your student in advance. Most of the resources in the Activity Guide include extensive instructions and documentation that will help you walk through each experience. If you have questions, utilize the forums listed in Step 9 to discover answers within the maker education community. Completing your activities in advance will help you build confidence before introducing them to students. As you saw in the Maker Program Activity Guide, many maker activities can be completed with relatively low-tech resources. Cardboard, fabrics, duct tape, paper and pencils can take you a surprisingly long way. On the other hand, if you’re incorporating technology and software you’ve never used before, building foundational knowledge with those tools will enable you to facilitate learning as smoothly as possible. To help you get started, we’ve put together a List of Educator Learning Resources.. This list includes the following information for over forty self-directed learning resources to help you gain experience with new skills and tools before your program begins. • • • • • • • LEARN NEW SKILLS LIST OF EDUCATOR LEARNING RESOURCES This is a Maker Program Starter Kit Resource, available in the appendix and on Google Drive. Tool/Skill Description Hours to learn basics Difficulty to learn Cost of necessary equipment, software and materials Cost of instruction, if applicable URL to resource Step 5: Skill Up58 GO TO STEP: 02 03 0601 08 09 100704 05FRONTCOVER CONTENTS APPENDIX
  • 59. 1 Tool/Skill Description Hours Difficulty to Learn Skill Category Tinkercad, 3D modeling Tinkercad has a fantastic and fun seires of interactive lessons that teach all the basics of navigating and using the software. https://www.tinkercad.com/learn/ 1 Easy 3D Technology 123D Design, 3D modeling 123D Desing has a seies of videos for mastering the tool's interface. http://www.123dapp.com/howto/design 2 Easy 3D Technology 123D Catch, 3D capture Videos and documentation to help you get started, or get more advanced with 123D Catch – a free app that turns photos into 3D models. http://www.123dapp. com/howto/catch 2 Easy 3D Technology 123D Sculpt, 3D modeling 123D Sculpt+ includes in-app training. 2 Easy 3D Technology Autodesk Fusion, 3D modeling Fusion has a great series of videos that will help you begin modeling quickly and easily. http://www.autodesk.com/products/fusion-360/learn-training-tutorials; After completing this you can dig deeper on the Autodesk Design Academy by filtering for "Fusion 360": https://academy.autodesk.com/explore-and-learn 2 Easy 3D Technology 3D Printing Basics Follow the instructions provided by the manufacturer of your 3D printer to print your first project. 6 Intermediate 3D Technology 3D Printing, Comprehensive Introduction If you don't have someone to teach you in person, take the online 3D printing course offered by Instructables for a fantastic introduction. http://www.instructables. com/class/3D-Printing-Class/ 30 Intermediate 3D Technology AutoCAD, 3D modeling The Autodesk Design Academy offers an extensive series of video tutorials to help you get started at https://academy.autodesk.com/software/autocad 10 Difficult 3D Technology Maya, 3D animation The Autodesk Design Academy offers an extensive series of video tutorials to help you get started at https://academy.autodesk.com/software/maya 10 Difficult 3D Technology 3DS Max, 3D animation The Autodesk Design Academy offers an extensive series of video tutorials to help you get started at https://academy.autodesk.com/software/3dsmax 10 Difficult 3D Technology Autodesk Inventor, 3D modeling The Autodesk Design Academy offers an extensive series of video tutorials to help you get started with Inventor. https://academy.autodesk.com/software/inventor 10 Difficult 3D Technology Scratch, beginner game design & coding Scratch includes a well-designed series of starter tutorials when you open the tool. If you need additonal support, the creators at MIT have made a very useful set of guides and videos at https://scratch.mit.edu/help/ 2 Easy Coding HTML & CSS, web design Online interactive tutorials like those offered by Codecademy are a great way to learn the basics of web design with HTML & CSS, as well as other programming languages. https://www.codecademy.com/learn/make-a-website 4 Intermediate Coding Powtoons, 2D Animation Powtoons offers a very easy to follow series of video tutorials to get you started. https://www.powtoon.com/tutorials/ 1 Easy Digital Media Video Production A great resource to learn or review the basics of video production and editing is the "Filmmaking 101" section of the Vimeo Video School. https://vimeo. com/blog/category/video-school 3 Intermediate Digital Media Step 5: Skill Up59 GO TO STEP: USE THIS! See Appendix 02 03 0601 08 09 100704 05FRONTCOVER CONTENTS APPENDIX
  • 60. If you’re seeking a more generalized introduction to maker education, you may want to consider professional development. Here’s a list of professional development opportunities that may be a fit for you: PROFESSIONAL DEVELOPMENT OPPORTUNITIES ONLINE PROFESSIONAL DEVELOPMENT MAKER ED Maker Ed offers a brand-new online PD program in maker education http://autode.sk/MakerEdPD ISTE ISTE, the International Society for Technology in Education, offers online courses and webinars http://autode.sk/ISTEpd HARVARD PROJECT ZERO http://autode.sk/projectzero SONOMA STATE UNIVERSITY Maker Certificate Course http://autode.sk/makercert COURSERA Tinkering Fundamentals: A Constructionist Approach to STEM Learning http://autode.sk/CourseraPD BUCK INSTITUTE http://www.bie.org/ LRNG Maker Educator Playlist http://autode.sk/LRNGplaylist EDUCATION CLOSET Assessment for Makers Online Course http://autode.sk/EduCloset HIGH TECH HIGH MOOCS http://autode.sk/ hightechhighmooc Step 5: Skill Up60 GO TO STEP: 02 03 0601 08 09 100704 05FRONTCOVER CONTENTS APPENDIX
  • 61. IN-PERSON PROFESSIONAL DEVELOPMENT IDEO TEACHERS GUILD COACHES https://teachersguild.org/ coaches DIGITAL HARBOR FOUNDATION Educator Workshops http://autode.sk/ DigitalHarborBlueprint INVENT TO LEARN Authors of Invent to Learn http://inventtolearn.com/ workshops/ LIGHTHOUSE CREATIVITY LAB http://autode.sk/ LighthouseCreativityLab THE EXPLORATORIUM San Francisco, CA Middle school and high school math and science professional development http://autode.sk/ TeacherInstitute NUVU INNOVATION CAMP FOR EDUCATORS http://autode.sk/ NUVUinnovation UNPROFESSIONAL DEVELOPMENT Berkeley, CA http://autode.sk/ berkeleyCreativity101 DISCOVERY EDUCATION http://autode.sk/DiscoverySTEM STANFORD D.SCHOOL K12 LAB Offers introductory workshops on design thinking. www.k12lab.org/ Step 5: Skill Up61 GO TO STEP: 02 03 0601 08 09 100704 05FRONTCOVER CONTENTS APPENDIX
  • 62. STEP 6 COORDINATE SUPPORT & LOGISTICS Step 6: Coordiate Support & Logistics62 GO TO STEP: 02 03 0501 08 09 100704 06FRONTCOVER CONTENTS APPENDIX
  • 63. It’s time to begin sharing your ideas with potential supporters and pulling together the resources that will bring your program to life. Although you may be able to take on a lot by yourself, engaging your community will be crucial for your program’s success and sustainability. Incorporating the unique resources and expertise of local businesses, community members, and organizations can also give your program a unique flare for participants. For example, can you get a female engineer from a local tech company to present to your group? Perhaps a nearby factory would be willing to give your participants a tour? Maybe the department store down the street has cardboard boxes you can use for an activity? Could a local graphic designer run a hands-on design workshop for your participants? You’ll never know until you ask! Beyond community support, much of the logistical work that goes into starting a makerspace or maker program is well-documented in other fantastic resources. We’ll introduce several considerations you’ll want to keep in mind as you move forward with your program, as well as dozens of existing resources to help you do so. The logistics-focused categories we’ll review include safety, people organization, funding, and space. STEP 6: COORDINATE SUPPORT AND LOGISTICS Step 6: Coordiate Support & Logistics63 GO TO STEP: 02 03 0501 08 09 100704 06FRONTCOVER CONTENTS APPENDIX
  • 64. Now that you’ve got your ideas organized, let’s put them into a format that will be easy to share with others. You can use our template or create your own custom one-page document to share your vision with the community. You could also create a website; tools like Weebly, Strikingly and Squarespace have drag-and-drop editors that make it very easy to design and build your first website. ACTIVITY 8: SHARE YOUR VISION ONE-PAGER TEMPLATE This is a Maker Program Starter Kit resource, available on Google Drive. TIME: 30 minutes - 4 hours PEOPLE: 1-6 MATERIALS: Computer with internet access Here are a few things to keep in mind as you share your vision: • • • • Other tools you might use to share your vision include: • • • • • • • • • • Be visual. If possible, use high-quality photos of your students engaging in making activities to capture viewer attention. Be concise and use simple language (no need for techie speak here!). Make your text easy to read by choosing simple fonts and using standard capitalization (ALL-CAPS is harder to read). If possible, share measurable success criteria (people love data!). Google Sites (you can also create an affiliated Google Group) Facebook page Medium Weebly Wordpress Squarespace Strikingly Piktochart Powtoons Freepik for free and low-cost graphics Activity 8: Share Your Vision Step 6: Coordiate Support & Logistics64 GO TO STEP: 02 03 0501 08 09 100704 06FRONTCOVER CONTENTS APPENDIX
  • 65. This template is available as a Google Doc in the Maker Program Starter Kit’s Google Drive Folder. This means all you have to do is copy it, plug in your details, and you’re ready to go! See the appendix for details.   Activity 8: Share Your Vision Step 6: Coordiate Support & Logistics65 GO TO STEP: USE THIS! See Appendix 02 03 0501 08 09 100704 06FRONTCOVER CONTENTS APPENDIX
  • 66. As discussed earlier, engaging your community will be crucial for building a thriving program. Your next step will be to share a survey - along with your beautiful one-pager or website - with potential supporters. Be sure to provide a brief introduction to your program in the body of any email or message you send requesting support. You can create your own survey from scratch, or get started with our template. ACTIVITY 9: SURVEY YOUR COMMUNITY COMMUNITY SURVEY TEMPLATE This is a Maker Program Starter Kit resource, available on Google Drive. TIME: Varies PEOPLE: 1-3 MATERIALS: Computer with internet access Some of the key ways your community may be able to help include: • • • • • • • • • • In addition to the immediate network at your school or organization, you may also reach out to the following to explore possibilities for collaboration and partnership: • • • • • • • • • Volunteering (extra hands on deck during program) Technology Instruction Guest speaking Mentorship for projects Event organization Outreach and promotion Donating equipment and materials Photography and/or videography Writing an article about your program Grant funding and monetary donations Local library youth department Boys and Girls Club Girl Scouts Boy Scouts YMCA youth services Youth Groups College students (education students in particular may be great volunteers!) Corporate partners (may be willing to donate goods/services) Business Leaders & Chamber of Commerce People will want to help! Don’t be afraid to ask for support. Activity 9: Survey Your Community Step 6: Coordiate Support & Logistics66 GO TO STEP: 02 03 0501 08 09 100704 06FRONTCOVER CONTENTS APPENDIX
  • 67. This template is available as a Google Doc in the Maker Program Starter Kit’s Google Drive Folder. This means all you have to do is copy it, plug in your details, and you’re ready to go! See the appendix for details. Activity 9: Survey Your Community Step 6: Coordiate Support & Logistics67 GO TO STEP: USE THIS! See Appendix 02 03 0501 08 09 100704 06FRONTCOVER CONTENTS APPENDIX
  • 68. SPACE When it comes to making, space matters. Do you have access to electricity? Wifi? Will using a loud drill or vacuum disturb people in the next room? Will direct sunlight damage your projects? There are many things to consider, and most depend on what you’re doing. For the most part, you’ll simply have to use your best judgement, but there also are many fantastic resources to help you avoid common mistakes as you get started. MAKER ED RESOURCE LIBRARY Spaces & Places http://autode.sk/MakerSpaces PLACES YouMakerspace Playbook, pages 5-8 http://autode.sk/ MakerspacePlaybook PLACES TO MAKE Youth Makerspace Playbook, pages 10-26 http://autode.sk/ MakerspacePlaybook SHAPING THE LEARNING ENVIRONMENT Chapter 9, Invent to Learn THE PHILOSOPHY OF EDUCATIONAL MAKERSPACES Part 1 of Making an Educational Maker Space http://autode.sk/EdMakerspace INFORMAL LEARNING ENVIRONMENTS FOR LIBRARIES YALSA Making Playbook, page 7 http://autode.sk/YALSAmaking Step 6: Coordiate Support & Logistics68 GO TO STEP: 02 03 0501 08 09 100704 06FRONTCOVER CONTENTS APPENDIX
  • 69. SAFETY CONSIDERATIONS Makerspace Playbook, pages 13-16 http://autode.sk/ MakerspacePlaybook SAMPLE LIABILITY WAIVER Makerspace Playbook, page 66 http://autode.sk/ MakerspacePlaybook TIPS FOR TAKING APART ELECTRONICS Youth Makerspace Playbook, pages 68-69 http://autode.sk/ YouthMakerPlaybook SAFETY Safety and liability are important considerations for your program. Your number one concern should always be providing a safe environment for your participants. Be aware of the hazards involved with using tools and equipment and take appropriate precautions. Please be sure all of Makerspace users (of all ages) are properly trained in safely operating tools and machinery before using them. It’s also a good idea to clearly post safety rules and requirements in your makerspace. Here are some starter resources to help make sure you and your students are safe during your program. Step 6: Coordiate Support & Logistics69 GO TO STEP: 02 03 0501 08 09 100704 06FRONTCOVER CONTENTS APPENDIX
  • 70. ORGANIZING PEOPLE As discussed earlier, finding the right people to help support and facilitate your program will be a crucial step toward success. You’ll need people who can help with the following: • • • • • • Here are some fantastic resources to help you build and maintain a great team: Instruction and coaching Logistics and scheduling Equipment maintenance and materials purchasing Budgeting and fundraising Marketing and recruitment Coaching and encouragement SAMPLE JOB DESCRIPTIONS FOR VOLUNTEERS AND MEMBERS Maker Club Playbook, pages 54-55 http://autode.sk/ MakerClubPlaybook GETTING BUY-IN YALSA Making Toolkit, page 8 http://autode.sk/YALSAmaking SAMPLE EMAILS Maker Club Playbook, pages 68-77 http://autode.sk/ MakerClubPlaybook PEOPLE & PARTNERS Makerspace Playbook, pages 52-57 http://autode.sk/ MakerspacePlaybook TIPS FOR MENTORS Maker Club Playbook, pages 20-22; 52 http://autode.sk/ MakerClubPlaybook MAKER ROLES Makerspace Playbook, pages 17-20 http://autode.sk/ MakerspacePlaybook Step 6: Coordiate Support & Logistics70 GO TO STEP: 02 03 0501 08 09 100704 06FRONTCOVER CONTENTS APPENDIX
  • 71. FUNDING AND BUDGET There are many approaches to making, and many of them are relatively inexpensive to pursue. At some point, however, you’ll likely want to find additional financial support. Grants, local companies, crowdfunding platforms and fundraising drives can all be great ways to get started. The below resources can help you create a realistic budget, reduce costs and find financial support to get your program off the ground. GETTING BUY-IN FOR YOUR MAKERSPACE http://autode.sk/getbuyin LIST OF TOOLS & MATERIALS Cost breakdown http://autode.sk/MakerTools CHECKLIST FOR GRANT PLANNING AND DEVELOPMENT Makerspace Playbook, pages 43-44 http://autode.sk/ MakerspacePlaybook LIST OF GRANTS FOR MAKERSPACE SCHOOLS http://makergrants.blogspot. com/ SAMPLE BUDGET Maker Club Playbook, page 53 http://autode.sk/ MakerClubPlaybook DONORS CHOOSE Crowdfunding for your program https://www.donorschoose.org/ SIX STRATEGIES FOR FUNDING A MAKERSPACE http://autode.sk/ FundMakerspace FUNDING YOUR MAKERSPACE http://autode.sk/ FundMakerspace2 LIST OF AFTER-SCHOOL PROGRAM FUNDERS By Sphero http://autode.sk/SpheroFunders Step 6: Coordiate Support & Logistics71 GO TO STEP: 02 03 0501 08 09 100704 06FRONTCOVER CONTENTS APPENDIX
  • 72. STEP 7 MARKET YOUR PROGRAM Step 7: Market Your Program72 GO TO STEP: 02 03 05 0601 08 09 1004 07FRONTCOVER CONTENTS APPENDIX
  • 73. STEP 7: MARKET YOUR PROGRAM Unless you’re a teacher with a classroom of students, you’ll probably need to do some legwork to recruit participants to your program. Planning the nuts and bolts of your program can be so exciting that recruitment is often overlooked. Creating a plan to get participants in the door and keep them coming back is as important as choosing the right equipment and volunteers. Here are a few common ways maker educators recruit program participants: • • • • • • • • • • Create a survey to collect contact information for interested participants. Attend a local Maker Faire where you might: Set up a booth to advertise your maker program Distribute flyers or balloons to participants Use Twitter, Facebook, Instagram and other social media platforms to share your program with local educators and youth organizers. Speak at conferences, networking events, and schools Set up an information table at a local school; this can be particularly effective during the lunch hour. Use “guerilla marketing” tactics like chalk stencils to share information about your program in locations frequented by youth and parents. Create posters, postcards, flyers, sticker and distribute them to teachers, parents, and community partners. Engage your school, organization, volunteer and team to help distribute promotional materials and recruit. RECRUITMENT Step 7: Market Your Program73 GO TO STEP: 02 03 05 0601 08 09 1004 07FRONTCOVER CONTENTS APPENDIX
  • 74. Intrinsic Motivation A best-case scenario for a maker program is to be working with students who are intrinsically motivated to take part. Some of your students will have a deep-seated interest in one or more technologies that will keep them coming back class after class. Other students will require more prompting. For learners without a natural interest in technology, problem-based learning can be a fantastic tool to foster intrinsic interest in your program. Even for students as young as 5 years old, the opportunity to use a new tool or technology to address a real-world problem can be a powerful and life-changing experience. Social Motivation For middle school and high school students in particular, social motivation is a powerful tool. Teamwork that requires the full participation of all members of the group can help engage the full class. This approach is most effective in programs that are at least partially student-lead. School Credit Academically-driven students will be more likely to participate fully if they are able to receive school credit for your program. Competitions/Contests Competition for small prizes can be a fun way to lighten the mood and encourage engagement, particularly for group work. Applied learning opportunities that enable students to develop and pitch solutions to real companies is a great way to not only motivate engagement from students, but to also involve the broader community in your program. COMMON METHODS TO MOTIVATE PARTICIPATION “HOW A BIGGER PURPOSE CAN MOTIVATE STUDENTS TO LEARN” By KQED’s Mindshift team http://bit.ly/ PurposeLearning Step 7: Market Your Program74 GO TO STEP: 02 03 05 0601 08 09 1004 07FRONTCOVER CONTENTS APPENDIX
  • 75. Students Pay Participants who are required to pay for a program are more likely to attend. Although free programs can reduce barriers to entry, they often result in overblown registration numbers that make them difficult to plan. Application-Only A selective application process can increase the perceived value of a program for participants and increase attendance and participation. Stipends Some programs - particularly those targeting low-income and at-risk populations - have found success with providing stipends to students who successfully complete programs. This means participants are paid a predefined amount of money when they complete the program. This approach enables learners who may otherwise need to work to make time for your program (and valuable skill building!). Step 7: Market Your Program75 GO TO STEP: 02 03 05 0601 08 09 1004 07FRONTCOVER CONTENTS APPENDIX
  • 76. One thing you can do to improve your chances of recruiting participants to your program is to create a marketing plan that outlines your outreach efforts. You can get your plan started by using the Marketing Plan Worksheet in the Maker Program Starter Kit. ACTIVITY 10: CREATE A MARKETING PLAN TIME: 2-4 hours PEOPLE: 1 MATERIALS: Marketing Plan Worksheet and computer with internet SUPERINTENDENT’S GUIDE TO SOCIAL MEDIA Check out this social media guide at http://bit.ly/ makermarketing Activity 10: Create a Marketing Plan MARKETING PLAN WORKSHEET This is a Maker Program Starter Kit Resource, available in the appendix and on Google Drive. Step 7: Market Your Program76 GO TO STEP: 02 03 05 0601 08 09 1004 07FRONTCOVER CONTENTS APPENDIX
  • 77.          Potential   Participants     Parents     Teachers     Youth   Organizations     _________________     ___________     ____________     _________________         Email     Phone   Calls     Local   events     Mail     Facebook     Newspapers     Radio     Twitter     School   Presentation     Flyers     Instagram     Presentations   to   community   groups     _______________     __________________        ___________________________     _______________        __________________        ___________________________         Online   paid   advertising     Graphic   Design     Printing     Offline   paid   advertising     Video   Production     Photography     ______________________     ___________________     ______________________     ______________________     ___________________     ______________________      Add your own ideas in the blanks! Activity 10: Create a Marketing Plan Step 7: Market Your Program77 GO TO STEP: USE THIS! See Appendix 02 03 05 0601 08 09 1004 07FRONTCOVER CONTENTS APPENDIX
  • 78. STEP 8 PREP FOR INCLUSIVITY Step 8: Prep for Inclusivity78 GO TO STEP: 02 03 05 0601 09 100704 08FRONTCOVER CONTENTS APPENDIX
  • 79. Making is a fun and rewarding endeavor that should be available to all, regardless of gender, age or physical or cognitive difference. One of the powerful things about the creative nature of making is that it’s extremely well-suited for adaptation to meet the needs of a wide variety of participants. Step 8 will take you through ways to weave inclusivity and adaptability into your program. STEP 8: PREP FOR INCLUSIVITY WORKING WITH YOUTH WITH DISABILITIES If possible, involve the learner in the adaptation process. It’s okay to describe the activity and ask the learner for suggestions. Some students with disabilities will be eager to participate in the adaptation process; others may require a great deal of encouragement to even try the activity. In the latter case, you’ll need to be more proactive in preparing a potential solution the learner can get excited about ahead of time. Explore tools or technologies you might use to adapt the activity for the learner. This is a maker program, after all! If it makes sense, find ways to use pair and group work to enable peers to support learners with disabilities. People who live with disabilities spend a great deal of time inventing solutions to overcome the unique barriers in their lives. This can range from wheelchair adaptations to navigate a space more effectively to original approaches to work and learning. In many ways, people with disabilities are natural makers. As a maker educator, you can approach disabilities as an opportunity for creativity. With the right mindset, you can adapt any activity for nearly any learner. Here are a few tips to help do so: • • • ENCOURAGING NEURODIVERSITY IN YOUR MAKERSPACE http://autode.sk/ neurodiversity MAKERSPACES FOR STUDENTS WITH SPECIAL NEEDS http://autode.sk/ MakerSpecialNeeds Step 8: Prep for Inclusivity79 GO TO STEP: 02 03 05 0601 09 100704 08FRONTCOVER CONTENTS APPENDIX
  • 80. Photo Credit: KIDmob PROGRAM SPOTLIGHT: SUPERHERO CYBORGS Superhero Cyborgs worked with kids with upper limb differences to design and prototype their own body modifications. Participants learned to use technology ranging from 3D printing, modeling, and scanning to plaster casting, fabrics, and electronics, before creating their own super powered device! This workshop seeks to reframe disability as an opportunity, asking the question: if not a hand, then what? Participants drove their designs, with the support of professional designers and engineers who asked great questions to guide them through the process. It’s a challenge that kids care about, and helps them to understand the process and build confidence in coming up with ideas and them bringing those ideas to reality. Step 8: Prep for Inclusivity80 GO TO STEP: 02 03 05 0601 09 100704 08FRONTCOVER CONTENTS APPENDIX
  • 81. You don’t even know what an impact this has had on Sydney she feels so big right now! I don’t know if that is the right word. She has so much confidence in herself now. She feels smart and that she can really make a difference. She gave her siblings, dad and neighbor a presentation about what she learned. It was great to see! Thank you to all of you for the opportunity she is truly a changed girl! Thank you thank you thank you. -Sydney’s Mother Sydney SUPERHERO CYBORGS Kieran can not stop talking about the wonder of so much he experienced with all of you, as he labeled you on the way home his “ personal tech family” There is no words or amount of money, I could have paid for all you gave to him and making him feel such strong confidence as he states now, he also claims is very knowledgeable now in the tech world because of all you willing to share and teach him. -Kieran’s Grandmother KIERAN SUPERHERO CYBORGS Jordan literally told me Superhero Cyborgs has changed her life and how she thinks about things. It’s an awesome awakening. I told Kate [an organizer] before the event that Jordan was a direction follower, she didn’t build stuff beyond what was offered in the directions. She’s thinking outside of the box now. And I’m super proud. -Jordan’s Mother JORDAN SUPERHERO CYBORGS SUPERHERO STORIES: Step 8: Prep for Inclusivity81 GO TO STEP: 02 03 05 0601 09 100704 08FRONTCOVER CONTENTS APPENDIX
  • 82. “We need to ask students which are the problems they want to solve and we, educators, have to make sure we create the spaces for them do it.” - Rafranz Davis, Executive Director of Professional and Digital Learning for Lufkin ISD Step 8: Prep for Inclusivity82 GO TO STEP: 02 03 05 0601 09 100704 08FRONTCOVER CONTENTS APPENDIX
  • 83. Another crucial consideration for your program is how to foster a culture of inclusivity for all genders and ethnicities. Since the 1950s, maker toys like robotics kits and remote-control cars have been traditionally marketed toward boys. Be intentional about providing counter- examples to help your students understand that anyone can be a maker, scientist, engineer or technologist. Here are a few ways you can support diversity and inclusivity in your program: • • • • Choose gender-neutral activities. Particularly for younger learners, selecting activities that don’t easily fall into “for boys” or “for girls” categories will encourage full engagement from participants of both genders. Include women and people of color as mentors or speakers in your program whenever possible. Be intentional in your choice of activities. Share stories of diverse makers from a variety of backgrounds. People you might feature include: • • • • • • • • • • • • • DIVERSITY Mae Jemision, the first African-American woman in space Marissa Mayer, President & CEO of Yahoo Ime Archibong, Manager of Strategic Partnerships at Facebook Reshma Saujani, Founder of Girls Who Code Luis Von Ahn, CEO & Co-Founder of Duolingo Megan Smith, Chief Technology Officer of the United States Timothy Campos, Chief Information Officer at Facebook Carolina Huaranca, Entrepreneur in Residence @KaporCSI Malik Ducard, Director of Content Partnerships at Youtube Ann Wojcicki, Co-Founder & CEO of 23andMe Lixia Zhang, Profession of Computer Science at UCLA Erica Joy Baker, Senior Engineer at Slack Cynthia Breazeal, Co-Director of the Center for Future Storytelling at MIT DIVERSITY DOES NOT HAPPEN BY ACCIDENT http://autode.sk/ NotByAccident BRIDGING THE GAP BETWEEN GIRLS AND STEM http://autode.sk/ GirlsAndSTEM MAKING INCLUSIVITY Meaningful Making, page 50 http://autode.sk/ MakingInclusivity COMPUTER SCIENCE WOMEN’S NETWORK https://www.cs.purdue. edu/cswn/ Step 8: Prep for Inclusivity83 GO TO STEP: 02 03 05 0601 09 100704 08FRONTCOVER CONTENTS APPENDIX
  • 84. STEP 9 DIVE IN Step 9: Dive In84 GO TO STEP: 02 03 05 0601 08 100704 09FRONTCOVER CONTENTS APPENDIX
  • 85. STEP 9: DIVE IN A key thing to keep in the back of your mind as you run your program is documentation. This will enable you to reflect on what worked (or didn’t work) during your program launch and make improvements in the future. Here are a few tips to help: Keep a Journal It’s surprising how much you can forget throughout the course of a program. Whether you take audio notes on your smartphone or scribble on loose-leaf paper, taking daily notes will be a tremendous asset as you plan for your next program. For example: • • Track Your Indicators of Success If you used the Indicators of Success worksheet, make sure you don’t forget to follow through on the methods you designed Take Photos and Videos of Everything Yes, you definitely want to capture smiling faces and participants at work, but also remember to document the things they make during your program. If you have time, take a minute or two after each class to capture pictures of participant brainstorming notes, worksheets, projects and prototypes. These will also help inform the development of your next program. Creating short videos that overview your projects and program can also be helpful for future recruitment. If you’re too busy to make this happen or are unfamiliar with video editing, consider having a few of your students take this on. “Brainstorming activity ran over. Need 30 minutes, not 20.” “Student really enjoyed the TED talk. Def use this again!” DOCUMENTING YOUR PROGRESS DOCUMENTATON Explore more ways to document projects in the Makerspace Playbook, pages 45-46 http://autode.sk/ MakerspacePlaybook Step 9: Dive In85 GO TO STEP: 02 03 05 0601 08 100704 09FRONTCOVER CONTENTS APPENDIX
  • 86. At one point or another, you will get stuck. Good thing there’s a community for that! Many of them, in fact... Online Communities, Groups & Forums • • • • • • • WHAT TO DO WHEN YOU GET STUCK Maker Ed Google Group: https://plus.google.com/u/0/communities/108516741770696736815 The IDEO Teachers Guild: https://collaborate.teachersguild.org/ K-12 Fab Labs and Makerspaces Google Group: https://sites.google.com/site/k12makers/ Maker Movement EDU Google Group: https://plus.google.com/collection/oE_wZ Fabfoundation.org International Society for Technology in Education: iste.org Fablearn.Stanford.edu/conferences Skill-Specific Forums: • • • • • • • General forum for Autodesk products: forums.autodesk.com/ Instructables forums: http://www.instructables.com/community/ Autodesk Fusion 360 Forum: https://forums.autodesk.com/t5/fusion-360/ct-p/1234 Community for Autodesk Media and Entertainment Products: area.autodesk.com/ Sparkfun forum for electronics projects: https://forum.sparkfun.com/ Wiki for the Stanford Design School (d.school) K-12 Lab Community: https://dschool.stanford.edu/groups/k12/search/?tag=educator+workshop Scratch Community: scratched.gse.harvard.edu/discussions Adobe Community: https://edex.adobe.com/search/global/?category=teach Step 9: Dive In86 GO TO STEP: 02 03 05 0601 08 100704 09FRONTCOVER CONTENTS APPENDIX
  • 87. Local Groups & Meetups: • • • • • • • • • • Search for “maker education” on Meetup.com to find related groups near you Reach out to a local Maker Corps site: http://makered.org/makercorps/about-maker-corps/program-partners/ Search the Design Thinking in Schools Map for local programs and resources: www.designthinkinginschools.org/ Search The Maker Map for nearby makerspaces and related resources: http://themakermap.com/ See if there’s a Fablearn K-12 Labs near you: http://fablearn.org/conferences/ Digital Harbor Maker Ed Meetups, Baltimore, MD: http://www.meetup.com/DigitalHarbor Bay Area Maker Educators Google Group: https://plus.google.com/communities/112974120022463718222 Bay Area Youth and DIY Education Facebook Group: https://www.facebook.com/groups/286189014822596/ Vancouver Maker Education Meetup: http://www.meetup.com/Vancouver-Maker-Education-Community/ Remake Learning in Pittsburg: remakelearning.org/meetups/ Conferences • • • • • Remake Education, Sonoma CA: www.remakeeducation.org/ Maker Faire, locations around the world: makerfaire.com/ SXSWedu, Austin, TX: sxswedu.com Maker Ed’s Maker Educator Convening, Oakland, CA: http://makered.org/pd-events FabLearn: Palo Alto, CA: http://fablearn.org/conferences/ Of course, you don’t have to wait until you get stuck to take part. Introduce yourself on forums and, if possible, meet a few other educators in person. Especially if you’re building your maker program alone, you’ll benefit from the added support. INFOGRAPHIC OF TOP EDTECH CONFERENCES by Edsurge http://autode.sk/ EdtechConferences Step 9: Dive In87 GO TO STEP: 02 03 05 0601 08 100704 09FRONTCOVER CONTENTS APPENDIX
  • 88. STEP 10 REFLECT & REVISE Step 10: Relfect & Revise88 GO TO STEP: 02 03 05 0601 08 090704 10FRONTCOVER CONTENTS APPENDIX
  • 89. Reflection is as important for you as it is for your students! After your program comes to an end (and you’ve taken a nice, recuperative break), remember to return to your notes, Indicators of Success Worksheet, and any surveys that were completed throughout the program to identify your successes and opportunities for improvement. Even if you don’t plan to run another maker program for a while, take time to reflect within a few weeks of your program’s conclusion. STEP 10: REFLECT AND REVISE One particularly generative activity that can be conducted with your team (or with students in small groups) at the conclusion of your program is “I Like, I Wish, What If.” This format of debriefing guides groups in a review of the successes and challenges of your program and opportunities for future changes. Follow the instructions from Stanford d.school partner ILikeIWish.org to complete this activity. ACTIVITY 11: I LIKE, I WISH, WHAT IF TIME: 1-3 hours PEOPLE: 2-10, core team MATERIALS: paper and pencils “I LIKE, I WISH, WHAT IF” INSTRUCTIONS http://ilikeiwish.org/ Activity 11: I like, I wish, What if Step 10: Relfect & Revise89 GO TO STEP: 02 03 05 0601 08 090704 10FRONTCOVER CONTENTS APPENDIX
  • 90. NEXT STEPS Conclusion & Next Steps90 GO TO STEP: FRONTCOVER CONTENTS APPENDIX 02 03 04 05 0601 08 09 1007