
Recommandé
Recommandé
Contenu connexe
Tendances
Tendances (19)
Similaire à Project in prof avm ii & rod 901
Similaire à Project in prof avm ii & rod 901 (20)
Dernier
Dernier (20)
Project in prof avm ii & rod 901
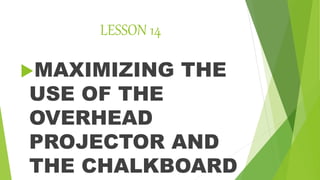
- 1. LESSON 14 MAXIMIZING THE USE OF THE OVERHEAD PROJECTOR AND THE CHALKBOARD
- 2. THE CHALKBOAD EVERY CLASSROOM HAS A CHALKBOARD .IN FACT, A SCHOOL MAY NOT HAVE A COMPUTER . BUT IT ALWAYS HAVE A CHALKBOARD . SO WHY NOT MAKE AN OPTIMUM USE OF WHAT WE HAVE. IN THIS LESSON WE ARE GOING TO DISCUSS ABOUT THE FULL USE OF THE CHALKBOARD .
- 3. CHALKBOARD TECHNIQUE SHARPEN YOUR CHALK TO GET A GOOD LINE QUALITY STAND YOUR ELBOW HIGH. MOVE ALONG AS YOU WRITE. USE DOTS AS “AIMING POINTS “ THIS KEEPS WRITING LEVEL. MAKE ALL WRITING OR PRINTING BETWEEN 2 & 4 INHES HIGH FOR LEGIBILITY WHEN USING COLORED CHALK, USE SOFT CHALK FOR AN EASY MODE OF ERASING
- 4. THE OVERHEAD PROJECTOR There are other kinds of projectors slide the opaque and slide projector. The overhead is more available in schools. And here are the advantages by brown (1969) cite the ff. The projector itself is easy to operate. The projector is used in front of the room . And the instructor has complete control of the gadget. Facing his class and observing their reaction . The instructor can guide the students, control their attention, and regulate the flow of info. In the presentation.
- 5. THE OVERHEAD PROJECTOR TECHNIQUES There are many attributes and techniques in use of the overhead projector in presenting the info. And control of sequence in presentation. Keep in mind that these are the features of the overhead projector. You can show pictures and diagrams . You can use felt pen or wax-based pencil to make points in the transparency during projection. You can control the rate of presenting of info. By covering with an opaque material and then exposing data ready to discuss each point (progressive disclosure technique). You can superimpose additional transparency sheet as a overlays on a base transparency so as to separate processes and complex ideas into elements and present them in step-by-step order.
- 6. Other reminders on the effective use of the ohp are: Stand off to one side of the OHP while you face the students . Don’t talk to the screen . face the students when you talk , not the screen. Place the OHP to your right, if your are right handed, and vice versa. Place the OHP on a table low enough so that it does not block you or the screen. Have the top of the screen title forward towards the OHP to prevent the “keystone effect” (where the top of the screen is larger than the bottom).
- 7. We can learn from the experiences from others. Brown (1969) enumerates effective practices. In primary grades , simple like, leaves, and cutout paper shapes can be placed directly on the projector to stimulate the children’s imagination and encourage discussion. In English composition lessons students themes or writing exercises' can be reproduce in film by means of heat or photo copy process. The teacher and the students can analyze the writing for style and grammar as each example is projected. In arithmetic, blank sheets of acetate and grease pencils can be given to selected students. Have them prepare solutions to homework problems so the class may evaluate and discuss their results.
- 8. The overlaying technique to do progressive disclosure is illustrated below: After making a sketch of the content for the transparency, decide which parts will be the base and which will be used for overlay. Prepare a master drawing for each separate part. In two corners on each master, make register marks that match the marks previously put on the sketch. This will ensure proper registration of each overlay. Prepare the transparency from each master.
- 9. Thank you and have a nice day ; )