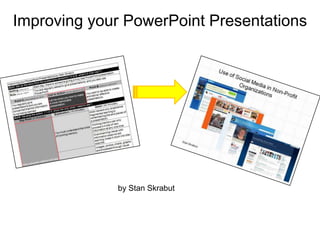
Improving Your Power Point Presentations By Stan Skrabut
•Télécharger en tant que PPTX, PDF•
15 j'aime•4,029 vues

Using the lessons from Cliff Atkinson and Lynell Burmark to depart from the traditional method for creating PowerPoint presentations. Learn to create presentations that will actually facilitate learning.

Recommandé
Contenu connexe
Tendances
Tendances (19)
En vedette
En vedette (20)
Similaire à Improving Your Power Point Presentations By Stan Skrabut
Similaire à Improving Your Power Point Presentations By Stan Skrabut (20)
Plus de Stan Skrabut, Ed.D.
Plus de Stan Skrabut, Ed.D. (20)
Dernier
Dernier (20)
Improving Your Power Point Presentations By Stan Skrabut
- 1. Improving your PowerPoint Presentations by Stan Skrabut @skrabut #UWCES and #netc2010 http://www.slideshare.net/skrabut
- 2. Every day, there is someone giving a bad PowerPoint presentation.
- 3. You regularly give presentations using PowerPoint.
- 4. You are concerned the information presented is not being retained.
- 5. You want to be able to create and deliver effective presentations.
- 6. Let me show you how to make more memorable presentations.
- 7. Why using this method will help you make a more memorable presentation.
- 8. You must understand the limits of working memory.
- 9. Most viewers only remember bits and pieces of a presentation.
- 10. Working memory can only process 3-4 bits of new information at any one time. Working Sensory Long Term
- 11. Overwhelming viewers with information does not aid learning; break it down.
- 12. Individuals process new information in both a visual and verbal channel. Visual Verbal
- 13. Images, photos, charts, graphs are processed through visual channel.
- 14. Narration is processed through verbal channel.
- 15. Text is verbalized and then processed through the verbal channel, overworking the channel.
- 16. You need to guide your viewer’s attention.
- 17. One idea per slide is easy to digest.
- 18. Use complete sentences to guide thought; this increases learning.
- 19. A simple graphic should relate to the specific point at hand.
- 20. Twitter Break @skrabut #UWCES and #netc2010
- 21. There are 3 basic steps for creating your slide deck.
- 22. 1. Develop the script using a Word template and convert them to PowerPoint slides.
- 23. The opening slides set the stage for the rest of your presentation.
- 24. Act II of the template is where you will put the main content of your presentation.
- 25. This is how you convert to Powerpoint.
- 26. 2. After converting your script to a PowerPoint presentation, add notes to your slides.
- 27. The notes section is where you enter your verbal channel information.
- 28. The notes section result in a well created handout.
- 29. The notes section will also be available to you in the presenter mode of your presentation.
- 30. 3. Finally, add images and graphics to tell the story.
- 31. First, sit down with a printout of your slides and sketch pictures for each slide.
- 32. Try to tie the key point slides together as well as the explanation slides.
- 33. Using your sketches, select images that will instantly add meaning to your point.
- 34. Twitter Break @skrabut #UWCES and #netc2010
- 35. How to deliver your memorable presentation.
- 36. Step into screen when giving your presentation.
- 37. Do not split attention from the screen, stay near the screen.
- 38. Use the presenter feature of PowerPoint and keep a small screen in front of you.
- 39. Use a remote control to change the slides.
- 40. Remove as many distractions as possible to make your presentation transparent.
- 41. Keep your slides simple; do not give into temptation of adding more information to them.
- 42. Prepare the physical environment ahead of time, make sure everything works.
- 43. Plan for problems that may develop.
- 44. You should be able to easily manage the flow of your presentation.
- 46. Spending time in preparation will help you deliver a memorable presentation.
- 47. Remember the three elements of your presentation; headline, graphic, and your voice.
- 48. You should acknowledge and encourage the backchannel.
- 49. Add backchannel information to your introduction slide.
- 50. Incorporate Twitter breaks into your presentation. @skrabut #UWCES and #netc2010
- 51. Review your backchannel for feedback that will help you improve.
- 52. References
Notes de l'éditeur
- It seems everywhere we go or every day we end up seeing a presentation someone gives using PowerPoint. If you're like me most of these presentations are absolutely horrible. They are trying to do too much and trying to push too much information on you. When you walk out, you still don't know anything about what's going on. Especially at conferences where you see hundreds of different presentations given throughout the conference. So what can we do to make better presentations?
- You regularly give presentations and you're using PowerPoint. You want to be able to give the best presentation that you can possibly give. I want you to be able to do the same thing
- What's the sense of people coming to your training sessions and in the end they are not gaining any information. You know that it's not being retained. The whole reason that we're educators is you want folks to leave your session with something of value. With some understanding that they know more about the topic then when they came into the presentation. I think you have the same concern that are they are understanding or retaining the information that you want.
- You want to be able to create and deliver effective presentations. That's what we're going to work on today. I am going to show you how to build better presentations
- So let me show you how to make a more memorable presentation. It's not really that hard to do. It does take a little extra work but it's not something that's outside the scope of what you do. If you follow the thoughts and principles that I am presenting, you will end up with a better presentation than your colleagues who do not follow this advice.
- You're probably curious why this method or what I’m going to show you works. Primarily, it's all because it's based on research. Just as you go out and you're providing advice to your clients, your advice is based on research that you have done. it is my job to come out and tell you about education methods also based on research. This will help you do what you're doing. So let’s talk a little bit about the research and why this is can help you.
- First of all, this is all based on the limits of working memory. Working memory is not as powerful as we think. We can’t just absorb everything at one time. We have all these different slides that we want to show, and push the information into the next person, and hope that individuals will figure this out. But to be honest they're not getting it. So, let's talk a little bit about the limits of working memory
- Most individuals will only remember bits and pieces of a presentation. When you set up this whole array of slides with all these bullet points and all these facts and figures, you're expecting that they will understand what you want them to understand. The reality is that basically three things will happen; 1). They understand none of it, 2). They are getting only pieces of what you said and these pieces may not be connected, and 3). They are getting the information and they are able to pull this information in bit by bit and store it the way that you want and are able to re-create all the important points of your presentation. This is where we want to go. Basically, our goal is to move information from the sensory memory into long-term memory.
- We have an array of PowerPoint slides that we want individuals to place in long-term memory. Individuals can only process small bits of information at one time. The vast amount of sensory information easily overwhelms the senses. It is difficult to move information through the working memory into long-term memory. So we must become smarter in how we develop our slides, so we can provide individuals with only the necessary information they need, in a sequence that is basically step-by-step, so they can put it into the long-term memory. We can easily overwhelm viewers and that's what typically happens in most PowerPoint presentations
- Basically, if we overwhelm individuals, we are not helping them learn. You have seen PowerPoint presentations where you are shown lots of bullets or paragraphs of information, and there is an individual either narrating the slides or talking about something entirely different, and you're basically overwhelming the individual. Individuals cannot break it down fast enough to make any meaningful learning; It just exhausts them to the point where they're frustrated and they're not having any learning take place.
- Individuals process information in both the visual and verbal channel. When you look at the slide, you start at the top of the slide and read the text heading. You translate this visual information to verbal information for processing by your working memory. You then view the entire slide with the graphic, and listen to what the presenter has to say. You are then processing information through a verbal channel. If you have a lot of text, individuals have to translate it from a visual to a verbal channel, and with a narration going on at the same time there is a competition going on for the verbal channel.
- Images, photos, charts, graphs, and anything that's visual basically gets processed through a visual channel. Individuals can to remember more through the verbal channel. There was a study completed where individuals were shown approximately 100 pictures, and a year later, they were shown 1,000 pictures but they were asked to identify pictures that they had previously seen. With great accuracy, they were able to identify images they had seen a year prior. The visual channel processes and stores images into memory different than words. Words are translated into a verbal channel.
- When you put up a bunch of text, you're basically a working against the verbal channel. When I’m standing here telling you about this slide, you are going ahead and processing this on your verbal channel. You're storing this information where your mind stores verbal information. What we have to do is get the verbal and the visual channel to work together.
- The problem is if we have a PowerPoint presentation where there's a lot of text, the text is being verbalized. So you are translating from a visual to a verbal and overwhelming the verbal channel while there is a narration going on at the same time. In the case of this slide, we have all these different bullet points here, you're reading these and trying to translate those in your head for the verbal channel. At the same time I am talking and you're not getting anything; you're not able to comprehend any of this information. We want to make things work together.
- The idea of what you're trying to do is guide your viewer’s attention. You're able to control it and walk them through your presentation bit by bit so they capture the main points of your slides. You do this in a variety of ways; by visually controlling which are the main points. I don't know if you've noticed that as we’re walking through the slides some slides are visually more important than others. I’m here to guide you through this presentation; I do this by controlling the visuals and the verbals that are presented.
- What you want to do is create one idea per slide, so that it's easy to break down. You don't want to overwhelm the individual with all these different bullets. Even though the items may be related you're pushing too much information and you're asking them process too much. Some people believe we should have less slides; actually, you want more slides. When we get done with this PowerPoint presentation, I will let you know how many slides that we've gone through. Basically, if I’m looking at a 45 minute presentation, I want one idea per slide per minute; in the end, were talking about 45 to 50 slides.
- If you notice at the top of each slide I put the key point that we’re discussing. You can choose to put that key point there or omit it. The idea is this is first-place your eye goes to. You read it; you take the visual and verbalizes it. You then look at the image; this helps increase learning. You basically get the idea in your head of the topic and now you're focusing on me and you're listening to what I have to say. We have a tendency to use fragmented sentences in PowerPoint presentations; this causes extra work because you have to fill in the blank. Use complete sentences when possible.
- The graphic you choose should be as simple as possible; you don't want to overwhelm your viewers with a really complex image. The image will get stored into memory and ties the information together. In this case, we’re using a simple knot. The image ties to the verbal and ties it all together.
- Let's talk about how build this type of presentation. There are three basic steps for creating your slide deck; getting your ideas down with a Word template, adding your notes, and adding the visuals to your PowerPoint.
- The first step is using a word template and converting it to a PowerPoint slideshow. This idea I got from a book by Cliff Atkinson called Beyond Bullet Points. It is a marvelous idea. With it you can structure your presentation so you're not giving too much information and really focusing on the main points. Each box associates to each slide in your presentation. You can identify each key point.
- The first part is the opening slides. So, if you remember to the beginning of this PowerPoint presentation you know I know that I started the slide show with the title. Next, I moved to the setting which was that we were seeing a number of bad presentations. We then discussed what your role was in this. You give presentations all time; do you want to be lumped in with other folks giving bad PowerPoint presentations? Then we started discussing where you are, where you want to be, and where I fit into the picture. You're setting the stage why they are there, and why they should be interested.
- The next part of the template is broken into three columns. If you have a five minute presentation to give then you only fill out the first column. This is broken into three different slides. For a 15 minute presentation you fill out the left side and the middle section. What happens is that you have this key point under five-minute column and you have three sub points under the explanation column. If you have to carry it out to a 45 minute presentation like I did then you get to also fill out the right-hand column. I have three points that I talk about for each explanation. We have 13 slides for each key point or roughly 13 minutes.
- Okay, so once you fill out that template, you need to move it to a PowerPoint presentation. Let me show you how to do this.
- After converting your script to a PowerPoint presentation, it's time to add notes. For this particular presentation that I created, I am using a new technology to see how it works. I’m using Dragon Naturally Speaking. I am narrating each of the slides into a voice recorder, then I feed it through a voice processor and it converts it into a word document. I'll cut and paste the pieces into my notes. I’m experimenting with this, I hope to be able to show this technology shortly.
- Your notes is where you enter your verbal channel information. This is your narrative. This is what you're going to be talking about. This is where you can put all those other details that you would normally shove onto a slide and overwhelm your viewers. Here's where you put the rest of that information and so they can read it on their own at another time.
- When you get done, you can print your presentation as a handout where you have your slide along with your notes. Your viewers actually end up with a better product in the end. If you distribute it this way, this allows them to be able to take these notes and really absorb the information.
- The other thing that happens is the notes section can be used in what's called the presenter mode of your presentation. As I’m showing this is presentation to you, you get to see my slide but on the computer in front of me I get to see what the next slide is going to be. I also get to see my notes. This allows me to have this conversation with you and be able to follow my notes. I don't have to carry papers around. This is what you can see on the presenter mode.
- Once you've completed putting your notes together, you add images to your presentation. This lets you tell the rest of the story. An important thing about this is you want to keep it as simple as possible. Let's talk about how to do this.
- Rather than go hunt for pictures on the web or through stock photo libraries or Microsoft clipart, you're going to sit down with a pencil and a print out of your handout. I print out two slides per page. You draw what you expect to see. I'll show you examples of what I've done to prepare my presentations. It doesn't have to be great art; it doesn't have to be in a perfect. You're just trying to get your thoughts down.
- Ideally, you want to try to tie the key points together as well as the explanation slides. To be honest, I’m not always successful with this. If you can find a metaphor or analogy to tie these things together more power to you. Try to tie these things together with your sketches.
- Using your sketches, select images that will add meaning to your points. You know what your key points are. Which are the focus of this presentation. You know that you are in control. Look for a slides that will really show all of the power of your presentation.
- So far we've created our template, moved our template to a PowerPoint presentation, added our notes, sketched out our slides and added images, now it's time to deliver your presentation. You want to be able to deliver the best presentation that you can, so here are some tips on how to do that.
- First of all, step into the screen when giving your presentation. Don't stand behind the podium. Don't stand way off to the side of your presentation. Stand out in front of your screen or just off to the right-hand or left hand side of the screen as you want to be the focal point of your presentation.
- Stand so that you do not split the attention from the screen. Stay near the screen because what happens is his folks are looking at your screen and then they look over at you, look at the screen, and look over at you. If you're way off to the side, they're splitting their attention from what's on the screen and what you're talking about. A worst-case scenario is that the screen is up at the front and you are way at the back. You want to be part of that attention, you're part of the movie that you are creating. Thinking about the movie analogy is really good. In the fact that if you think about a movie, how many words do you really see? You see images and hear narration; you don't see a lot of words.
- Use the presenter feature in PowerPoint and keep the screen in front of you. Set it up in the front, so you know where you’re at. You shouldn't have to look back and see which slide you are on. You should be able to look down in front of you and see which slide that you are at. Ideally, you have your presenter notes right front of you. You can focus on your audience. You're not distracted and that's the ideal way to present.
- Use a remote control to change the slides. This is once again in an ideal situation. If you have a computer with a remote control to change slides, this is really what you want to be able to do. You don't want to go back to your computer each time and switch slides, or have someone sitting near the computer and you keep telling them next slide.You want to be able to control what's going on and that's where the presenter mode helps. The fact that you know what the next slide is helps you mentally. You're already ready to talk about that slide and you can just give a fluid presentation.
- Remove as many distractions as possible to make your presentation as transparent as possible. You know that people come in and out of doors, cell phones going off. Try to control as much as possible. But remember everything you've prepared so far, you are in control. You should be able to walk up and give a great presentation simply because you've control every aspect of your presentation.
- Keep your slides simple. We talked about this throughout this entire presentation. Guide your viewers step-by-step through this film that you are creating. In this movie that you're creating, you are controlling every shot. You are controlling how they are moving through it. We have a temptation to insert extra information. Remember, if it wasn't in your template, then they don't need it.
- Prepare the physical environment. Take time to check your equipment, check the setup, and arrange the setup where it's going to be comfortable for you. Ensure that you are controlling things.
- Plan for problems that may develop. While you can’t forecast every problem that you may have you can plan for worst-case scenarios. For example, the projector doesn't work or the computer suddenly stops working. I would certainly have a handout sitting to the side that you can distribute. You can then walk and talk everybody through the handout. The more presentation you do, then the more you will understand how to do preplan.
- You are in control of the flow of your presentation, no one else is. As you walk through the slides, you are controlling the flow from one slide to another. If you've done everything right, if you've created your template, put your template into a PowerPoint, added your notes, sketched out some images, found the right images, and put the images on the slides, you know more about this presentation than anyone else. You are in total control of this presentation.
- You need practice, practice, practice. You will practice throughout the preparation of your presentation, as you're going through each step. When you build your template and you look over your template, it’s a practice session. When you put it into PowerPoint and adding styles to identify what the key slides and explanation slides, you are practicing. When you add your notes, you are practicing. When you add images, you are practicing. When you're done, you really should understand this presentation. It's always good to give it a run through to make sure that you are meeting your time limits. You may have to add information in your notes section or a better explanation.
- The real key to a better presentation is the time spent in preparation. I’m hoping that as you walk out of here, you walk out with information that will help you prepare a better presentation. It should not be death by PowerPoint. The goal is that your viewer walks away and remembers your presentation and the message of your presentation.
- Remember the three elements of your presentation. First headline that will capture the attention. An image that will tie it together and guide attention. Finally, simply your voice being able to give a great narration and this will help you give a memorable presentation.
- Image from http://www.flickr.com/photos/superkimbo/3479119091/sizes/l/
- I got my references from “Beyond Bullet Points” from Cliff Atkinson and “Visual Literacy” from LynellBurmark. I hope you enjoyed the presentation.Image from http://www.flickr.com/photos/inju/4368963974/sizes/o/