Learning Episode 16: Using the project-based Learning Multimedia as a Teaching-learning Strategy
•Télécharger en tant que PPT, PDF•
2 j'aime•579 vues

Learning Episode 16: Using the project-based Learning Multimedia as a Teaching-learning Strategy

Recommandé
Recommandé
Contenu connexe
Tendances
Tendances (12)
Similaire à Learning Episode 16: Using the project-based Learning Multimedia as a Teaching-learning Strategy
Similaire à Learning Episode 16: Using the project-based Learning Multimedia as a Teaching-learning Strategy (20)
Plus de Kaenah Faye Padongao
Plus de Kaenah Faye Padongao (9)
Dernier
Dernier (20)
Learning Episode 16: Using the project-based Learning Multimedia as a Teaching-learning Strategy
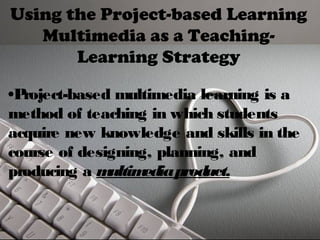
- 1. Using the Project-based Learning Multimedia as a Teaching- Learning Strategy •Project-based multimedia learning is a method of teaching in which students acquire new knowledge and skills in the course of designing, planning, and producing a multimediaproduct.
- 2. The effective use of multimedia learning project requires: • Clarifying goals and objectives • Determining how much time is needed • Extent of students’ involvement in decision making • Setting up forms of collaboration • Identifying and determining
- 3. To trim down time devoted to a multi- media project, Simkins et al (2002) suggest the following: ◘ Use technology students already know. ◘ Use time outside of class wherever possible. ◘ Assign skills, practice, as homework. ◘ Use “special” classes as extra time. ◘ Let students compose text and
- 5. ☺BEFORE THE PROJECT STARTS Create project description and milestones. • Identify what isyour project all about and describeit in aforty (40) wordsor less. • Includetheproject componentsstudents will beresponsiblefor and their duedate.
- 6. Stage Estimated Time Before the project starts 2 weeks Introducing the project 1-2 days Learning the technology 1-3 days Preliminary research and planning 3 days – 3 weeks Concept design and storyboarding 3-5 days First draft production 1-3 weeks Assessing, testing, and finalizing presentations 1-3 weeks Concluding activities 1-3 days Total class time 5-13 weeks
- 7. Work with Real If you havepeopleoutsidethe classroom involved asevaluatorswork with them to makean appropriate scheduleand includetheir ideasfor activities.
- 8. Prepare Resources Seek theassistanceof your librarian or school mediaspecialist.
- 9. Prepare software and peripherals such as microphones Ask thehelp of technical people.
- 10. Organize Computer Files Finding fileseatsmost of your timeif you arenot organized. Naming filesand foldersafter their filetypeand section title helpsto keep thingsorganized and makes it easier to mergeelementslater on.
- 11. Sample:
- 12. Prepare the Classroom Organizebooks, printed papersand any other resourcesso studentscan accessthem independently. Makebulletin boardsin theroom for hanging printoutsof student work, schedules, and organizational charts.
- 14. ☺ introducing the project Help thestudentsdevelop a“big picture” to understand thework ahead. Makesurewhat they will bemaking, who their audiencewill beand what you expect them to learn and demonstratein termsof theRBEC.
- 15. 1. Review project documents You can ask studentsto work with the project documentsyou haveproduced. Encourageyour studentsto ask questionsabout theproject to clarify what you havewritten.
- 16. 2. Perform pre-assessments Your studentscan writepre-assessment questionsbased on your learning goalsto further clarify expectations.
- 17. 3. Perform relevant activities You can show studentsanything you can find that issimilar to what they will beproducing such asWebsiteor your own mini-project you did to learn thetechnology. You can also brainstorm for topics, organizational ideas, and design ideas.
- 18. 4. Group students Form small student groups from three to five students pergroup. Here are some grouping strategies: • By topic interest • By student talents and expertise • By student choice • Randomly
- 19. 5. Organize materials Give each group a folderthat stays in the classroom. All theirgroup work such as storyboards, group journals, and research notes goes in that folder.
- 20. ☺Learning the technoLogy Giveachancefor thestudentsto work with whatever softwareand technology they will beusing. If somestudentsarealready familiar with thetoolsand processes, ask them to help you train theothers. If studentsarenew to multimedia, then begin with lesson that involveusing thedifferent mediatypes. Remember, you and your studentsarecolearnersand you both learn asyou go.
- 21. ☺ PreLiminary research and PLanning At thisstage, studentsshould immerse themselvesin thecontent or subject matter they need to understand to createtheir presentations.
- 22. ☺ ConCept design and storyboarding Processof organizing apresentation that is useful to theaudience. Storyboard: isapaper-and-pencil sketch of the entirepresentation, screen by screen, or in the caseof video, shot by shot.
- 23. Hereareafew design tipsto keep in mind throughout storyboarding and production: • Usescanned, handmadeartwork to makea project look personal and to managescary technology resources. • Keep navigation • Organizeinformation similarity throughout so userscan find what they arelooking for. • Carefor collaboration • Organizemanageablesteps • Check and assessoften
- 24. ☻assessing, testing, and finalizing presentations Two kinds of testing: • Functional Testing • User testing Assessment: Assessment means critical evaluation of yourpresentation.
- 25. ☻ ConCluding aCtivities Way of presenting theproject to the audiences.