SlideShare une entreprise Scribd logo
1  sur  21
Télécharger pour lire hors ligne
Report Date
         May 18, 2006


Stucco 3rd Party-Final Report


    123 Anywhere Drive


     Report Prepared For:
     General Contractor
Guest House--Front Elevation


Front elevation of guest house/second garage before windows on foundation were padded out with EPS
board and PVC accessories/lath were installed over upper level of wood framing.


Window nailing fins padded out with expanded poly-styrene (EPS) board and bead/lath installation over
wood framed walls.
Guest House--Right Elevation


Right elevation of guest house before installation of PVC accessories and 2.5 self-furring diamond lath
over wood framed wall space.


Lath installation with necessary accessories on guest house right elevation wall.
Guest House--Rear Elevation


Rear elevation of guest house just as the lath and bead stage had begun.


After PVC control joints, roofline casing bead, foundation weep screed and lath system were installed.
Guest House--Left Elevation


Left side of front garage before foundation bead and framed wall lath system were installed.


PVC cornerbead installed on CMU foundation; lath system installed on framed walls.
Front Elevation 1


Front left section of wall space before installation of foundation wall accessories and lath system.


Front left elevation section during lath and bead system installation. Note omission of control joints off
openings as requested by builder--secondary reinforcing lath strips were installed to strengthen corners
in lieu of vertical control joints.
Front Elevation 2


Front elevation photo before lath and bead system installation.


All wall space has been lathed and scratched.
Front Elevation 3


Front elevation before required stucco components were installed.


All front elevation wall space except for front entry arches, which need to have framing deficiencies
corrected, is lathed and scratched.
Right Elevation


Entire right elevation wall space before system components were installed.


Right elevation after installation of bead/lath system and necessary control/expansion joints.


                                                                                                 12
Rear Elevation 1


Rear elevation before lath system installation. Arrow denotes area where builder applied additional
flashing tape to flat horizontal surface.


Entire rear elevation, including radius walls and arches, is complete with lath system. The scratch and
texture coats have already begun
Rear Elevation 2


Rear decks and arches before lath system was installed. Now that the waterproofing is complete,
applicator has lathed all areas as required for application of plaster system.


Completed rear elevation lath and bead system.
Left Elevation


Left elevation photo of wood framed wall before installation of bead and lath system.


After installation of lath/bead system and texture coat on framed wall.
Detail Photos #1


3/4" PVC case bead installed 2" off roofline       1/2" PVC case bead and paperback lath
as required. Kickout flashing with hot mop         system installed over forti-flash to prevent
installed by GC.                                   plaster delamination.


PVC case bead installed 1/4" off perimeter         PVC 780 foundation weep screed installed
of wood framed openings to allow for               at CMU/framing intersection as required by
installation of engineered sealant joints.         ASTM.


Plaster stop bead installed at pre-cast            Vertical PVC expansion joint installed on
column headers.                                    right elevation wall to break up wall space
                                                   every 144sqft.
Detail Photos #2


Perfect mitered corners of PVC corner bead      Reinforcing lath "butterfly" strips installed
on garage side HVAC wall.                       on corners of windows to omit control joints
                                                and help restrict cracking as specified.


Again, additional reinforcement off window      Two (2) chimneys with cupola caps
corners were installed to help control          complete with lath and bead system.
cracking off jambs.


All windows protected with window film          Lath system was run continuously from rear
and clean release tape.                         master radius wall onto arches for aesthetic
                                                purposes. PVC corner bead installed.
Scratch/Texture Photos


Fibers added into scratch coat for additional   Horizontal scratch coat being applied to
strength and as applicator contract states.     wood framed walls over lath system.


Soffits and windows are protected from          Texture coat is complete on entire guest
scratch coat process which is almost            house. Windows were padded out with EPS,
complete on the front elevation.                beaded, and then lathed where necessary.


Scratch coat is complete except for the         Guest house during application of scratch
arches which need to be remediated to           and texture coat--now 100% complete.
correct framing issues.
Guest House-Completion Photos


Front Elevation of garage/guest house upon      Right elevation of guest house after stucco
completion of stucco system--paint samples      on lower CMU and upper wood
present.                                        framed/sheathed walls.


Rear elevation guest house 100% complete.       Left elevation of garage is complete. Circle
Refer to previous elevation for detail photos   denotes area of bleed through on CMU
during construction.                            which is being corrected.


Interior garage walls complete with 1/2"        1/2" PVC case bead had to be employed on
sand float texture system where required.       garage walls to compensate for design issues
                                                around openings-discussed w/ GC.
Main House-Completion Photos #1


Main house photo #1 illustrating completion   Main house photo #2 illustrating completion
of stucco texture to all exterior walls.      of stucco system with soft adobe float and
                                              scoring where specified (arrows).


Right elevation complete with texture coat.   Vertical control joints were employed on
Note kickout flashing is functioning          these opening due to size and hidden
properly as visible from water path.          location.


Rear elevation photo #1 illustrating stucco   Rear elevation photo #2 illustrating stucco
system is complete on all walls.              system complete to all exterior walls.
Main House-Completion Photos #2

Rear elevation arch window detail padded out with
poly-isocyanurate board (quick-r) and beaded off
exercise room.


Left elevation exterior walls complete with stucco
system on both CMU(lower) and wood (upper)
substrates.


Left/front elevation photo illustrating exterior wall
system is complete.
Detail Photos-Post Application


Texture chosen was soft adobe trowel finish.   Bevel/slope installed on all horizontal
Arrow indicates 1/4" joints left around        surfaces as required to prevent standing
openings for expansion/contraction.            water.


Note stucco system has been terminated         Termination of foundation weep screed
above rooflines as required. Kickout           above dissimilar materials as required-
flashings will require sealant.                cleaned during punch out.


Additional flashing tape was installed at      Note 16" square scoring was fabricated into
horizontal reveal. Vertical expansion joint    sand float texture in middle section of front
for movement.                                  elevation radius wall.
CONCLUSION:
As this report illustrates, the exterior stucco wall system is complete on all elevations. As
our lath/bead stage report indicated, the applicator employed PVC foundation weep
screed at the CMU/framing intersections as required by ASTM to allow for water egress.
After several discussions with builder, he insisted the stucco contractor omit control
joints installed vertically off openings fro aesthetics. After consulting the SMA manual,
the applicator chose to install reinforcing lath butterfly strips off the corners of openings.
This, in conjunction with the 1/4" engineered joint around the perimeter of windows and
doors, will help control cracking and preserve aesthetics. PVC accessories and 2.5
self-furring diamond lath were installed to all framed walls and arches as required. The
scratch coat is fiber reinforced to add additional strength to the plaster over wood framed
walls. The texture chosen by the owner and designer was a soft adobe. Samples were
provided on the CMU garage wall and approved by the appropriate parties.

After numerous discussions with the framing contractor , we agreed the front entry
arches had to be corrected to rectify framing inconsistencies. The remaining arches were
double beaded in some places with a regular and wide flange corner bead. Applicator
was able to achieve a consistent arch through field adjustments, but the main entry had to
be removed and replaced.

There are intersections of dissimilar materials which require an ASTM 920 approved
building sealant (Vulkem or equivalent). to prevent water ingress. It is critical that these
areas be properly sealed in order to protect the structure. They should include:

   1- Wood fascia/stucco intersection
   2- Back and underside of ALL kickout flashings installed at sloped roof/vertical wall
      intersections.
   3- Deck intersections
   4- Penetrations through system (i.e. electrical, plumbing etc.)
   5- Around perimeter of ALL openings where 1/4" gap is present. The ¼” gap left around windows
      over wood framing should have a 3/8” soft cell backer rod installed into the gap before the
     engineered sealant joint can be completed. The rod must be 25% larger than the joint size so it
     stays snug and does not move (hence 3/8”). The rod is critical to prevent three-sided adhesion
     and subsequent adhesive/cohesive sealant failure.
   6- Around all exterior lighting attachments (and all other attachments through system).
   7- Any areas which may allow water ingress into the building envelope.
Representative photographs illustrating design and construction details have been
included in the "photos" section of this report. EHS will perform a follow up inspection
in six (6) months to evaluate the system performance and condition. We will submit a
report indicating our findings and any issues which need to be addressed. If you have any
questions or comments, please feel free to contact our office.

Respectfully,


Project Supervisor

Contenu connexe

Tendances

Concrete society award 2007 -Hilton hotel
Concrete society award 2007 -Hilton hotelConcrete society award 2007 -Hilton hotel
Concrete society award 2007 -Hilton hotel
Dave Deakin
 
Project Spotlight_PR0415
Project Spotlight_PR0415Project Spotlight_PR0415
Project Spotlight_PR0415
Ingrid Bush
 
James Primmer Further Portfolio
James Primmer Further PortfolioJames Primmer Further Portfolio
James Primmer Further Portfolio
James Primmer
 

Tendances (19)

EARTHQUAKE SAFE CONSTRUCTION OF MASONRY BUILDINGS
EARTHQUAKE SAFE CONSTRUCTION OF MASONRY BUILDINGSEARTHQUAKE SAFE CONSTRUCTION OF MASONRY BUILDINGS
EARTHQUAKE SAFE CONSTRUCTION OF MASONRY BUILDINGS
 
Agora at Trinity Design Guidelines
Agora at Trinity Design GuidelinesAgora at Trinity Design Guidelines
Agora at Trinity Design Guidelines
 
By laws Gujrat
By laws GujratBy laws Gujrat
By laws Gujrat
 
Concrete society award 2007 -Hilton hotel
Concrete society award 2007 -Hilton hotelConcrete society award 2007 -Hilton hotel
Concrete society award 2007 -Hilton hotel
 
1314 2nd Street
1314 2nd Street1314 2nd Street
1314 2nd Street
 
Bye laws
Bye lawsBye laws
Bye laws
 
Planning of residential buildings
Planning of residential buildingsPlanning of residential buildings
Planning of residential buildings
 
Portfolio
PortfolioPortfolio
Portfolio
 
Construction of bukit berapit twin bore pipe arch tunnel
Construction of bukit berapit twin bore pipe arch tunnelConstruction of bukit berapit twin bore pipe arch tunnel
Construction of bukit berapit twin bore pipe arch tunnel
 
Sustainable Design of a Commercial Building
Sustainable Design of a Commercial BuildingSustainable Design of a Commercial Building
Sustainable Design of a Commercial Building
 
BNBC
BNBCBNBC
BNBC
 
Case study low raise appartment
Case study  low raise appartmentCase study  low raise appartment
Case study low raise appartment
 
Top down construction presentation
Top down construction presentationTop down construction presentation
Top down construction presentation
 
World builders sample bid
World builders sample bidWorld builders sample bid
World builders sample bid
 
World Builders Sample Bid
World Builders Sample BidWorld Builders Sample Bid
World Builders Sample Bid
 
Project Spotlight_PR0415
Project Spotlight_PR0415Project Spotlight_PR0415
Project Spotlight_PR0415
 
James Primmer Further Portfolio
James Primmer Further PortfolioJames Primmer Further Portfolio
James Primmer Further Portfolio
 
Hot Climate Double Facades: A Focus on Solar Avoidance
Hot Climate Double Facades: A Focus on Solar AvoidanceHot Climate Double Facades: A Focus on Solar Avoidance
Hot Climate Double Facades: A Focus on Solar Avoidance
 
Haryana, Delhi, Noida, Chandigarh Building byelaws v
Haryana, Delhi, Noida, Chandigarh Building byelaws vHaryana, Delhi, Noida, Chandigarh Building byelaws v
Haryana, Delhi, Noida, Chandigarh Building byelaws v
 

Similaire à Stucco Installation Report

Scs – A World Of Possibilities R New
Scs – A World Of Possibilities R NewScs – A World Of Possibilities R New
Scs – A World Of Possibilities R New
neerajtri
 
Mill 14-1-15 - Sheet - A118 - 3D SECTIONS
Mill 14-1-15 - Sheet - A118 - 3D SECTIONSMill 14-1-15 - Sheet - A118 - 3D SECTIONS
Mill 14-1-15 - Sheet - A118 - 3D SECTIONS
Sin Byrne
 
REINFORCED CONCRETE PRECAST TWIN WALLS
REINFORCED CONCRETE PRECAST TWIN WALLSREINFORCED CONCRETE PRECAST TWIN WALLS
REINFORCED CONCRETE PRECAST TWIN WALLS
Guy Pomphrey
 
Stone tree product introduction webinar
Stone tree product introduction webinarStone tree product introduction webinar
Stone tree product introduction webinar
specbach
 
011 - Proposed Ground Floor plan
011 - Proposed Ground Floor plan011 - Proposed Ground Floor plan
011 - Proposed Ground Floor plan
Danny Chiverton
 
Visual Dictionary 2- Conrete
Visual Dictionary 2- ConreteVisual Dictionary 2- Conrete
Visual Dictionary 2- Conrete
concrete
 
School Buildings of the Future
School Buildings of the FutureSchool Buildings of the Future
School Buildings of the Future
Edel Fox
 
1515-T_Drawings
1515-T_Drawings1515-T_Drawings
1515-T_Drawings
Mark Daly
 

Similaire à Stucco Installation Report (20)

Provisions for non -structural fastenings
Provisions for non -structural fasteningsProvisions for non -structural fastenings
Provisions for non -structural fastenings
 
Scs – A World Of Possibilities R New
Scs – A World Of Possibilities R NewScs – A World Of Possibilities R New
Scs – A World Of Possibilities R New
 
Infographic_ How We Build.pdf
Infographic_ How We Build.pdfInfographic_ How We Build.pdf
Infographic_ How We Build.pdf
 
Mill 14-1-15 - Sheet - A118 - 3D SECTIONS
Mill 14-1-15 - Sheet - A118 - 3D SECTIONSMill 14-1-15 - Sheet - A118 - 3D SECTIONS
Mill 14-1-15 - Sheet - A118 - 3D SECTIONS
 
Winter Panel Complete Guide
Winter Panel Complete GuideWinter Panel Complete Guide
Winter Panel Complete Guide
 
Eric Buck resume 2017
Eric Buck resume 2017Eric Buck resume 2017
Eric Buck resume 2017
 
REINFORCED CONCRETE PRECAST TWIN WALLS
REINFORCED CONCRETE PRECAST TWIN WALLSREINFORCED CONCRETE PRECAST TWIN WALLS
REINFORCED CONCRETE PRECAST TWIN WALLS
 
Stone tree product introduction webinar
Stone tree product introduction webinarStone tree product introduction webinar
Stone tree product introduction webinar
 
011 - Proposed Ground Floor plan
011 - Proposed Ground Floor plan011 - Proposed Ground Floor plan
011 - Proposed Ground Floor plan
 
Trulift presentation
Trulift presentationTrulift presentation
Trulift presentation
 
Sanfer System build process and solutions
Sanfer System build process and solutionsSanfer System build process and solutions
Sanfer System build process and solutions
 
Acp and glazing
Acp and glazingAcp and glazing
Acp and glazing
 
Visual Dictionary 2- Conrete
Visual Dictionary 2- ConreteVisual Dictionary 2- Conrete
Visual Dictionary 2- Conrete
 
Installation instruction Mineral wool sandwich panels
Installation instruction Mineral wool sandwich panelsInstallation instruction Mineral wool sandwich panels
Installation instruction Mineral wool sandwich panels
 
School Buildings of the Future
School Buildings of the FutureSchool Buildings of the Future
School Buildings of the Future
 
Aac
AacAac
Aac
 
Acotec installation in residential and commercial project
Acotec installation in residential  and commercial projectAcotec installation in residential  and commercial project
Acotec installation in residential and commercial project
 
Allan block Installation guide
Allan block Installation guideAllan block Installation guide
Allan block Installation guide
 
advanced constructiion technologies
advanced constructiion technologiesadvanced constructiion technologies
advanced constructiion technologies
 
1515-T_Drawings
1515-T_Drawings1515-T_Drawings
1515-T_Drawings
 

Plus de South Carolina Property Pros

Plus de South Carolina Property Pros (19)

West ashley-parks-map
West ashley-parks-mapWest ashley-parks-map
West ashley-parks-map
 
Sc counties
Sc countiesSc counties
Sc counties
 
Northchasmap
NorthchasmapNorthchasmap
Northchasmap
 
Kiawah map
Kiawah mapKiawah map
Kiawah map
 
Johns island-parks-map
Johns island-parks-mapJohns island-parks-map
Johns island-parks-map
 
James island-parks-map
James island-parks-mapJames island-parks-map
James island-parks-map
 
Greater charleston-area-map
Greater charleston-area-mapGreater charleston-area-map
Greater charleston-area-map
 
Edisto island map
Edisto island mapEdisto island map
Edisto island map
 
Downtown charleston-parks-map
Downtown charleston-parks-mapDowntown charleston-parks-map
Downtown charleston-parks-map
 
Daniel island northmap
Daniel island northmapDaniel island northmap
Daniel island northmap
 
Daniel island downtown
Daniel island downtownDaniel island downtown
Daniel island downtown
 
Chaspenmap
ChaspenmapChaspenmap
Chaspenmap
 
Activitiesmap
ActivitiesmapActivitiesmap
Activitiesmap
 
Home Inspection on Fiddlers Point Mount Pleasant
Home Inspection on Fiddlers Point Mount PleasantHome Inspection on Fiddlers Point Mount Pleasant
Home Inspection on Fiddlers Point Mount Pleasant
 
Moisture Analysis By The SC Property Pros
Moisture Analysis By The SC Property ProsMoisture Analysis By The SC Property Pros
Moisture Analysis By The SC Property Pros
 
Scpp Webrpt1
Scpp Webrpt1Scpp Webrpt1
Scpp Webrpt1
 
Flashing 101 by The SC Property Pros Charleston SC
Flashing 101 by The SC Property Pros Charleston SCFlashing 101 by The SC Property Pros Charleston SC
Flashing 101 by The SC Property Pros Charleston SC
 
Inspection Report
Inspection ReportInspection Report
Inspection Report
 
Government Affairs Tax Credit Ext Chart
Government Affairs Tax Credit Ext ChartGovernment Affairs Tax Credit Ext Chart
Government Affairs Tax Credit Ext Chart
 

Dernier

call Now 9811711561 Cash Payment乂 Call Girls in Dwarka Mor
call Now 9811711561 Cash Payment乂 Call Girls in Dwarka Morcall Now 9811711561 Cash Payment乂 Call Girls in Dwarka Mor
call Now 9811711561 Cash Payment乂 Call Girls in Dwarka Mor
vikas rana
 

Dernier (15)

Top Rated Pune Call Girls Tingre Nagar ⟟ 6297143586 ⟟ Call Me For Genuine Se...
Top Rated  Pune Call Girls Tingre Nagar ⟟ 6297143586 ⟟ Call Me For Genuine Se...Top Rated  Pune Call Girls Tingre Nagar ⟟ 6297143586 ⟟ Call Me For Genuine Se...
Top Rated Pune Call Girls Tingre Nagar ⟟ 6297143586 ⟟ Call Me For Genuine Se...
 
The Selfspace Journal Preview by Mindbrush
The Selfspace Journal Preview by MindbrushThe Selfspace Journal Preview by Mindbrush
The Selfspace Journal Preview by Mindbrush
 
9892124323, Call Girls in mumbai, Vashi Call Girls , Kurla Call girls
9892124323, Call Girls in mumbai, Vashi Call Girls , Kurla Call girls9892124323, Call Girls in mumbai, Vashi Call Girls , Kurla Call girls
9892124323, Call Girls in mumbai, Vashi Call Girls , Kurla Call girls
 
(Anamika) VIP Call Girls Navi Mumbai Call Now 8250077686 Navi Mumbai Escorts ...
(Anamika) VIP Call Girls Navi Mumbai Call Now 8250077686 Navi Mumbai Escorts ...(Anamika) VIP Call Girls Navi Mumbai Call Now 8250077686 Navi Mumbai Escorts ...
(Anamika) VIP Call Girls Navi Mumbai Call Now 8250077686 Navi Mumbai Escorts ...
 
call Now 9811711561 Cash Payment乂 Call Girls in Dwarka Mor
call Now 9811711561 Cash Payment乂 Call Girls in Dwarka Morcall Now 9811711561 Cash Payment乂 Call Girls in Dwarka Mor
call Now 9811711561 Cash Payment乂 Call Girls in Dwarka Mor
 
8377087607 Full Enjoy @24/7-CLEAN-Call Girls In Chhatarpur,
8377087607 Full Enjoy @24/7-CLEAN-Call Girls In Chhatarpur,8377087607 Full Enjoy @24/7-CLEAN-Call Girls In Chhatarpur,
8377087607 Full Enjoy @24/7-CLEAN-Call Girls In Chhatarpur,
 
Pokemon Go... Unraveling the Conspiracy Theory
Pokemon Go... Unraveling the Conspiracy TheoryPokemon Go... Unraveling the Conspiracy Theory
Pokemon Go... Unraveling the Conspiracy Theory
 
$ Love Spells^ 💎 (310) 882-6330 in West Virginia, WV | Psychic Reading Best B...
$ Love Spells^ 💎 (310) 882-6330 in West Virginia, WV | Psychic Reading Best B...$ Love Spells^ 💎 (310) 882-6330 in West Virginia, WV | Psychic Reading Best B...
$ Love Spells^ 💎 (310) 882-6330 in West Virginia, WV | Psychic Reading Best B...
 
LC_YouSaidYes_NewBelieverBookletDone.pdf
LC_YouSaidYes_NewBelieverBookletDone.pdfLC_YouSaidYes_NewBelieverBookletDone.pdf
LC_YouSaidYes_NewBelieverBookletDone.pdf
 
2k Shots ≽ 9205541914 ≼ Call Girls In Jasola (Delhi)
2k Shots ≽ 9205541914 ≼ Call Girls In Jasola (Delhi)2k Shots ≽ 9205541914 ≼ Call Girls In Jasola (Delhi)
2k Shots ≽ 9205541914 ≼ Call Girls In Jasola (Delhi)
 
2k Shots ≽ 9205541914 ≼ Call Girls In Palam (Delhi)
2k Shots ≽ 9205541914 ≼ Call Girls In Palam (Delhi)2k Shots ≽ 9205541914 ≼ Call Girls In Palam (Delhi)
2k Shots ≽ 9205541914 ≼ Call Girls In Palam (Delhi)
 
2k Shots ≽ 9205541914 ≼ Call Girls In Dashrath Puri (Delhi)
2k Shots ≽ 9205541914 ≼ Call Girls In Dashrath Puri (Delhi)2k Shots ≽ 9205541914 ≼ Call Girls In Dashrath Puri (Delhi)
2k Shots ≽ 9205541914 ≼ Call Girls In Dashrath Puri (Delhi)
 
2k Shots ≽ 9205541914 ≼ Call Girls In Mukherjee Nagar (Delhi)
2k Shots ≽ 9205541914 ≼ Call Girls In Mukherjee Nagar (Delhi)2k Shots ≽ 9205541914 ≼ Call Girls In Mukherjee Nagar (Delhi)
2k Shots ≽ 9205541914 ≼ Call Girls In Mukherjee Nagar (Delhi)
 
WOMEN EMPOWERMENT women empowerment.pptx
WOMEN EMPOWERMENT women empowerment.pptxWOMEN EMPOWERMENT women empowerment.pptx
WOMEN EMPOWERMENT women empowerment.pptx
 
(Aarini) Russian Call Girls Surat Call Now 8250077686 Surat Escorts 24x7
(Aarini) Russian Call Girls Surat Call Now 8250077686 Surat Escorts 24x7(Aarini) Russian Call Girls Surat Call Now 8250077686 Surat Escorts 24x7
(Aarini) Russian Call Girls Surat Call Now 8250077686 Surat Escorts 24x7
 

Stucco Installation Report

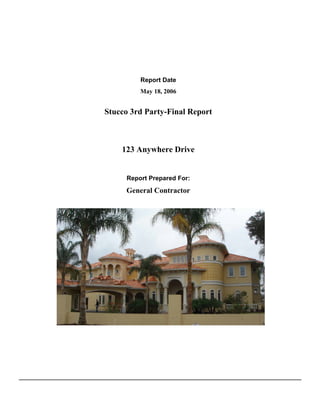
  • 1. Report Date May 18, 2006 Stucco 3rd Party-Final Report 123 Anywhere Drive Report Prepared For: General Contractor
  • 2. Guest House--Front Elevation Front elevation of guest house/second garage before windows on foundation were padded out with EPS board and PVC accessories/lath were installed over upper level of wood framing. Window nailing fins padded out with expanded poly-styrene (EPS) board and bead/lath installation over wood framed walls.
  • 3. Guest House--Right Elevation Right elevation of guest house before installation of PVC accessories and 2.5 self-furring diamond lath over wood framed wall space. Lath installation with necessary accessories on guest house right elevation wall.
  • 4. Guest House--Rear Elevation Rear elevation of guest house just as the lath and bead stage had begun. After PVC control joints, roofline casing bead, foundation weep screed and lath system were installed.
  • 5. Guest House--Left Elevation Left side of front garage before foundation bead and framed wall lath system were installed. PVC cornerbead installed on CMU foundation; lath system installed on framed walls.
  • 6. Front Elevation 1 Front left section of wall space before installation of foundation wall accessories and lath system. Front left elevation section during lath and bead system installation. Note omission of control joints off openings as requested by builder--secondary reinforcing lath strips were installed to strengthen corners in lieu of vertical control joints.
  • 7. Front Elevation 2 Front elevation photo before lath and bead system installation. All wall space has been lathed and scratched.
  • 8. Front Elevation 3 Front elevation before required stucco components were installed. All front elevation wall space except for front entry arches, which need to have framing deficiencies corrected, is lathed and scratched.
  • 9. Right Elevation Entire right elevation wall space before system components were installed. Right elevation after installation of bead/lath system and necessary control/expansion joints. 12
  • 10. Rear Elevation 1 Rear elevation before lath system installation. Arrow denotes area where builder applied additional flashing tape to flat horizontal surface. Entire rear elevation, including radius walls and arches, is complete with lath system. The scratch and texture coats have already begun
  • 11. Rear Elevation 2 Rear decks and arches before lath system was installed. Now that the waterproofing is complete, applicator has lathed all areas as required for application of plaster system. Completed rear elevation lath and bead system.
  • 12. Left Elevation Left elevation photo of wood framed wall before installation of bead and lath system. After installation of lath/bead system and texture coat on framed wall.
  • 13. Detail Photos #1 3/4" PVC case bead installed 2" off roofline 1/2" PVC case bead and paperback lath as required. Kickout flashing with hot mop system installed over forti-flash to prevent installed by GC. plaster delamination. PVC case bead installed 1/4" off perimeter PVC 780 foundation weep screed installed of wood framed openings to allow for at CMU/framing intersection as required by installation of engineered sealant joints. ASTM. Plaster stop bead installed at pre-cast Vertical PVC expansion joint installed on column headers. right elevation wall to break up wall space every 144sqft.
  • 14. Detail Photos #2 Perfect mitered corners of PVC corner bead Reinforcing lath "butterfly" strips installed on garage side HVAC wall. on corners of windows to omit control joints and help restrict cracking as specified. Again, additional reinforcement off window Two (2) chimneys with cupola caps corners were installed to help control complete with lath and bead system. cracking off jambs. All windows protected with window film Lath system was run continuously from rear and clean release tape. master radius wall onto arches for aesthetic purposes. PVC corner bead installed.
  • 15. Scratch/Texture Photos Fibers added into scratch coat for additional Horizontal scratch coat being applied to strength and as applicator contract states. wood framed walls over lath system. Soffits and windows are protected from Texture coat is complete on entire guest scratch coat process which is almost house. Windows were padded out with EPS, complete on the front elevation. beaded, and then lathed where necessary. Scratch coat is complete except for the Guest house during application of scratch arches which need to be remediated to and texture coat--now 100% complete. correct framing issues.
  • 16. Guest House-Completion Photos Front Elevation of garage/guest house upon Right elevation of guest house after stucco completion of stucco system--paint samples on lower CMU and upper wood present. framed/sheathed walls. Rear elevation guest house 100% complete. Left elevation of garage is complete. Circle Refer to previous elevation for detail photos denotes area of bleed through on CMU during construction. which is being corrected. Interior garage walls complete with 1/2" 1/2" PVC case bead had to be employed on sand float texture system where required. garage walls to compensate for design issues around openings-discussed w/ GC.
  • 17. Main House-Completion Photos #1 Main house photo #1 illustrating completion Main house photo #2 illustrating completion of stucco texture to all exterior walls. of stucco system with soft adobe float and scoring where specified (arrows). Right elevation complete with texture coat. Vertical control joints were employed on Note kickout flashing is functioning these opening due to size and hidden properly as visible from water path. location. Rear elevation photo #1 illustrating stucco Rear elevation photo #2 illustrating stucco system is complete on all walls. system complete to all exterior walls.
  • 18. Main House-Completion Photos #2 Rear elevation arch window detail padded out with poly-isocyanurate board (quick-r) and beaded off exercise room. Left elevation exterior walls complete with stucco system on both CMU(lower) and wood (upper) substrates. Left/front elevation photo illustrating exterior wall system is complete.
  • 19. Detail Photos-Post Application Texture chosen was soft adobe trowel finish. Bevel/slope installed on all horizontal Arrow indicates 1/4" joints left around surfaces as required to prevent standing openings for expansion/contraction. water. Note stucco system has been terminated Termination of foundation weep screed above rooflines as required. Kickout above dissimilar materials as required- flashings will require sealant. cleaned during punch out. Additional flashing tape was installed at Note 16" square scoring was fabricated into horizontal reveal. Vertical expansion joint sand float texture in middle section of front for movement. elevation radius wall.
  • 20. CONCLUSION: As this report illustrates, the exterior stucco wall system is complete on all elevations. As our lath/bead stage report indicated, the applicator employed PVC foundation weep screed at the CMU/framing intersections as required by ASTM to allow for water egress. After several discussions with builder, he insisted the stucco contractor omit control joints installed vertically off openings fro aesthetics. After consulting the SMA manual, the applicator chose to install reinforcing lath butterfly strips off the corners of openings. This, in conjunction with the 1/4" engineered joint around the perimeter of windows and doors, will help control cracking and preserve aesthetics. PVC accessories and 2.5 self-furring diamond lath were installed to all framed walls and arches as required. The scratch coat is fiber reinforced to add additional strength to the plaster over wood framed walls. The texture chosen by the owner and designer was a soft adobe. Samples were provided on the CMU garage wall and approved by the appropriate parties. After numerous discussions with the framing contractor , we agreed the front entry arches had to be corrected to rectify framing inconsistencies. The remaining arches were double beaded in some places with a regular and wide flange corner bead. Applicator was able to achieve a consistent arch through field adjustments, but the main entry had to be removed and replaced. There are intersections of dissimilar materials which require an ASTM 920 approved building sealant (Vulkem or equivalent). to prevent water ingress. It is critical that these areas be properly sealed in order to protect the structure. They should include: 1- Wood fascia/stucco intersection 2- Back and underside of ALL kickout flashings installed at sloped roof/vertical wall intersections. 3- Deck intersections 4- Penetrations through system (i.e. electrical, plumbing etc.) 5- Around perimeter of ALL openings where 1/4" gap is present. The ¼” gap left around windows over wood framing should have a 3/8” soft cell backer rod installed into the gap before the engineered sealant joint can be completed. The rod must be 25% larger than the joint size so it stays snug and does not move (hence 3/8”). The rod is critical to prevent three-sided adhesion and subsequent adhesive/cohesive sealant failure. 6- Around all exterior lighting attachments (and all other attachments through system). 7- Any areas which may allow water ingress into the building envelope.
  • 21. Representative photographs illustrating design and construction details have been included in the "photos" section of this report. EHS will perform a follow up inspection in six (6) months to evaluate the system performance and condition. We will submit a report indicating our findings and any issues which need to be addressed. If you have any questions or comments, please feel free to contact our office. Respectfully, Project Supervisor