
Recommandé
Recommandé
Contenu connexe
En vedette
En vedette (9)
Plus de libnam
Plus de libnam (20)
Dernier
Dernier (20)
educational sheet using a harling trowel
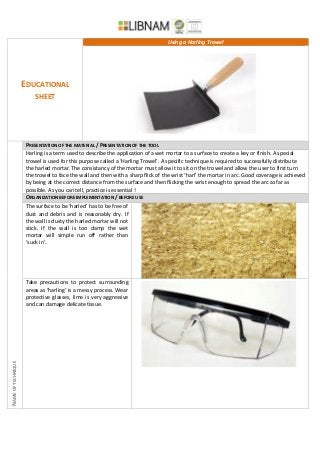
- 1. EDUCATIONAL SHEET Using a Harling Trowel NAMEOFTECHNIQUE PRESENTATION OF THE MATERIAL / PRESENTATION OF THE TOOL Harling is a term used to describe the application of a wet mortar to a surface to create a key or finish. A special trowel is used for this purpose called a ‘Harling Trowel’. A specific technique is required to successfully distribute the harled mortar. The consistancy of the mortar must allow it to sit on the trowel and allow the user to first turn the trowel to face the wall and then with a sharp flick of the wrist ‘harl’ the mortar in arc. Good coverage is achieved by being at the correct distance from the surface and then flicking the wrist enough to spread the arc as far as possible. As you can tell, practice is essential ! ORGANIZATION BEFORE IMPLEMENTATION / BEFORE USE The surface to be ‘harled’ has to be free of dust and debris and is reasonably dry. If the wall is dusty the harled mortar will not stick. If the wall is too damp the wet mortar will simple run off rather than ‘suck in’. Take precautions to protect surrounding areas as ‘harling’ is a messy process. Wear protective glasses, lime is very aggressive and can damage delicate tissue.
- 2. ORGANIZATION DURING IMPLEMENTATION / DURING USE A good spread of harled mortar is desirable as it may go on too thick if not applied correctly. This can lead to it ‘slumping’ off and excessive amounts of mortar used. A well- practiced technique is vital. You must clean all areas of excess mortar as you proceed as lime mortar will dry white and stain. Always have plenty of clean water and a brush to hand. ORGANISATION AFTER IMPLEMENTATION /AFTER USE Make sure that the harled coat of mortar is given enough time to dry before applying a troweled coat on top. If the harled coat is not dry you will not have the key to the background that you require. Once dry the harled coat is an effective key for the rest of your plaster system, whether internal or external. The harled coat may require damping down to limit suction depending on the thickness of the next coat.
- 3. USEOFAHARLINGTROWEL IMPLEMENTATION / USE ENSURE SURFACE TO BE ‘HARLED’ IS REASONABLY DRY AND FREE FROM DUST AND LOOSE DEBRIS. ENSURE MORTAR IS OF A CONSISTENCY THAT WILL FLOW FREELY OFF THE TROWEL BUT WILL SIT ON IT WHEN HELD FLAT. BRUSH, WATER AND THE HARLING TROWEL PHOTOS STANDING SIDE ON AT ABOUT 1M FROM THE SURFACE TO BE HARLED, AND USING A WELL-PRACTISED FLICK OF THE WRIST APPLY THE MORTAR. YOU SHOULD HEAR AN AUDIBLE ‘SLAP’ AS THE MORTAR HITS THE WALL. CLEAN ALL EQUIPMENT AND SURROUNDING AREAS AS NECESSARY. WET MORTAR (3 SAND TO 1 LIME PUTTY UNHAIRED) AND YOUR HARLING TROWEL. PLENTY OF CLEAN WATER AND A BRUSH. PHOTOS ALLOW THE HARLED COAT TO FULLY DRY BEFORE APPLYING A TOP COAT. DAMP DOWN IF NECESSARY WATER. PHOTOS