Class #7: Here's the Scoop
•
0 j'aime•59 vues

Starting With Scratch is a block-based programming course provided by the CodeTigers and STEM Impressionists Program collaboration. Over the course of 10 weeks, students will practice programming on Scratch while simultaneously learning fundamental computer science concepts. Each week will be taught by two student mentors who will walk participants through different lessons that will overtime build their understanding of coding through the Scratch platform. Throughout the course, students will be provided with resources to further their exploration of computer science in addition to preparing them to continue on to other coding platforms such as Python, micro:bit, and HTML/CSS. YouTube class: https://www.youtube.com/watch?

Recommandé
Contenu connexe
Similaire à Class #7: Here's the Scoop
Similaire à Class #7: Here's the Scoop (20)
Plus de Angela DeHart
Plus de Angela DeHart (20)
Dernier
Dernier (20)
Class #7: Here's the Scoop
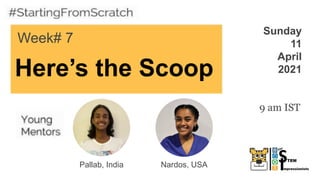
- 1. Here’s the Scoop Week# 7 Sunday 11 April 2021 Pallab, India 9 am IST Nardos, USA
- 2. Coolest Projects Competition Registration is OPEN! You can register to share your creations in Raspberry Pi's world-leading online tech showcase! Raspberry Pi welcomes projects from anywhere in the world, whatever your experience level!
- 3. Reminder Please be respectful and appropriate with your responses in the chat!
- 5. Week 7
- 6. ● Never miss an episode! ● Get Notified of new shows! CodeTigers SUBSCRIBE
- 7. 1. Introductions 2. Week 6 studio time 3. Ice cream project 4. Game Time 5. Next week’s class
- 8. What you will learn 1. How to use lists 2. User input blocks
- 9. Meet the Mentors! Starting with Scratch:
- 11. Virginia, USA 11th grade Listening to music & watching netflix
- 12. Karnataka, India 11th grade Basketball, Rubix Cubes, Piano
- 13. Fun-ctions! Week# 6 Sunday 4 April 2021 Noora, USA 9 am IST Vagish, India
- 15. 5. RockIt1234 6. scratch_aysha 4. @shridev 3. @ScratchWithLavanya
- 17. Coolest Projects Celebration!! When will we see which projects are picked as favorites? June 8, 2021!
- 20. Begin…..
- 21. The customer is welcomed into the shop The customer orders ice cream from a menu of delicious choices! The customer takes their receipt and leaves the store with their ice Customer -
- 22. Let’s break down the customer’s…. Enter the shop Place the order Get the receipt, leave
- 23. The owner welcomes the customer to the shop Tells the customer about the flavors of ice cream available to purchase and takes the customer’s order! Gives the customer a receipt, and wishes them a good day Owner -
- 24. Let’s break down the owner’s…. Welcomes the customer Takes customer’s order Says good-bye
- 25. File Naming Protocol Shop(Your first name) ● Example: ShopAya
- 27. Head over to scratch and create a new project!
- 28. Project #1 File Naming Protocol Shop(Your first name) ● Example: ShopAya
- 29. Name your file using the class protocol Shop(YourName)
- 30. The customer is welcomed into the shop Customer The owner welcomes the customer to the shop Owner
- 31. Computer Science Design Thinking! Research details about your design elements Design with your audience in mind Plan your program. List the details Brainstorm. Keep an open mind. Talk to others. Create and then select final ideas Create draft #1 of your program. Test through the process. Get user feedback to improve your design and use to improve you program Start
- 32. Design Element: Understanding ● What other Scratch programs feature ice cream parlors? ○ What could I learn from looking at them? ○ Do those have any ideas that I would like to build on? ● Do I want to learn a skill that I do not have in order to create this program the way I want? ○ Who could I get help from? ● How detailed do I want to do this program to be? ○ I am just doing this for fun - one and done ○ Spend lots of time with - I love this program ○ I am submitting this program to a competition and I want to do my best
- 33. Design Element: Empathize ● What will make the program fun for the player or my game? ○ Do I need to keep score? ○ Does it need a timer? ● How many time do I want someone to play my game? ○ If I got 50 views I would be happy ○ I am using this to build my STEM skills ○ I am using this to demonstrate my coding skills. I want a summer internship! ● How can I get feedback on my game so I can make it better? ○ Can I ask my family, my friends? Will they tell me the truth? ○ Did I get any online feedback? Is it reliable?
- 34. The customer is welcomed into the shop Customer The owner welcomes the customer to the shop Owner Design Element: Define
- 35. Customer Owner Both 1. What makes the customer go into the store? 2. What types of ice cream are they looking for? 1. What type of door do I want? 2. What fonts “look like ice cream?” 1. How can I design the store to look inviting to customers? 2. What money am I going to use in my story? Design Element: Ideate
- 36. Design Element: Prototype ● What elements of my game needs to be tested? ○ How can I college the feedback? ■ Survey? ■ Verbal comments? ● How quickly can I incorporate the changes I want to make? ○ I need a week? ○ I will do them right away ○ I need training before I can finish the changes
- 37. Design Element: Prototype ● You need to test your program throughout the time you are creating it. ○ Frequent testing is an effective way to catch mistakes (debug) before you run into problems ● How long am I going to test before I start the next draft or begin a new project? ○ Am I competing in a competition? When is the due date? ○ Is this project for my computer science class? When is it due? ○ Am I just doing this for fun? ○ Am I working with a partner/team? What do they think?
- 38. Our planning is done….for now. Let’s begin to code our program! We won’t need the cat sprite so let’s delete it!
- 39. Step 1: Show the customer is hungry and they want to go get ice cream Step 2: Show the front of the store and allow the customer to enter when the space bar is clicked Step 3: The owner waves and welcomes the customer
- 40. We need to make our own backdrop so let’s click on “stage” and under the backdrops tab, click “choose a backdrop”
- 41. We need a plain screen for the player to think they’re hungry so I’m picking the “blue sky”
- 42. Name the backdrop “start.” Now you can click on the fill button and choose a color for the backdrop
- 43. Once you pick the color you want, click on the text option and to make the text readable, change the fill color to black
- 44. The player thinks they’re hungry so I’m going to write “hmm..I’m hungry” Then pick the font you like, I choose “Marker”
- 45. To introduce the ice cream shop, add another text that says “I’m going to go get ice cream” Then pick the font you like, I choose “serif”
- 46. Now we can switch to the code tab and add our sprite.
- 47. Look at all the options and pick the sprite you want for your owner
- 48. I’m going to search for “Dani” and pick this sprite
- 49. Now the sprite shows up on the stage but it’s a little too big...we can change the size below the stage 70
- 50. Let’s check out the sprite’s costumes
- 51. We only need one of costume. I am going to choose the “Dani-b” costume and delete the rest
- 52. The goal of the owner is to welcome customers. In order to achieve that goal I am going to make the sprite wave to the customer. The first step is to duplicate the costume twice
- 53. Tip: It is much easier to change parts of the sprite under Bitmap
- 54. You will see this toolbar in Bitmap, choose the select option so we can move the sprite’s arm from the elbow down 1. Paintbrush tool 2. Circular tool 3. Text box tool 4. Eraser tool 5. Line tool 6. Box tool 7. Fill tool 8. Selector tool 1. 2. 3. 4. 5. 6. 7. 8.
- 55. Choose the tool and then select the sprites hand from the elbow down
- 56. Rotate the arm up into a waving position Use the eraser tool to clean up the areas around the arm Name the costume “waving” so you can identify it when you code
- 57. Duplicate the waving costume and use the selector tool again Rotate the arm and adjust it to fit normally where the hand is closer to the sprite’s face
- 58. Go back and make sure to name the first sprite “standing” Now let’s switch over to the code tab
- 59. We don’t want the store owner, Dani, on the starting page (that is the customer talking) so let’s hide her by getting the “when green flag clicked” block followed by “hide”
- 60. Because we will be changing the backdrop later (inside store backdrop vs outside of the store backdrop), let’s make sure the program starts on the backdrop we want by adding the “switch backdrop” block Test Your Code!
- 61. YEAAA It works! Now the sprite is hidden and we can go to the next part of our story!
- 62. Step 1: Show the customer is hungry and they want to go get ice cream Step 2: Show the front of the store and allow the customer to enter when the space bar is clicked Step 3: The owner waves and welcomes the customer
- 63. For step 2, we need a new backdrop so go over to the backdrops and click “choose a backdrop” Step 2: Show the front of the store and allow the customer to enter when the space bar is clicked
- 64. We need a blank backdrop for the front of the store
- 65. Name the backdrop “Front” and select the text box to type the name of the shop Add the name of your shop and you can change the font, color and size to whatever you like!!! Front
- 66. I have a brilliant idea! Why don’t we add a door for the shop that opens when the customer wants to enter the store? What else can we do to add a door to the beginning of our program? Backdrops don’t move
- 67. We can use a door sprite that has an open and closed the door costume! You have two options: 1. You can upload a door from google images as a sprite 2. OR you can “backpack” sprites from the project named “BackpackItems” in the Class 7 Studio. https://scratch.mit.edu/studios/28848144/projects/
- 68. Click the “see inside” button to add the sprites for this week’s class
- 69. Backpack 1. Click and drag the door sprite into your backpack 2. There are multiple sprites that we will need later on, so just add them all to your backpack now.
- 70. Under costumes, we can take a closer look at the door! CloseDoor OpenDoor
- 71. Let’s go back to this week’s project and drag the door sprite out of the backpack onto the stage...
- 72. Hmm...we can’t see the door sprite on the stage so let’s switch to the door workspace
- 73. Oh look! There is already code here...when you backpack sprites, all the code written on the sprite’s workspace is backpacked with it! ● Do we want to keep this code? ○ YES!! When the program starts, we are on the “start” page with no sprites! ● When should the door show up? ○ When the backdrop is on the “Front” page we just created so let’s add the code for that!
- 75. For the door sprite to show up on the “Front” backdrop, add the “when backdrop switches to” event block followed by the “show” block door sprite workspace door sprite workspace Test Your Code!
- 76. Nothing happens! This is because we are on the “Start” backdrop. We need to switch to the “front” backdrop, so let’s go over to the owner Dani’s workspace! We are here….. We need to be here…..
- 77. First we are going to add a wait block - giving the player time to read the information on the backdrop….. by adding a “wait” block Let player read information on the backdrop.. Test Your Code!
- 78. ..then we are going to test the time required to read the backdrop and then change to the “Front” backdrop Change the wait to 2 seconds so the customer has time to read... ….then add the “switch backdrop to” block and select “Front” Test Your Code!
- 79. Oh NO! The door appears in the middle of the screen and it’s open...what can we do?
- 80. Drag the door to the location you want it to be seen Add the “go to” block that matches the coordinates of that location From the door sprite workspace drag the door to the “proper” location and secure it with the “go to xy” block
- 81. When the door first shows up, we want the player/customer to have the fun of opening the door so it feels like they are walking into the store - so we’ll use the “switch costume” block and select “CloseDoor” Open door Closed door Test Your Code!
- 82. WOOHOO!!!! ● Humm… How can the player/customer open the door to go inside of the store??? ○ We can use the spacebar!
- 83. ● This event block allows code to run ○ But ONLY when the computer recognizes the spacebar is pressed Add the “when space key pressed” block followed by “switch costume to” and select “OpenDoor”
- 84. WAIT!! As excellent programmers, it’s our job to tell the player/customer how to use the program so let’s add instructions to the “Front” backdrop As always, you can change the font, color and size of this text! Test Your Code!
- 85. It works!!! We are now done with the beginning of the story! Introduce the program and the front of the shop
- 86. Step 1: Show the customer is hungry and they want to go get ice cream Step 2: Show the front of the store and allow the customer to enter when the space bar is clicked Step 3: The owner waves and welcomes the customer
- 87. Click on “stage” and under the backdrops tab, click “choose a backdrop”
- 88. I like the blue color so I’ll start with the blank “Blue Sky 2” backdrop again
- 89. We can name this backdrop “store” so we can remember what it is in the code tab Notice that the backdrop is currently in Vector format. To convert to Bitmap format you would have to click on the button.
- 90. In every movie that I have ever seen the ice cream shop has a checkered floor! We have to continue the legacy - right! Use the box tool and change the fill color to what you want
- 91. Place the first box in the bottom right corner, then copy it so you can fill up the floor faster Tip: use ctrl + c keys on your keyboard to copy
- 92. Start pasting the boxing and place them diagonally from one another. Then you can select both rows and copy them
- 93. Paste twice and position the rows to create a checkered look Tip: If you leave the top section of the backdrop empty then you can put the name of the shop there!
- 94. To create the banner for the name of the shop…. You can select the box tool and change the fill color then draw a box over the blank top space
- 95. Now it’s time for the text…. Use the text box tool and change the color to black so it is readable on the baner Then type out the name of your shop
- 96. Now you can change the font, color, and size of the text until it’s to your liking -
- 97. ….don’t forget to delete the extra backdrop we aren’t using!
- 98. Backdrop Key! Start Front Store
- 99. AWESOME!!! ...Now we can go to Dani’s workspace to switch to the Store backdrop when the spacebar is pressed Don’t forget to Test Your Code!
- 100. Uh Oh! The door shows up in the store AND it opened after the backdrop switches…. 1 2
- 101. The door will disappear when the store backdrop is showing, so A. add the “when backdrop switches to store” block and B. then add a hide block 1 Don’t forget to Test Your Code!
- 102. Under the owner Dani’s sprite workspace, if we add a wait block we can see the door open BEFORE the backdrop switches! * You can adjust how long the wait lasts until you like it. 2 Code the wait block STEP 1: Door closed STEP 2: Door open Wait Block Command executes The STORE backdrop displays! Make changes on Dani’s workspace
- 103. It works!! We are in the store! Now we want Dani be inside of the store, ready to greet customers! Go to Dani’s workspace and add the “show” block after switching the backdrop to the store The STORE backdrop displays! Dani is in the store! Don’t forget to Test Your Code!
- 104. Hummm...how could we design the store that is attractive to the customer? Let’s add a counter? ● Tip: You can’t layer items on a backdrop ○ So we can make a counter sprite! Counter
- 105. Select the box tool, change the fill color and make 3 rectangles in the shape of a counter I chose red, but you can make the counter any color you like!
- 106. Now let’s switch over to the “counter” sprite and make sure that it shows and hides on the right backdrops Perfect! No counter sprite showing on either of these backdrops 1 2 This is the starting screen when the green flag is clicked No sprites are supposed to show up on this page ....the counter needs to show! When the store backdrop presents....
- 107. Don’t forget to move the Dani sprite to her “customer” greeting locating by using the “go to xy” block! Test Your Code!
- 108. Whoops! Dani is still in front of the counter! To place her behind the counter you need to use the “go to ()layer block... The block allows you to layer sprites in the order you want. ● In this case, we have the counter in the front layer so that the owner can be behind it. Test Your Code!
- 109. The plan is to have Dani wave hello to customers as they enter the store so we have to create her wave! Add the switch costume to standing block Then add a wait block before having the sprite wave Make changes on Dani’s workspace Test Your Code!
- 110. Test Your Code! To create a waving effect, we can switch between the two waving costumes and add a wait block between them! Standing Waving Waving2
- 111. The code kind OK but could we improve it? We need to end in a standing position and the hand waving isn’t clear...
- 112. Why don’t we put the switch costume blocks in a loop? 1. We can repeat these blocks of code twice to see if that makes it look more like waving! 2. Then add a switch costume to standing block after the loop! Don’t forget to Test Your Code!
- 113. ...the waving is a little slow so why don’t we speed it up by reducing the time on the wait blocks? The code working but... Test Your Code!
- 114. Perfect! Now Dani can say hello and welcome her customers into the store! 1. We can enhance the customer/player’s experience of being in a store by having Dani verbally great her customers while she is waving…. 2. ...and having her change positions while she is talking! Don’t forget to Test Your Code!
- 115. YEAHH!!!! It works!
- 116. Step 1: Show the customer is hungry and they want to go get ice cream Step 2: Show the front of the store and allow the player to enter when the space bar is clicked Step 3: The owner waves and welcomes the customer
- 117. Step 4: Show menu and ask which flavor the customer wants Step 5: Show the ice cream the customer asked for and their receipt for them to pay Step 6: Show the front of the store again
- 118. BUT WAIT!!! We don’t have a menu yet! ● What does a menu do? ○ It organizes food items for people to look at ● BUT how can we make our own menu in Scratch (computer science)? ○ We can make a list!
- 119. Huh????.....but What are lists? ● A list or sequence that represents a countable number of ordered values, where the same value may occur more than once. ● A list is a sequence of variables grouped together under a single name. ● A list is a container that holds other values.
- 120. Lists in the real world The Patel’s ● Mother ● Father ● Child
- 121. What characteristics do lists have? ● An identifier ○ Lists, like variables, have identifiers or names that allow us to remember what we are storing ● Numbers for each item ○ For example, “milk” is item #2 in this list ○ This allows us to easily access items in the list ● A length ○ The size of a list = the number of items in it Let’s look at this example
- 122. ● There are TONS of lists blocks in Scratch ● We will explore some of them ○ But be curious and try out different things on your own and see how it works Lists in Scratch...what can you do?
- 123. 3 Steps to make a list in Scratch (It is just like the variable making process) 1 2 3 Go to the variables tab Select “Make a List” under all the variable options Now we can name the list..in this case “menu”
- 124. Just like variables, the blue check mark allows us to see the list on the stage 1 2 3 1. The name of the list shows up at the top a. This allows us to identify the list we need when using multiple lists 2. The middle section is where the items of the list are shown a. The list is currently empty 3. The amount of items in the list is shown as the “length” a. An empty list has a length of zero
- 125. We can move the “menu” list to where we want it to show up on the stage and we can even decide when we want it to show/hide I can move the list to make sure it doesn’t cover the banner of the shop Using this block allows us the show the menu list at any time in the program Using this block allows us the hide the menu list at any time in the program
- 126. Given our plot, when should the menu (list) appear? 1. Do we need the list when we first enter the store? a. NO!! We want to make sure the owner greets the customer first b. Up until this point, we need the list to stay hidden 2. Should the list appear when the owner asks the customer which flavor they want? a. YES! Customer should be able to look at the menu and choose what they want. Step 3: The owner waves and welcomes the customer Step 4: Dina shows customer the menu and ask which flavor the customer wants 1 2
- 127. Now let’s switch over to the Dani’s sprite and make sure that the menu hides on the right backdrops Perfect! No menu/list showing on either of these backdrops! This is the starting screen when the green flag is clicked No sprites or lists are supposed to show up on this page
- 128. Now we can start adding items to the list! What kind of ice cream do you like? What flavors should Dani offer to her customers? ● This block adds the “thing” you want into the list selected ○ For this project, we can use this block to add the different flavors we want to the menu list Test Your Code!
- 129. Yay!! Our menu is completed! Now Dani needs to be programmed so that she can ask her customers to look at it and pick which flavor ice cream cone they want to order!
- 130. Before we ask for which flavor the customer wants…. ● Go back to the code where Dani talks... we can have heri continue moving and then say that the shop has lots of flavors for a certain price! ○ I chose to have each ice cream cost 150 rupees, what price will you choose? ● Then we can introduce the menu and add the “show list” block to make the menu visible Test Your Code! 2 1
- 131. OH NO!! When the menu shows up, it the flavors we added over and over again! Why is this happening? The flavors we originally added…. The 3 flavors we added listed 3 times! ● Each time we test the code, the list never clears. It just adds the 3 flavors over and over and over again! ○ So..We need to delete the items in the list every time the green flag is clicked BEFORE adding the flavors in again ● The “delete all of” block allows you to delete all the items in a list
- 132. Congratulations - it works!!! WOW! Look at all the code we’ve written for Dani! Remove Dani from 1st page/Start backdrop Wave to customers Say hello to customers. Ask what their order is Create menu of ice cream flavors
- 133. Helping you with step #2 is a bit complicated. We want to make SURE we are being as clear as we possible can SO we are going to 1. Give you an overview of what is coming next and then 2. Teach you how to code everything needed to make your program work Our hope is that this technique will help you understand what you are doing as a programmer and how your code affects what the computer is doing even when the code looks complicated!
- 134. When you have successfully created a function you will see a define block in your workspace and Overview: Taking the Customer’s Order! This block “Calls the function” A block with the name of your function will show up under your My Blocks tab |----------------------Create a function----------------------| “Hello?” You want me to ask the customer what flavor ice cream they want? OK! Bye.! The customer types in the flavor of ice cream they want into the computer... Is that flavor on the menu? Process begins! The
- 135. Now let’s create a function for the process of asking and picking flavors! (Why? it will be more organized and easy to debug!) 1 2 3 Go to Dani’s workspace and under My Blocks, click on “Make a Block” Then you can name your block, I’ll say “pickFlavor” You will know that you are successful when this block will show up in Dani’s workspace
- 136. To define the block, let’s ask ourselves exactly what this function needs to do???? 1. Ask what flavor the customer wants a. Store that flavor into a variable so that other sprites (like the cone) can access it 2. Check if the flavor selected is in the “list” a. If it is in the list, the owner can repeat it back to the customer, then broadcast a message for the cone to show b. If the flavor selected is NOT in the list, tell the customer the shop does not have that flavor available and to please pick another flavor 3. Repeat step 1 and 2 until the customer has gotten their ice cream
- 137. Ask what flavor the customer wants... 1. Programmers have LOTS of choices but they can decide to let the user have choice as well! 2. There are two blocks in Scratch that help programmers ask the user questions 3. The “ask and wait” block allows the programmer (YOU!) to ask the user a question with a pop up where they can answer 4. Their answer is then stored in this temporary variable that Scratch created called “answer”
- 138. Ask the customer what flavor they want! After using the ask block… ...we can store the answer in a variable….. ...this allows us to know which flavor the customer ordered when it’s time to give them their ice cream cone order.
- 139. 3 Steps to making a variable 1 2 3 Go to the Variables tab Click on “Make a Variable” Name your variable. I am calling mine “flavor” flavor
- 140. Now we can set the flavor variable to whatever the customer answers as the flavor they want Remember to leave the variable check box blank because we do not want the variable to be visible on the stage Test Your Code!
- 141. Nothing happened!
- 142. We never called the function and the story is going fast! Let’s use a wait block to slow the story then call the pick flavors function! Test Your Code! When you have successfully created a function you will see a define block in your workspace and A block with the name of your function will show up under your My Blocks tab This block “Calls the function” This is the function
- 143. It works! Now it is time to decide what happens after the customer answers the question! Let’s review the purpose of this function: 1. Ask what flavor the customer wants a. Store that flavor into a variable so that other sprites (like the cone) can access it 2. Check if the flavor selected is in the “list” a. If it is in the list, the owner can repeat it back to the customer, then broadcast a message for the cone to show b. If the flavor selected is NOT in the list, tell the customer the shop does not have that flavor available and to please pick another flavor 3. Repeat step 1 and 2 until the customer has gotten their ice cream
- 144. Overview: Is that flavor on the menu? Let’s look at what this “if-else” block allows us to do! ...and the flavor is added to the customer’s receipt…. You picked vanilla Dani repeats the order back to the customer YES! The customer types in their order for a vanilla ice cream cone….. Does Vanilla exist in the menu list? ...and the customer’s order shows up on the counter! YES! response Page 1 of 2
- 145. Overview: Is that flavor on the menu? The customer types in their order for a mango ice cream cone….. Does Mango exist in the menu list? NO! No! response Page 2 of 2 Does Mango exist in the menu list? NO. Let’s look at what ELSE this “if-else” block allows us to do! Dani asks the customer “Which flavor ice cream would you like?” YES! Then you would go through the process outlined on Page 1 of 2
- 146. Use an “if-else” block where the condition is the flavor chosen existing in the menu ● This block checks if “thing” exists in the list menu ○ We can use this block to check if the answer is a flavor in the menu ○ If it’s not in the menu, the owner will have to say that to the customer
- 147. Just like most stores, I want the owner to repeat the order back to the customer but how can I use both the variable “flavor” and type in the say block?
- 148. ● This block puts together two words/sentences ○ The block comes with apple, banana ○ “apple ” + “banana” = “apple banana” Inside the “then” of the if-else block, use the “join” block to say “you picked ” + flavor (variable)
- 149. If the condition is NOT met (the flavor is not in the menu) then the owner can tell the customer to try again! Test Your Code!
- 150. Take a look at the result when you test the code This version is when the customer enters a flavor that exists in the menu. Why don’t we show the ice cream the customer orders? This version is when the customer enters a flavor that DOESN’T exist in the menu. The owner says to try again but the question disappears.
- 151. When the customer enters a flavor that DOESN’T exist in the menu, we need to keep asking the question until a condition is met ● This process happens over and over again so we can use a loop! ○ We can use the “repeat until” block ● What condition do we need for the loop to stop?
- 152. We need a way to know if the customer picked a flavor that is offered in the menu 1. The next step in our planning process shows that the owner shows a receipt to the customer a. So we can make a list for the bought items and ONLY ADD to it if the flavor the customer wants is offered in the menu The next step in our plot! I have an Idea
- 153. To make a list for the bought items, we’ll follow the three steps to making a list! 1 2 3 Go to the variables tab Select “Make a List” under all the variable options Now we can name the list..in this case “BoughtItems”
- 154. The boughtItems list shows up on the stage 1. We don’t want to show this list in the program yet a. We can uncheck the blue mark next to the list name b. AND add the block when green flag is clicked, so the list stays hidden in the beginning of the story UNTIL we need it to be visible.
- 155. Add the “hide list” block to the code that runs when green flag is clicked
- 156. We know from the “menu” list that a list needs to be deleted so it is empty everytime we restart the code, add the “delete all” block Test Your Code!
- 157. Now the list is hidden!! Let’s add the flavor variable to the bought list inside the if statement
- 158. Now when the customer enters a flavor that DOESN’T exist in the menu, we need to keep asking the question until there is at least one item in the “bought items” list
- 159. The block allows us to use how long the list is (how many items it has) in our code Test Your Code!
- 160. Back to the purpose of this function.... 1. Ask what flavor the customer wants a. Store that flavor into a variable so that other sprites (like the cone) can access it 2. Check if the flavor selected is in the list a. If it is in the list, the owner can repeat it back to the customer, then broadcast a message for the cone to show b. If the flavor selected is NOT in the list, tell the customer the shop does not have that flavor available and to please pick another flavor 3. Repeat step 1 and 2 until the customer has gotten their ice cream
- 161. YAY!! It works! Now we can add ice cream to our project so it shows up when the customer orders it from the menu 1. We need to have ice cream show up when it is ordered correctly...how can we do this? a. Let’s broadcast a message b. BUT WAIT!! We need an ice cream sprite first!
- 162. Before we move on to the ice cream sprite…. 1. We will break down the process to make it easier to understand 2. We hope that this will help you get creative and really personalize your ice cream shop!
- 163. 1. Duplicate 2. Change color! Wait!!!! We need to make the ice cream cones!!! showCone Scratch regchocolate regstrawberry regvanilla 1. Duplicate 2. Change color! This costume has been provided to you in the class backpack! Use it to make your other ice cream cone flavors!
- 164. Let’s get started by dragging the ice cream cone to the stage!
- 165. Look!! The sprite already has code to hide it in the beginning of the story...now we need to tell it when to show up…. ….go back to Dani’s workspace so that we can broadcast a message to show an empty cone BEFORE asking the customer what flavor they want!
- 166. Under the drop down menu of the broadcast block, we can make a new message
- 167. Name the message “showCone” so we can identify it, then click OK. Now the message “show cone” is selected on the broadcast block
- 168. Then we can broadcast ANOTHER message to show the flavor AFTER the customer answers which cone they want AND it exists in the menu This means we need to broadcast a “show flavors” message INSIDE the if-then block
- 169. Now we can go to the cone sprite workspace and add a “show” block after the “when I receive showCone” 1. When the “showFlavors” message is broadcasted, we need to show the ice cream that the customer ordered a. Let’s take a look at the costumes and make the ice cream flavors we need! We can also drag the “when I receive showFlavors” block
- 170. Go to the costumes tab... LOOK we have an empty cone and a vanilla ice cream cone! Scratch
- 171. Let’s duplicate the vanilla costume, make the chocolate and strawberry ice cream, change their color.... The fill option allows us to change the pixels of parts of the sprite Play around with the colors until you get the shades of you like
- 172. ...and then change their name! EASY!
- 173. Now we have all our costumes! Let’s go back to the code tab and make sure we start with the empty cone The if-then block allows us to run a block only when a condition is met. Now how can we show the flavor the customer ordered? What can we use for the condition? 1. The variable “flavors” 2. The menu list 3. The brought items list
- 174. We can use the variable and check if it equals a flavor Use the equal sign to compare the variable to “vanilla” for the condition Add the “switch costume to” block and choose the vanilla costume
- 175. Now we can duplicate the code and change the condition and costume to the other two flavors! Test Your Code!
- 176. It works but the cone shows up in the middle of the stage...
- 177. Let’s move the cone where we want it to be and use the “go to x: y:” block in the before it is visible Test Your Code!
- 178. Step 4: Show menu and ask which flavor the customer wants Step 5: Show the ice cream the customer asked for and their receipt for them to pay Step 6: Show the front of the store again
- 179. To show the receipt, let’s go back to the owner, dani, sprite workspace But first, the menu is still showing so let’s add the “hide list” block after calling the pick flavors function
- 180. TIP: Our code is getting long and complicated, to make it more organized, let’s create a “checkout” function to show the receipt and handle the payment 1 2 3 Under My Blocks, click on “Make a Block” Then you can name your block, i’ll say “checkout” Lastly, this block will show up in the workspace
- 181. What does the checkout function do? 1. Show the receipt a. Tell the customer that the owner has the receipt and show the “broughtItems” list 2. Have the customer pay a. We will need to add money that shows up after the owner says how much it costs b. Have the money disappear after a short time 3. Thank the customer and wave goodbye
- 182. Let’s start by introducing and showing the receipt Test Your Code!
- 183. Oh NO! We forgot to call the function! Test Your Code! 1. Use the “Checkout” function to call the function a. This way the code that defines the function runs b. AND the owner show the customer their receipt!
- 184. Now the checkout function is running! The “broughtItems” list shows up in the middle of the screen You can move the list to the left side and use the sides to make it smaller
- 185. What does the checkout function do? 1. Show the receipt a. Tell the customer that the owner has the receipt and show the “broughtItems” list 2. Have the customer pay a. We will need to add money that shows up after the owner says how much it costs b. Have the money disappear after a short time 3. Thank the customer and wave goodbye
- 186. Next the owner can tell the customer how much they need to pay
- 187. In order to pay, we need money!! Let’s drag the money sprite form our backpack into the stage
- 188. We should also add a register for the owner to accept the money!
- 189. Let’s start by making the register show up when the backdrop switches to the store! When we test the code, the register isn’t on the counter so move it to the edge of the counter Then add the “go to x: y:” block before making the sprite visible Test Your Code!
- 190. Now let’s go back to the owners workspace to tell the money sprite when to become visible Add a broadcast block and click new message Name the message something we can identify like “showMoney” Now your code should look like this
- 191. While we’re here, the money doesn’t have to show up and we can broadcast another message for it to disappear Wait for 2 seconds for the money to be seen, then have the owner say thank you Add another broadcast block and create a message for “hideMoney”
- 192. Now let’s switch to the money sprite and have the money appear when we broadcast “showMoney” Test Your Code!
- 193. The money shows up in the middle, let’s move the money next to the register so it looks like the customer is paying
- 194. We can also add the code to hide the sprite when it receives the message to “hideMoney”
- 195. The register is also hidden by the counter, let’s go over to the register sprite and bring it to the front layer Test Your Code
- 196. The money is also a little hidden, let’s go to the money sprite and add the “go to front layer” block Test Your Code!
- 197. Step 4: Show menu and ask which flavor the customer wants Step 5: Show the ice cream the customer asked for and their receipt for them to pay Step 6: Show the front of the store again
- 198. First let’s have owner hide the receipt and wave goodbye to the customer Use the “hide list” block to make the receipt invisible Duplicate the loop we coded to wave in the beginning Move the loop to the end of the checkout function Test Your Code!
- 199. Great Job!!! Now let’s make the last screen, go to backdrops and duplicate the storefront backdrop End
- 200. Use the selector tool and change the message at the bottom to a nice goodbye to the customer
- 201. WOAH, there are so many sprites on the stage! Let’s look at what should be shown/hidden on this backdrop ● Dani (the owner): hide ● Register: hide ● Counter: hide ● Ice cream: hide ● Door: show with closed costume
- 202. Let’s start with Dani’s workspace Start by switching backdrop to End Then add the hide block!
- 203. Now to counter sprite workspace Hide the sprite when the backdrop switches to the end screen We will repeat this code for the other sprites so drag this code to your backpack
- 204. Drag the code from the backpack to the sprite workspaces Drag the code from the backpack to the money sprite to the register For the Ice cream sprite…. ● We can hide it when the money sprite disappears ○ This will make it look like the customer took their ice cream after they finished paying ● Drag the “when I receive” block and select “hideMoney” then hide the sprite
- 205. Now on the door workspace, since we are dealing with the front of the store again, let’s switch to the “CloseDoor” costume and show the sprite Test Your Code!
- 206. Step 4: Show menu and ask which flavor the customer wants Step 5: Show the ice cream the customer asked for and their receipt for them to pay Step 6: Show the front of the store again
- 207. Why don’t we enhance the story with some music? Under the owner’s workspace, go to sounds and delete the pop sound because we will not be using it
- 208. Click on choose a sound and explore your options! I’m going to go to the loops, section and pick “BassaNova”
- 209. Let’s go to the code tab to play the music and use a forever loop so it can play in the background We will loop through the sound over and over again but when we switch to the end backdrop, we can use the “stop all” block to stop the music! Test Your Code!
- 211. www.menti.com Code: 33 97 50 5 https://online.coolest projects.org/
- 212. Don’t forget to…..
- 213. Scratch Lesson 8: Kites, Cookies, or Samosas! Join us next week for…..