
Recommandé
Contenu connexe
Tendances
Tendances (20)
Similaire à Manual uppababy vista
Similaire à Manual uppababy vista (20)
Plus de Mamayaestoyaqui
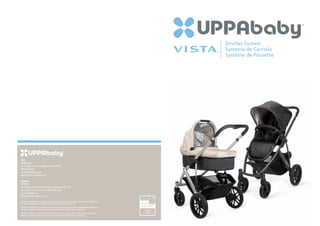
Manual uppababy vista
- 1. Stroller System Systema de Carriola Système de Pousette USA UPPAbaby 60 Sharp Street, Hingham, MA 02043 781.413.3000 www.uppababy.com Model 0112 | Version 1.0 Canada 5514KM 19 Industrial Street Toronto, Ontario M4G 1Z2 416.422.2700 | toll free: 1.888.502.5514 www.5514km.ca Model 0130 | Version 1.0 VISTA and UPPAbaby are trademarks and/or registered trademarks of Monahan Products LLC. All other trademarks are the property of their respective owners. VISTA et UPPAbaby sont des marques et/ou des marques déposées de Monahan Products LLC. Toutes les autres marques sont la propriété de leurs propriétaires respectifs. VISTA y UPPAbaby son marcas comerciales y/o marcas registradas de Monahan Products LLC. Todas las demás marcas comerciales pertenecen a sus respectivos propietarios.
- 2. TABLE OF CONTENTS ÍNDICE /TABLE DES MATIÈRES ENGLISH WARNINGS + SAFETY INFORMATION Page 2 PARTS LIST Page 4 STROLLER ASSEMBLY Page 5 BASSINET ASSEMBLY Page 6 BASSINET OPERATION Page 8 STROLLER OPERATION Page 10 LIMITED WARRANTY Page 14 ESPAÑOL ADVERTENCIAS E INFORMACIÓN SOBRE SEGURIDAD Página 15 LISTADO DE LAS PIEZAS Página 17 ENSAMBLAJE DEL CARRIOLA Página 18 ENSAMBLAJE DEL CAPAZO Página 20 FUNCIONAMIENTO DEL CAPAZO Página 21 FUNCIONAMIENTO DEL CARRIOLA Página 23 GARANTÍA LIMITADA Página 27 FRANÇAIS MISES EN GARDE ET INFORMATIONS SUR LA SÉCURITÉ Page 28 LISTE DES PIÈCES Page 30 ASSEMBLAGE DE LA POUSSETTE Page 31 ASSEMBLAGE DE LA NACELLE Page 33 UTILISATION DE LA NACELLE Page 34 POUR OPÉRER LA POUSSETTE Page 36 GARANTIE LIMITÉE Page 40 Please read these instructions carefully prior to assembly and use. Leer atentamente estas instrucciones antes del ensamblaje y uso. Veuillez lire attentivement ces instructions avant d’assembler et d’utiliser la poussette.
- 3. WARNINGS + GENERAL SAFETY INFORMATION WARNINGS + GENERAL SAFETY INFORMATION WARNINGS + GENERAL SAFETY INFORMATION WARNINGS + GENERAL SAFETY INFORMATION WARNINGS STROLLER WARNINGS: • Never leave your child unsupervised in the stroller. Please read this manual carefully before using • The brake must be locked while taking the child this stroller. Failure to follow instructions in or out of the stroller, and when parked. AVOID SERIOUS INJURY FROM FALLING OR SLIDING OUT– properly may result in serious injury to your child. • Bumper bar must be attached at all times. ALWAYS USE THE SEAT HARNESS. NEVER LEAVE CHILD UNATTENDED! • This stroller is suitable for children from birth KEEP THESE INSTRUCTIONS FOR FUTURE REFERENCE. (with optional Infant SnugSeat accessory) until child WARNING: The canopy for the seat is not is 50 lbs (22.7 kg), and child height is 40" (101 cm). intended to retain the child. BASSINET WARNINGS: • Open flames and other sources of heat, such as • Canopy must be attached at all times. • Unit may become unstable if the manufacturer’s Failure to follow these warnings and instructions electric heaters, gas ovens, etc. in the immediate recommended load is exceeded, or if a parcel bag, • Children and adults should be clear of moving parts could result in serious injury or death: vicinity of the bassinet are dangerous and should accessory or rack other than that recommended by while making stroller adjustments. Damage to fingers • Audible “click” must be heard in order to determine be avoided. the manufacturer is used or hung from the unit. or extremities may occur when opening or closing that each lock is in the proper position. To ensure • This bassinet is only designed to be used with the the stroller frame. • Unstable hazardous conditions may exist if package proper locking engagement, check to see that the VISTA stroller frame and the VISTA Bassinet Stand. carrying accessories are added onto the product. • Never leave child in the stroller while ascending bassinet/carry handle cannot be disengaged from • Do not use the infant carrier if it is damaged or descending stairs, or using an escalator. .• Maximum capacity for seat pocket 1 lb. the stroller without unlocking the device. or broken. • Maximum weight for the storage basket is 5 lbs. • Check to be sure the seat is securely locked to • Bassinet attaches ONLY in the rear-facing direction, the stroller frame before each use. Excessive weight may cause a hazardous unstable so infant is facing the user. WARNING: condition to exist. • Do not make any alterations or modifications • Bassinet must be removed to fold stroller. STRANGULATION/ • This stroller is intended to be used with one child to the stroller with products not supplied by • Maximum child weight 20 lbs (9 kg). SUFFOCATION HAZARD: only unless equipped with UPPAbaby accessories. the manufacturer as this may cause instability or • Maximum child length 25" (63 cm). structural damage not covered under warranty. • Strings can cause strangulation! Do not place items with strings around a child’s neck, such as BASSINET FALL HAZARD: hood strings or pacifier cords. Do not suspend strings over a bassinet or cradle or attach strings CARE CLEANING + GENERAL MAINTENANCE CLEANING + GENERAL MAINTENANCE: • To prevent falls, do not use this product when the infant begins to push up on hands and knees to toys. FRAME AND FABRIC CARE: MAINTENANCE AND REPAIR: or has reached manufacturer’s recommended Infants can suffocate: maximum weight, whichever comes first. • Clean frame with a damp cloth and a mild • This stroller requires regular user maintenance. • Infants can suffocate in gaps between an extra detergent and dry thoroughly. Do not use abrasives. Regularly check all connecting hardware (rivets, • The bassinet is suitable only for babies not yet able pad and side of bassinet, or on soft bedding. • If the stroller chassis parts have been exposed screws, etc.) for tightness and security. to sit up on their own. • NEVER add a mattress, pillow, comforter or to salt water we recommend that they be rinsed • Inspect your VISTA periodically. Seek prompt repairs, • Child’s movement can slide carrier. NEVER place padding. ONLY use the mattress pad provided with fresh (tap) water as soon as possible to avoid replacing worn or broken parts as needed. Check all carrier near edges of counter tops, tables or other by the manufacturer. corrosion. Always dry frame if wet. safety devices, locks and harnesses, for correct and elevated surfaces. • To reduce the risk of SIDS pediatricians recommend • All fabrics are removable except the outer secure operation. Never continue to use a product • NEVER use the bassinet carrier as a means to healthy infants be placed on their backs to sleep, that is structurally unsound. bassinet base. transport an infant in a motor vehicle. unless otherwise advised by physician. • Remove shoulder harness straps with microsuede • Only UPPAbaby replacement parts should be used. • Use of bassinet cover is recommended for added • If a sheet is used with a bassinet pad, use only the It may be unsafe to use parts supplied by another harness pads before washing seat fabric. safety of your child. See page 7 for installation one provided by the bassinet manufacturer or one manufacturer. instructions. • For removable fabrics, hand wash in cold water specifically designed to fit the dimension of the • Contact Customer Service with any repair questions. with mild detergent. Air dry completely and away • The bassinet should only be placed on a low, dry, bassinet pad. from direct sunlight before re-use or storage. firm horizontal surface when not in use with stroller • NEVER place carrier on beds, sofas or other soft or bassinet stand. • The bassinet base fabric may be sponged lightly surfaces. Infant carrier can roll over on soft surfaces using a damp cloth and a mild detergent. Allow it • Do not permit other children to play unsupervised and suffocate child. to dry completely before re-use or storage. next to the bassinet. • Do not allow any part of the bassinet storage bag • To extend the life of your VISTA’s fabric, keep it clean to cover a child’s nose or mouth. and do not leave it in direct sunlight for long periods of time. • Do not fold or store the VISTA if it is damp or wet, nor store in a damp environment. UPPAbaby reserves the right to make design changes and improvements to any of our products as part of our commitment to innovation. UPPAbaby RumbleSeat Instruction Manual 2 3 ENGLISH
- 4. PARTS LIST STROLLER ASSEMBLY UNFOLD STROLLER CANOPY BASSINET CANOPY STEP 1 : Pull latch back with your thumb to release locking mechanism. MATTRESS + STROLLER MATTRESS COVER FRAME BUMPER BAR SEAT STEP 2: Pull the handle upward until the frame locks open as shown. INSTALL/REMOVE WHEELS BASSINET REAR WHEELS BASSINET FRONT COVER WHEELS TO INSTALL THE BACK WHEELS: While pressing in the hubcap of the wheel, slide the wheel into the axle until it locks into place. TO INSERT THE FRONT WHEELS: TO REMOVE THE FRONT WHEELS: TO REMOVE THE BACK WHEELS: Slide each front wheel into the Slide plastic lever in direction Push the hubcap in and pull the housing until it locks. indicated on button and pull wheel wheel out. out from frame. TODDLER SEAT TODDLER SEAT BASSINET BASSINET STORAGE BAG RAIN SHIELD BUG SHIELD BUG SHIELD BASSINET STORAGE BAG UPPAbaby RumbleSeat Instruction Manual 4 5 ENGLISH
- 5. STROLLER ASSEMBLY BASSINET ASSEMBLY ATTACH THE SEAT SET-UP THE BASSINET STEP 1: Insert the posts on the sides of the seat into STEP 3: To remove, (arrow 1) simultaneously push down the slots of the frame. Push until you hear it “click” both release buttons and (arrow 2) lift the seat from on both sides. the frame. STEP 2: Pull up on seat to be sure it is properly STEP 1: Remove mattress. STEP 2: Fold back liner. attached to the frame. NOTE: Seat can attach in either forward or rear-facing direction. ATTACH/REMOVE CANOPY INSTALLATION THE BUMPER BAR STEP 3: Pull both steel braces firmly into their STEP 4: Replace bassinet liner and mattress. respective sockets. Make sure that both braces are properly locked in place. STEP 3: To remove, (arrow 1) simultaneously push down STEP 1: Insert metal posts into bumper bar STEP 1: Pull canopy fabric over seat back and attach both release buttons and (arrow 2) lift the seat from attachment slots found on both sides of seat. Velcro to top of seat. the frame. STEP 5: Pull bassinet canopy upright and fasten STEP 6: ATTACH BASSINET COVER canopy to Velcro strips at top of liner. 1: Place the closed end of the cover over the bottom STEP 2: To remove, press button at bottom of plastic STEP 2: Snap each side of canopy attachment to seat of the bassinet, and pull the cover toward the top of housing and lift bumper bar out. frame above plastic ring. the bassinet. 2: Fasten the ends of the bassinet cover to the outside of the canopy with the Velcro strips. WARNING: Bumper bar must be attached at all times! NOTE: Canopy height is adjustable. UPPAbaby RumbleSeat Instruction Manual 6 7 ENGLISH
- 6. BASSINET OPERATION BASSINET OPERATION ATTACH BASSINET TO REMOVE BASSINET COLLAPSING BASSINET PROPER USE OF ACCESSORIES TO STROLLER STEP 1: Insert the posts on the sides of bassinet STEP 1: Lift rear lever firmly and completely (90˚). STEP 1: Collapse bassinet canopy by simultaneously USING BASSINET STORAGE BAG: Slide collapsed into the slots on the frame. Push until you hear it STEP 2: Lift bassinet off of frame using pressing buttons on both sides and pushing back. bassinet into bag and fasten Velcro tab. “click” on both sides. carrying handle. STEP 2: Check carefully that the bassinet is properly attached to the frame by pulling up on the bassinet carry handle. NOTE: Bassinet attaches only in the rear-facing NOTE: Bassinet must be removed direction so infant is facing the user. from stroller to fold. VENTILATED CANOPY FOR ADDITIONAL VENTILATION STEP 2: Lift fabric liner and mattress out of the PROPER INSTALLATION OF BASSINET BUG SHIELD way. Disengage by pulling steel braces from their respective sockets. REMOVING BASSINET FABRICS STEP 1: Unzip the bottom zipper on the canopy hood exterior. Undo Velcro flap found on bottom exterior of STEP 1: Remove liner by pulling STEP 2: Unzip canopy zippers STEP 3: Unzip fabric sheet at top bassinet and adhere to lower Velcro strip. elastic up and over sides of located on the underside of canopy of bassinet pad and remove. bassinet. Release side Velcro strips. where fabric meets the carry handle. Detach Velcro from liner at bottom. STEP 2: Lift and line up seam half-way until magnets connect. CLEANING Hand wash gently with Dry flat and away from direct DO NOT bleach, iron mild detergent. sunlight before re-use or storage. or dry clean. UPPAbaby RumbleSeat Instruction Manual 8 9 ENGLISH
- 7. STROLLER OPERATION STROLLER OPERATION SET SWIVEL/ SET THE BRAKE LOCK THE HARNESS TILT THE SEAT LOCKING SYSTEM TO LOCK WHEEL SWIVEL: Push button down to lock. TO LOCK THE BRAKE: TO LOCK: Slide both belt ends together until Pull the lever near the top of the seat and tilt seat TO UNLOCK: Slide button up. STEP 1: Brake is located on the right rear wheel. it locks. to desired position. Release the lever to lock in Push down on the pedal with foot to lock. TO OPEN: Depress button at center and pull apart. one of five preset positions. STEP 2: Attempt to push stroller back and forth to ensure brake is engaged. NOTE: Lock wheel swivel if traveling through rough TO RELEASE BRAKE: Push the pedal down again. NOTE: Do not use upright position for infants less terrain or sand. than six months old. Use the most reclined position WARNING: Use the 5-point harness to and gradually re-position the seat more upright as restrain the child while in the stroller at all the child is able to support its head without assistance. times. Adjust harness to fit child securely. Always re-adjust harness after changing positions. ADJUST SEAT HARNESS ADJUST CANOPY CLICK ADJUST HANDLE + LEG REST PROPER INSTALLATION OF RAIN AND BUG SHIELD STEP 1: Detach silver adjustment clip from upper TO ADJUST CANOPY: Slide canopy attachment or lower harness attachment loop. (Remove simultaneously up or down the seat frame (in TO ADJUST HANDLE: Push the button at the top microsuede harness pad if necessary to facilitate between two plastic rings) for desired height. and slide handle to one of three handle positions harness adjustment.) suited to user height and comfort. STEP 2: Reattach clip to the desired harness loop. USE SUNSHADE: Pull USE PEEK-A-BOO TO ADJUST LEG REST: Push both buttons (left Use loop location above child’s shoulder line, or sunshade out for SPF WINDOW: Roll flap and right side of leg rest). Rotate leg rest to one closest to child’s shoulder. 50 sun protection. and attach. of five preset positions. UPPAbaby RumbleSeat Instruction Manual 10 11 ENGLISH
- 8. STROLLER OPERATION STROLLER OPERATION FOLD STROLLER REMOVE FABRIC FROM SEAT STEP 1: Activate the brake to prevent stroller from STEP 2: Place handle bar in lowest position. STEP 1: Unfasten Velcro STEP 2: Disconnect STEP 3: Release strap on the underside of seat and rolling forward while folding. from lower foot rest. straps on side of seat slide fabric over and off of the top of seat frame. that are wrapped Reverse process when putting fabric back on seat frame. around seat frame. 1 1 2 2 REMOVE FABRIC FROM CANOPY STEP 3: Simultaneously, push and hold black plastic STEP 4: Holding both buttons, push handle bar all the tab on left side of stroller in with your left thumb way in firmly until indication line meets top of plastic and squeeze the handle height adjustment button collar on right side of handle bar, then push down. with your right hand. You can now release both buttons. STEP 1: Unscrew hinge on one side of canopy. STEP 2: Remove hinge from aluminum frame. STEP 5: Continue to collapse until locking mechanism engages on right side of stroller. Stroller will stand STEP 3: Remove plastic frame from hinge by sliding STEP 4: Remove frame from canopy by sliding fabric when folded. it upward. off of both aluminum and plastic frames. NOTE: When folding frame with seat attached, seat must be in forward facing and upright position. WARNING: Children and adults should be clear of moving parts while making stroller adjustments. Damage to fingers or extremities may occur when opening CLEANING Hand wash gently with Dry flat and away from direct DO NOT bleach, iron or closing the stroller frame. mild detergent. sunlight before re-use or storage. or dry clean. UPPAbaby RumbleSeat Instruction Manual 12 13 ENGLISH
- 9. LIMITED WARRANTY ADVERTENCIAS E INFORMACIÓN GENERAL DE SEGURIDAD WARNINGS + GENERAL SAFETY INFORMATION ADVERTENCIAS EVITE LESIONES GRAVES COMO CONSECUENCIA DE CAÍDAS O Your UPPAbaby stroller is warranted to be free from any manufacturing defects for a DESLIZAMIENTOS–UTILICE SIEMPRE EL ARNÉS DEL ASIENTO ¡NUNCA period of 2 years from the date of purchase under normal use and in compliance with DEJE AL NIÑO SIN SUPERVISIÓN! GUARDE ESTAS INSTRUCCIONES PARA the operating instructions. FUTURAS CONSULTAS. This warranty cannot be extended and an extended warranty cannot be purchased. This warranty is not transferable and extends only to the original retail purchaser and ADVERTENCIAS SOBRE EL CAPAZO: • Las llamas y otras fuentes de calor como las estufas is only valid when supplied with proof of purchase. Please retain proof of purchase for Ignorar estas advertencias e instrucciones podría eléctricas, los hornos de gas, etc. que se encuentren this limited warranty. ocasionar lesiones graves o la muerte accidental: cerca del capazo suponen un peligro y deben evitarse. The warranty is valid only in the original country of purchase. This warranty is subject • Se debe escuchar un chasquido para establecer si • Este capazo está diseñado para su uso exclusivo to the conditions set forth by country in which the items were purchased. Conditions cada uno de los seguros se encuentra en la posición con el chasis del carriola VISTA y el soporte para may vary. UPPAbaby will not ship replacement or repair parts out of the country correcta. Para asegurarse de que los seguros estén capazos VISTA. of purchase. en la posición correcta, compruebe que el capazo/ • No use el capazo si está dañado o roto. UPPAbaby will provide replacement parts or conduct repairs as determined fitting by el asa no se pueda desacoplar del carriola sin soltar los seguros. the company. UPPAbaby reserves the right to exchange item with a replacement part. ADVERTENCIA: PELIGRO DE Some parts may be replaced with newer model parts as the stroller is improved over time. • El capazo solamente se puede colocar en sentido contrario a la marcha, con el bebé de cara a la ESTRANGULAMIENTO/ASFIXIA: Please note that a repair issue will NOT be covered by this warranty if: persona que lleva el coche. • ¡Los cordones pueden estrangular al bebé! No ponga • The issue is caused by misuse or poor maintenance. Please refer to this instruction • Para plegar el carriola se debe quitar el capazo. objetos con cordones alrededor del cuello del bebé, booklet for guidance on stroller use and maintenance. • El peso máximo del niño debe ser de 9 kg. como cordones de capuchas o de chupetes. No • Damage is caused by improper installation of UPPAbaby parts and/or accessories. • La estatura máxima del niño debe ser de 63 cm. cuelgue cordones sobre el capazo o la cuna ni ate Please refer to this instruction booklet for guidance on stroller assembly and use. cordones a los juguetes. • Damage is corrosion caused by lack of maintenance or service. RIESGO DE CAÍDAS CON EL CAPAZO: • Los bebés se pueden asfixiar: • Damage is due to general wear and tear, which is the result of everyday use or negligence. • A fin de evitar caídas, no utilice este artículo cuando • Los bebés se pueden asfixiar en los espacios que el niño empiece a empujarse con las manos o las queden entre un colchón adicional y los laterales • Damage is caused by sun intensity, sweat, detergents, damp storage or frequent washings. del capazo o sobre ropa de cama muy mullida. rodillas o cuando ya haya alcanzado el peso máximo • Repairs or modifications are carried out by a third party. recomendado por el fabricante, lo que suceda primero. • NUNCA ponga un colchón adicional, una almohada, • Stroller is purchased from an authorized retailer. Approved retailers are listed on our website • El capazo solamente es apto para bebés que todavía un edredón ni relleno. Use solamente el colchón at www.uppababy.com. no se puedan sentar sin ayuda. suministrado por el fabricante. • Stroller is second-hand. • El movimiento del niño puede deslizar el capazo. • Para reducir el riesgo de que los bebés sufran el NUNCA deje el capazo cerca de bordes de síndrome de muerte súbita del lactante, los pediatras • Stroller is damaged as a result of an accident, airline or freight damage. mostradores, mesas ni cualquier otro tipo de recomiendan acostarlos boca arriba en el momento UPPAbaby reserves the right to determine if warranty terms and conditions have been met. superficie alta. de dormir, a menos que un médico indique lo contrario. • NUNCA use el capazo para transportar a un bebé • Si se usa una sábana con el colchón del capazo, Please contact your local distributor if you have any questions regarding warranty. en un automóvil. utilice solamente la suministrada por el fabricante del capazo, o una diseñada específicamente para • Se recomienda el uso de la cubierta del capazo adaptarse al tamaño del colchón del capazo. CUSTOMER SERVICE para que el bebé esté más seguro. Consultar las instrucciones de instalación en la página 20. • NUNCA ponga el capazo encima de una cama, sofá u otro tipo de superficie mullida. Al estar sobre COUNTRY CONTACT TELEPHONE WEBSITE • El capazo se debe poner únicamente sobre una superficie mullida, el capazo podría volcarse superficies bajas, secas, firmes y horizontales US 60 Sharp Street Hingham, MA 02043 781.413.3000 www.uppababy.com y sofocar al bebé. cuando no se esté usando con el carriola ni con 5514KM el soporte para capazos. • No deje que ninguna parte de la bolsa de CANADA 19 Industrial Street 1.888.502.5514 www.5514km.ca almacenamiento del capazo tape la nariz o la • No deje que otros niños jueguen sin supervisión Toronto, Ontario M4G 1Z2 boca del bebé. cerca del capazo. Register your stroller online at www.uppababy.com. UPPAbaby RumbleSeat Instruction Manual 14 15 ESPAÑOL
- 10. ADVERTENCIAS E INFORMACIÓN GENERAL DE SEGURIDAD LISTADO DE LAS PIEZAS WARNINGS + GENERAL SAFETY INFORMATION ADVERTENCIAS SOBRE EL CARRIOLA: • El freno deberá estar puesto al sacar al niño del Lea este manual atentamente antes de usar el carriola. carriola o meterlo en él, o cuando el carriola Ignorar las instrucciones o no seguirlas correctamente esté aparcado. podría ocasionar lesiones graves al niño. • La barra protectora debe estar colocada en todo • Este carriola es apto para niños desde su nacimiento momento. (con el accesorio opcional SnugSeat bebé ) y hasta ADVERTENCIA: La capota del asiento no está que alcancen 22,7 kg de peso y 101 cm de estatura. diseñada para mantener al niño en su sitio. CAPOTA • El carriola puede perder estabilidad si se excede la carga recomendada por el fabricante, o si se usa • La capota debe estar puesta en todo momento. o se cuelga del coche una cesta portapaquetes, • Los niños y adultos deben permanecer lejos de accesorio o rejilla que no sean os recomendados las piezas móviles cuando se realicen ajustes en por el fabricante. el carriola. Al abrir o cerrar el chasis del carriola se podría causar daño a los dedos o extremidades. CAPOTA DEL CAPAZO • Se puede crear inestabilidad si se añaden al producto accesorios portapaquetes. • NUNCA deje al niño en el carriola al subir o bajar • La capacidad máxima del bolsillo del asiento es 450 gr. escaleras o usar escaleras mecánicas. CHASIS DEL • El peso límite para la cesta portapaquetes es 2,2 kg. • Antes de cada uso compruebe que el asiento esté CARRIOLA BARRA Un peso excesivo puede crear inestabilidad. bien acoplado al chasis del carriola. PROTECTORA COLCHÓN + FUNDA • Este carriola está diseñado para usarse sólo con un • No realice alteraciones ni modificaciones en el carriola DEL COLCHÓN niño, a menos que esté equipado con accesorios de con productos que no sean los suministrados por el ASIENTO UPPAbaby. fabricante, ya que se podría causar inestabilidad o daños estructurales no contemplados en la garantía. • NUNCA deje al niño sin supervisión en el carriola. CLEANING + GENERAL MAINTENANCE: CARE LIMPIEZA Y MANTENIMIENTO GENERAL CUIDADO DEL CHASIS Y LA TELA: limpia y no dejarla expuesta a la luz solar directa • Limpiar el chasis con un trapo húmedo y detergente durante mucho tiempo. suave. Secar bien. No usar sustancias abrasivas. • No doble ni guarde el coche VISTA si está húmedo o • Si las piezas del chasis del carriola se han mojado mojado, ni lo guarde en un sitio donde haya humedad. CAPAZO RUEDAS con agua salada recomendamos que se aclaren con TRASERAS agua fresca (del grifo) lo antes posible para evitar la MANTENIMIENTO Y REPARACIONES: oxidación. El chasis se debe secar siempre que se • Este carriola requiere que el usuario lleve a cabo CUBIERTA RUEDAS haya mojado. un mantenimiento con regularidad. Se deben DEL CAPAZO DELANTERAS • Todas las telas se pueden sacar excepto la de la base inspeccionar regularmente todas las piezas de externa del capazo. conexión y sujeción (remaches, tornillos, etc.) para comprobar que estén bien apretadas y fijas. • Antes de lavar la tela del asiento, saque las tiras de hombros del arnés con las almohadillas de microante. • Inspeccione el coche VISTA con regularidad. Lleve a cabo las reparaciones oportunamente para sustituir • Las telas que se pueden sacar se deben lavar a mano las piezas rotas o desgastadas según sea necesario. en agua fría y con un detergente suave. Dejar secar Se deben inspeccionar todos los dispositivos de completamente al aire y lejos de la luz solar directa seguridad, los cierres y los arneses para comprobar antes de volver a usar o guardar. que funcionen correctamente y de forma segura. • La tela de la base del capazo se puede limpiar con No se debe seguir usando un artículo que tenga una cuidado usando un trapo húmedo y un detergente estructura inestable. suave. Dejar secar completamente antes de volver • Solo se deben usar piezas de repuesto UPPAbaby. a usar o de guardar. Puede que sea peligroso usar piezas de otro fabricante. • Para que la tela del carriola VISTA dure más tiempo PLÁSTICO DE LLUVIA MOSQUITERA MOSQUITERA BOLSA DE ALMACENAJE PARA EL CAPAZO • Póngase en contacto con el Centro de atención al en buenas condiciones debe mantenerla PARA EL ASIENTO PARA EL PARA EL CAPAZO cliente si tiene alguna pregunta sobre reparaciones. ASIENTO UPPAbaby se reserva el derecho de introducir cambios en el diseño y mejoras en cualquier a de sus productos como parte de su compromiso con la innovación. Manual de instrucciones UPPAbaby RumbleSeat 16 17 ESPAÑOL
- 11. ENSAMBLAJE DEL CARRIOLA ENSAMBLAJE DEL CARRIOLA ABRIR EL CARRIOLA COLOCACIÓN DEL ASIENTO PASO 1: Con el pulgar, tire del seguro hacia atrás para PASO 1: Introduzca los puntales a ambos lados del PASO 3: Para sacarlo, (flecha 1) apriete al mismo desbloquear. asiento en las ranuras correspondientes del chasis. Ejerza tiempo los dos soltadores y (flecha 2) tire del asiento presión hasta que se oiga un chasquido en ambos lados. hacia arriba para sacarlo del chasis. PASO 2: Tire del asiento hacia arriba para comprobar que esté bien colocado en el chasis. NOTA: El asiento se puede colocar en dos posiciones: en el sentido de la marcha o en el sentido contrario a la marcha. PASO 2: Tire del manillar hacia arriba hasta que el chasis se abra del todo y quede bloqueado en esa COLOCAR/SACAR COLOCACIÓN DE LA CAPOTA posición tal como se muestra. LA BARRA PROTECTORA COLOCAR/SACAR LAS RUEDAS PASO 1: Meta las varillas de metal en las piezas PASO 1: Coloque la tela de la capota sobre el de acoplamiento de la barra protectora situadas respaldo del asiento y pegue el Velcro a la parte a ambos lados del asiento. superior del asiento. PARA COLOCAR LAS RUEDAS TRASERAS: Ejerza presión sobre el tapacubos de la rueda y, al mismo tiempo, deslice la rueda sobre el eje hasta que quede fija. PARA COLOCAR LAS RUEDAS PARA SACAR LAS RUEDAS DELANTERAS: Meta cada una de DELANTERAS: Deslice la palanca PARA SACAR LAS RUEDAS las ruedas delanteras en la pieza de plástico en la dirección que PASO 2: Para sacar la barra protectora, pulse el botón PASO 2: Acople los laterales de la capota al chasis, TRASERAS: Ejerza presión sobre de acoplamiento hasta que encaje se indica y tire de la rueda para en la parte inferior de las piezas de acoplamiento y por encima del aro de plástico. el tapacubos y tire de la rueda y quede fija. sacarla del chasis. tire de la barra hacia afuera. hacia afuera. BASSINET ADVERTENCIA: La barra protectora STORAGE BAG debe estar puesta en todo momento. NOTA: La altura de la capota se puede regular. Manual de instrucciones UPPAbaby RumbleSeat 18 19 ESPAÑOL
- 12. COLOCACIÓN DEL CAPAZO FUNCIONAMIENTO DEL CAPAZO PREPARAR EL CAPAZO COLOCAR EL CAPAZO PARA SACAR EL CAPAZO EN EL CARRIOLA PASO 1: Introduzca los puntales a ambos lados del capazo en las ranuras correspondientes del chasis. PASO 1: Levante la palanca trasera con firmeza y Ejerza presión hasta que se oiga un chasquido en por completo (con un ángulo de 90˚). ambos lados. PASO 2: Tire del asa del capazo para sacarlo PASO 2: Compruebe que el capazo esté bien PASO 1: Sacar el colchón. del chasis. PASO 2: Retirar la funda acoplado al chasis. Para ello, tire del asa del capazo hacia arriba. NOTA: El capazo solamente se puede colocar en sentido contrario a la marcha, de modo que el bebé quede NOTA: Para plegar el carriola es preciso de cara a la persona que lleva el carriola. sacar primero el capazo. CAPOTA CON VENTILACIÓN PARA VENTILACIÓN ADICIONAL PASO 3: Tirar de las abrazaderas de acero con firmeza PASO 4: Vuelva a colocar la funda y el colchón del para acoplarlas en sus respectivos seguros. Asegúrese capazo. de que las dos abrazaderas estén bien acopladas. STEP 3: To remove, (arrow 1) simultaneously push down both release buttons and (arrow 2) lift the seat from the frame. PASO 1: Abra la cremallera inferior de la parte exterior de la capota. Abra la solapa que se encuentra en la parte inferior y exterior del capazo y péguela a la tira de Velcro. PASO 5: Tire de la capota del capazo para extenderla PASO 6: COLOCAR LA CUBIERTA DEL CAPAZO y pegue la capota a las tiras de Velcro en la parte 1: Ponga la parte cerrada de la cubierta sobre la parte superior de la funda. inferior del capazo y tire de la cubierta hacia la parte de arriba del capazo. 2: Pegue los extremos de la cubierta del capazo a la PASO 2: Levante el borde inferior y júntelo con la parte externa de la capota con las tiras de Velcro. parte media de la capota de forma que se unan los imanes. Manual de instrucciones UPPAbaby RumbleSeat 20 21 ESPAÑOL
- 13. FUNCIONAMIENTO DEL CAPAZO FUNCIONAMIENTO DEL CARRIOLA PLEGAR EL CAPAZO USO CORRECTO DE LOS RUEDAS PIVOTANTES / ACCESORIOS PONER EL FRENO SISTEMA DE BLOQUEO PASO 1: Pliegue la capota del capazo. Para ello, USO DE LA BOLSA DE ALMACENAJE DEL CAPAZO: PARA BLOQUEAR LAS RUEDAS PIVOTANTES: PARA PONER EL FRENO: apriete al mismo tiempo los dos botones situados Meta el capazo dentro de la bolsa y ciérrela con la Presionar hacia abajo el botón para bloquear. PASO 1: El freno se encuentra en la rueda trasera derecha. a ambos lados y empújela hacia atrás. tira de Velcro. PARA DESBLOQUEAR: Deslice el botón hacia arriba. Con el pie, empuje el pedal hacia abajo para bloquearlo. PASO 2: Intente mover el carriola hacia delante y hacia atrás para comprobar que el freno esté bien puesto. NOTA: Bloquee el mecanismo pivotante de la rueda cuando lleve el carriola por caminos con PARA SOLTAR EL FRENO: Empuje el pedal hacia abajo baches o por arena. nuevamente. AJUSTAR EL ARNÉS DEL ASIENTO AJUSTAR LA CAPOTA CLICK PASO 2: Retire la funda de tela y el colchón. Saque INSTALACIÓN CORRECTA DEL MOSQUITERO las abrazaderas de los seguros correspondientes. DEL CAPAZO SACAR LAS TELAS DEL CAPAZO PASO 1: Saque la anilla plateada de ajuste de la PARA AJUSTAR LA CAPOTA: Deslice la capota presilla superior o inferior del arnés. (Si es necesario, hacia arriba o hacia abajo a lo largo del chasis retire la almohadilla de microante del arnés para (entre los dos aros plásticos) hasta que esté a la facilitar el ajuste.) altura deseada. PASO 1: Para sacar la funda, tire PASO 2: Abra las cremalleras de la PASO 3: Abra la cremallera de la del borde elástico hacia afuera capota situadas en la parte inferior sábana de tela en la parte superior y levántelo sobre los lados del de la capota, donde la tela se junta del colchón del capazo y saque la capazo. Despegue las tiras laterales con el asa de transporte. Despegue sábana. de Velcro. la tira de Velcro de la funda en la parte inferior. USAR LA PANTALLA DE USAR LA VENTANILLA: Lavar a mano con cuidado Dejar secar sobre una PASO 2: Vuelva a colocar la anilla en la presilla que PROTECCIÓN SOLAR: Enrrollar la solapa y y con un detergente suave. superficie plana y lejos de la luz desee. Utilice la ranura que quedaría justo encima del Extienda la pantalla de pegarla. NO usar lejía, planchar LIMPIEZA directa del sol antes de volver hombro del niño o que esté más cerca de esa posición. protección solar con ni lavar en seco. a usar o de guardar el artículo. FPS 50. Manual de instrucciones UPPAbaby RumbleSeat 22 23 ESPAÑOL
- 14. FUNCIONAMIENTO DEL CARRIOLA FUNCIONAMIENTO DEL CARRIOLA ABROCHAR EL ARNÉS RECLINAR EL ASIENTO PLEGAR EL CARRIOLA 1 2 PARA ABROCHARLO: Meta los dos extremos de la Levante la palanca situada cerca de la parte superior PASO 1: Ponga el freno para impedir que el carriola PASO 2: Ponga el manillar en su posición más baja. correa de la cintura al mismo tiempo en el broche del asiento y recline el asiento en la posición se desplace hacia adelante mientras lo pliega. hasta que encajen. deseada. Suelte la palanca para que el asiento quede PARA DESABROCHARLO: Pulse el botón en el bloqueado en una de las cinco posibles posiciones. centro del broche y tire de los extremos hacia afuera. 1 1 NOTA: No use la posición vertical para bebés de 2 menos de seis meses. Utilice la posición más reclinada 1 ADVERTENCIA: Utilice siempre el arnés de y, gradualmente, vaya poniendo el asiento más vertical 1 2 2 5 puntos de sujeción para sujetar al niño a medida que el niño sea capaz de sostener la cabeza cuando esté en el carriola. Ajuste el arnés sin ayuda. Cada vez que cambie la posición del asiento para que se ciña al niño de forma segura. deberá volver a ajustar el arnés. 2 REGULAR LA ALTURA DEL USO CORRECTO DE LOS MANILLAR Y EL REPOSAPIERNAS ACCESORIOS PASO 3: Con el pulgar izquierdo, presione y mantenga PASO 4: Mantenga2 la lengüeta y el botón pulsados, 1 presionada la lengüeta negra de plástico situada en el empuje el manillar hasta que la marca coincida con la lado izquierdo del coche de paso y, al mismo tiempo, parte superior del aro de plástico en el lado derecho presione el botón de ajuste de la altura del manillar del manillar y empuje hacia abajo. Ya puede soltar la con la mano derecha. lengüeta y el botón. PARA REGULAR EL MANILLAR: Apriete el botón en la parte superior y deslice el manillar hasta situarlo en una de las tres posiciones posibles, la que sea más cómoda para el usuario según su estatura. PASO 5: Continúe plegando hasta que el seguro se acople en el lado derecho del carriola. El coche de paseo permanecerá de pie cuando esté plegado. PARA REGULAR EL REPOSAPIERNAS: Pulse NOTA: Al plegar el carriola con el asiento, el asiento debe estar colocado en el sentido de la marcha y en los dos botones (a la izquierda y derecha del posición vertical. reposapiernas) Mueva el reposapiernas para ADVERTENCIA: Los niños y adultos deben estar lejos de las piezas móviles cuando se realicen situarlo en una de las cinco posiciones posibles. ajustes al carriola. Al abrir o cerrar el chasis del carriola se podría causar daño a los dedos o extremidades. Manual de instrucciones UPPAbaby RumbleSeat 24 25 ESPAÑOL
- 15. FUNCIONAMIENTO DEL CARRIOLA GARANTÍA LIMITADA SACAR LA TELA DEL ASIENTO El carriola UPPAbaby tiene una garantía por defectos de fabricación durante un periodo de 2 años a contar a partir de la fecha de la compra, siempre y cuando se haga un uso normal del artículo y se sigan las instrucciones. Esta garantía no se puede ampliar y tampoco se puede adquirir una garantía ampliada. Esta garantía no es transferible; se otorga únicamente al comprador original del artículo en la tienda y solo es válida si se adjunta una prueba de compra. Le rogamos que guarde la prueba de compra para esta garantía limitada. La garantía solo es válida en el país donde se realizó la compra. Esta garantía está sujeta a PASO 1: Despegar el PASO 2: Soltar las tiras PASO 3: Soltar la tira de la parte inferior del asiento las condiciones establecidas por el país en el que se hayan adquirido los artículos. Las Velcro del reposapiés en el lateral del asiento y deslizar la tela sobre la parte superior de la estructura condiciones pueden variar. UPPAbaby no enviará piezas de repuesto ni de reparación fuera inferior. que rodean la estructura del asiento para sacarla. Seguir los pasos en orden del país en el que se realizó la compra. del asiento. inverso para volver a colocar la tela en el asiento. UPPAbaby solamente suministrará piezas de repuesto o llevará a cabo reparaciones si la empresa lo considera apropiado. UPPAbaby se reserva el derecho de cambiar un artículo por na pieza de repuesto. Es posible que algunas piezas se sustituyan por otras de un modelo más nuevo debido a mejoras realizadas en el diseño del carriola a lo largo del tiempo. SACAR LA TELA DE LA CAPOTA Debe tener en cuenta que un problema que requiera reparación NO estará cubierto por esta garantía si: • El problema fue causado por un mal uso o un mantenimiento deficiente. Consulte el manual de instrucciones para ver las recomendaciones de uso y mantenimiento del carriola. • El daño fue causado por una instalación incorrecta de piezas y/o accesorios UPPAbaby. Consulte este manual de instrucciones para ver las recomendaciones de uso y ensamblaje del carriola. • El daño es producto de la corrosión causada por falta de mantenimiento. • El daño se debe al desgaste natural que es consecuencia del uso diario o de negligencia. • El daño está causado por la intensidad de la luz solar, el sudor, detergentes, humedad al guardar PASO 1: Desenrosque la bisagra situada en uno de PASO 2: Saque la bisagra de la estructura de aluminio. el artículo o lavados frecuentes. los lados de la capota. • Las reparaciones o modificaciones fueron efectuadas por un tercero. • El carriola se adquirió en un establecimiento comercial no autorizado. En nuestro sitio web puede ver una lista de los vendedores autorizados: www.uppababy.com. • El carriola es de segunda mano. • El carriola está dañado como resultado de un accidente o durante el transporte aéreo o de carga. UPPAbaby se reserva el derecho a determinar si se han cumplido las condiciones de la garantía. Póngase en contacto con su distribuidor local si tiene alguna pregunta respecto a la garantía. PASO 3: Deslice hacia arriba la estructura de PASO 4: Deslice la tela para sacarla de las estructuras SERVICIO AL CLIENTE plástico para sacarla de la bisagra. de plástico y aluminio y así separar la capota de la estructura. PAÍS CONTACTO TELÉFONO PAGINA WEB US 60 Sharp Street Hingham, MA 02043 781.413.3000 www.uppababy.com Distribuido por 5514KM 416.422.2700 CANADÁ 19 Industrial Street www.5514km.ca Lavar a mano con cuidado Dejar secar sobre una toll free: 1.888.502.5514 Toronto, Ontario M4G 1Z2, Canada y con un detergente suave. superficie plana y lejos de la luz NO usar lejía, planchar LIMPIEZA directa del sol antes de volver ni lavar en seco. a usar o de guardar el artículo. Registre su carriola en www.uppababy.com. Manual de instrucciones UPPAbaby RumbleSeat 26 27 ESPAÑOL