Web & Social Media Analytics Previous Year Question Paper.pdf
Dr ghazy 2012 my implant lecture for 4th year students
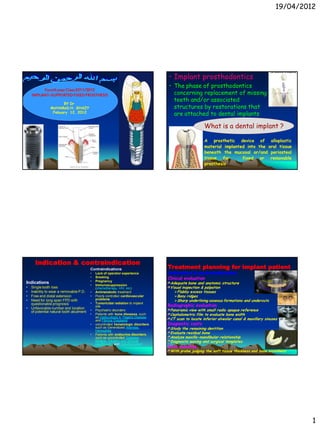
1. 19/04/2012
• Implant prosthodontics :
• The phase of prosthodontics
Fourth year Class 2011/2012
IMPLANT–SUPPORTED FIXED PROSTHESIS concerning replacement of missing
teeth and/or associated
BY Dr
MoHAMeD H. GHAZY structures by restorations that
Febuary 12, 2012
are attached to dental implants
What is a dental implant ?
A prosthetic device of alloplastic
material implanted into the oral tissue
beneath the mucosal or/and periosteal
tissue for fixed or removable
prosthesis
Indication & contraindication
Contraindications Treatment planning for implant patient
• Lack of operator experience Indication &contraindication
• Smoking Clinical evaluation
• Pregnancy
Indications
• Immunosuppression
Adequate bone and anatomic structure
• Single tooth loss (chemotherapy, HIV, etc) Visual inspection & palpation
• Inability to wear a removable P.D. • Antimetabolic treatment Flabby excess tissues
• Free end distal extension • Poorly controlled cardiovascular Bony ridges
• Need for long span FPD with problems Sharp underlining osseous formations and undercuts
•
Radiographic evaluation
questionable prognosis Tumoricidal radiation to implant
site
• Unfavorable number and location
of potential natural tooth abutment • Psychiatric disorders Panoramic view with small radio opaque reference
• Patients with bone diseases, such Cephalometric film to evaluate bone width
as Histiocytosis X, Paget's Disease
and Fibrous Dysplasia CT scan to locate inferior alveolar canal & maxillary sinuses
• uncontrolled hematologic disorders Diagnostic casts
such as Generalized Anemias, Study the remaining dentition
Hemophilia
• Patients with endocrine disorders, Evaluate residual bone
such as uncontrolled Diabetes Analyze maxillo-mandibular relationship
Mellitus, Pituitary and Adrenal Diagnostic waxing and surgical templates
insufficiency and Hypothyroidism
Bone sounding
With probe judging the soft tissue thickness and bone soundness
1
2. 19/04/2012
To the left you can
see a typical modern
Root form Implant
and to the right of
Transosteal the implant is a
Subperiosteal picture of a natural
tooth.
One can see how the
implant is designed
to replace the root of
Endosteal
Endosteal plate root form a tooth by the
form somewhat apparent
similarity.
Implant supported
prosthesis may be
Screw Retained
OSSEOINTEGRATION
Transocclusal
A direct structural and functional
connection between ordered living
bone and the surface of a load
Screw Retained carrying implant
Transversal
Swedish professor of orthopedics
named Per-Ingvar Branemark
in 1965 he used the first titanium dental implant into a
human volunteer
Cemented
Fixed Partial
Denture
2
3. 19/04/2012
Principles of Implant location
Anatomic limitation
Implant most commonly used from
General guide lines
–commercially pure (CP) titanium • Ideal bone should be 10 mm vertical and 6
– titanium-aluminum-vanadium alloy (Ti- mm horizontal
6Al-4V) - stronger & used w/ smaller
diameter implants • Two mm above the superior aspect of
inferior alveolar canal
Why Titanium • Five mm anterior to mental foramen
• lightweight • one mm from the periodontal ligament of
• biocompatible adjacent tooth
• corrosion resistant (dynamic inert oxide layer) • Three mm between 2 implant to ensure bone
• strong & low-priced vitality.
Principles of Implant location Principles of Implant location
Anatomic limitation
Anatomic limitation
Anterior maxilla Posterior maxilla
• 1- Minimum of 1 mm between the Bone less dense, larger narrow spaces, and thin cortex
implant apex and nasal vestibule • 1- One implant for every tooth
• 2- Implant slightly off midline on either • 2- One mm of bone between the floor of
sides of incisive foramen. sinus and implant
3
4. 19/04/2012
Principles of Implant location Principles of Implant location
Anatomic limitation Anatomic limitation
Posterior mandible
Anterior mandible • 1- Two mm above the superior aspect
• 1- One implant placed through the of inferior canal
entire cancellous bone • 2- More time required for integration
• 2- Five mm anterior to the foramen • 3- Attachment of mylohyoid muscle
Principles of Implant location Principles of Implant location
Restorative consideration Restorative consideration
Implant placement Implant placement
1- Stay 1mm from the adjacent natural tooth but not so far 2- Long axis of implant should be positioned in the central
to for contouring restoration fosse of the restoration
Less ideal location
Natural
tooth
Ideal
implant
placement
4
5. 19/04/2012
Implant and restoration size Surgical guide
1-Size should be considered during treatment planning Template extremely
2- 4mm diameter for maxillary central useful for anterior
3- 3mm for mandibular incisors implant
4- 5-6mm for molars Objectives
1- Delineate the
embrasures
2- Locate the implant
within the restoration
contour
3- Align the implant within
the long axis of the
restoration
4- Identify the level of
CIJ or tooth emergence
from the soft tissue
Wax model of a tooth to be replaced in the surgical guide
5
6. 19/04/2012
Surgical guide template
Stent used as guide for implant placement
Surgical guide for correct implant
placement Implant surgery
Surgical access
Implant placement
Postoperative evaluation
Implant uncover
Guide drill / 2mm twist drill / Pilot drill / 3mm twist drill / Countersink
6
7. 19/04/2012
Fourth year Class 2011/2012
IMPLANT–SUPPORTED FIXED PROSTHESIS
BY Dr
MoHAMeD H. GHAZY
Implant restorations February 19, 2011
Significant factors for success
1- Precise placement
2- A traumatic surgery
3- Unloaded healing
4- Passive restoration
Components of an
implant restoration
Composite resin
Gutta percha
Screw- retained implant
restorations consist of Retaining screw
three components. Abutment screw
Abutment
(a) Implant fixture
(b) Abutment
(c) Restoration
- The abutment screw secures Implant fixture
the abutment to the fixture
- The prosthetic retention screw
secures the prosthesis to the
abutment.
7
8. 19/04/2012
• Lekholm and Zarb bone type classification
Type I bone
homogenous, compact bone
Type II bone
a thick layer of compact bone surrounding a core of dense
trabecular bone
Type III bone
a thin layer of cortical bone surrounding a core of dense
trabecular bone of good strength
Type IV bone
thin layer of cortical bone surrounding core of low density .
Implant insertion into
the prepared socket
Unscrewing the abutment from the implant
fixture, screw covering and suturing
8
9. 19/04/2012
The abutment removed from the implant
Removal of the cover screw in
the 2nd stage and abutment fixture
attached to the fixture as a
coping ready for impression
Abutment prepared to its final form in the
Abutment and its implant analog and working cast
repositioned in the impression
9
10. 19/04/2012
Prepared abutment and final restoration Implant restorations
Impression post Closed tray
in the patient mouth Impression
Imp post & analog
Polyether soft tissue
Imp post & analog
injected around
relocated on the
analog before
impression
pouring
Poured cast
Impression coping
locates the analog in Contouring of the
the same position in soft tissue material
the cast as the
implant in the mouth
Zirconia abutment Zirconia abutment
for cement retained seated on cast Zirconia abutment
restoration selected seated in the mouth
10
11. 19/04/2012
Prosthetic Crown Clinical Implant system components
Look and feel of real
tooth. Implant body
Easily replaced.
Is the component placed within the bone during
1st stage surgery
Abutment
Secures the crown to the
Dental Implant. Can be
straight or angled depending Titanium screw
on implant location
Hydroxyl
Titanium
screw
Dental Implant
Apatite
Should promote bone in- coated Titanium plasma
growth. Structure and Hydroxyl cylinder sprayed cylinder
geometry differences are appetite
the selling point for most coated
companies. screw
Two images showing two different types of tapered, Cover screw
cylindrical implants. One looks like a Christmas tree with fins It is the component placed over the dental implant during the
projecting out to the sides; the other shows a special surface osseointegration phase to seal the occlusal surface of the
treatment consisting of spherical titanium beads. implant and prevent tissue from proliferating into the internal
portion of the implant body
It should be of low profile to facilitate the suturing of soft
tissue tension _free.
11
12. 19/04/2012
Healing abutment
Dome shaped 2-10 mm
screw placed on the implant Healing Abutments
after the 2 and stage
surgery & before insertion Transgingival Titanium piece which
of the prosthesis will form the soft tissue
Selected considering the
A- screw into implant Emergence Profile needed for the
restoration and the tissue height
B- Screw into abutment
(healing cap)
Healing Abutments EP® (Emergence
Profile)
Necessary Information: Height
Healing Abutment Height
Platform Diameter (normally same as Restorativ
implant diameter ) e Platform
Healing Abutment Diameter (EP
Profile
12
13. 19/04/2012
Abutment
Component of the implant system that
screw directly into the implant to support
and or retains a prosthesis or implant
superstructure
Abutment
(Screw retained restoration)
- can be either parallel
(standard) or conical
(estheticone) in shape. Abutment
screw 15º Pre-Angled
- are secured with an (green)
abutment screw that is Straight
tightened to 20 Ncm. Abutment
(red)
Abutment
(Cemented restoration)
Engages Engages
- Cera One abutment Implant 12 Point
Hex Double Hex
- secured with a square
head screw tightened to 32
Ncm. Click Zone
13
14. 19/04/2012
Open tray impression Concept
2 impression techniques
Open tray impression Closed tray impression
Implant & impression post Intraoral situation Analog & impression post
Education
Impression procedure Impression procedure
Remove closure screw or healing abutment Take impression with an open tray
Insert impression post and hand tighten screw with the Use an elastomeric impression material
screwdriver
55 Education 56 Education
14
15. 19/04/2012
Types of impression posts
Impression procedure
When impression material is set,
unscrew and remove the impression
A one piece coping Two piece coping Two piece coping
Screw into the abutment Screw into the implant Screw into the abutment
used if the abutment does not used if the abutment does used to orient the anti-
need to be changed on the not need to be rotational feature or to
57 Education lab cast changed on the lab make impression of
cast very divergent implant
Impression with laboratory analog to make the master cast.
Two piece Impression
coping
Impression
coping attached
to the implant
analog
• The impression posts attached to
the implants fixtures.
The master cast is that one used to fabricate the
final prosthesis.
15
16. 19/04/2012
Laboratory analogs
Components made to represent the top of
the implant fixture or the abutment in the
laboratory cast
Fixture analog Abutment analog
{Duplicate implant top} {Duplicate abtument top}
16
17. 19/04/2012
Attach Analog
Push Analog/Impression Coping Assembly into Impression
Twist and Lock Grooves into Impression
17
18. 19/04/2012
Waxing sleeves
Prosthesis retaining
screw
Screw used to secure the
Plastic waxing sleeve tightened Gold cylinder tightened to a prosthesis to the implant
or the transmucosal
to a laboratory analog laboratory analog abutment
Combination
Components of an implant
Prosthetic retaining screw
restoration
Prosthetic Composite resin
retaining screw
Gutta percha
Screw retained implant restorations
Retaining screw
consist of three components.
Abutment screw
(a) Implant fixture Abutment
(b) Abutment
Have a slot or hex head (c) Restoration
Access is usually covered by a combination of gutta - The abutment retaining screwImplant fixture
percha and composite.
secures the abutment to the fixture
used to retain the prosthesis to the abutment.
- The prosthetic retaining screw
Tightened to 10 Ncm.
secures the prosthesis to the abutment.
18
19. 19/04/2012
Slot Screw
Screw retained implant crown Driver
- Used to remove or replace slotted prosthetic retention screws.
- Tighten to 10 Ncm
Hex Screw Driver Abutment Screw Driver
- Used to remove or replace hex prosthetic retention screws. - Used to remove or replace abutment screws for standard or
conical (estheticone / mirus cone) abutments.
- Tighten to 10 Ncm.
- Tighten to 20 Ncm.
19
20. 19/04/2012
Impression tray without impression material:
Square Screw Driver After the impression tray is prepared, it should be checked to see that it fits
and fully covers the area of the impression and that the hole in the tray is
aligned with the guide pin.
Impression tray with impression material in the jaw:
The coping must be completely covered by impression material and the tray be
fully seated.
It is very important that the guide pin protrudes through the impression tray
in order to open it with the hex driver.
- Used to remove or replace Cera One abutment screw.
- Tighten to 32 Ncm
Inverted impression tray with Stone model prepared with simulated
emphasized hex: gingiva and implant analog
The hexagon of the impression coping
can be seen. It is very important to In the final stage in impression taking, a
check that the position of the
stone model of the gingiva and teeth
impression coping has been accurately
recorded and that the hex is clear of should be cast, and the simulated gingiva
any impression material. should remain on the model.
After the stone is hardened, the
impression coping can be released from
the model by removing the guide pin.
Inverted impression showing gingiva being
syringed around analog The impression tray can now be
The analogue can now be attached to the separated from the model
impression coping by screwing in the guide
pin. It should be confirmed that the
coping is attached to the analogue
with no misalignment of gaps. At this
stage, injecting impression material
around the neck of the analog can
simulate the gingiva.
20
21. 19/04/2012
Silicone index and wax model
of tooth
Option 1: Placing the gold plastic cylinder abutment on the stone model
When the wax model of the Following the construction of the silicone index a gold plastic cylinder
abutment with hexagon can be selected.
tooth is appropriately
positioned a silicon key can be
prepared that will serve as a
good replica of the missing
tooth.
Option 1: Wax Carving
The plastic part of the gold plastic cylinder abutment can now be grind to the
appropriate height on the stone model, taking into account the height of the adjacent
teeth. After the gold abutment and the plastic cylinder have been prepared, it is
possible to carve the wax to the desired shape.
Following the carving of the wax on the gold abutment and the plastic cylinder they will
be cast.
Option 1: Silicon index
with wax up Option 1: Porcelain in mouth
The silicon index will be After placing the crown, the screw
used to check that the of the gold abutment should
dimensions of the wax- be tightened to 20 Ncm utilizing
up are appropriate to
its
the TORKIT wrench.
surroundings. This will minimize the chances of
the screw opening. After the
Option 1: Metal casting screw has been tightened, the
When fabricating P.F.M crown, screw hole should be closed.
using the direct wax-up
technique on the cap to get a
metal frame
onto which the porcelain firing
takes place.
Checking the metal on the stone
model and the seating of the
external hex of the gold
abutmnent
in the internal hex of the
implant analog.
21
22. 19/04/2012
Option 2: Placing the plastic
Option 2: Silicon index with
cylinder on the stone model
wax up
The silicon index will be
Following the construction of the
used to check that the
silicon index a plastic cylinder
dimensions of the wax-up
with hexagon can be selected
are appropriate to its
surroundings.
MT-HHR13
Option 2: Metal casting
When fabricating P.F.M crown, using
Option 2: Wax Carving the direct wax-up technique on the
The plastic cylinder can now be grind plastic cylinder a metal
to the appropriate height on the stone frame onto which the porcelain
model, taking in the account the firing takes place.
height of the adjacent teeth. Checking the metal on the stone
model and the seating of the
After the plastic cylinder have been external hex of the casting (what
prepared, it is possible to carve the was
wax to the desired shape. previously the external hex. of the
Following the carving of the wax on plastic cylinder MD-CPH13), in the
the plastic cylinder they will be cast. internal hex of the implant
analog.
Option 2: Check the casting Option 2: Porcelain in mouth
in the mouth After placing the crown, the screw
of the plastic cylinder should
After completion of the
be tightened to 20 Ncm utilizing the
casting, a check must be TORKIT wrench.
made in the
paient’s mouth using the This will minimize the chances of the
screw MD-SO220 to connect screw opening. After the screw has
been tightened the screw hole
it.
should be closed.
Option 2: Porcelain on
plaster model
Following the selection of
the appropriate color, the
porcelain is
fired on the metal casting.
22
23. 19/04/2012
IMPLANT RESTORATIVE IMPLANT RESTORATIVE
OPTIONS OPTIONS
Distal-extension Implant Restoration.
Distal-extension Implant Restoration.
There are two distal-extension restorative options.
Long Edentulous Span Restoration.
1. Tooth-implant supported restoration 1. The clinician may choose to have multiple
implants placed between the remaining
Place an implant distal to the most natural teeth and to fabricate a fully
posterior natural abutment and implant-supported restoration.
fabricate a fixed prosthesis 2. One or two implants can be placed in the
connecting the implant with the long edentulous span and the final
natural tooth. However, there are problems restoration connected to natural teeth.
associated with implants connected to natural teeth When it is necessary to connect implants and the
. natural teeth, protecting the teeth with
2. Implant supported restoration telescopic copings is recommended .
In this manner, prosthesis retrievability can be
Place two or more implants posterior to maintained.
the most distal natural tooth and Some long edentulous spans require the
fabricate a completely implant-supported reconstruction of soft and hard tissue and teeth.
using resin teeth processed to a metal
restoration ). substructure rather than a conventional metal-
If the crown-to-implant ratio is favorable, two implants to support a three-unit ceramic restoration is recommended.
Soft tissue esthetics can be more easily and
fixed prosthesis.
accurately mimicked with heat-processed resin
If implants are short and crowns are long, one implant to replace each missing tooth. and large defects .
If doubt remains, more implants are used when heavier forces are expected (e.g., This type of restoration has been called a hybrid
posterior part of the mouth in patients with evidence of parafunctional activity). because it combines the principles of
Fewer implants are used when lighter forces are expected (e.g., those opposing a conventional fixed and removable prosthodontics.
complete denture or those supporting a prosthesis in the anterior part of the mouth).
IMPLANT RESTORATIVE
OPTIONS
Distal-extension Implant Restoration.
Long Edentulous Span Restoration.
Single-tooth Implant Restoration.
Indicated in the following situations:
1. An otherwise intact dentition
2. spaces difficult to treat with conventional fixed
prosthodontics
3. Distally missing teeth.
4. A prosthesis that needs to closely mimic the missing
natural tooth
The requirements for single-tooth implant crowns are:
1. Esthetics
2. Ant rotation to avoid prosthetic component
loosening
3. Simplicity-to minimize the amount of
components used
4. Accessibility-to maintain optimum oral health
5. Variability-to allow the clinician to control the
height, diameter, and angulations of the implant
restoration
23
24. 19/04/2012
IMPLANT RESTORATIVE CEMENT-RETAINED VERSUS
SCREW-RETAINED IMPLANT
OPTIONS CROWNS
Distal-extension Implant Restoration.
Long Edentulous Span Restoration.
Single-tooth Implant Restoration. Zinc phosphate, glass ionomer, and composite
Fixed Restoration in the Completely resin cements have all been suggested for this
purpose.
Edentulous Arch.
Advantages of cement-retained restorations.
1.The hybrid prosthesis is a cast alloy 1. Simplicity
framework with processed denture resin 2. Less expensive.
and teeth. It requires a minimum of five 3. Allow minor angle correction.
implants in the mandible and six in the 4. More esthetically pleasant
maxilla. Suitable for patients who have had
moderate bone loss, the prosthesis Disadvantages of cement-retained restorations.
1. Require more chair time
restores both bone and soft tissue
2. Have the same propensity to loosen as the
contours. screw retained.
2. The metal-ceramic rehabilitation also Advantages of screw-retained restorations.
requires five implants in the mandible and
six in the maxilla. Only if minimal bone loss 1. Retrievability
has occurred and is best suited for
Disadvantage of a screw-retained implant
patients who have recently lost their
restoration
natural teeth (within 5 years). 1. The screw may loosen during function.
2. Cost
3. For patients with severe bone loss,
there is probably only one option: a Moderate sever resorption
Minimal resorption
removable restoration . —Metal ceramic
resorption —resin to
—Over denture
metal restorations
restorations
CEMENT-RETAINED VERSUS
SCREW-RETAINED IMPLANT
CROWNS
If the screw is sufficiently tightened into the
Screw Retained
implant crown to seat it, a clamping load or
preload is developed between the implant and the
crown.
Transocclusal
If this clamping force is greater than the
forces trying to separate the joint between
implant and crown, the screw will not loosen.
24