ScratchGPIO, Raspberry Pi & BerryClip
•Télécharger en tant que PPTX, PDF•
1 j'aime•410 vues

This Slide Show contains info on using Scratch on Raspberry Pi and Berry Clip. The Case Study video explains the project: https://youtu.be/RshEjqaK4gQ The presentation contains lots of useful scripts and tips on getting things working.

Recommandé
Recommandé
Contenu connexe
Tendances
Tendances (11)
Similaire à ScratchGPIO, Raspberry Pi & BerryClip
Similaire à ScratchGPIO, Raspberry Pi & BerryClip (20)
Plus de David Dryden
Dernier
Dernier (20)
ScratchGPIO, Raspberry Pi & BerryClip
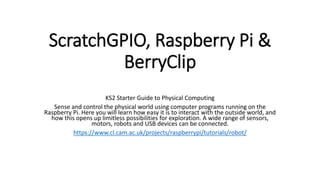
- 1. ScratchGPIO, Raspberry Pi & BerryClip KS2 Starter Guide to Physical Computing Sense and control the physical world using computer programs running on the Raspberry Pi. Here you will learn how easy it is to interact with the outside world, and how this opens up limitless possibilities for exploration. A wide range of sensors, motors, robots and USB devices can be connected. https://www.cl.cam.ac.uk/projects/raspberrypi/tutorials/robot/
- 5. Desirable features Interactive Design
- 6. Scratch and BerryClip http://www.rpischool.org.uk/?p=114 A simple way for primary school aged children to control lights, a buzzer and use a physical button with their scratch programs. + +BerryClip Raspberry Pi BerryClip plugs directly onto the Raspberry Pi’s GPIO header and provides 6 coloured LEDs, 1 Buzzer, 2 Switches and a 13 pin header. It can be controlled using any programming language that can manipulate the GPIO pins and this includes Python and C. GPIO
- 7. ScratchGPIO: How to install on your Raspberry Pi A modified version of Scratch called ScratchGPIO is needed to be able to connect to the BerryClip. The following are instructions to install ScratchGPIO7 software on Raspberry Pi • With Raspberry Pi connected to Internet Copy the text below ( left click just before the s of sudo and drag right until all the text in the line as been selected) then right-click and select copy. Open up an LX Terminal window and select Edit and the Paste that into an LX Terminal window and press Enter it to download the installer. wget http://bit.ly/1wxrqdp -O isgh7.sh Once the installer has been downloaded then just type (or copy and paste the text below as before) sudo bash isgh7.sh and press Enter (If logged in as a different user to standard pi, then type sudo bash isgh7.sh yourusername) This will install all the necessary extra software and some simple examples. http://simplesi.net/scratchgpio/scratch-raspberrypi-gpio/
- 8. •With Raspberry Pi not connected to Internet. Power down you Pi and put the SD card into another computer and download this file http://bit.ly/1wxrqdp and copy it to your SD card. Put the card back into your Pi and then open up an LX Terminal window and type the following sudo bash /boot/install_scratchgpio7.sh (If logged in as a different user to standard pi, then type sudo bash /boot/install_scratchgpio6.sh yourusername) This will install all the necessary extra software and some simple examples. The installer will create 2 desktop icons – ScratchGPIO7 which is used for beginners using simple circuits and ScratchGPIO 7Plus which is used with a lot of add-on boards. Continue onto 1st Project http://simplesi.net/scratchgpio/scratchgpio-1st-project/ ScratchGPIO6 was the previous version – if you need a copy of it – then click here
- 10. Raspberry pi installation • https://www.raspberrypi.org/documentation/installation/noobs.md
- 11. Use ‘Broadcast’ to control lights • ScratchGPIO Run the special Scratch icon (ScratchGPIO) on your desktop. • To test out control from Scratch, click on File then Open and then click on the My Projects button and select blink11 and click on OK. Once the project opens, just click on the OK to enable Remote Sensor Connections. To run the script just click on the Green Flag. Your LED should now blink on for 1 second and off for 2 seconds (Play Video below to see)
- 12. Turn on all the BerryClip LED lights The LEDs have a Hardware Reference: Use this reference in ScratchGPIO: or = LED on or = LED off (All the LED’s are on) (GPIO pin numbers/ordering do not follow anything that makes sense to most people so you just have to go with the seemingly random numbering arrangement)
- 13. • As you can see in the blink11 script , you can simply use a broadcast message telling Pins to go on or off (Up to 3.3V and down to 0V) The valid messages are along with the corresponding pin off messages. You can also say And you can replace the word on with high and replace off with low if you want to talk in pure logic levels. Play video:
- 14. Using variables instead of broadcasts For more advanced Scratchers, you can use variables instead (or as well as broadcast messages) A broadcast allows a signal to everything with the ‘When I Receive’ to be broadcasted, and it allows different objects to do different things all at the same time. A custom block is a ‘Shortcut’ to a command. For example, pressing Ctrl+X cuts something much like a string of custom commands created by you using custom blocks. Custom Block - Allows you to create a new block which you can use in the sprite in which it is defined Broadcast - Sends an event so all the corresponding when I receive scripts will start running Edit: OK a broadcast can be used to replace a custom block. The custom block makes things much easier by having parameters. The custom block also has run without screen refresh which broadcast cannot do. • For example: create a global variable called pin11 • To make pin11 go on or off, set it to; • ‘1’ = on • ‘0’= off
- 15. Variables to control the GPIO’s (General Purpose In and Out) Hardware Reference The following list shows the mapping between the components, the header pins and the GPIO references : LED 1 - Pin 7 - GPIO4 LED 2 - Pin 11 - GPIO17 LED 3 - Pin 15 - GPIO22 LED 4 - Pin 19 - GPIO10 LED 5 - Pin 21 - GPIO9 LED 6 - Pin 23 - GPIO11 Buzzer - Pin 24 - GPIO8 Switch - Pin 26 - GPIO7 Make a variable for each of the LED lights. For example: To control the first RED LED (LED 1) the Hardware Reference for LED-1 is Pin 7. Go to ‘Variables’. Click on ‘Make a variable’ call it ‘pin7’ Drag the ‘set pin7 to 0’ block to the Sprite Script. Create variables like this for all the LEDs. Use the Hardware Reference as a guide. To turn a LED on set it to ‘1’ To turn it off set it to ‘0’
- 16. Make LED light pattern • Once you know how to turn on an off the LED’s you can easily start to write your own sequences. This piece of script when I press ‘space’ will create a looping light cycle.
- 20. Try your own combinations of flashing lights • Use either ‘Broadcast’ or ‘Variable’ method to create your own light patterns, turning on and off the individual LED’s. • Which method is easier? • Use ‘wait’ block to vary the length of time a light stays on. • Use ‘forever’ block to loop the pattern. • Save your work.
- 21. Traffic lights sequence (Simple) Lights go off in pairs in sequence like traffic lights
- 22. Traffic Lights Sequence When flag is clicked it goes to green. Press Space to start sequence. Print PCB?
- 23. GPIO Example: control LED’s using keyboard Ways to control LED’s using keyboard input with either ‘broadcast’ or a ’variable’.
- 24. GPIO Game BerryClip • A simple game that uses Scratch GPIO extensions to play. • The 3 LED’s display health/ lives of the cat • Use buttons or arrows to move the cat up and down to avoid Rex. Be careful, he gets faster!
- 25. LED Health Bars -Raspberry Pi, BerryClip, ScratchGPIO http://computers.tutsplus.com/tutorials/learn-how-to-use- raspberry-pi-gpio-pins-with-scratch--mac-59941
- 26. Random ‘Crazy’ Lights GPIO
- 28. Allpins on/off • To set all outputs to on or off use • For a complete list of all commands that ScratchGPIO understands see here.
- 29. Robot Antenna project Raspberry Pi, Scratch and Breadboard https://www.raspberrypi.org/learning/getting-started-with-scratch/worksheet/ Robot on Scratch linked with ‘Real’ robot
- 32. SWEET SHOP REACTION GAMEhttps://www.raspberrypi.org/learning/reaction-game/
- 33. http://www.dmict.co.uk/programming-using-a-raspberry-pi-berryclip-and-scratchgpio/ • The 3 projects are: 1. Creating a ‘scanning’ LED sequence (Think KITT’s lights from the TV show ‘Knight Rider’). 2. Creating a Morse code generator using the Berryclip’s buzzer. 3. Creating a working die using the 6 LEDs that is triggered by the on-board switch. • A guide for creating these mini-projects can by downloaded from the link below, the Scratch project files can be downloaded for modification from my Scratch page and demos of the 3 projects are embeded below. • 3 Raspberry Pi Berryclip mini-projects documentation
- 34. Simplesi website have the basics… • http://simplesi.net/scratchgpio/scratchgpio-1st-project/ • I’m using this website as reference but have changed it slightly as I’m using the BerryClip and not a Breadboard.
- 35. 1st BerryClip project Control the ‘Traffic Lights’ Manually Remote Sensor Connections (RSC Scratch uses this RSC feature to talk to external devices over a network. To enable this in scratch, go the ‘sensor’ blocks, then right click on either of the last two blocks to find a menu item called ‘Enable remote sensor connection’. Your scratch program will remember this setting when you save your scratch file. RSC has two main types of communication: • Broadcast messages These are simple messages that can be sent and received over RSC. e.g.’led1on‘ • Sensor-updates These are special messages that pass a value associated to a changing sensor input or variable. These sensor updates are only sent when a variable or sensor’s value has changed. The berryclip push button is a simple sensor, when pressed a value of 1 is sent, on releasing the button a value of 0 is sent. You should at this point be using ScratchGPIO on your Raspberry Pi with the BerryClip attached to it. Now you must enable ScratchGPIO to talk to the BerryClip; In Scratch, go to the ‘sensor’ block, then right click on either of the last two blocks to find a menu item called ‘Enable remote sensor connection’.
- 36. SCRATCH INTERFACE DEVICE (SID • use Scratch on a desktop/laptop PC and get it to remotely control the GPIO pins via a WiFi connection. HTTP://SIMPLESI.NET/SIDRPI/
- 37. Berry Bookies – A Horse Racing Game For The BerryClip • http://www.raspberrypi-spy.co.uk/2014/01/berry-bookies-a-horse-racing-game-for-the-berryclip/
- 38. Raspberry Pi and Berry Clip http://www.rpischool.org.uk/?p=114 • BERRYCLIP PLUS INSTRUCTIONS • The BerryClip+ is an enhanced version of the popular BerryClip add-on board. It is a simple, cheap and easy to use addition to the Raspberry Pi. It plugs directly onto the Pi’s GPIO header and provides 6 coloured LEDs, 1 Buzzer, 2 Switches and a 13 pin header. It can be controlled using any programming language that can manipulate the GPIO pins and this includes Python and C. • The 13 pin header allows additional components and sensors to be added. • The kit includes the following parts : • – 1 PCB – 1 26-way header – 1 13-way header – 2 Red LEDs – 2 Yellow LEDs – 2 Green LEDs – 1 Buzzer – 2 Switches – 6 330 ohm resistors – 2 1K ohm resistors – 2 10K ohm resistors – 1 Rubber bumper
- 39. Pin Pattern • To use a “bit-pattern” to set/unset multiple outputs simultaneously use (this will set Pin 11 , Pin 13, Pin 16 and Pin 18 on and Pins 12 and 15 off)
- 40. 25 fun things to do with a Raspberry Pi • http://www.cnet.com/uk/how-to/25-fun-things-to-do-with-a-raspberry-pi/ • https://pihw.wordpress.com/lessons/rgb-led-lessons/rgb-led-lesson-2-scratch-gpio-getting-started/ • http://www.ncl.ac.uk/computing/outreach/resources/primary/primary-conf-2014/resources/w2.4.pdf • http://www.adafruit.com/
- 42. Broadcast v custom block
- 44. Custom build an enclosure digital fabrication https://github.com/diy-electronics/raspberrypi-b-plus-case
- 45. How To Create A Raspberry Pi Video Capture Unit – Part 1 • http://www.raspberrypi-spy.co.uk/2014/11/how-to-create-a- raspberry-pi-video-capture-unit-part-1/
- 48. Where to buy a BerryClip I bought my BerryClip + (the '+' version is red and has an extra switch button) from DAwn Robotics: http://www.dawnrobotics.co.uk/brands/Raspberry-Pi-Spy.html Also recommended outlets are: https://www.modmypi.com/search/?search=berryclip and: https://www.m.nu/berryclip-addon-p-767.html
- 49. Berry Clip and more Pi Shoppinghttp://www.modmypi.com/raspberry-pi
- 51. Melting ice cube game