3. PAGE:
1
2
3
4
5
6
7
8
9
10
11
12
13
14
15
16
17
18
19
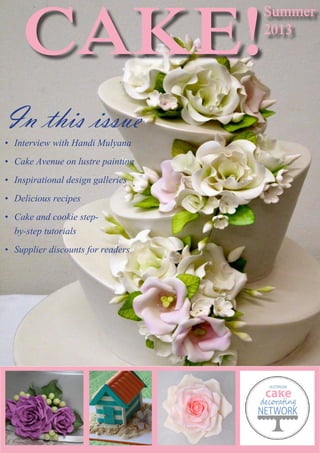
In this issue...
FEATURED:
Decorators’ Spotlight:
Handi Mulyana (Handi’s Cakes)
Janet O’Sullivan (The Cupcake Lady)
Cake Avenue’s Guide to Lustre Painting
Cake Camp 2013
TUTORIALS:
Summer Beach Hut Cookie
Vintage Rose
Ruffled Flower Cupcake Topper
Ruffles and Corrugated Iron tips
GALLERIES:
Glamorous Weddings
Summer Florals
International Inspirations
REGULARS:
Contributors
Business Basics: Insurance
Shopping Guide
Decorator Directory
Next issue: Submit your work
RECIPE FILES:
Mascarpone, mango & hazelnut tarts
Tricolour macarons
Ginger spice cake with peach brown sugar
swiss meringue buttercream and salted caramel
Disclaimer
The views and comments expressed by the authors are not always that of the editor or publisher. While every effort
has been made to ensure the accuracy of this information within Cake! magazine, the Australian Cake Decorating
Network and Cake! magazine accepts no responsibility or liability for any errors, omissions or resultant consequences
including loss or damage arising from reliance on information in this publication.
2austcakedecoratingnetwork.com
4. We would like to thank an amazing group of contributors from all over
Australia, who have helped bring our launch issue to life. Our first
issue is jampacked with gorgeous photos, sumptuous recipes, inspiring
interviews and imaginative tips and techniques for your various cake
projects. Cake! would not be possible without this wonderful group of
Australian contributors, so THANKYOU!
Handi Mulyana
Handi’s Cakes
www.facebook.com/handiscakes
Trinh Nguyen
Cake Avenue
www.facebook.com/cakeavenue
Amy De La Rosa
De La Rosa Cupcakes
www.facebook.com/
delarosacupcakes
Jacki Fanto
Blissfully Sweet
www.facebook.com/blissfullysweet
3austcakedecoratingnetwork.com
5. Contributors
Lisa Brown
Serves Eight
www.facebook.com/serveseight
Nicole Slater
Sweet Love Cake Couture
www.facebook.com/
sweetlovecakecouture
Karen Stack
Lick The Bowl
www.facebook.com/lickthebowl
Janet O’Sullivan
The Cupcake Lady
www.facebook.com/
thecupcakeladyadelaide
Want to be part of the next issue of Cake!?
We publish quarterly online and select our favourite images, tutorial proposals
and feature ideas from our members and supporters. To get involved email
editor@austcakedecoratingnetwork.com
4austcakedecoratingnetwork.com
6. HandiMulyana
Handi Mulyana is an
international award winning
cake decorator, business
owner, teacher and all round
Mr Nice Guy. He opened
Handi’s Cakes in Sydney in
2010 after five years as course
director at the famous Planet
Cake, Sydney and hasn’t
looked back.
With over 20 years’ experience
in making, decorating and
sculpting cakes, Handi travels
regularly across Australia and
around the world sharing his
knowledge and passion for
all things cake. His designs
have earned him the title of
number one wedding cake
expert in Australia and ranked
him as Australia’s best cake
decorator and fifth worldwide
in the Wedding Industry
Expert 2012 awards. He was
also named Cake Decorator
of the year in 2011 by the
National Baking Industry
Association of Australia. Handi
is an ambassador for Bakel’s
and has been featured on
Decorator
Spotlight
MasterChef Australia and
MasterChef Indonesia. Some
of his more famous clients
have included Oprah Winfrey
and the popstar, Rhianna.
The Australian Cake
Decorating Network is proud
to announce that Handi
will be a guest tutor at our
first cake camp in March
2013, teaching the fantastic
Circus Topsy Turvy cake.
5 austcakedecoratingnetwork.com
7. I caught up with him at his
Sydney shop to find out more
about this bubbly, brilliant and
very busy cake decorator.
How did you first get started in
cake decorating?
I worked in my family cake
shop, Ten Keng Cu Bakery
in Indonesia, from the age of
10. My dad was a baker so
I think it’s just in my genes.
I moved to Sydney in 1994
and studied hospitality and
cake decorating at various
colleges as well as through the
NSW Cake Decorating Guild. I
worked in The Cake Store in
London for a couple of years
before coming back to Planet
Cake. I’ve been lucky that my
passion for cakes has taken
me all over the world.
What would a typical day be
like at Handi’s Cakes?
There is no typical day! I
could be sketching ideas for
my next class, teaching, in
appointments with clients,
dealing with enquiries from
magazines like Cosmo
Bride, decorating cakes for
my bookings, setting up my
online store, flying to Perth,
Tasmania, Jakarta or anywhere
else that I teach. I tend to be
away in two week blocks so
I’m lucky that Margie Carter
works with me. When I’m not
in Sydney she looks after
the classes and is such a
wonderful decorator.
6austcakedecoratingnetwork.com
8. “I’ve bee
that my pa
cakes has t
all over th
What is the most rewarding
part of cake decorating?
I love teaching and travelling.
I love meeting new people,
love interacting with others
and learning from my students.
Spending day in day out in
the kitchen on your own can
be a bit lonely so I love the
teaching side of my work. The
Sydney shop though really is
my baby. I’m working on an
online store too where I can
sell decorating tools that are
exclusive to Handi’s.
Tell me more about your
online store.
It’s still in development and
is going to be small and
exclusive. I’ll stock tools
that are used in my classes.
Tools that are made to my
exact specifications – veiners,
scrapers, rolling pins etc… Of
course, they will be branded
Handi’s Cakes but the real
point is to make it easy for
everyone who takes my
classes to access the tools
they use on the day.
You teach a lot in Asia. Tell
us about cake decorating over
there.
Traditionally Asian decorators
tend to use a lot of
buttercream. Their cakes are
really intricate and fussy.
Fondant decorating is really
just starting to boom. That’s
why there is so much interest
in Australian style cake
decorating. Faye Cahill is
just so popular. They like our
techniques, our different style.
You know… the sharp edges,
the clean and elegant designs.
They like that our cakes are
not over the top, that there’s
no fuss. I think Faye Cahill
really set a trend there.
1. Be focused –
specialise in the
one thing you’re
best at.
2. Pay attention to
details.
3. Keep an open mind
when you start
creating something.
4. Make sure you have
a good serrated
knife, a good rolling
pin and a good
modelling tool.They
are indispensable
to good cake
decorating.
7 austcakedecoratingnetwork.com
TOP TIPS
9. en lucky
assion for
taken me
he world.”
What is your cake decorating
style?
I love big cakes. The biggest
I’ve ever made was 1.2m
x 1.2m and 2m high. I’ve
recently completed a 10 tier
wedding cake which was
amazing to do. The techniques
I enjoy most are piping, sugar
flowers (particularly roses and
lilies) and sculpting.
Where do you get your
inspiration from?
It’s comes from all around. I’m
always dreaming about cakes.
For wedding cakes I tend
to look at the invitation, the
dress, the venue, the flowers. I
consider the overall theme. Is
it traditional or modern? What
are the main colours being
used? I think the cake has to
be part of a continuous design.
I think about cutting the cake
in the picture frame – does the
design of the cake flow into
the rest of the scene? There’s
only a two second shot, but, if
the cake isn’t as beautiful as
the dress, it ruins the whole
effect. I very rarely produce
the same cake twice. I tailor
the cake to my clients. I often
sketch ideas whilst sitting with
them in our initial appointment.
It develops their trust in me.
They need to see what I’m
thinking.
8austcakedecoratingnetwork.com
10. Which other cake decorators do you
admire?
I admire Maggie Austin for being
herself and doing her own thing.
I think she’s only been decorating
for two years but her style is so
creative. Her cakes are so pretty and
reflect her personality and perhaps
her original training as a ballerina.
I think Debbie Brown is fantastic.
She’s really successful and everyone
in the industry likes her. Ron Ben-
Israel is my idol and I also love
Sylvia Weinstock, Karen Portaleo and
Mike from Mike’s Amazing Cakes.
Their work is just stunning. And of
course here in Australia it has to be
Faye Cahill, she’s really set a design
trend and is so inspirational.
What is your greatest challenge?
I think learning to say ‘no’ and
balancing my time. I’m just so busy
and love creating things that I find
it hard to turn down opportunities.
In the past, I’ve also had some
requests for cake designs that I
didn’t feel comfortable making – not
because of the skill involved but
because of the subject matter. They
were always really hard to do.
Have you had any cake disasters?
I’ve not had any major disasters yet
but this past week has been one of
those weeks where everything goes
wrong. Yesterday I had to cover a
dummy cake three times before I
was happy with it and it just seemed
like everything had to be done twice
all week.
What cake trends do you expect to see
in 2013?
I think that stencilling and ombre is
on the way out. My guess is that
piping and buttercream cakes will start
becoming big. In fact I’m considering
running buttercream classes later in the
year. For wedding cakes, they tend to
follow fashion. So I’m expecting bigger
cakes and lace piping this year.
What are you looking forward to in
2013?
Well, cake camp obviously but also
teaching in Europe for the first time.
I’m going to Barcelona and The
Netherlands and maybe Italy too. I’m
also excited about my entries into the
Royal Easter Show this year. I want
to do something a little bit unusual
involving sculpting and another cake
with royal icing piping. I want to
surprise people with what you can do
with sugar art, bring cake decorating
into the modern era. Really put it out
there. I’d also like to develop my own
book – maybe something informative
for the coffee table. But we’ll have to
see about that…
Handi’s Cakes
www.facebook.com/handiscakes
www.handiscakes.com
9 austcakedecoratingnetwork.com
11. “I want to surprise
people with what
you can do with
sugar art.”
10austcakedecoratingnetwork.com
14. Janet O’Sullivan, Adelaide’s
famous cupcake lady, is an
experienced cake decorator with
a passion for creating exquisite
sugar flowers, unique figurines
and fantasic fun novelty cakes.
She creates beautiful cakes to
suit any style or theme and is
passionate about cake artistry.
Janet will be a guest tutor at
the Australian Cake Decorating
Network’s first cake camp
in March 2013, teaching the
fantastic cake techniques shown
in the photo on page 17. She
also runs decorating workshops
in Adelaide throughout the year.
Decorator
Spotlight
How did you get started in cake
decorating?
I just fell into cake decorating. I
am a registered nurse and also
studying to be a paramedic.
Cake decorating started as I
was looking for something to
do at home while caring for the
kids and studying part time. But
study has been on hold for a
few years as business is too
busy. Life often takes you in
different directions and I alway
run with it to see where it takes
me.
When did you start ‘The
Cupcake Lady’?
We started in January 2010 and
since launching on Facebook we
have not had many days off!!
Do you have formal training or
are you self taught?
Up until September 2011 I was
solely self taught but since then
I’ve done courses with Handi
from Handi’s cakes which have
been priceless in advancing my
skills. I also recently learnt from
Maggie Austin.
TheCupcakeLady
13 austcakedecoratingnetwork.com
15. What’s your favourite thing about
cake decorating?
I love being creative, love seeing
the cake come together, love
being my own boss, love the
flexibility of cake decorating.
I very much enjoy designing a
cake, thinking outside the square,
giving it a go and most days it all
comes together just as planned. I
love a happy customer.
And your least favourite?
Not much but mostly baking
errors.There are days when a
batch is mixed incorrectly and it
is 2am and you have to start all
over again. As much as I don’t
like the all nighters I do love
working at night as it is peaceful
and when my imagination runs
wild!
Do you specialise in any
particular types of cake?
No I am an all rounder. I do
anything from cupcakes to stand
up guitar cakes to tiered wedding
cakes. I find specializing in one
style quite boring so like to mix it
up a lot.
14austcakedecoratingnetwork.com
16. Where do you get your cake decorating
inspirations from?
Inspirations come from all over the
place. Most of the time my ideas come
to me when I least expect it. I used to
look at Google and other designers a
lot when I first started for inspiration
but not so much now. I use wedding
invitations, textures, colours themes.
Once I have a design concept I just
play and create.
Do you ever recreate other people’s
designs or do you always create your
own designs?
I have recreated other people’s designs
when requested by a client. I always
touch base with the designer to make
sure all is ok. And if that image is
popped on Facebook, I always reference
the original designer. However, unless
the client specifies they want the exact
design I do try and put my own spin on
it.
What has been your biggest cake
challenge?
Funnily enough I find that its the
most clean cakes that have very little
decoration and very little room for error.
The novelty cakes such as the guitar
have been challenging but very fun.
“I predict
boundaries will be
pushed and people
will use their cake
as a true canvas.”
Janet O’Sullivan,
The Cupcake Lady
15austcakedecoratingnetwork.com
18. Give us 3 top tips all decorators should
know
1. Get a good air conditioner!
2. When you have been working on a
cake for days and start to think it is
looking wrong... Walk out of the room
for 20 minutes and walk back in and I
assure you you will love what you see.
3. Trust your gut on a design. Give
things a go. Try new techniques and
attend as many classes as you can..
What do you think will be the trends for
cakes in 2013?
Buttercream cakes are making a come
back but in regards to designs and
colours I see a huge shift from your
everyday cake to a lot more designs. I
predict boundaries will be pushed and
people are using their cake as a true
canvas.
Are you looking forward to Cake Camp?
What are the key skills you’re teaching
in your course?
I am very much looking forward to
cake camp and will be teaching a
huge range of beginners techniques
including ganaching cakes, achieving
sharp edges, stacking cakes, stencilling,
quilting, stripes, ruffles, hand painting
and sugarflowers.
17 austcakedecoratingnetwork.com
19. Five things to consider
when setting up your
own cake business
1. Do your research, make sure you have set up
your business name and domainname.
2. Don’t rely solely on Facebook as your
advertising platform.
3. Make sure you have a business plan, revise
that plan regularly. Be organized..
4. Don’t look at your competitors. It is hard with
Facebook around but you need to try.
5. Focus on your business, your brand and your
goals.
6. Be confident in your product but be flexible to
change. Listen to your customers and have fun
along the way.
The Cupcake Lady
www.facebook.com/thecupcakeladyadelaide
www.thecupcakelady.com.au
18austcakedecoratingnetwork.com
TOP TIPS
20. Lustre Painting
Cake Avenue’s Guide to Lustre Paintingguide and photography by Trinh Nguyen - Cake Avenue
19 austcakedecoratingnetwork.com
21. Trinh, the woman behind
Cake Avenue, lives in
the Blue Mountains in
NSW. She started her
cake business while on
maternity leave and now
juggles working as a
pharmacist, two children
under four and Cake
Avenue.
She started cake
decorating about eight
years ago after doing a
local community college
course with her sister.
Originally only wanting
to learn how to make
great cakes for her
children, she’s now been
decorating professionally
since 2010.
Inspired by the creative
aspects of cake design
and her cake idols,
Jacqueline Butler of
Petalsweet Cakes, Alan
Dunn and Debbie Brown,
Trinh particularly enjoys
making sugar flowers
and modelling figurines.
Never having received
any formal training, Trinh
has taught herself to
decorate through books,
YouTube and sharing
with other decorators
and is happy to share
her painting techniques
with you.
Why do cake decorators
paint their cakes?
I think it’s because it
just looks spectacular.
Painted cakes shimmer
and change colour under
different lighting and its
far more effective than
say using silver leaf.
Which decorators do
you admire that use this
technique?
There are lots but Faye
Cahill comes to mind
first. That’s where I first
saw the metallic finishes
done on cakes. And then
there’s Patricia from
Yummy Cupcakes and
Mignon from Cake Face.
They all apply lustre so
flawlessly.
What are some common
mistakes to avoid?
1. Using too small a
brush.
2. Applying coats before
the previous coat is
dry and making it look
patchy.
3. Not covering your
cake properly to start
with. Painting your
cake highlights any
imperfections!
What tools do you need?
• A wide soft bristle
brush 2 inches wide
or wider (I like using
goat’s hair artist
brushes.)
• Edible metallic or
pearl lustre (e.g.
Squires Kitchen Edible
Metallic Silver or
Edible Pearl Lustre,
Caroline’s Pure Lustre
or Rainbow Colours
edible lustres)
• Cake decorators’
alcohol or vodka
• A small bowl wide
enough to fit your
brush
• A turntable
• Newspaper or sheet
to protect your table
from paint splatters!
Lustre Painting
20austcakedecoratingnetwork.com
22. What painting technique
do you use?
I always start at the top
of the cake and spin
it on a turntable as I
apply the lustre. I then
do the sides the same
way. Keep the brush
perpendicular to the cake
and spin it as you apply
the mixture, reloading the
brush when it becomes
dry.
What steps do you take
in painting your cake?
1. Colour your fondant
to a similar shade to the
paint.
2. Cover your cake well
and make sure it’s as
smooth as possible.
3. Mix the edible lustre
with decorators’ alcohol
in a small bowl to form a
liquid paint.
4. Place your cake on a
turntable and then start
painting.
5. As the alcohol
evaporates you may
need to add more to
keep the mixture runny.
6. Don’t forget to let the
paint dry between each
coat.
How long should you
leave your cake to dry
between coats?
It only takes a few
minutes but really it
depends on the humidity.
I tend to do two or three
cakes at a time so by
the time I’ve applied one
coat to the last tier I’m
ready to go back and
apply a second coat to
the first cake. Just make
sure to always check
that the cake is touch
dry before applying
subsequent coats.
What is wet brushing?
Wet brushing is used to
create dramatic painted
effects on cakes. I
mix lustre dust with
decorator’s alcohol so it
becomes a consistency
like ink. I then simply
apply the paint with a
soft bristled brush.
What is dry brushing?
Dry brushing creates a
more subtle effect than
wet brushing. To dry
brush, I use a large
puffy makeup brush
specifically reserved for
cakes. I apply the dust
in large circular motions
all over the cake for
subtle sparkle or I use a
smaller brush to highlight
specific parts, eg on
figurines.
Cake Avenue
www.facebook.com/cakeavenue
www.cakeavenue.com.au
21 austcakedecoratingnetwork.com
23. 1. Cover your cake well - marks/wrinkles are
enhanced by lustre paint.
2. Only use EDIBLE LUSTRE DUSTS.
3. Colour your fondant a similar shade to the
paint.
4. Apply several thin coats (3-4) and allow them
to dry in between.
5. Use a wide soft bristled brush.
6. Use long brush strokes.
7. Practice on a dummy cake in advance.
8. Take your time and don’t rush.
Lustre Painting
22austcakedecoratingnetwork.com
TOP TIPS
24. 23 austcakedecoratingnetwork.com
Join us & other like-
minded decorators for
a weekend away in the
gorgeous
Kangaroo Valley on
CAKE CAMP!
Catering for all decorators
from the novice to
professional this weekend
features a 2-day cake
decorating course (2
courses on offer), 2 x night
workshops,
networking and socialising
opportunities!
8-10 March
2013
CAKE CAMP is
located at the
Kangaroo Valley Golf
Club & Resort
with accommodation
in luxury villas.
All food, accommodation
& course fees are
included in the camp fee.
25. 24austcakedecoratingnetwork.com
Janet from The Cupcake Lady, Adelaide, will be teaching the
beginner-intermediate course which is suitable for for those with
no or minimal experience in decorating with fondant, or for those
who have experience but want to perfect their ganaching skills
and acheiving sharp edges.
Participants will learn:
- How to set up both a round 6” and square 8” cake
- How to fill and ganache both a round and square cake
- How to cover a round and square cake with fondant
- How to achieve sharp edges
- How to securely stack a 2 tiered cake with internal
supports
- How to cover a cake board with fondant
- How to finish your cake board with ribbon
- How to make a simple sugarflower
- 5 different decorating techniques to apply to their
bottom tier, including stencilling, quilting, stripes,
ruffles and hand painting
26. 25 austcakedecoratingnetwork.com
Multi award-winning Sydney cake
decorator, HANDI MULYANA from
Handi’s Cakes will be teaching the
intermediate-advanced course.
This is a brand new course by Handi
which is not yet taught in Australia. It is a
fabulous 3 tier topsy turvy circus themed
cake with elephant topper.
In this course,
participants will learn:
- The correct technique
of covering a styrofoam
dummy/cake
- Sculpting various
elements from
sugarpaste
- To correctly stack and
support a topsy turvy
cake whilst achieving
correct proportions
- To create a stable,
gravity defying structure
- How to use internal
supports
Images used with permission
27. 26austcakedecoratingnetwork.com
Places are limited so book
early to avoid disappointment!
See our website for more details:
www.austcakedecoratingnetwork.com
or email us at:
admin@austcakedecoratingnetwork.com
29. Tutorial
28austcakedecoratingnetwork.com
Equipment
List
12 inch square cake board
1.2 kilos white fondant
Food colouring of choice (eg
Wilton)
Biscuits for ‘sand’
Royal icing
Sugar glue
Piping bag
Spatula
Scalpel knife
Boxcutter blade
Knife
Scissors
Ruler
Rolling pin
Baking tray
Baking paper
Cake smoother
Circle cutter
Jelly beans or other treats to
fill beach hut
Supports to hold beach hut
while drying
The Beach Hut template is
provided on page 34.
Cookie Recipe
Ingredients
200 grams unsalted butter
200 grams castor sugar
1 egg lightly whisked
400 grams plain flour
2 tsp vanilla essence
Instructions
1. Beat butter and sugar until creamy then
add vanilla essence.
2. Slowly add beaten egg then mix in small
batches of flour at a low speed until all
ingredients are combined together.
3. Press mixture into a ball and cover
in plastic wrap. Chill in the fridge for a
minimum of one hour.
4. Preheat oven to 160 degrees.
5. Roll out dough to an even thickness.
6. Use spatula to lift the dough onto a
baking tray prelined with baking paper.
7. Bake for 10-15 minutes (depending
on cookie size).
You will need approximately one batch of
the cookie dough for this project.
Tutorial
30. 1. Colour approx. 300 grams of fondant a sandy
colour (eg Wilton Ivory). Brush your cake board
with a little water and roll out the fondant, using
a little cornflour on the bench to prevent it from
sticking. Gently smooth the fondant with your
hand or a cake smoother. Cut off the excess
leaving a little fondant overhanging the sides. Use
the cake smoother on an angle and press down
on the top edge of the board. The fondant will
cut away leaving a nice bevelled edge. Set aside
to dry.
2. Take the cookie dough from the fridge. Roll your
cookie dough to about 1cm thickness and place
the cut-out template pieces onto the dough. Cut
the shapes out using a knife and a ruler. The
dough will have warmed during this process so
don’t try and pick up the pieces - pop them
back in the fridge to firm up for 10 mins - then
the shape won’t distort while transferring to the
baking tray.
3. Place each piece onto the baking tray - keeping
some distance between them - they will spread a
little during baking. Cooking times will vary but try
baking in a fan forced oven at 160 for 15 mins.
Once the cookies have cooled use a knife to
clean them up. Gently file away any rough edges
and straighten any ‘wonky’ sides. Use the same
filing technique to remove any lumps and bumps
from the face of the cookie. You want a nice
smooth finish ready for your fondant.
4. Colour approx. 300grams of fondant in the colour
of your choice (eg Wilton Teal) and set aside
approx. 300grams of white fondant. Roll out your
coloured fondant onto a surface. Let it dry out
for a few minutes before cutting as this will help
stop the blade from sticking.
29 austcakedecoratingnetwork.com
31. 5. Using a scalpel blade, cut out strips 1.5cm wide.
Each strip needs to overhang the sides of the
cookie. Brush your cookie with a little sugar glue
(or royal icing) and begin to place the fondant
strip over each cookie - leaving a 1.5cm gap
from the bottom. Use a ruler as a guide. Cutting
the ends off at once will give them all a clean
crisp straight uniform edge. Repeat this process
for both the sides and the front of the beach
house.
6. Roll out some coloured fondant and using the
back of your knife or blade; gently make some
impressions to the fondant. Using a little sugar
glue, place a rectangle shape onto one of the
beach hut ends. Cut the overhang with the blade.
Colour a further 300 grams of fondant (Wilton
Orange). Roll out a little ball for a handle and
two little sausage shapes for hinges. Stick both
with a little sugar glue.
7. Roll out some white fondant and using the blade
cut little strips - about 5mm wide. Brush the top
of each strip with a tiny amount of sugar glue (or
water) and layer the strips over each other until
you have enough to cut out a circle shape - I’ve
used a 3.5cm diameter circle cutter.
8. Place the circle onto the other end of the beach
hut end. Roll out some orange fondant to create
the window frame. When rolling fondant I begin
to roll a sausage shape in my hand. Then I
place this on the work bench and using my cake
smoother start gently rolling the sausage back
and forth with the smoother. This creates an even
roll. Using a little sugar glue (or water) wrap the
fondant around the window shutters. Cut off the
excess with a blade.
Tutorial
30austcakedecoratingnetwork.com
Tutorial
32. 9. Mix up some Royal Icing and using a spatula
spread it along the base of the beach hut side
wall. Position the side wall onto the covered cake
board. Use a foam block to help support the
sides while they dry. To speed up the drying time
mix a tiny amount of CMC into the Royal Icing
mix. Don’t add too much - just a sprinkle - or the
Royal Icing will harden too quickly.
10. Pop some of the Royal Icing into a piping bag
and secure the inside walls. At this stage leave
the structure to dry - preferably overnight. If you
try to put the roof on before the walls have set -
you will cause the beach hut to collapse. Remove
any excess Royal Icing from the cake board
before it sets
11. To create the corrugated roof roll out some of
the left over fondant and place strips over the two
roof cookies. You won’t see these so you can
use any leftover colour you have. Secure them
with a little sugar glue. Cut off the excess with a
blade.
12. Roll out some orange fondant and place it
over the roof. With your fingers GENTLY smooth
the fondant over each roll. Once the fondant is
smoothed cut off the excess with the blade.Once
your beach hut has dried, you will be able to tilt it
on the bench. Cut some fondant strips to tidy the
sides and to add a foot around the base.
13. BEFORE attaching the roof - fill your beach
hut with some treats. You could bake some little
flower cookies or use chocolates or jelly beans.
Again use some Royal Icing as glue to attach the
roof. Find something to help support each end
and set aside to dry.
31 austcakedecoratingnetwork.com
33. Always use a clean blade for achieving
clean crisp edges. Press the blade gently
down onto the fondant to ensure that there
is no pulling or stretching.
14. Roll out some orange fondant and place it with
some sugar glue to hide the join. Cut out the
template provided but hold it up against your
own cookie beach hut first to make sure it fits.
Make any adjustments if necessary. Once you
know your end will fit, cut out the fondant and
leave it to dry. Put some CMC into the fondant
to quicken the process. If you try to attach the
roof end before the fondant has dried it till loose
its shape. Repeat this process on both ends.
15. To display your cookie beach hut, sprinkle
some ‘sand’ around the board. Use a food
processor to crush some Arnott’s Finger biscuits
or use brown sugar. Finish with a flower or other
summer decoration.
Tutorial
Lick the Bowl
www.facebook.com/lickthebowl
www.lickthebowl.com.au
32austcakedecoratingnetwork.com
Tutorial
TOP TIPS
37. Tutorial
36austcakedecoratingnetwork.com
Preparation
1. Colour petal paste the day before. This rose has been created using a
vintage pink (mix Wilton rose pink with ivory) and white.
2. Hook the end of the 18-gauge wire, apply hot glue and insert into the
Styrofoam ball. Remove excess glue at the base of the Styrofoam ball.
3. Roll petal paste very thin, using a pasta machine if you have one. Cut 5
petals from the pink sugarpaste using the size 1 cutter. Cover to avoid
drying.
4. Take your Styrofoam ball and lightly brush with piping gel.
5. Take 2 petals and gently ball the edges. Apply to the Styrofoam ball,
interlocking the petals. Pinch off the excess petal paste from the bottom.
Some of the ball will be showing - don’t worry, this gets covered later.
Materials
• 25mm Styrofoam ball
• 1 x 18-gauge white floral wire, cut
in half
• 5 x 28-gauge white floral wires, cut
into thirds
• Petal paste
• Gel colours - Wilton rose pink and
ivory
• Cornflour for dusting
• Piping Gel
• Tylose glue
Equipment
• Rose petal cutters in the following
sizes (measured across at the
widest point):
• Size 1: 3.5cm
• Size 2: 4cm
• Size 3: 4.5cm
• Size 4: 5cm
• Firm foam pad for balling petals
• Balling tool
• Toothpick
• Plastic spoons or similar for forming
and drying
• Dental Floss
• Florist Tape in white
• Pasta machine (optional)
Tutorial
38. 37 austcakedecoratingnetwork.com
Creating the Inner Petals
6. Petal layer 2: take the remaining 3 petals.
Thin and ball the edges. Apply tylose glue to the
bottom half of the petal. Apply these to the rose bud
overlaying the petals in a ‘helicopter pattern’. Turn
out the outer edges so they curl back slightly.
7. Petal layer 3: mix the pink petal paste with
white at a ratio of approximately 50:50. Cut 4
petals using the size 1 cutter. Thin and ball the
edges. Apply tylose glue in a v-shape on the bottom
of the petal from 9 to 3 o’clock. Apply these to the
rose bud, overlaying the petals. Turn out the outer
edges so they curl back slightly.
8. Petal layer 4: mix the pink paste remaining from
step 7 with white at a 50:50 ratio. Cut 4 petals
using the size 2 cutter. Thin and ball the edges. Dry
in plastic spoons to form the curved shape. When
almost dry - but still pliable - glue the bottom edges
and apply the next layer to the rose centre.
9. Petal layer 5: Repeat step 8, this time cutting
6 petals from the size 3 cutter. Before drying in the
spoons, roll the top edges of the petal back using
a toothpick to help form the curl. Dry on upturned
spoons so the rolled edges don’t flatten. When
almost dry, apply to the rose centre.
10. Allow the centre of the rose to dry completely
(preferably overnight). Use a cupcake case to cup
the rose so the petals don’t flop.
39. Creating the Outer Petals
11. Petal layer 6: mix the remaining paste from step
9 with white at a 50:50 ratio. Cut 6 petals from the
size 3 cutter. Using a 28-gauge wire, lightly glue
the wire and insert into the petal, approx one-half to
two-thirds of the way up the petal. This time, use a
rolling pin to thin out the sides and top of the petal
to slightly widen and heighten. Roll the top edges of
the petals back. Place over upturned plastic spoons
and allow to dry completely (preferably overnight).
12. Petal layer 7: repeat step 11, this time cutting 8
petals from the size 4 cutter.
Assembling
13. Using dental floss, tape the dried petals from
step 11 around the prepared centre, one at a time.
Ensure they are held in place tightly.
14. Repeat the process with the petals from step 12.
15. Finally, wrap all the wires tightly in white floral
tape to secure.
Tutorial
Sweet Love Cake Couture
www.facebook.com/sweetlovecakecouture
www.sweet-love.com.au
38austcakedecoratingnetwork.com
Tutorial
41. Instructions
1. Roll out your fondant and using the circle cutters
cut out 4 to 5 fondant circles.
2. Place fondant circles onto the foam pad and thin
out the edges with your flower frilling tool.
3. Place each ruffle fondant circle on top of each
other and use a little of water to glue each layer
together. Using your small ball tool, gently push
into the centre of your ruffle flower.
4. Transfer your flower onto the drying plate or
drying palette. Leave it to dry overnight and they
will be ready to use on your cake and cupcakes.
5. Cover your cupcake with fondant or buttercream
and place your ruffle flower at the centre and
then you will have your beautiful fondant ruffle
flower.
Equipment
• Fondant
• Round Fondant Cutters - Sizes: 3cm, 3.5cm,
4.5cm and 5cm
• Flower Frilling Tool and Ball tool
• Drying Plate or Drying Palette
• Foam Pad and Shaping Foam
Tutorial
40austcakedecoratingnetwork.com
Tutorial
43. RUFFLES
1. Roll out your fondant to approx. 3mm.
Ensure you measure the circumference of the
ruffle that you will need as it is preferable to
have the ruffle in one piece.
2. & 3. Using your Celpad and your ball tool,
gently press down on the edge of one long
side of the fondant and continue along to
the end. The harder you push down while
ruffling the edge the more it will curl. For
this cake, I only wanted a slight ruffle.
4. To provide the elevation for my ruffles (so
they looked as if they were suspended in air
and with gravity) I used bamboo skewers
placed around the cake while I waited for it to
dry.
Equipment
• Fondant in your colour choice
• Sponge type pads (Celpads)
• Rolling pin
• Ball tool
• Skewers
• Paint brush, skewers and lustre dusts are for the
corrugated iron detail
42austcakedecoratingnetwork.com
Tutorial
44. 5. To create a fuller effect add a little
“padding” under the ruffle. Pad the skewers
with tissue.
6. Allow the fondant to dry out a little so
it is less pliable and flexible (about 10-15
minutes). Then gently lift and work quickly
to fix to your cake sides with a little sugar
glue/water/egg white (whatever is your
preference). Allow for as much draping on
the skewers as you would like.
7. Once it is all fixed in place, fluff up the
places that need to be fluffed up with your
tissue and wait for the ruffle layer to dry
overnight.
8. Once dry add your texture treatment
(piping, painting, lustre etc) and wait for this
to dry too.
9. Repeat steps 4 through 8 for as many
ruffled layers as you like.
Remember to always look around at your
everyday household items and see how they
can be turned into cake decorating tools.
43 austcakedecoratingnetwork.com
TOP TIPS
45. Corrugated Iron Effect
1.Roll out your fondant in the size that is
needed to cover your board, approx. 3mm
thick. Let the fondant have more of a
weathered look, that is what you are after.
2. Lay out your skewers about 7 mm apart.
These will form the base of your corrugated
iron.
3. Lay your fondant piece over the skewers
and then using your finger tips, or ball tool,
push the fondant down around the skewers
and then keep smoothing until you have
achieved your desired iron look.
4. After allowing your fondant to dry over the
skewers (depending on the weather, about 1.5
hours) cut and fix to your cake board. Allow
to dry on the cake board overnight.
5. Apply your lustre. I used a wet lustre
painted finish on my iron, you can also dry
brush it on. I then dotted over sprinkles of
copper/bronze coloured lustre and roughly
painted into the silver. This gave the look of
the rusty corrugated iron.
Blissfully Sweet
www.facebook.com/blissfullysweet
www.blissfullysweetcakes.blogspot.com.au
44austcakedecoratingnetwork.com
TutorialTutorial
54. Please note: The above information has been supplied by Red Star Insurance Brokers. The Australian Cake Decorating
Network does not provide any advice regarding insurance matters. Please contact Red Star Insurance Brokers on the
above contact details to discuss your insurance requirements.
SPECIAL MEMBERS RATES
Red Star Insurance Brokers offer special rates to members of the Australian Cake
Decorating Network. Rates start at just $415 annually for up to $20 million cover
and monthly payment plans are also available.
Contact Anthony today
1300 799 242 or email Anthony@redstarinsurance.com.au
The popularity of baking and
cake decorating in Australia,
driven by the popularity of
shows such as Cake Boss,
Planet Cake and the soon
to be released The Great
Australian Bake Off, is growing
rapidly.
Cake decorating is now one
of the most common start-
up business ideas in the
country. If you’re one of those
hobbyists thinking of turning
professional or already run
a cake business, it’s wise to
make sure your business is
comprehensively insured.
Anyone who sells a product to
the public in Australia needs
to have liability insurance.
A Public and Product Liability
policy protects you essentially
from two common scenarios
when running a business:
1) Personal Injury to third
parties
2) Property damage to third
party owned goods
53 austcakedecoratingnetwork.com
55. “Australia is the second
most litigious country
in the world behind
the US. Cake decorators
in particular need to
protect their home
and other assets from
potential litigation as
many small businesses
can leave themselves
vulnerable”
Anthony Murphy,
Red Star Insurance Brokers
Even if you’re just making
cakes for family and friends it
is important to be covered. If
a friend’s child suffers a long
term medical injury following
an allergic reaction to one
of your cakes, you can be
assured their solicitor will
advise them to pursue legal
action.
54austcakedecoratingnetwork.com
Business Basics: Insurance
57. Dessert table created for the Oh Sweet Mum Event,
cakes by Blissfully Sweet, photography by Sweet Style.
56austcakedecoratingnetwork.com
Summer Florals
58. Luna Cakes De La Rosa Cupcakes
Handi’s Cakes
Rouvelee’s Creations
57 austcakedecoratingnetwork.com
63. Blissfully Sweet
www.facebook.com/blissfullysweet
www.blissfullysweetcakes.blogspot.com.au
62austcakedecoratingnetwork.com
Recipe instructions
1. Whip the mascarpone until fluffy
and slowly add your icing sugar
continuing to whip until both
ingredients are fluffy.
2. In a seperate dish, whip your
thickened creeam until it has soft
peaks.
3. Gently mix the cream into the
mascarpone mix.
4. Assemble your short crust pasty
shells on your serving dish and
then pipe or spoon a generous
dollop of the mascarpone mix into
each shell.
5. Top each tart with the mango
juliennes and sprinkle with crushed
hazelnuts.
6. To finish, drizzle over your
balsamic glaze and refrigerate until
serving.
*You may want to quarter the size of
the filling ingredients when making the
mini tarts. The mascarpone mix can
be made and then stored in the fridge
for 3 days. To use again, quickly
whip and use as a topping for a cake,
cannoli filling etc...
Ingredients (makes 24 mini tarts)
• Shortcrust pastry mini tart cases
• 500 gms mascarpone cheese
• 1 cup icing sugar (sifted)
• 300 mls thickened cream
• 1 fresh mango (cut into juliennes)
• 1/2 cup freshly roasted hazelnuts (lightly chopped)
• Aged balsamic glaze (if desired)
Recipe Files
64. Join the Australian Cake
Decorating Network online
and get instant access to the
MEMBERS ONLY BENEFITS:
- Discounts & offers from ACDN preferred suppliers
- Listing in the decorator, supplier and/or courses directories
- Live chat sessions with guest decorators
- Post in the ACDN Trading Post
- Post in the ACDN Job files
- Post in the members forum
- Discounted Cake Decorator Insurance
- Subscription to the Members Only newsletter
- Priority booking for all ACDN events
- Your work shared on the ACDN Facebook page
- Affiliate program: Earn money for friends that join ACDN from
your referral!
www.austcakedecoratingnetwork.com.au
63 austcakedecoratingnetwork.com
cake
decorating
NETWORK
AUSTRALIAN Join Us
65. Rouvelee’s Creations, Aus
Dinky Doodle Designs, UK
Want to get involved?
Submit your work via email -
editor@austcakedecoratingnet-
work.com
Sign up to our newsletter - www.
austcakedecoratingnetwork.com
Follow us on facebook.com/
australiancakedecoratingnetwork
Next issue April 2013
• Decorators Spotlight with
Rouvelee’s Creations & Dinky
Doodle Designs
• Airbrushing techniques,
figurine modelling and mothers
day tutorials
• Australian and international
contributors
Plus all our regulars
including Australian and
international galleries, Business
Basics, Decorator’s Directory,
Recipes Files, Shopping Guide
and even more reader discounts.
Don’t miss out on Issue 2 of
Cake! from the Australian Cake
Decorating Network.
Carina’s Cupcakes, UK
64austcakedecoratingnetwork.com
Next Issue
67. 66austcakedecoratingnetwork.com
Method
1. Place your almond meal and icing
sugar in a bowl, and using a hand
held mixer, ‘blend’ the two ingredients
into a fine mix. There is no need
to sift if you have ‘blended’ the two
together well.
2. Pour 60g of the egg white on top
of the almond and icing sugar mixture
(tant pour tant - half and half).
3.In a small saucepan, place your
sugar and water, and heat on the
stove to 118 degrees, brushing down
the sides of the pan with a wet pastry
brush.
4. While the sugar is coming to
temperature, start mixing the other
60g of eggwhites in a stand mixer,
the eggwhites should be foamy by
the time your sugar syrup is the right
temp.
5. Slowly pour the syrup into your
beating eggwhites in a thin stream
down the side of the bowl to stop
from creating spun sugar. You can
also slow down the beaters while you
add in the syrup.
6. Increase to your highest setting
and beat until the bowl is warm to
the touch, and the meringue holds its
shape, but isn’t stiff and dry.
Ingredients
• 150g almond meal
• 150g icing sugar
• 150g sugar
• 40ml water
• 110g egg whites (aged for
two days and brought to room
temperature, or straight from
the carton and brought to room
temperature)
• Gel food colouring of your choice
- I used peach, yellow and rose
Note: you don’t need to use pure
icing sugar, and the small amount
of usually corn or tapioca flour can
help to stabilise the mix.
Recipe Files
68. Serves Eight
www.facebook.com/serveseight
www.serveseight.com.au
67 austcakedecoratingnetwork.com
13. Take out your frustrations with the
tray on your bench, this will bring any
large bubbles to the surface and pop
them for you.
14. Leave to develop a skin for about
an hour - you can tell when they are
ready when you can touch the top of
your mac and the mix doesn’t stick to
your finger. Make sure to carefully test
the sides of your mac too. Another
way to tell is that they will lose the
wet shine, and become a little matte.
15. Leaving them too long will develop
a thick skin, which will give you a
hard crunchy shell. Macarons should
be moist, with a delicate shell - avoid
making macs that end up with a
regular meringue type top on them.
16. Your oven will determine how
long your cook them for, and on what
shelf - I cook mine in a gas oven
where the heat isn’t direct or strong
7. Add the meringue to the tant pour
tant and egg whites, start by slowly
folding in the meringue until the
ingredients are incorporated. Fold from
the centre, slowly turning the bowl.
8. To get the three tone effect we’ve
created, separate the mix into three
separate bowls and add gel colouring.
9. Carefully mix the colour into the
mixture while simultaneously deflating
the mix. When the mixture falls from
your spatula in an even ribbon, you’re
ready - STOP MIXING!!
10. Fill each of three disposable
piping bags with each colour.
11. Fit the fourth bag with a 2cm
round tip, twist the piping bag at the
top of the tip and push the bag inside
the tip with your thumb - this will stop
the mix leaking out and going all over
your bench while you’re working.
NB I use a tall stein glass to hold my
bags while filling them and in between
trays.
12. Use a 3cm circle cutter to trace
even circles on a piece of baking
paper the same size as your tray,
place a second clean piece of paper
over the top of your template and pipe
in the rounds. This way you only need
to make one template, and you can
slip it out and reuse under another
piece of paper.
69. 68austcakedecoratingnetwork.com
Recipe Files
on a perforated tray at 160 degrees
for about 12 minutes. In an electric
oven with the heat source at the base
of the oven, the temperature is much
more direct, and I cook them on an
insulated tray at 150 degrees for 10
minutes. It really is worth piping a few
onto half sheets of baking paper and
testing out your oven.
17. The perfect macaron has a ‘foot’
created when the heat below the
macarons lifts the mixture up, and the
skin created by leaving the macarons
rises to create a perfect shiny shell.
Macarons should be moist, and
wonderful to eat as individual biscuits.
18.To fill, pipe a generous amount
of buttercream (like the peach
buttercream we made for the ginger
cake), salted caramel, chocolate
ganache, jam or other filling. I’ve
made a chia seed jelly using chia
seeds, lemon juice and castor
sugar, with fresh peach to fill some
super food macs - think outside the
square for some surprisingly delicious
combinations!
19. To get the beautiful bulging filling
that you see in patisseries, twist the
shells together rather than plonking
and squishing them together.
20. Once filled, to get the gorgeous
texture that we all just love in our
macarons, leave them in the fridge
over night.
70. Ginger spice cake with peach sugar swiss
meringue buttercream and salted caramel
Recipe and photography by Lisa Brown - Serves Eight
69 austcakedecoratingnetwork.com
Serves Eight
71. 70austcakedecoratingnetwork.com
Recipe Files
Cake
• 1 cup firmly packed brown sugar
• 3/4 cup plain flour
• 1/2 cup self raising flour
• 1/2 tsp bicarb soda
• 3 tsp ground ginger
• 1 tsp ground cinnamon
• 1 tsp ground nutmeg
• 175g butter softened
• 2 eggs
• 1 cup buttermilk
Salted Caramel
• 175g caster sugar
• 125g cream
• 175g butter chopped into small
cubes
Swiss Meringue Buttercream
• 100g egg whites
• 175g brown sugar
• 250g salted butter cool, but not soft
or firm.
• 1 vanilla bean or 1 tsp of vanilla
bean paste
• 2 yellow or white peaches
• 1/4 cup of water
• 1 cinnamon quill
• 1 tbsp caster sugar
Ingredients
72. 71 austcakedecoratingnetwork.com
1. Pre-heat oven to 150 degrees
celcius.
2. Sift dry ingredients into the bowl of
your mixer, add the eggs, softened
butter and buttermilk. Start the mixer
on its lowest setting to combine the
ingredients, then set to a medium
setting and allow to beat for about
fifteen minutes, or until the ingredients
are fully combined and the mix is
smooth and glossy.
3. For an 8 inch tin, bake your cake
for approximately 1 hour on the
middle shelf of your oven.
4. For cupcakes, bake for
approximately 15 minutes on the
middle shelf of your oven - makes
approximately 12.
5. Place the egg whites and brown
sugar in a bowl over a saucepan of
just simmering water.
6. Constantly stir the egg white and
brown sugar mixture until it reaches a
temperature of 70 degrees celcius.
7. When the egg white and brown
sugar mixture has reached 70
degrees celcius, place it in your
• if the mix appears to be slightly curdled
or has lots of little lumps, the butter
wasn’t soft enough, let it continue
beating, the butter will soften and
incorporate and the mix will get lighter,
glossy and smooth in texture.
• can I use milk instead of buttermilk?
no, bicarb soda is activated by acid,
the acidity of the buttermilk activates
the bicarb soda and gives your cake a
lovely velvety texture.
• to test that the cake is cooked, insert
a skewer into the top of the cake, if it
comes out clean, the cake is cooked.
You can also gently press the top of
the cake, if it springs back, the cake is
cooked.
• to test that the cupcakes are cooked,
lightly press the top of the cake, if it
springs back, the cake is cooked.
Method
TOP TIPS
73. 72austcakedecoratingnetwork.com
Recipe Files
stand mixer and mix on high
until the meringue reaches room
temperature.
8. Add your cool butter to the
mixer a few cubes at a time until
fully incorporated. Your mix should
be soft, glossy and smooth, but
hold its shape.
9. While the egg white and brown
sugar mixture is beating, score
a cross into the bottom of your
peaches, and blanche in a large
saucepan full of boiling water.
10. To blanche, place the pears
into the boiling water for about 1
minute or until the colour of the
peaches intensifies and brightens
slightly.
11. Pull the peaches out of the
boiling water and submerge in a
bowl of ice water to cool them
and quickly stop the cooking. You
should be able to easily peal the
peaches.
12. Roughly chop the flesh off the
peaches and macerate using a stick
blender/blender/food processor.
13. Add the water, sugar, cinnamon
quill and peach puree to a small
saucepan, and slowly reduce until
the mixture is thick and syrupy -
remove the cinnamon quill.
14. Add 1/2 cup of the reduced
peach mixture to the freshly made
SMBC and beat to combine.
15. Place the caster sugar in a
small heavy bottomed pan over
medium heat. Stir as the sugar melts
to ensure that it melts evenly.
16. While the sugar is melting, heat
the cream in a separate pan.
17. When the sugar is a dark
caramel colour, take off the heat
and add the hot cream - the mix
will bubble and spit, continue mixing
carefully until the cream and sugar
come together.
18. Allow to cool slightly, then add
the butter stirring until the butter is
incorporated.
19. Pour into a shallow dish and
allow to cool until room temperature.
74. Serves Eight
www.facebook.com/serveseight
www.serveseight.com.au
73 austcakedecoratingnetwork.com
20. To put together, torte the cake
into even layers.Fill with a thick layer
of peach buttercream, and pour some
of the room temperature caramel over
allowing it to drip over the sides.
21. Repeat and on your top layer
omit the buttercream and drizzle over
the salted caramel.
22. Decorate with fondant accents or
leave it as is.
75. Bake-a-boo Cakes, New Zealand
We asked award-winning, highly
talented cake decorators from around
the world to choose their favourite cake
design from 2012. Here they are - a truly
international gallery of inspiration .
74austcakedecoratingnetwork.com
International Inspirations
76. Peggy Does Cake, USA
CottonandCrumbs,UK
Carina’s Cupcakes, UK
75 austcakedecoratingnetwork.com
Int
77. Vinism Sugarart by Kelvin Chua, Malaysia
76austcakedecoratingnetwork.com
ternational Inspirations
78. Way Beyond Cakes by Mayen
Buns in the Oven
Cupcakery, Malaysia
Cake Over Heels,
Singapore
Firefly India
Joylicious Cakes, Singapore
77 austcakedecoratingnetwork.com
Int
79. Antonella Di Maria Torte & Design, Italy
78austcakedecoratingnetwork.com
ternational Inspirations
81. Shereen’s Cakes & Bakes, UK
The Clever Little
Cupcake Company. UK
Dinky Doodle Designs, UK
80austcakedecoratingnetwork.com
ternational Inspirations
82. Cake Boxes 10inch, 100 for
$68.21
www.packagingplace.com.au
4 inch dummies from $2.97
www.completecake.com.au
Pushpops and acrylic stand
www.packagingplace.com.au
Chandellier stencil $22.95
www.lollipopcakesupplies.com.au
Bride & Groom topper $15.95
www.lollipopcakesupplies.com.au
Butterfly silicone mould $8.75
www.completecake.com.au
Bakels dark choc mud mix $7.95
www.lollipopcakesupplies.com.au
Amerimist 12 asst colours $34.00
www.bakeboss.com.au
Complete photo guide to cake
decorating $35.95
www.cakedecoratingsolutions.com.au
86. 85 austcakedecoratingnetwork.com
Teacups and Roses
Vintage China & Prop Hire in Sydney region
Specialising in pre-loved and eclectic fine
bone china, cake stands, silverware and
decorative accessories for vintage themed
events, photo shoots, displays and corporate
events.
Contact: Sarah 0424 504 421
Email: enquiries@teacupsandroses.com.au
Website: www.teacupsandroses.com.au
Advertise with
Cake magazine
in 2013.
Next issues are:
April, July and October.
Contact Advertising for details of
our great rates and packages.
Discounts for members available.
Email: advertising@
austcakedecoratingnetwork.com
89. Panache Cakes
Ballina NSW
Sweet Love Cake Couture
Coffs Harbour, NSW
Just Cupcak’d
Batemans Bay, NSW
Mix Bake Frost
Ayr QLD
NSW & QLD
90. Lick the Bowl
Rowville VIC
Benita’s Cakes
Langwarrin VIC
It’s Caked On
Melbourne VIC
Handmade with Love by Lisa
Mount Martha VIC
Decorators’ Directory VIC
91. Amanda’s Specialty Cakes
and Desserts
Narre Warren South, VIC
KBJ Cupcakes
Rowville VIC
Amy’s Ambrosial Delights
Stratton, Perth, W.A
Cake of Art
Perth, WA
VIC & WA
92. The Cupcake Lady
Adelaide, SA
Sugar Push
Adelaide SA
Jake’s Cakes
Perth WA
Cake Ellicious
Adelaide SA
Decorators’ Directory SA &
93. Whip It Up
Online & Salisbury East SA
Cake 2 the Rescue
Online
Cubicake WA
Online
Crystal Occasions
Online
Suppliers’ DirectoryWA
94. We hope you enjoyed our
first issue of Cake!
Our second issue will be out in
April 2013 full of more tutorials,
features, inspirational galleries
and GIVEAWAYS.
Advertising enquiries:
advertising@austcakedecoratingnetwork.com
Editorial enquiries:
editor@austcakedecoratingnetwork.com
95. In our second issue:
CakeBoss Software GIVEAWAY!
We’ve got a software
package to give away
to one lucky reader!
Valued at $149!
NEXT ISSUE
with Rouvelee’s
Creations:
Q&A with Rouvelee
Mother’s Day
modelling tutorial