How to animate objects in ppt 2010
•Télécharger en tant que PPT, PDF•
2 j'aime•1,967 vues

The document provides tips on animating objects in PowerPoint to simulate a volcanic eruption over multiple slides: 1) Add objects like clouds and lava that can be animated with effects like fading in, growing, and following motion paths from slide to slide. 2) Draw and duplicate shapes on separate slides to simulate lava flowing down the mountain over time. 3) Right click shapes and edit their points to gradually change their form across slides to further depict the eruption unfolding. 4) Select the animation transition as "After" and set the timing to instantly transition between slides to view the animation.

Recommandé
Contenu connexe
Tendances
Tendances (20)
Similaire à How to animate objects in ppt 2010
Similaire à How to animate objects in ppt 2010 (20)
Plus de Jacqui Sharp
Plus de Jacqui Sharp (20)
Dernier
Dernier (20)
How to animate objects in ppt 2010
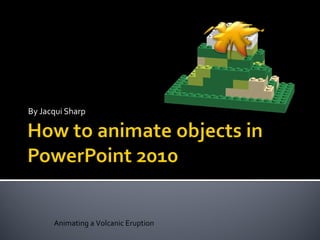
- 1. By Jacqui Sharp Animating a Volcanic Eruption
- 2. Step One: You need objects Tip : you need to close the shape before you can see a colour in it. Go to Paint Can and choose colours from the Gradient Fill to make interesting effects.
- 3. Tip : you need to make sure all of the lines intersect and join if you want to use different colours. To insert into PowerPoint click on the Square selector tool, click and drag around the picture and then press Ctrl C to copy. Go to your PowerPoint page and click Ctrl V to paste. If you want to save your drawing to use somewhere else, right click on the drawing in PowerPoint and click on Save as Picture .
- 4. Tip : When you have finished your painting you will need to save it as a jpeg. Go to File – Export as Image . Once you import it into PowerPoint it may need cropping if there is a lot of white space around it.
- 5. Tip : When you have finished your Lego model go to Toolbox-Take a Screen shot . It will save the lego model as a PNG file. Once you import it into PowerPoint it may need cropping if there is a lot of white space around it.
- 6. Add a new drawing object Step Two: add objects that will animate You might need to get rid of the white background. Click on the Format tab. Click on the Remove Background button. Click and drag on the corners of the selection box so that it surrounds the cloud shape, click out of the drawing and the white background will disappear.
- 7. Then move it behind by clicking on the Format tab. Click on the Send Backward button then Send to Back
- 8. To animate the cloud object in this picture Click on Cloud Go to Animations tab, click on None. Click on the Add Animation button Choose an animation under Entrance . In my example I have chosen Appear
- 9. To further animate add another effect or add a motion path. Click on object to be animated, click on Add Animation button , choose Motion Paths. (Scroll down to see them). Choose a motion path or choose draw custom one. Click where you want the object to move from and click and drag a path. Click when the path finishes.
- 11. Draw your shape Move it to the back Duplicate the whole slide and move the lava out a bit more. Repeat with more slides until you have the lava running down the mountain. Step Three : add objects that animate over several slides and change shape To view this as an animation, press the arrow quickly to get to each page. Page animation instructions on last slide.
- 17. Right click on the shape and select Edit Points . Click and drag on the points of the shape to change the shape gradually.
- 20. Step Four: add objects that animate over several slides and change shape