Advance techniques of vegetable seedling production and nursery
•Télécharger en tant que PPTX, PDF•
1 j'aime•2,013 vues

This presentation comprises complete seedling production and nursery management of vegetable crops by conventional and advanced method.

Recommandé
Recommandé
Contenu connexe
Tendances
Tendances (20)
Similaire à Advance techniques of vegetable seedling production and nursery
Similaire à Advance techniques of vegetable seedling production and nursery (20)
Plus de Shashank Shekhar Solankey
Plus de Shashank Shekhar Solankey (11)
Dernier
Dernier (20)
Advance techniques of vegetable seedling production and nursery
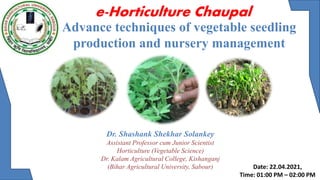
- 1. e-Horticulture Chaupal Date: 22.04.2021, Time: 01:00 PM – 02:00 PM Dr. Shashank Shekhar Solankey Assistant Professor cum Junior Scientist Horticulture (Vegetable Science) Dr. Kalam Agricultural College, Kishanganj (Bihar Agricultural University, Sabour) Advance techniques of vegetable seedling production and nursery management
- 2. "Success of any production system depends on the kind of seed we are sowing“ Healthy seedlings grown in a well managed nursery will decide the yield and consequently the profit. Definition of Nursery: A vegetable nursery is a place or an establishment for raising or handling of young vegetable seedlings until they are ready for more permanent planting. 2
- 3. Why do we need Nursery? Some vegetables require special cares during their early growth period and very small sized seeds. These are first sown in the nursery for better care and to combat with the time for field preparation and after about one month of seed sowing, transplanted in the main field. These vegetables are: 3 • Tomato, • Brinjal, • Chilli, • Capsicum, • Cauliflower, • Cabbage, • Knol-khol (kohl rabi), • Chinese cabbage, • Brussels sprouts, • Sprouting broccoli, • Endive, • Chicory (red and green), • Celery, • Kale
- 4. Advantages of Nursery Management: • Provide favourable growth conditions i.e. germination as well as growth • Better care of younger plants as it is easy to look after nursery in small area against pathogenic infection, pests and weeds. • Crop grown by nursery raising is quite early and fetch higher price in the market, so economically more profitable. • There is saving of land and labour as main fields will be occupied by the crops after 1 month. More intensive crop rotations can be followed. • More time is available for the preparation of main field because nursery is grown separately. • As vegetable seeds are very expensive particularly hybrids, so we can economize the seed by sowing them in the nursery. Site Selection is the first important consideration for nursery management: • Area selected should be well drained, and free from water logging, • There should be proper sunlight, • The nursery should be near the water supply so that irrigation can be easy, • The area should be well protected from pet and wild animals. 4
- 5. Soil treatment: For getting healthy seedlings Soil must be treated to make it pathogen and pest free. Treatment of soil against pathogens: A. Soil Solarization : • Suitable Time Period: May-June as temperature rises up to 45oC at this time. • Wet the soil with water, or saturate it with water. • Spread white polythene of 200 gauges on the whole nursery area for about 5-6 weeks. • The margin of the polythene should be covered by wet soil (compressed mud) to check the entry of air. • Prepare the beds for seed sowing. 5
- 6. Soil solarization with polythene sheets Seed bed preparation after opening of polythene cover 6
- 7. B Formalin Solution treatment: • This treatment should be done 15-20 days before seed sowing. • Prepare formalin solution (1.5 to 2%) in one container and drench the soil @ 4.5 litre of water per square meter soil surface to saturate it up to a depth of 15-20 cm. • Cover the drench area with polythene sheet of 200 gauge. • Put the wet soil on the margin of the covered polythene sheet. • Removes the cover (polythene) after 15 days. • Prepare the beds for seed sowing. C Application of fungicides: • Generally used fungicides: Captan, Thiram which kill the soil borne pathogens. • Use 5-6 g of any of the fungicides per square meter nursery area. 7
- 8. E Steam treatment: • Hot steam can be used to treat the soil against harmful insect pest. • For this, cover the required area with the help of polythene sheet and stop the movement of air in the covered area. • Supply the hot steam for at least 4-6 hours continuously. • This way all the harmful pathogen and insect pest will be killed. 8 D Insect Control: • Presence of certain insect pest and their egg or secondary stage insects present in the soil which can infect the seedlings in the later stage. • Soil treatment with Chlorpyriphos @ 2 ml/ liter of water. • At the depth of 15 - 20 cm in the nursery soil and then prepared the beds for seed sowing followed by covering of seed bed with 50 mesh nylon net. Covering of seed bed with 50 mesh nylon net
- 9. Nursery bed preparation • Nursery bed should be prepared according to the season and crop. • In the rainy season raised beds are prepared but in the winter and summer season flat beds should be prepared. 9
- 10. Raised nursery beds • Length of the bed may be kept 3 to 5 meter; however, width is restricted to 1 meter only which facilitates intercultural operations. • The beds are raised 15 to 20 cm high from the ground level. A space of 30 - 40 cm is left in between two beds. • The space between two beds helps in weeding, nursery care against diseases and insect pest and also for draining out the excess rain water from the nursery beds. • The beds should be prepared in the east and west direction and line should be made from north to south direction on the beds. 10
- 11. Sowing of seeds in the nursery After the seed bed preparation seeds are sown in the nursery bed either by broadcasting or in lines depending upon the nature and season of crop. • In broadcasting method seeds are broadcasted on the well prepared nursery beds and later on the seeds are covered with well rotten fine sieved and treated FYM or compost. The major disadvantages of this method are: • Uneven distribution of seeds in the nursery beds. • Growth and development of seedlings is poor. • Some times nursery becomes so dense to look like as patches of grasses. In such cases there is more possibility of damping off disease occurrence. 11
- 12. 12
- 13. 13
- 14. Line Sowing • Line sowing is the one of the best method of seed sowing in nursery. • Lines are made 0.5 to 1.0 cm deep parallel to the width at an distance of 5.0 cm from the line and seeds are sown or placed singly at a distance of about 1.0 cm apart. • Cover the seeds with fine mixture of sand, soil and well rotten and sieved FYM or leaf compost (1:1:1). After the seed covering a light irrigation must be given. • Apply 3-4 g thiram or captan per kg mixture if, it is not treated. • Care should be taken that every seed is well covered by seed covering material. 14
- 15. Removal of mulch After 3-4 days, observe the seed beds daily. As and when the white thread like structure is seen above the ground, remove the mulch carefully to avoid any damage to emerging plumules. Always remove mulch in the evening hours to avoid harmful effect of bright sun on newly emerging seedlings. 15 Covering of seed bed with paddy straw Use of mulch • It maintains the soil moisture and temperature for better seed germination. • It suppresses the weeds. • Protects from direct sunlight and raindrops. • Protects against bird damage.
- 17. 17
- 18. Plug trays of different cell capacity Production of healthy seedlings in plug trays 18
- 19. 19 Automatic Plug Tray Seeder Seedling Nursery Machine Sowing speed 400-500 trays per hour. Sowing rate: 95% - 98%
- 20. Seedling trays are placed on plastic-lined sloping beds - a low cost option 20
- 21. Seedling from plug tray to field • Seedlings grown in plug trays using soil-less media are healthy and do not suffer transplanting shock. • Ideal technology for high value crops, especially for greenhouses. 21
- 22. Net-house nursery to grow plug seedlings 22
- 23. 23
- 24. 24
- 25. 25
- 26. • It is a silicous mineral of volcanic origin • It is first crushed and then heated until the vaporization of combined water expands for increased aeration and drainage • Perlite is very dusty when dry and has the tendency to float to the top of the container during irrigation • It also contains potential toxic levels of fluorine • Although costs are moderate perlite is an effective amendment for growing media Perlite
- 27. Vermiculite It is a micacious mineral produced by heating to approximately 745 °C The expanded plate like particles which are formed have a very high water holding capacity and aid in aeration and drainage It has excellent exchange and buffering capacities, as well as the ability to supply Ca, K and Mg It is less durable than sand and perlite.
- 28. 28 Cocopeat is natural fiber made out of waste coconut husks. The extraction of coconut fiber from husks gives us this byproduct called coco-peat, which is a 100% natural growing medium. Properties of Cocopeat: • Cocopeat is light, easy to handle and can even be reused for up to 4 years. • The physical and biochemical properties of cocopeat make it resistant to bacterial and fungal growth. • Cocopeat can store and release nutrients to plants for extended periods of time. • It has great air movement or oxygenation properties which are important for healthy root development. • Cocopeat is perfect soil conditioner, and it can retain moisture up to eight times of its volume. Cocopeat
- 29. 29
- 30. 30
- 31. 31
- 32. 32
- 33. 33
- 34. 34 Use of plastic low tunnels for early yield
- 35. Performance of different cucurbits under plastic low tunnels and the advance in maturity Crops Time of transplanting Expected advance in crop maturity (days) Summer squash First week of December to last week of January 30 – 60 Bottle gourd First week of January to first week of February 30 – 40 Bitter gourd Third week of January to first week o February 25 – 45 Musk melon Second week of January to first week of February 30 – 40 Cucumber End of January to first week of February 30 – 35 Water melon Second week of January to first week of February 30 – 40 Source: Singh and Sirohi (2005)
- 36. Use of shedding net After seed germination during the seedling growth, if there is very high temperature (> 30o C) then beds should be covered by 50% or 60% shedding nets of green/green + black coloured, about 60 - 90 cm above ground by the use of suitable support. Watering • The nursery beds require light irrigation with the help of rose can till the seeds get germinated. • Excess rainwater or irrigated water should be drained out from the field as and when it is required otherwise plants may die due to excess of water. • Watering in the beds depends upon the weather condition. If temperature is high, open irrigation is applied. Need not to irrigate the beds during rainy days. 36
- 37. Thinning • Remove weak, unhealthy, diseased, insect pests damaged and dense plants from the nursery beds keeping distance of about 0.5 to 1.0 cm from plant to plant. • The thinning facilitates balance light and air to each and every plant. It also helps in watching the diseased and insect pest attacked plants while moving around the nursery. Weed control • Timely weeding in nursery is very important to get healthy seedling. If there are some weeds in the seed bed, remove them manually either by hand or by hand hoe (thin forked Khurpi). • Pre emergence herbicides can also be sprayed soon after seed sowing to control the weeds. Stomp @ 3 ml/litre of water should be sprayed on the nursery beds after the seed sowing and seed covering with mixture of FYM, soil and sand. 37
- 38. Plant protection Adaptation of plant protection measures in the nursery against the incidence of insect pest and diseases is very important task to get the healthy seedlings. Damping off seedlings, leaf curl, leaf blight diseases and leaf miner and borer infect the seedling in the nursery. The care for controlling them time to time is essential. 38 Damping off (Pythium, Rhizoctonia, Phytophthora, etc.) Damping off by Pythium sp. Damping off by Rhizoctonia sp. Patchy seedlings in seed bed
- 39. Raising of virus free seedlings • Leaf curl of tomato and chilli causes great loss of the crop. • The leaves show curling, mottling, rolling puckering etc. • Treat the soil of the nursery. • Seed treatment with Imidachloprid @ 2.5 ml/kg seed • Cover the seed bed after seed sowing by Agronet making a tunnel like structure. • Spray Imidachloprid @ 0.5 ml/litre of water at 7-10 days interval. • Remove the infected plants if any in the field and buried in with soil or burn. 39 TOLCV Pep. LCV
- 40. Selection of seedlings for transplanting: After attaining proper growth, seedlings are transplanted in main field. At the time of transplanting, seedling should be: • Stocky and sturdy • Should have good root system • Should be free from any insect pests and diseases. Hardening of the plants in the nursery • Plants accumulate more carbohydrates reserves and produce more foliage. • In this process seedlings are given some artificial shocks at least 7-10 days before uprooting and transplanting. These shocks includes • Exposure to the full sunlight, • Removal of all the shedding nets, polythene sheets • Irrigation is stopped slowly and slowly. 40
- 41. Techniques of hardening • By holding the watering to the plant by 4-5 days before transplanting • Lowering the temperature also retards the growth and adds to the hardening processes. • By application of 4000 ppm NaCl with irrigation water or by spraying of 2000 ppm of Cycocel. Duration and degrees of hardening • Hardening should be gradual to prevent or check the growth. • Warm season crops like tomato, brinjal and chillies do not favour severe hardening. In Indian condition allowing the soil to become dry for 5-6 days does the hardening. 41
- 42. Effect of hardening • Hardening improves the quality and modifies the nature of colloids in the plant cell enabling them to resist the loss of water. • Hardening increases the presence of dry matter and regards in the plants but decrease the percentage of freezable water and transpiration per unit area of leaf. • Decreases the rate of growth in the plants • Hardened plants can withstand better against unfavourable weather conditions like hot day winds or low temperature • Hardening of the plants increases the waxy covering on the leaves of cabbage. 42
- 43. 43 पॉली हाउस क्षेत्र : 100 वर्ग मीटर एक बार में 40,000 पौध तैयार हो सकते हैं । पौध तैयार होने में 30 दिन का समय लर्ेर्ा । एक वर्ग में 4 बार पौध तैयार कर सकते हैं । पौधा तैयार करने का खर्ग : 50 पैसे प्रतत पौध (बीज का मूल्य छोड़कर) वर्ग में 100 वर्ग मीटर से रु० 2,40,000 तक लाभ प्राप्त कर सकते हैं । ब ांस य लकड़ी क े खम्भे से कम खर्च में पॉली ह उस बन य ज सकत है प्लग ट्रे में कोकोपीट+क े र्ुआ ख द भरन बीज की बुआई तैय र पौध स्वस्थ पौध पॉली ह उस में वर्च भर पौध उत्प दन द्व र स्वरोजग र पॉली ह उस नसचरी की ववशेर्त यें पॉली ह उस में प्लग ट्रे में नसचरी
- 44. 44