Télécharger pour lire hors ligne


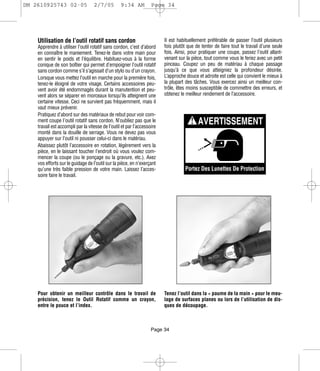


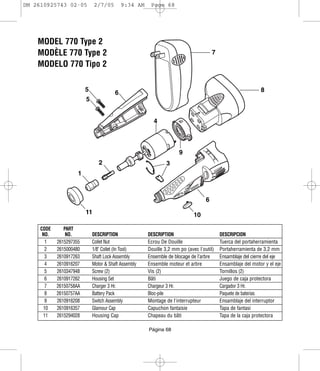

Ce manuel d'utilisation pour les outils rotatifs sans fil Dremel (modèles 750, 754 et 770) contient des instructions de sécurité essentielles pour éviter les blessures. Il souligne l'importance de suivre des mesures de sécurité telles que l'utilisation d'équipements de protection et des pratiques adéquates lors de l'utilisation des outils électriques. Il inclut également des avertissements concernant les batteries et l'entretien approprié des outils pour garantir leur performance et sécurité.


