
Recommandé
Contenu connexe
En vedette
En vedette (18)
Similaire à Différenciation NTIC
Similaire à Différenciation NTIC (20)
Dernier
Dernier (19)
Différenciation NTIC
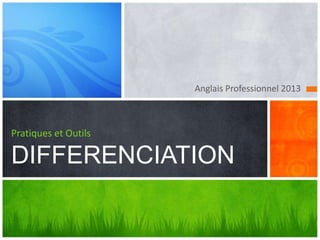
- 1. Anglais Professionnel 2013 Pratiques et Outils DIFFERENCIATION
- 2. Pratiques en séances d’anglais Usages Impacts Applications Des pratiques pour des besoins ciblés
- 3. Usages pour Formateur et Apprenti Concevoir, organiser et collaborer
- 4. Apprendre seul et accompagné Les situations d'enseignement collectives L’apprenti acquiert des connaissances dans des contextes lui permettant d’observer, d’analyser, de comprendre, de mémoriser et de synthétiser. Les situations d’apprentissage L’apprenti peut travailler, encadré ou en autonomie, seul ou en équipe (groupe, sous-groupe)
- 5. Des outils Google à votre disposition Google Drive L’apprenti et le formateur échangent tous types de données en direct. hkhjk
- 6. Des outils Google à votre disposition Compte Gmail L’apprenti et le formateur procèdent à la création d’un compte Gmail.
- 7. Des outils Google à votre disposition Dossier Google Drive L’apprenti et le formateur font glisser leurs documents dans leur dossier Google Drive. Ils partagent les mêmes données en temps réel.
- 8. Trop de fichiers? Divisez, classez et partagez vos fichiers de présentations en les Organiser les documents organisant en plusieurs sections thématiques. Vous pouvez les nommer, les imprimer, leur attribuer des paramètres de Google confidentialité et les modifier en temps réel à tout moment.
- 9. Collaboration Editions simultanées sur un document unique. Plus besoin d’attendre votre tour pour corriger ou repasser une multitude de versions révisées. Le travail d’équipe: votre statut de co-auteur assure la reconnaissance de votre production.
- 10. Impacts Sur Votre Travail Stylisez, éditez et animez vos media
- 11. Ce n’est pas qu’une question de visuels. L’important, c’est VOTRE MESSAGE.
- 12. Nouveaux Effets Photos : un exemple de contenu “This is an … avocado.”
- 13. Animez Vos Documents Regardez cette animation: Avec Animation Painter pour Powerpoint 2010 Vous pouvez re-créer la même animation en un clic
- 14. Des Vidéos Parfaites Vous pouvez faire beaucoup plus encore avec les outils vidéos de PowerPoint 2010. Ces vidéos peuvent s’intégrer à votre présentation. Vous pouvez aussi recolorer toute la vidéo ou même appliquer un style vidéo facilement.
- 15. Vous souhaitez ajouter une fonctionnalité “pause” sur votre vidéo intégrée? Passez la souris sur la vidéo, cliquez et une surprise vous attend ! Sans compter les possibilités d’ajouts de marque-pages, l’intégration de dégradés et de rognages … Fontaine Geyser Fountain Geyser (anglais du tourisme)
- 16. De nouveaux effets de transition Et cessuperbes transitions ! Elles vous plaisent? Elles mettent de l’animation, elles aussi.
- 17. Diffusez Vos Documents et Vos Applications Diffusez et compressez pour des envois en continu
- 18. DIFFUSEZ » Montrez et faites connaître votre travail avec Broadcast Slide Show et les outils Google » Partagez vos présentations en direct avec vos collègues, directement à partir de PowerPoint ou de Google Docs. » Plus besoin de dire “Diapo suivante, s’il vous plaît.” !
- 19. Enregistrez votre présentation avec Create a Video et capturez narrations, animations, media et bien plus. Chargez, intégrez et partagez!
- 20. Parlez-en à vos collègues! Pour des présentations riches en medias, vous pouvez Optimiser et permettre une Compatibilité ou Compresser vos Media pour partager votre travail avec fiabilité sans faire exploser votre boîte de réception. Préparez vos présentations pour un partage facile
- 21. ? Attendez… Encore mieux! Visionnez vos diaporamas de là où vous le souhaitez !
- 22. Accédez Sans Contraintes » Faites connaissance avec PowerPoint Web App » Accédez à vos diaporamas de n’importe où
- 23. ANGLAIS PROFESSIONNEL 2013 What’s Your Message? Benoît Cottenceau Formation et ingénierie pédagogique
Notes de l'éditeur
- This presentation demonstrates the new capabilities of PowerPoint and it is best viewed in Slide Show. These slides are designed to give you great ideas for the presentations you’ll create in PowerPoint 2010!For more sample templates, click the File tab, and then on the New tab, click Sample Templates.
- Etapesuivante : intégration de vosprésentationssur le web
- Light Bulb Questions(Intermediate) To reproduce the box effects on this slide, do the following:On the Home tab, in the Slides group, click Layout, and then click Blank.On the Design tab, in the Themes group, click the arrow next to Colors and then click Oriel.On the Insert tab, in the Illustrations group click the arrow under Shapes, and then under Rectangles, select rectangle (first row, first option from left).On the slide, drag to draw a rectangle.Under Drawing Tools, in the Format tab, in the Size group, click the arrow at the bottom right corner launching the Format Shape dialog box.In the Format Shape dialog box, select Size in the left pane, under Size and rotate in the right pane set Height to 1.88” and Width to 2”.Also in the Format Shape dialog box, select Fill in the left pane, and under Fill in the right pane select No Fill.Also in the Format Shape dialog box, select Line Color in the left pane, under Line Color in the right pane, select Solid Line, and then click the arrow to the right of Color, and under Theme Colors, select Black, Text 1 (first row, second option from left).Also in the Format Shape dialog box, select Line Style in the left pane, under Line Style in the right pane set Width to 0.25 pt.Close the Format Shape dialog box.Select the rectangle. On the Home tab, in the Drawing group, click Arrange, point to Align, and then do the following:Click Align Left.Click Align Top.Select the rectangle. On the Home tab, in the Clipboard group, click the arrow to the right of Copy, and then click Duplicate. Repeat this process three more times for a total of five rectangles.Select duplicate on right side. On the Home tab, in the Drawing group, click Arrange, point to Align, and then do the following:Click Align Right.Click Align Top.Select all five rectangles. On the Home tab, in the Drawing group, click Arrange, point to Align, and then do the following:Click Align Top.Click Distribute Horizontally.Under Drawing Tools, on the Format tab, in the Arrange group, click the arrow to the right of Group and select Group.Select the grouped rectangles. On the Home tab, in the Clipboard group, click the arrow to the right of Copy, and then click Duplicate. Repeat this process two more times for a total of four grouped sets.Select one grouped set. On the Home tab, in the Drawing group, click Arrange, point to Align, and then do the following:Click Align Center.Click Align Bottom.Select all other grouped sets, and also on the Home tab, in the Drawing group, click Arrange, point to Align, do the following:Click Align Center.Click Distribute Vertically.Select all grouped rectangles. Under Drawing Tools, on the Format tab, in the Arrange group, click the arrow to the right of Group and select Ungroup. To reproduce the video effects on this slide, do the following:On the Insert tab, in the Media group, click Video, and then click Video from File. In the left pane of the Insert Video dialog box, click the drive or library that contains the video. In the right pane of the dialog box, click the first video that you want, and then click Insert.Under Video Tools, on the Format tab, in the Size group, click the arrow at the bottom right corner to launch the Format Video dialog box.In the Format Video dialog box, select Size in the left pane, under Size and Rotate in the right pane, set Height to 1.88” and Width to 1.99”.In the Animations tab, in the Animation group, select Play.Also on the Animations tab, in the Timing group, click the arrow to the right of Start and select With Previous.On the Home tab, in the Drawing group, click Arrange, point to Align, and then do the following:Click Align Left.Click Align Top.Also on the Home tab, in the Drawing group, click Arrange, under Order Objects, click Send to Back.On the Insert tab, in the Media group, click Video, and then click Video from File. In the left pane of the Insert Video dialog box, click the drive or library that contains the video. In the right pane of the dialog box, click the second video that you want and then click Insert.In the Format Video dialog box, select Size in the left pane, under Size and Rotate in the right pane, and set Height to 1.88” and Width to 1.99”.In the Animations tab, in the Animation group, select Play.Also on the Animations tab, in the Timing group, click the arrow to the right of Start and select With Previous.On the Home tab, in the Drawing group, click Arrange, point to Align, and then click Align Top.Press and hold CTRL, select second video and second rectangle from top left. On the Home tab, in the Drawing group, click Arrange, point to Align, and then select Align Left or Align Right (depending on which way the video needs to move to match up with rectangle).Select the second video, on the Home tab, in the Drawing group, click Arrange, under Order Objects, click Send to Back.On the Insert tab, in the Media group, click Video, and then click Video from File. In the left pane of the Insert Video dialog box, click the drive or library that contains the video. In the right pane of the dialog box, click the third video that you want and then click Insert.Under Video Tools on the Format tab, in the Size group, click the arrow at the bottom right corner to launch the Format Video dialog box.In the Format Video dialog box, select Size in the left pane, under Size and Rotate in the right pane, set the Height to 3.75” and the Width to 4”.In the Animations tab, in the Animation group, select Play.Also on the Animations tab, in the Timing group, click the arrow to the right of Start and select With Previous.On the Home tab, in the Drawing group, click Arrange, point to Align, and then do the following:Click Align Right.Click Align Top.Also on the Home tab, in the Drawing group, click Arrange, under Order Objects, click Send to Back.On the Insert tab, in the Media group, click Video, and then click Video from file. In the left pane of the Insert Video dialog box, click the drive or library that contains the video. In the right pane of the dialog box, click the fourth video that you want and then click Insert.In the Format Video dialog box, select Size in the left pane, under Size and Rotate in the right pane, set the Height to 1.88” and the Width to 1.99”.In the Animations tab, in the Animation group, select Play.Also on the Animations tab, in the Timing group, click the arrow to the right of Start and select With Previous.On the Home tab, in the Drawing group, click Arrange, point to Align, and then click Align Bottom.Press and hold CTRL, select fourth video and seventeenth rectangle (fourth row, second option from left). On the Home tab, in the Drawing group, click Arrange, point to Align, and then select Align Left or Align Right (depending on which way the video needs to move to match up with rectangle).Select just the video, on the Home tab, in the Drawing group, click Arrange, under Order Objects, click Send to Back.On the Insert tab, in the Media group, click Video, and then click Video from file. In the left pane of the Insert Video dialog box, click the drive or library that contains the video. In the right pane of the dialog box, click the fifth video that you want and then click Insert.In the Format Video dialog box, select Size in the left pane, under Size and Rotate in the right pane, set the Height to 1.88” and the Width to 1.99”.In the Animations tab, in the Animation group, select Play.Also on the Animations tab, in the Timing group, click the arrow to the right of Start and select With Previous.Press and hold CTRL, select fifth video and thirteenth rectangle (third row, third option from left). On the Home tab, in the Drawing group, click Arrange, point to Align, and then select Align Left or Align Right, and then Align Top or Align Bottom (depending on which way the video needs to move to match up with rectangle).Select just the video, on the Home tab, in the Drawing group, click Arrange, under Order Objects, click Send to Back.On the Insert tab, in the Media group, click Video, and then click Video from file. In the left pane of the Insert Video dialog box, click the drive or library that contains the video. In the right pane of the dialog box, click the sixth video that you want and then click Insert.In the Format Video dialog box, select Size in the left pane, under Size and Rotate in the right pane, set Height to 1.88” and Width to 1.99”.Close the Format Video dialog box.In the Animations tab, in the Animation group, select Play.Also on the Animations tab, in the Timing group, click the arrow to the right of Start and select With Previous.On the Home tab, in the Drawing group, click Arrange, point to Align, and then click Align Bottom.Press and hold CTRL, select sixth video and nineteenth rectangle (fifth row, fourth option from left). On the Home tab, in the Drawing group, click Arrange, point to Align, and then select Align Left or Align Right (depending on which way the video needs to move to match up with rectangle).Select just the video, on the Home tab, in the Drawing group, click Arrange, under Order Objects, click Send to Back. To reproduce the text effects on this slide, do the following:Press and hold CTRL, select rectangles six, seven and eight (second row, first, second and third options from left), then under the Home tab, in the Clipboard group, click the Cut icon.On the Insert tab, in the Text group, click Text Box, and then on the slide drag to draw your text box in the area you just cut.Type text, Questions, in the text box, and then select the text. On the Home tab, in the Font group, select Book Antiqua from the Font list, with a Font Size of 88 pt. Under Drawing Tools, on the Format tab, in the WordArt Styles group, click the arrow at the bottom right to launch the Format Text Effects dialog box.In the Format Text Effects dialog box, select Text Fill in the left pane, under Text Fill in the right pane select Solid fill, then click the arrow to the right of Color and under Theme Colors, select Light Yellow, Background 2, Darker 75% (fifth row, third option from left).Also in the Format Text Effects dialog box, select Shadow in the left pane, under Shadow in the right pane, click the arrow to the right of Color and under Theme Colors, select Black, Text 1 (first row, second option from left), and the do the following:In the Transparency box, enter 35%.In the Size box, enter 100%.In the Blur box, enter 6 pt.In the Angle box, enter 90 degrees.In the Distance box, enter 4 pt.Also in the Format Text Effects dialog box, select 3-D Format in the left pane, under 3-D Format in the right pane, click the arrow to the right of Top, under Bevel select Art Deco (third row, fourth option from left), and then do the following:To the right of Top, in the Width box, enter 2 pt.To the right of Top, in the Height box, enter 4.4 pt.Under Contour, click arrow to right of Color and under Theme Colors, select Light Yellow, Background 2, Darker 10% (second row, third option from left), then set Size to 2pt.Under Surface, click the arrow to the right of Lighting and under Neutral, select Soft (first row, third option from left).Select text. On the Home tab, in the Paragraph group, select Center Text.Close the Format Text Effects dialog box. To reproduce the background effects on this slide, do the following:On the Design tab, in the bottom right corner of the Background group, click the arrow at the bottom right to launch the Format Background dialog box. In the Format Background dialog box, select Fill in the left pane, under Fill in the right pane, select Gradient fill, then click the arrow to the right of Type and select Radial.Still in the Fill pane, under Gradient stops, click Add gradient stop or Remove gradient stop until four stops appear on the slider. Customize the gradient stops as follows:Select the first stop on the slider, and then do the following:In the Position box, enter 0%.Click the button next to Color, and then under Theme Colors select Gold, Accent 4, Lighter 80% (second row, eighth option from the left).Select the second stop on the slider, and then do the following: In the Position box, enter 26%.Click the button next to Color, and then under Theme Colors select Gold, Accent 4, Lighter 60% (second row, eighth option from the left).Select the third stop on the slider, and then do the following:In the Position box, enter 59%.Click the button next to Color, and then under Theme Colors select Gold, Accent 4, Lighter 40% (fourth row, eighth option from the left).Select the last stop on the slider, and then do the following: In the Position box, enter 100%.Click the button next to Color, and then under Theme Colors select Gold, Accent 4, Darker 25% (fifth row, eighth option from the left). Close the Format Background dialog box.